MP-Man TPM 500 Manuale utente

TPM500
DIGITAL VOICE RECORDER
OPERATION MANUAL

1
Note:
★If the unit is left unused for a long period, please turn off the POWER switch.
★Do not use the unit in places that are extremely hot, cold, dusty, or humid.
★Avoid the unit being dropped
★The battery service life may differ under different usage conditions and different
models
★Please charge the unit when any of the following cases occur:
* The logo appears and displays: low battery
* The keys become inactive
* The unit stops running under normal condition.
* Do not allow water or foreign objects to enter the unit.
The content of this manual may be changed for better services.
Specifications are subject to change and improvement without notice.
If the actual setup and usage of the unit is different from this manual, please accessing
our company’s website for the latest product information
Important information: please read and retain all the operating instructions before
operating the unit, we do not assume any liability arising out of
improper operation or incidental damages. Be note to operate
this unit with care and back up any files if necessary.

2
Features
¤
LCD display, easy to operate.
¤
Built-in loud-speaker
¤
Built-in high-sensitive microphone
¤
Support twos types of recording: HQ and LQ
¤
Voice-controlling recording
¤
Indicate the remaining space
¤
Connect with PC, download and upload files
Battery indicator
3
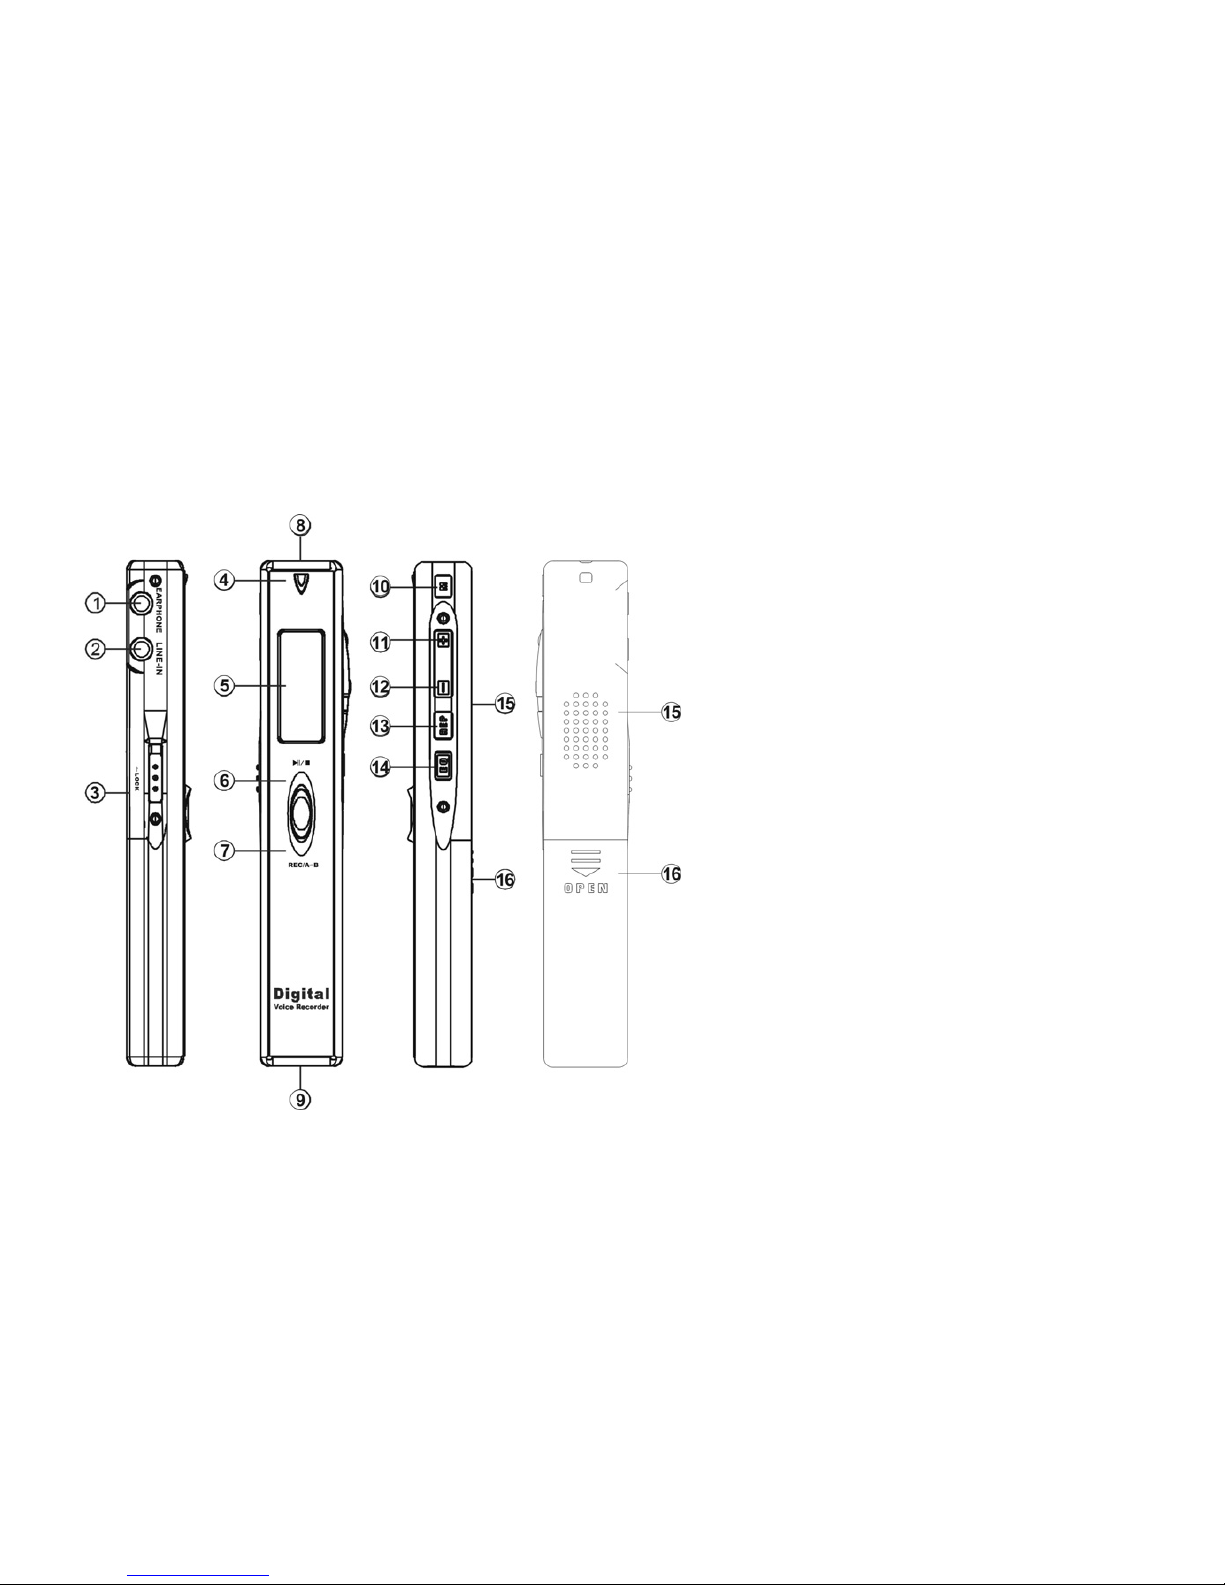
Instruction of cover
1-Earphone jack
2-Mic/Line-in cable
3-Lock
4-REC indicator light
5- LCD display
6-Play/Pause/Stop
7-REC/A-B
8-Built-in microphone
9- USB interface
10-M (MODE)
11-Vol+/Next
12-Vol-/Previous
13-REP mode
14-EQ
15-Loud-speaker
16-Battery cover
4
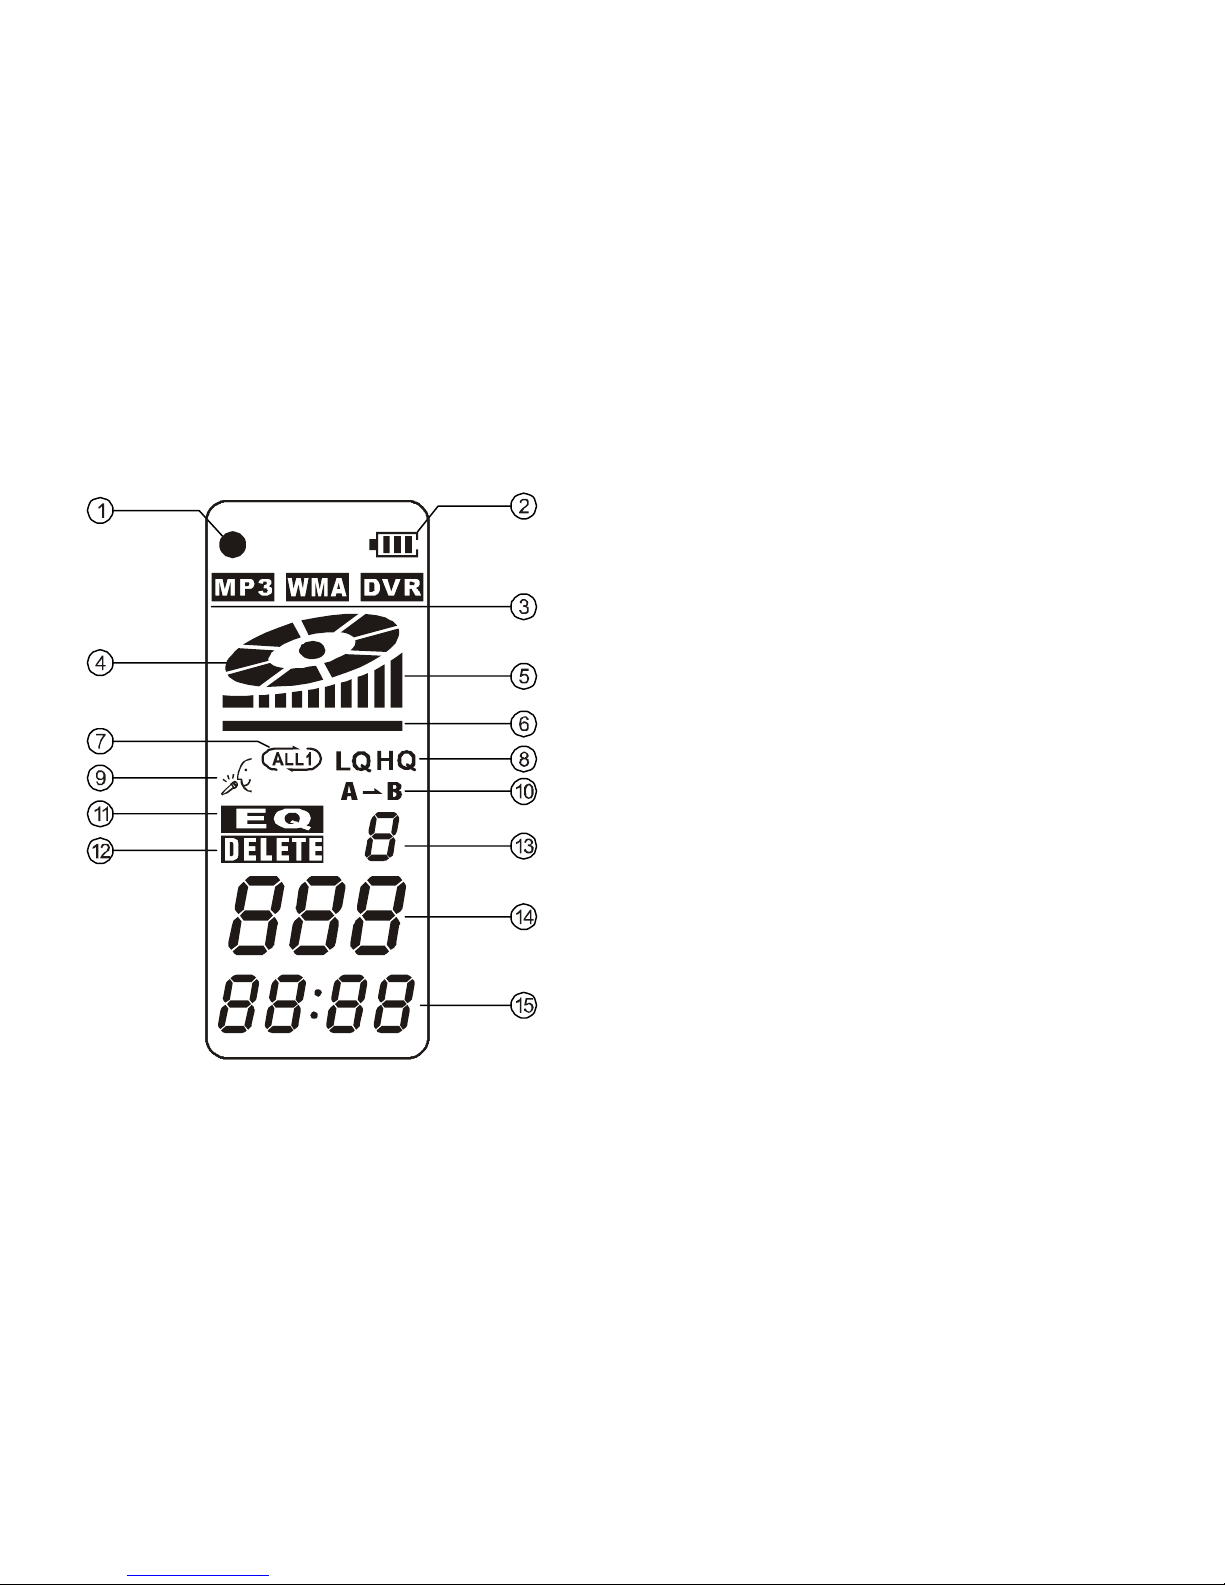
Introduction to display
1-Recording type indicator
2-Battery indicator
3-MP3/WMA/DVR icon
4-Turntable icon
5-Volume indicator
6-Volume switch
7-Repeat indicator
8- LQ indicator
HQ indicator
9-Recording icon
10-Repeat icon
11-EQ
12-Delete icon
13-EQ selection ordinal number
14-Sequence number of song
15-Time indicator

5
Basic operation
1-Power supply
It is powered by AAA battery; please buy the rechargeable battery with large capacity.
When
the remaining capacity of battery indication shows please change the battery in time.
2-Power on/off
Power on: press button to turn on the unit, the LCD display the logo and
enter the DVR mode under stop status.
Power off: continuously press button until the LCD displays OFF
Note: if the unit is locked by the LOCK key, it displays the locked icon and then power
off automatically while power on
3-Modes
There are 5 modes: DVR mode, MP3 mode, voice-controlling, REC Type, remaining
capacity mode.
Under the state of pause or stop, press M to shift MP3 mode from DVR, from MP3 to
Voice-controlling recording, from Voice-controlling recording to REC type, from REC
type
to remaining capacity mode. Five modes can be shifted round.

6
DVR mode
2.1. Recording
Under any modes (except for powering off), press and hold REC/A-B button, the LCD
displays “●” and recording indicator “ ”, will the light turns on and flash during the
recording. Release REC/A-B button, the unit start to record. During the recording, press
to pause and LCD display a flashing turntable. Press REC/A-B button to stop
recording, while other buttons not active
2.2. Playback the files recorded
Under stop or pause status, press button to play current recorded files. LCD
displays the volume, track number, time indicator, battery level, EQ indicator and rolling
turn plate indicator
NOTE: The unit only supports the files in IMA ADPCM and WAV format.
2.3. Pause/stop/power off
1) Pause: under playing status, shortly press button to pause the playback. LCD
displays the flashing turn plate. Shortly press button again to continue play back 2)
Stop: under play or pause status, continuously press button for about 2seconds, the
turn plate stop flashing, then release the button to enter stop mode.
3) Power off: under playing or pause status, continuously press button until the

7
LCD display OFF. Release the button to turn off the unit.
Note: under pause or stop status, the unit will automatically turn off if no operation were
conducted within 3minutes
2.4 -previous / next file, FF/RW
Under the state of stop, shortly press - button to skip to the previous file; shortly press +
button to skip to the next file.
Under the state of playback, press “-” to skip to the previous file; press “+” to skip to the
next file; press and hold “+” to FF, press and hold “-” to RW.
2.5 volume adjustment
Press and hold “Mode”, a shine line will appear below the turntable of LCD. Press and
hold “+” to increase the volume, while continuously press “–“to decrease the volume.
And the volume indicator on the LCD will change accordingly.
2.6 A-B repeat
Under the state of playback, press “REP/A-B” once to set up the starting point of A,
press “REP/A-B” again to set up the ending point of B, the LCD will display AB, the
unit will implement the repetition between A-B.
Cancel: 1) Press “REP/A-B” to cancel AB repeat preset, then starts to playback from the
cancelled point.

8
2) Press “Play/Pause” to cancel AB repeat and pause playback.
3) Press “Play/Pause’ to cancel A-B repeat and stop playback.
2.7 Repeat mode
Press REP to select the repeat mode: non-repeat, single repeat, all repeat. While no
repeat icon display on LCD, it is in non-repeat state; single repeat and all repeat will
display as respectively, these three modes can be shifted round.
2.8-delete files
A. Delete one
Under stop status, continuously press EQ button to enter delete mode. Then the LCD will
display DELETE and ONE and the indicator will flash to be confirmed. Press the button
again to delete current file. If you press other buttons except PLAY and EQ or no
operation was conducted within 5 seconds, the unit will give up delete and return to stop
status.
B. Delete all
Under stop status, continuously press EQ to enter delete mode. Then the LCD display
DELETE and ONE and the indicator will flash to be confirmed, shortly press EQ button
again, LCD will display and flash ALL to wait the confirmation. Press the button again
to delete current file. If you press other buttons except PLAY and EQ or no operation

9
was conducted within 5 seconds, the unit will give up delete and return to stop status.
Note: this unit only supports WAV files in IMA ADPCM format
2.9 Time indication of files recorded
1). Time indication under the stop state of DVR
Under the stop state of DVR, it will display the total time of current files recorded. If the
time length of the file recorded is less than 1 hour, the time length will display as (m; s)
at the right side of the sequence of song, if more than 1 hour, it will display as (h; m);
while “:” will flash, like “01:34” displays below the song sequence, it indicates that the
whole length of time is 1 hour 34minutes.
2). Playback time indication of the DVR recording files
The file recorded in the unit, whose time length is less than 1 hour, it normally displays
the playback time as (m; s), when its time length is more than 1 hour, the playback time
exceeds 1 hour while playing, the time length of current file display as (h; m), “:” will
flash.
2.10. Telephone conversation recording
Connect the external telephone line and telephone cable to the telephone adaptor; link
the audio line to the adaptor and LINE IN jack. Continuously press button to start
recording.
Indice
Altri manuali MP-Man Registratore vocale


