
Mr Beam dreamcut [x] Manuale utente

QUICKSTARTGUIDE
When you start up your Mr Beam, remember that it has been as-
sembled and packed by us with great care. We hope that you will
take the time to unpack and set it up carefully.
Munich, February 2023 | Rev.
1.56
EN
DESKTOP LASERCUTTER
21
!
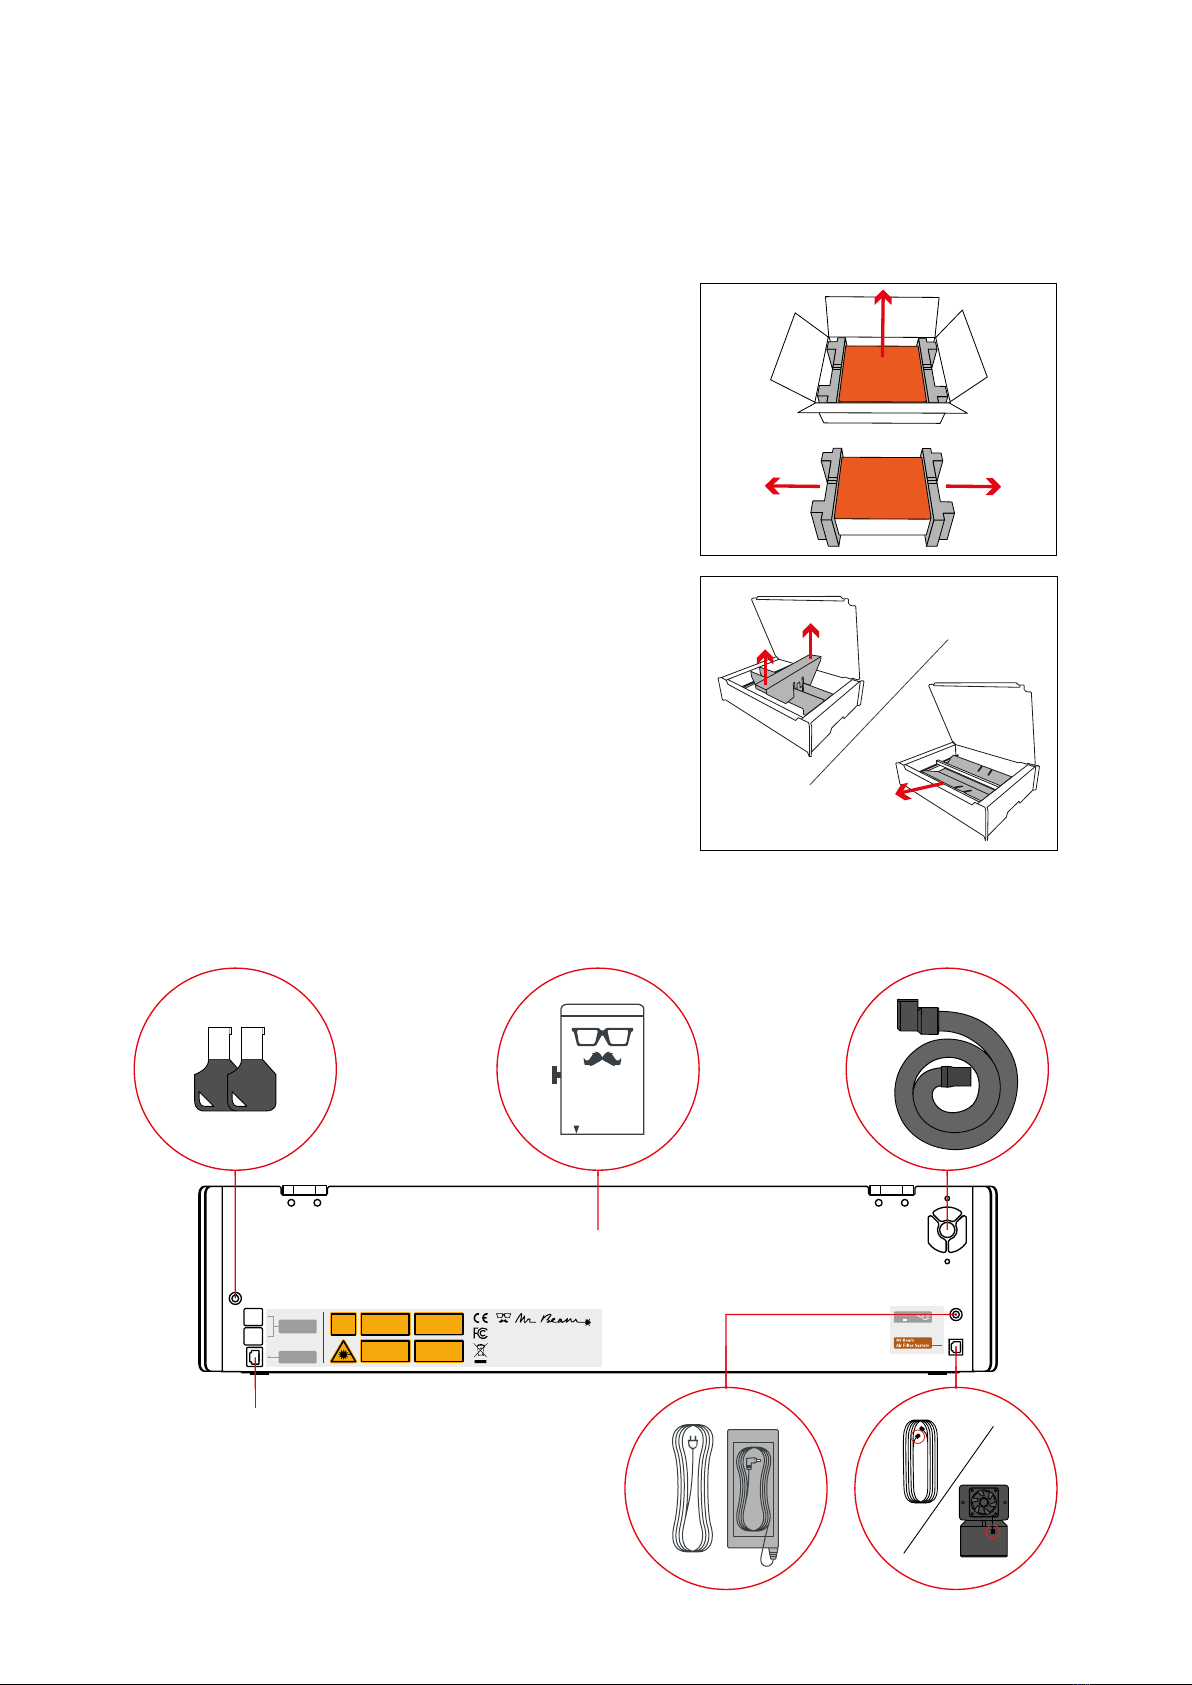
Only process materials that Mr Beam Lasers
has classified as harmless. You can find an
up-to-date list of materials at mr-beam.org/
materialien
Warning: Never process PVC, vinyl, glass fiber,
carbon fiber or materials containing chlorine!
The processing of these materials produces
toxic fumes that can damage your health and
machinery.cause machine damage and health
hazard.
User Manual
Before using your Mr Beam, please read and
understand the user manual and the safety
instructions.
You can find the latest manual and safety inst-
ructions in the menu of your Mr Beam
user interface and on mr-beam.org/downloads.
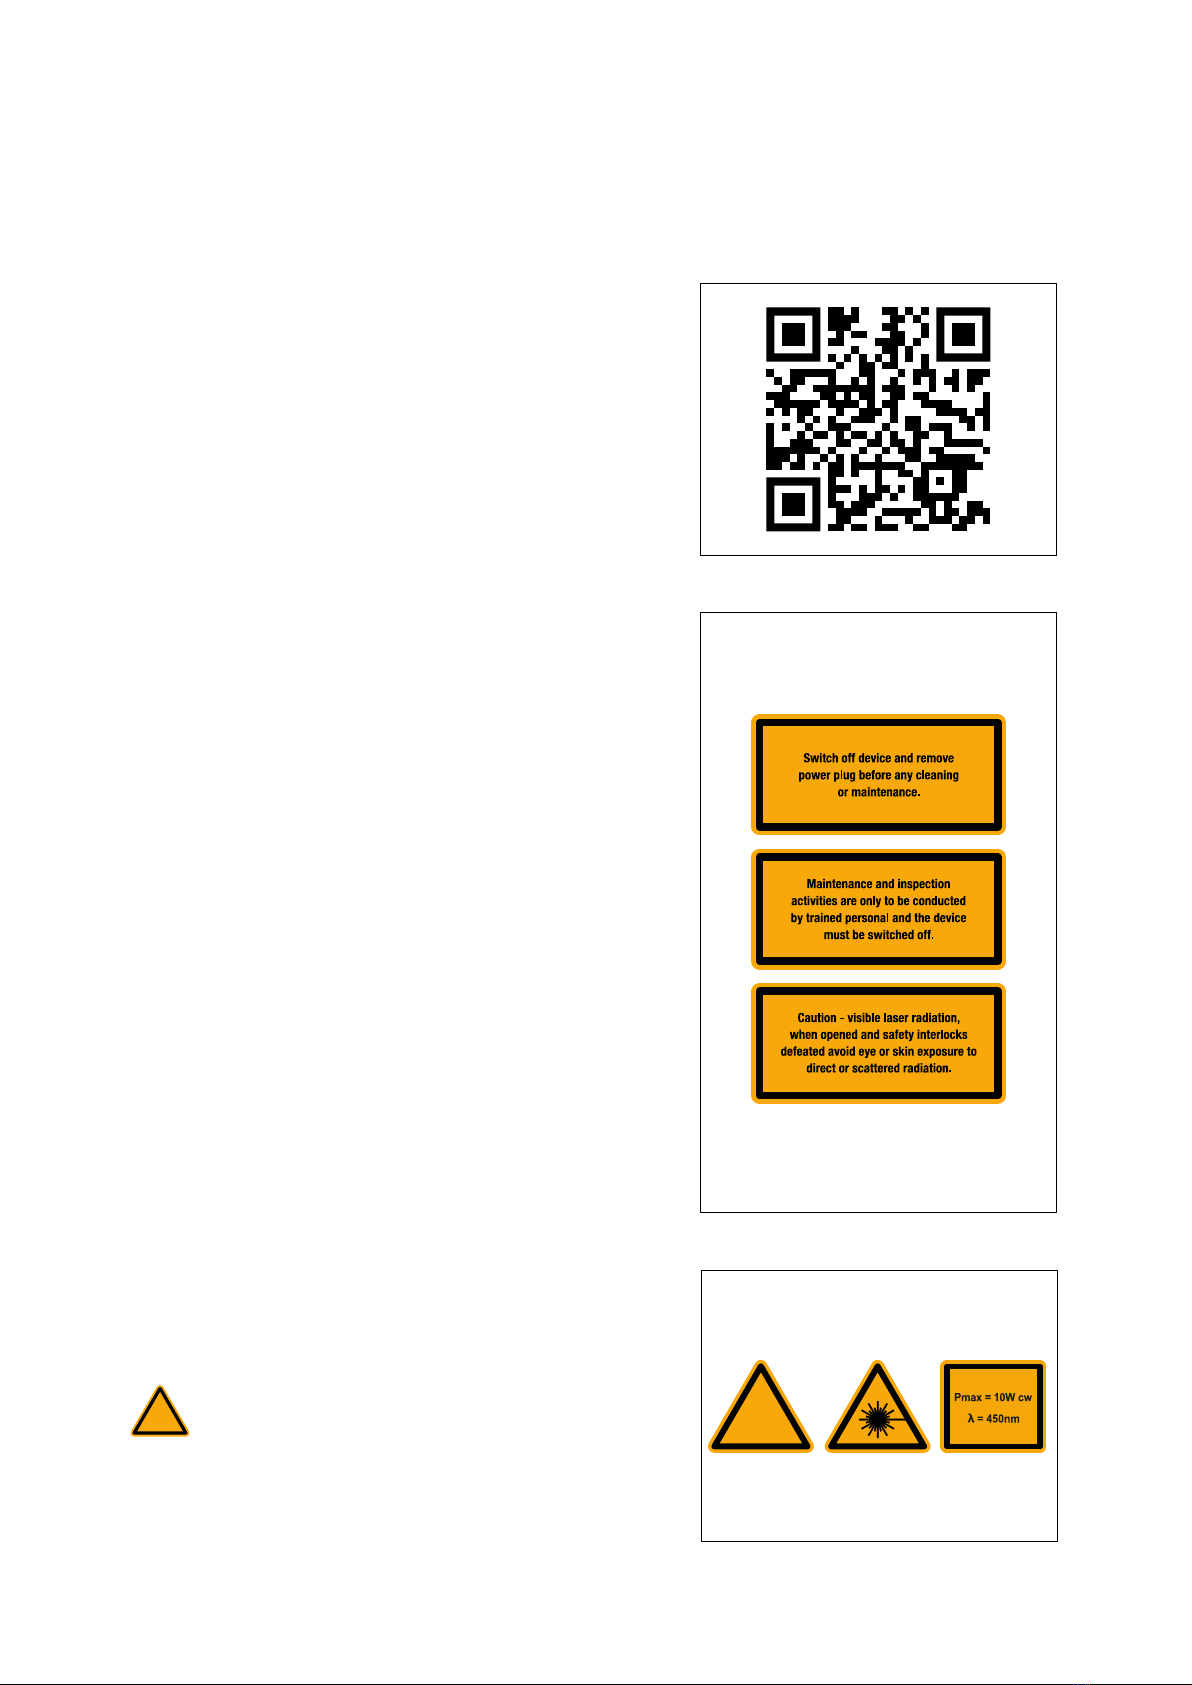
You can find the latest version of this Quick
Start Guide, as well as that of previous modells,
and some other information about your Mr
Beam at the following QR Code.
At www.mr-beam.org/support, you will also
find answers to many questions regarding Mr
Beam.
SAFETY INSTRUCTIONS
!
22
AIR FILTER
SYSTEM
Power
19V 3.42A
Network connection
(Ethernet)
Air filter
system (only!)
AIR FILTER
SYSTEM
AIR FILTER
SYSTEM
AIR FILTER
SYSTEM
UNPACKING AND SETTING UP YOUR MR BEAM
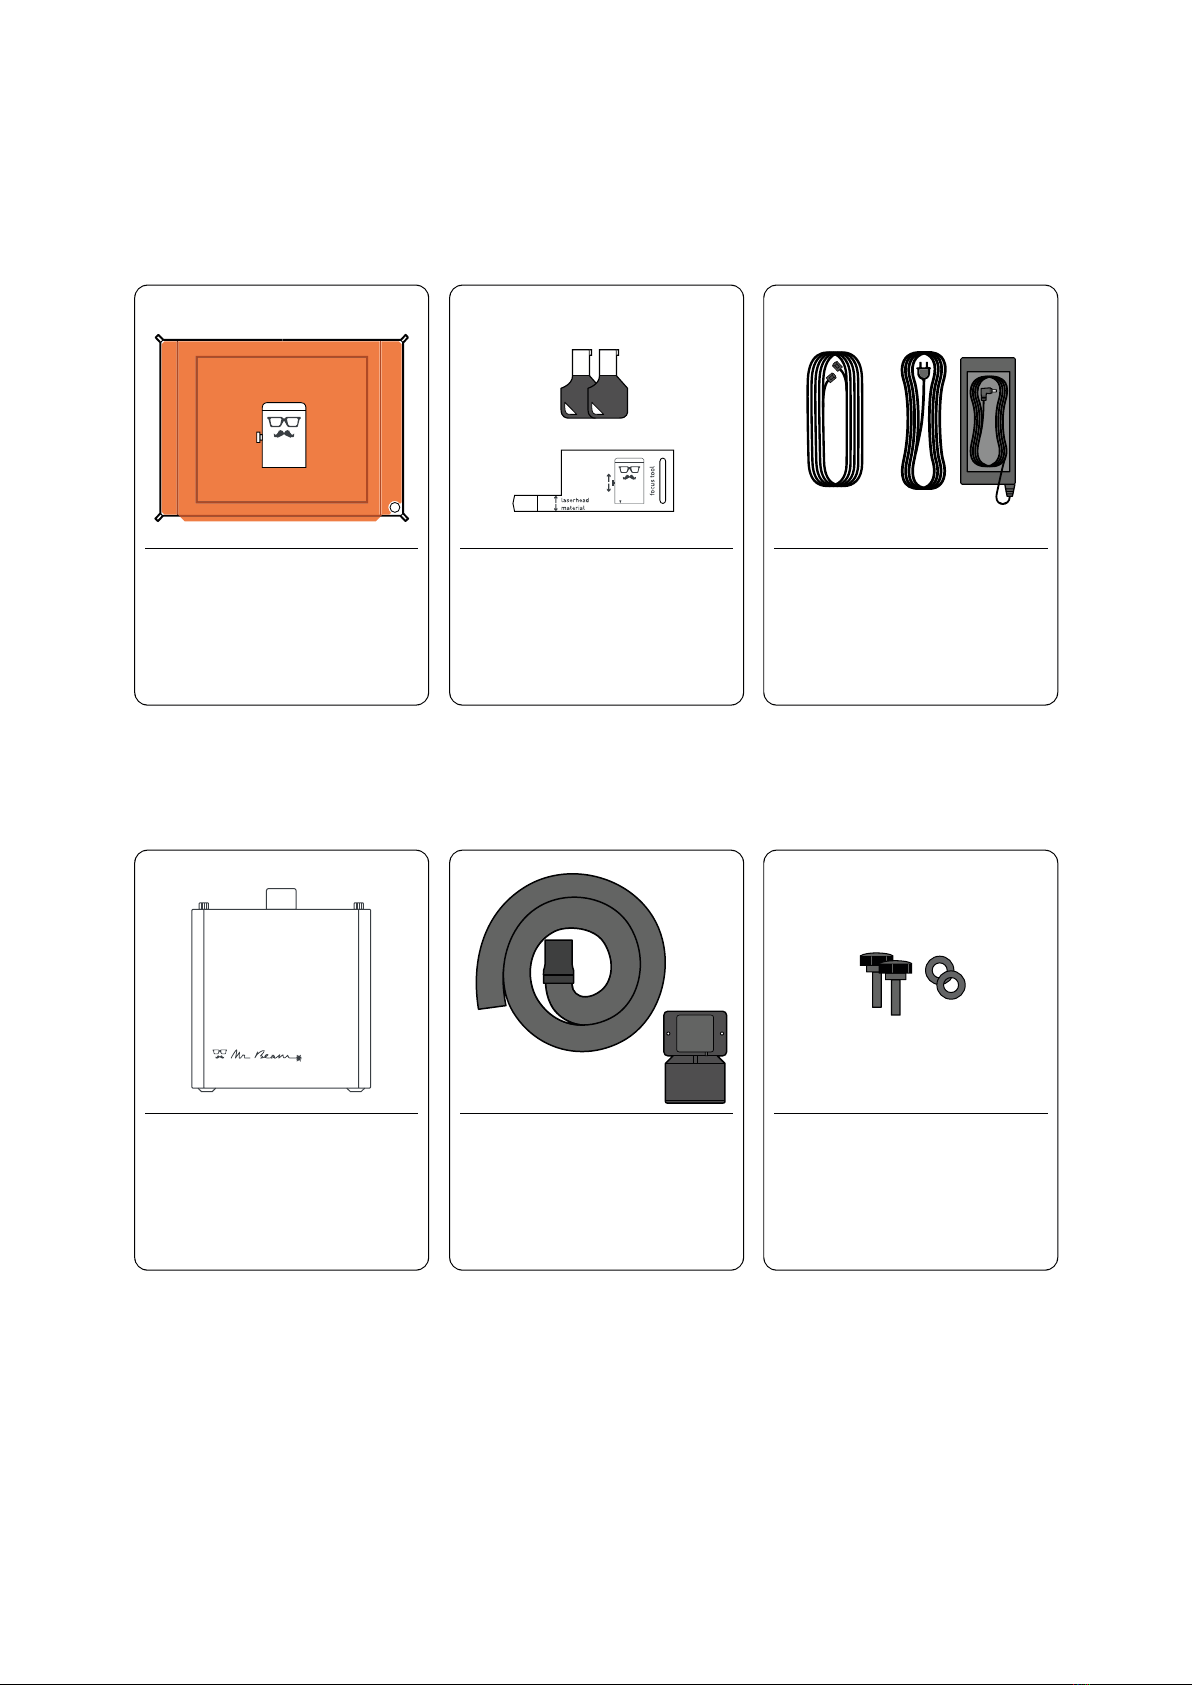
Remove the transport safeguard inside the
device carefully.
First, remove the small box on the side. The
laser head, the power adapter, the key and the
Focus Tool are inside it.
23
Air Filter System
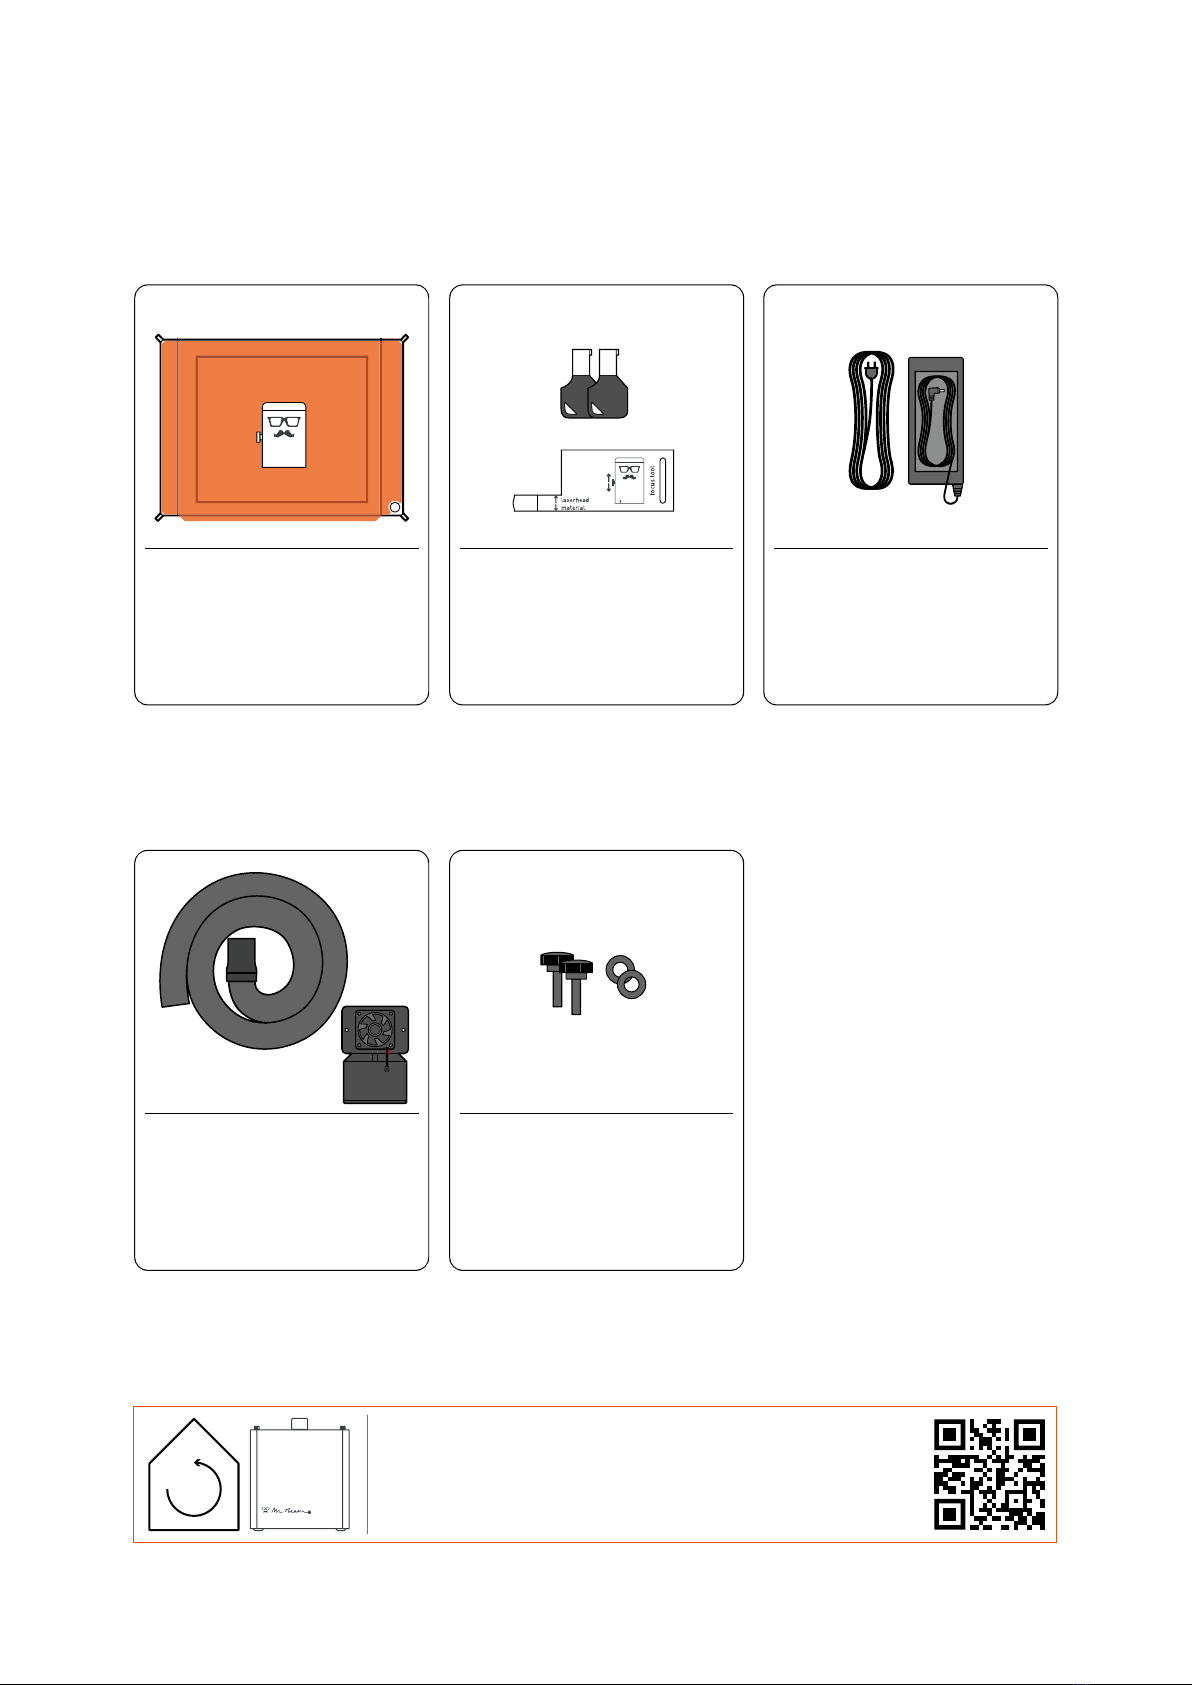
SCOPE OF DELIVERY - WITH AIR FILTER SYSTEM
LASER HEAD
MR BEAM
AIR FILTER SYSTEM
2 KEYS
FOCUS TOOL
HOSE
SUCTION SOCKET
CABLE AIR FILTER
POWER CABLE
POWER SUPPLY UNIT
SCREWS
WASHERS
24
Air Filter System
SCOPE OF DELIVERY - WITHOUT AIR FILTER SYSTEM
LASERKOPF
MR BEAM
HOSE
SUCTION SOCKET
FAN
2 KEYS
FOCUS TOOL
SCREWS
WASHERS
POWER CABLE
POWER SUPPLY UNIT
For indoor use we recommend a Mr Beam Air Filter System.
If you don‘t have one yet, order it now from our shop at
www.mr-beam.org
25
i
i
i
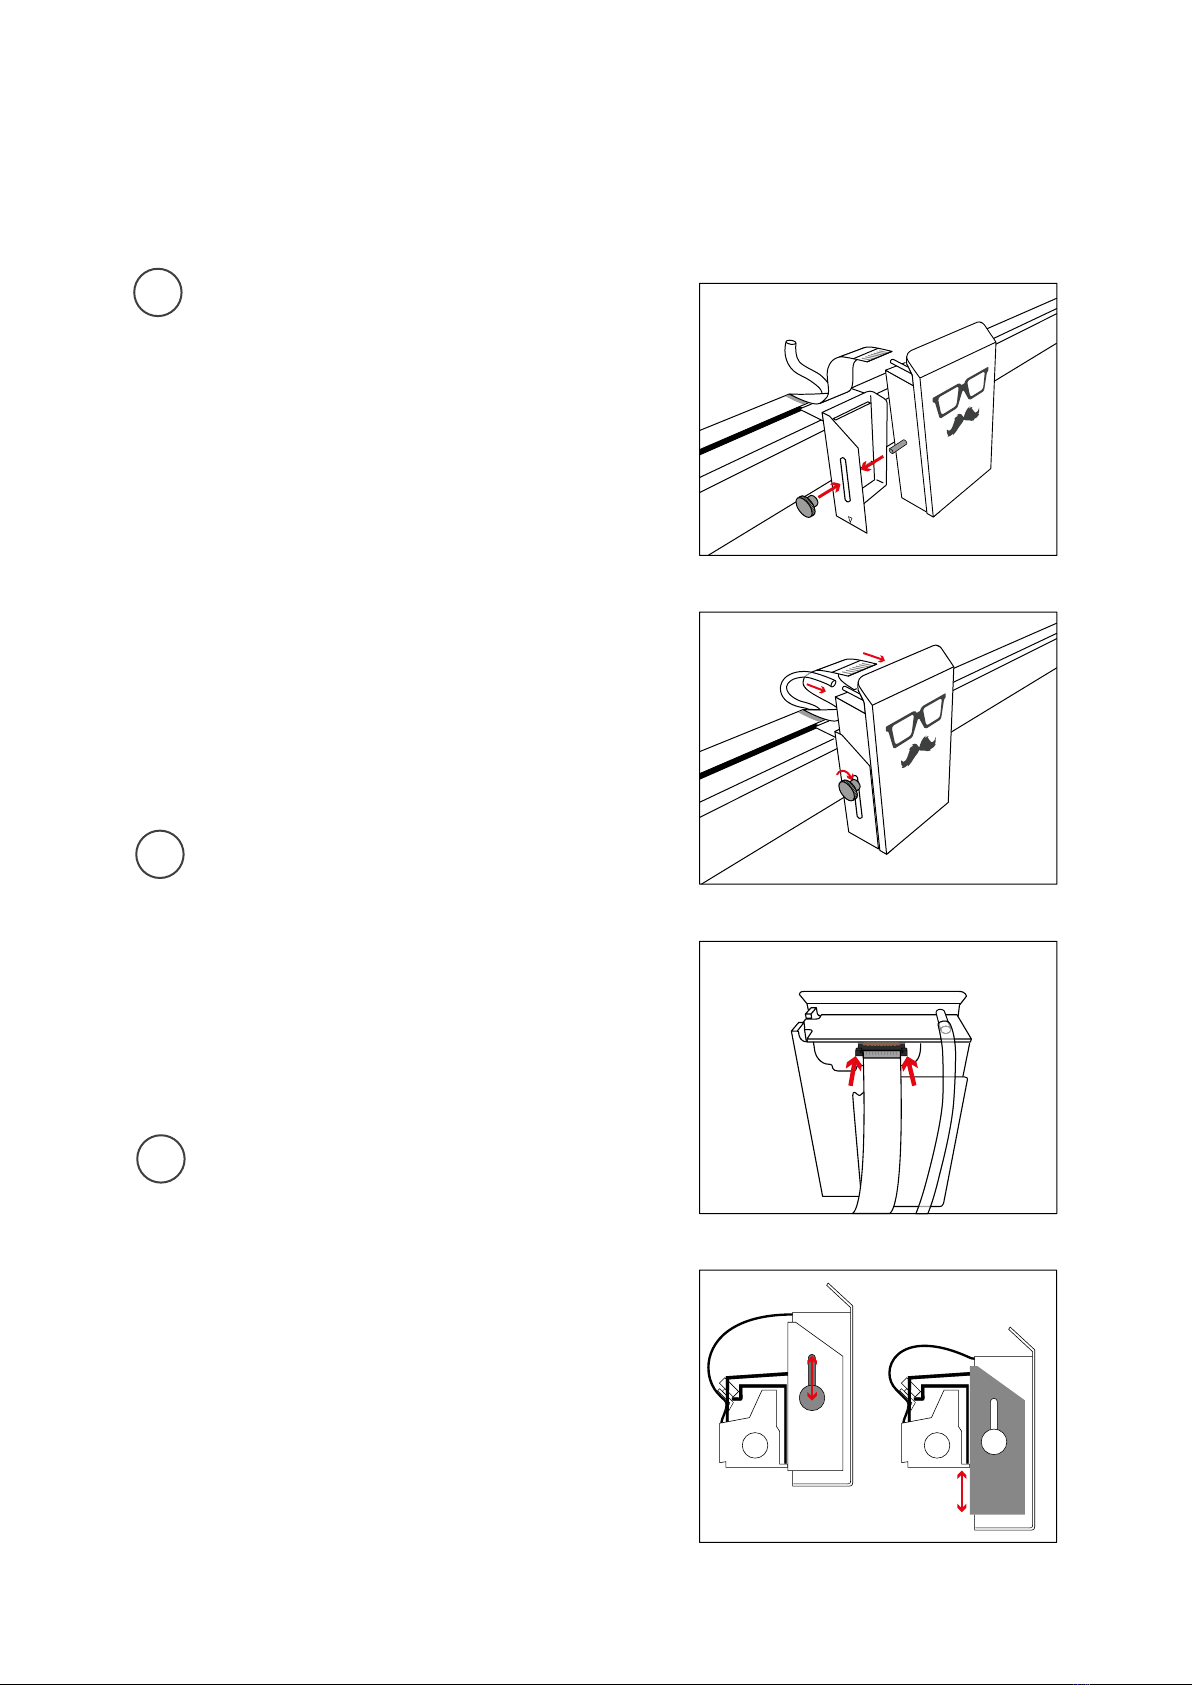
CONNECTING THE LASER HEAD TO THE X-AXIS
Tighten the knurled screw moderately with two
fingers.
Then connect both the hose, as well as the rib-
bon cable to the laser head.
Attention: The silver contacts of the ribbon
cable must be on the top.
Remove the sticker from the back side of the
laser head.
Mount the laser head to the base plate using
the knurled screw.
The black bracket fixes the ribbon cable to
the socket.
Attention: To disconnect the cable, pull out the
bracket about 2 mm carefully. For fastening,
press in the bracket on both sides.
Attention: In order to connect and disconnect
the laser head, the Mr Beam must be dis-
connected from the power supply!
To adjust the laser focus to different material
heights, the base plate can be mounted at
different heights. You can make fine adjust-
ments using the knurled screw and the slotted
hole in the base plate.
See the chapter: Mr Beam Focusing
26
!
Air Filter System
AIR FILTER
SYSTEM
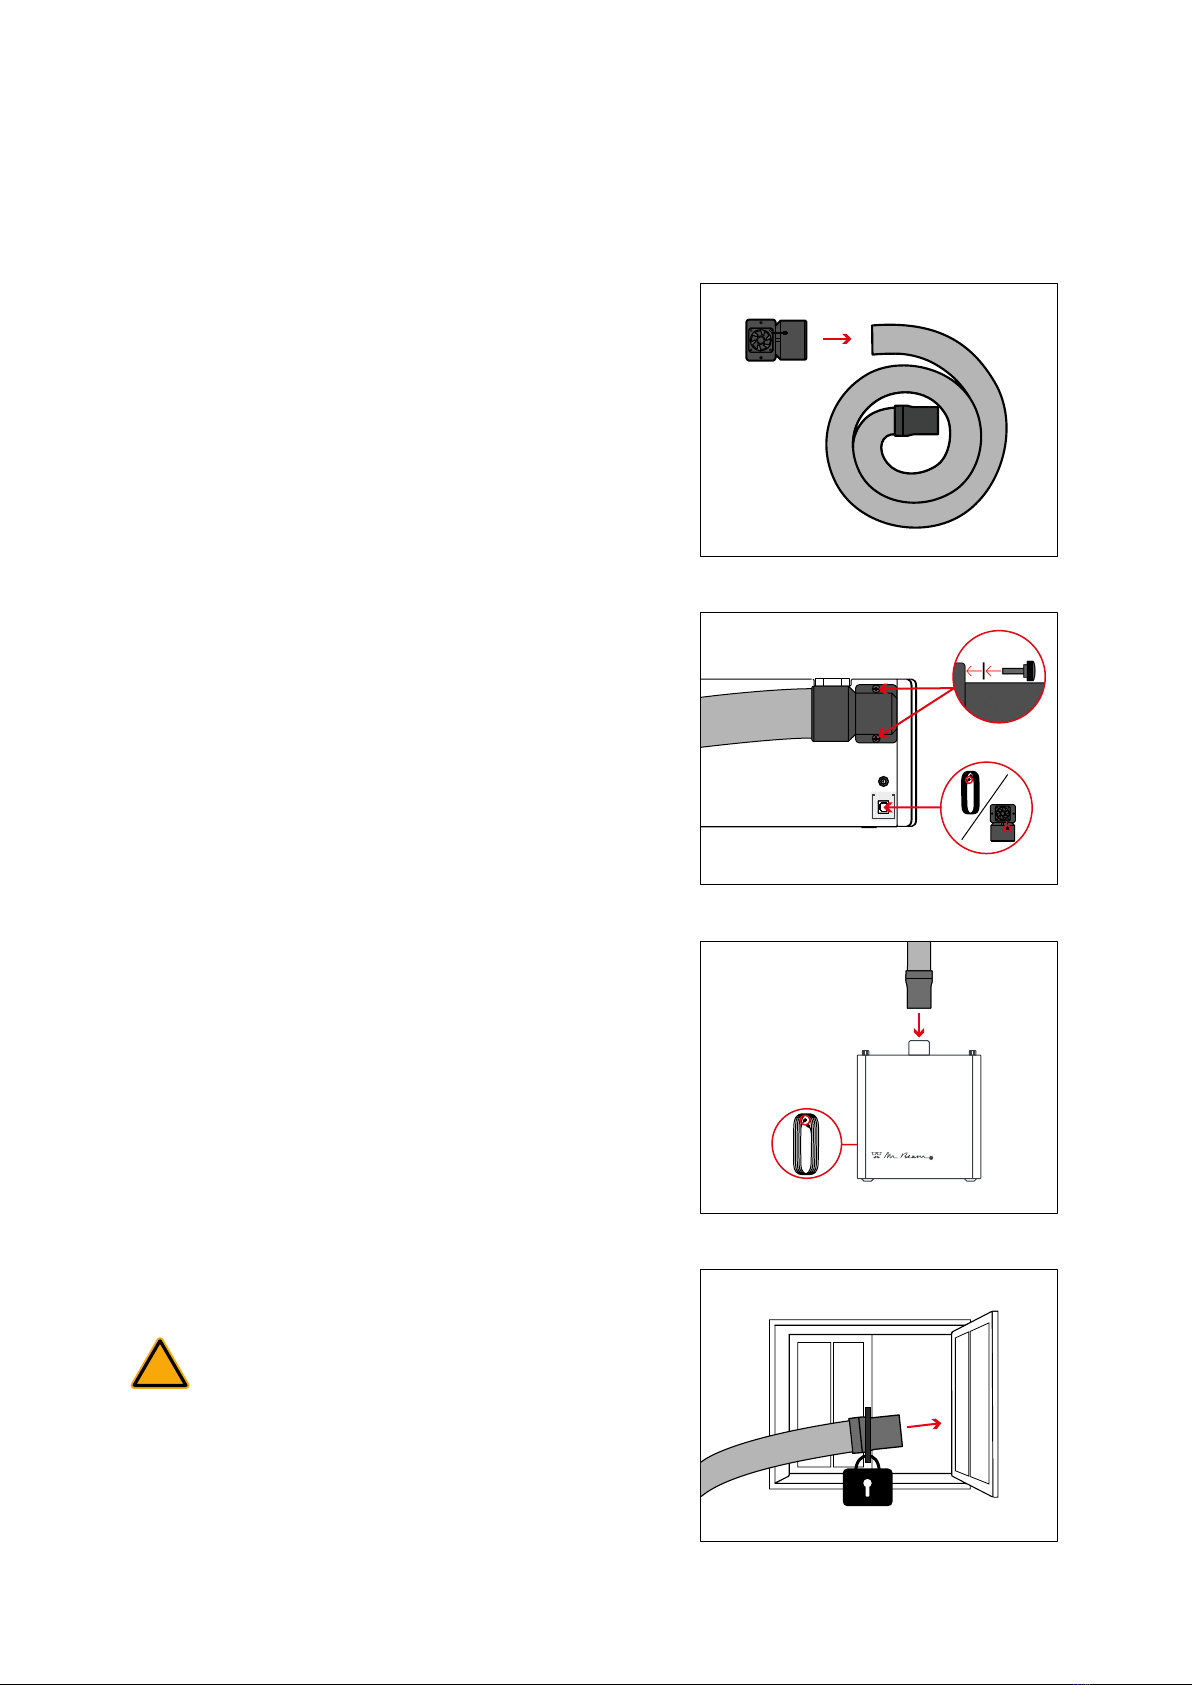
CONNECTION OF THE SUCTION
/ AIR FILTER SYSTEM
Caution: If you operate your Mr Beam without
Mr Beam Air Filter System, you are obliged to
ensure that the waste air is discharged properly.
To do this, direct the waste air outdoors or
connect the hose to an existing waste system.
Fix the hose carefully and prevent the waste air
from entering the room.
Screw the elbow to the end of the hose
(left-hand thread).
Connect the Mr Beam Air Filter System or
suction fan to your Mr Beam.
Screw the contra-angle incl. hose to the
housing using the knurled screws. Place the
washers between the screw and the rubber.
Also connect the Mr Beam Air Filter System or
suction fan with the appropriate cable.
27
AIRFILTER
SYSTEM
Off On
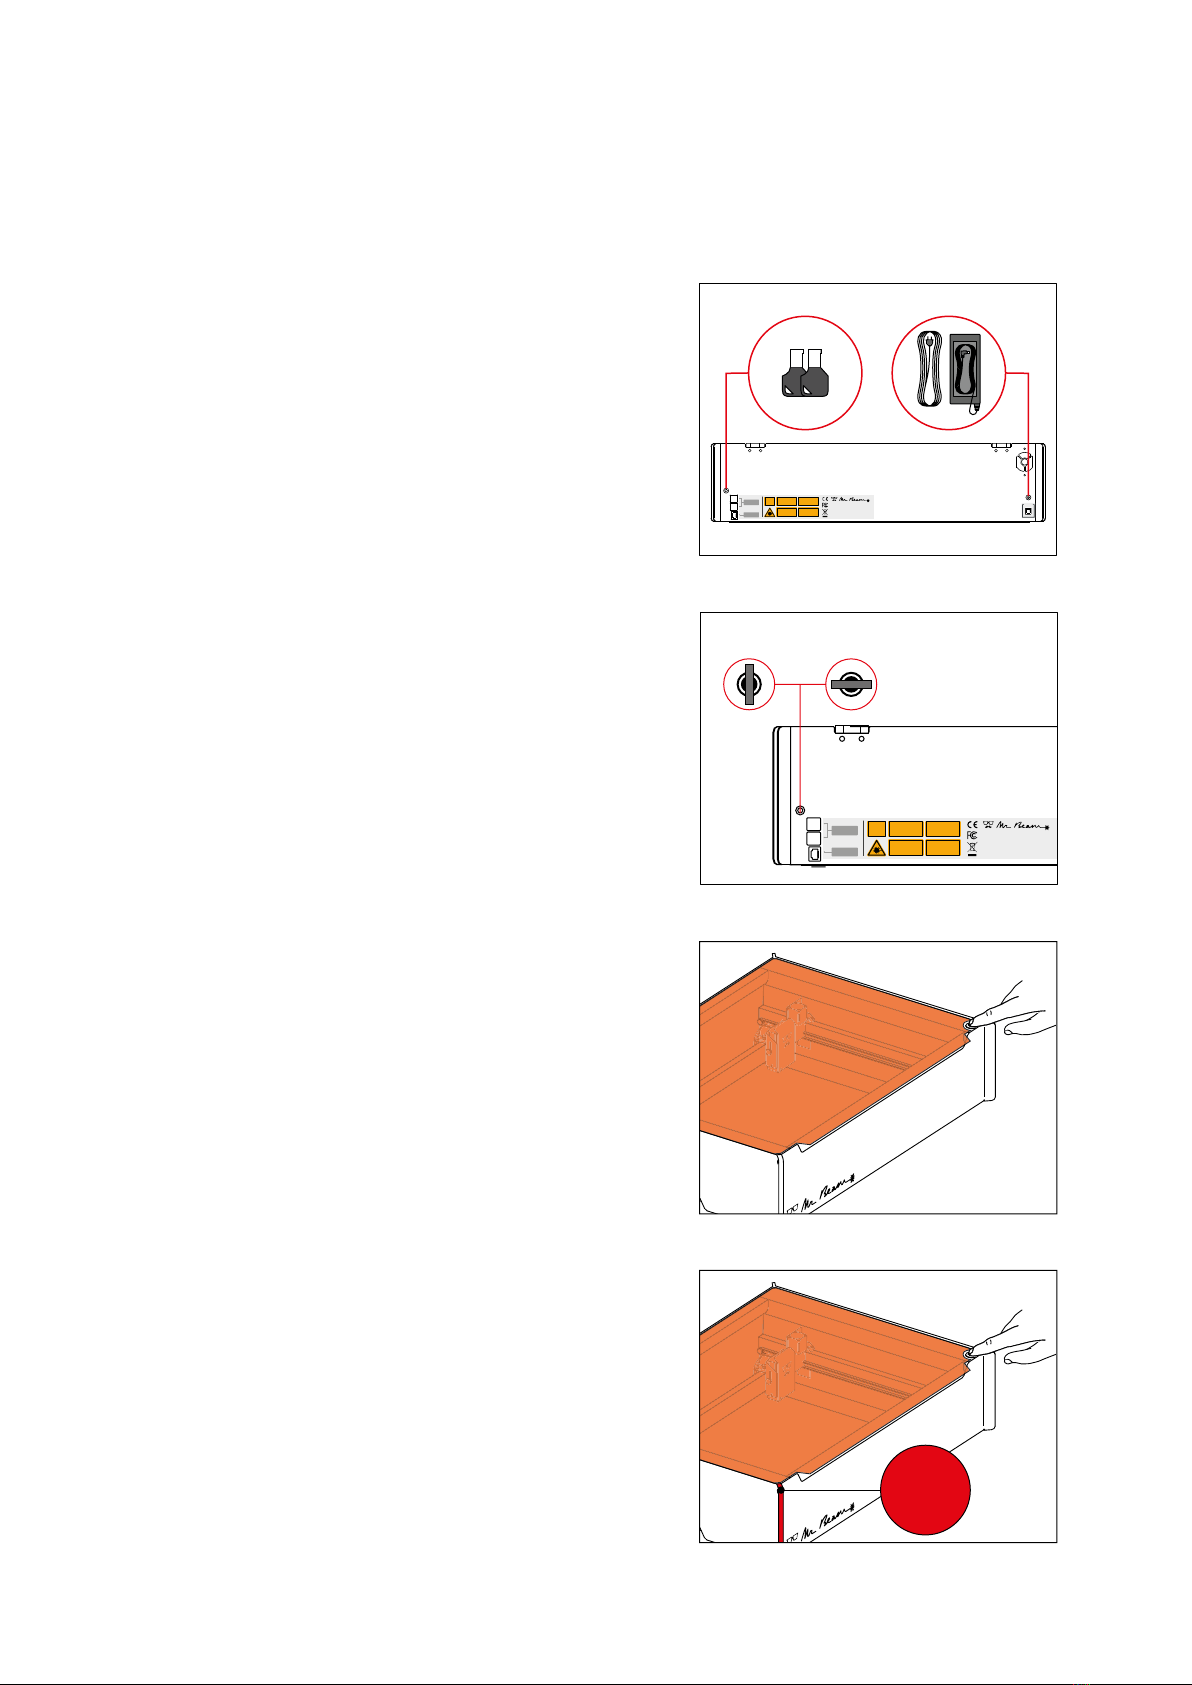
POWER SUPPLY / ON-OFF SWITCH
Turn on your Mr Beam using the key. It serves
as access control for authorized users.
To shut down your Mr Beam, press the button
5 seconds until the Status Lights turn perma-
nently red. After 15 seconds the whole system
shuts down.
When all the lights in the Mr Beam are off, turn
the key to turn it off completely.
Press the button to turn on your Mr Beam. The
light of the laser head is switched on immedia-
tely and after 10 seconds the Status Lights are
also switched on.
Connect the power adapter to your Mr Beam
before you connect it to the socket.
28
STARTING UP
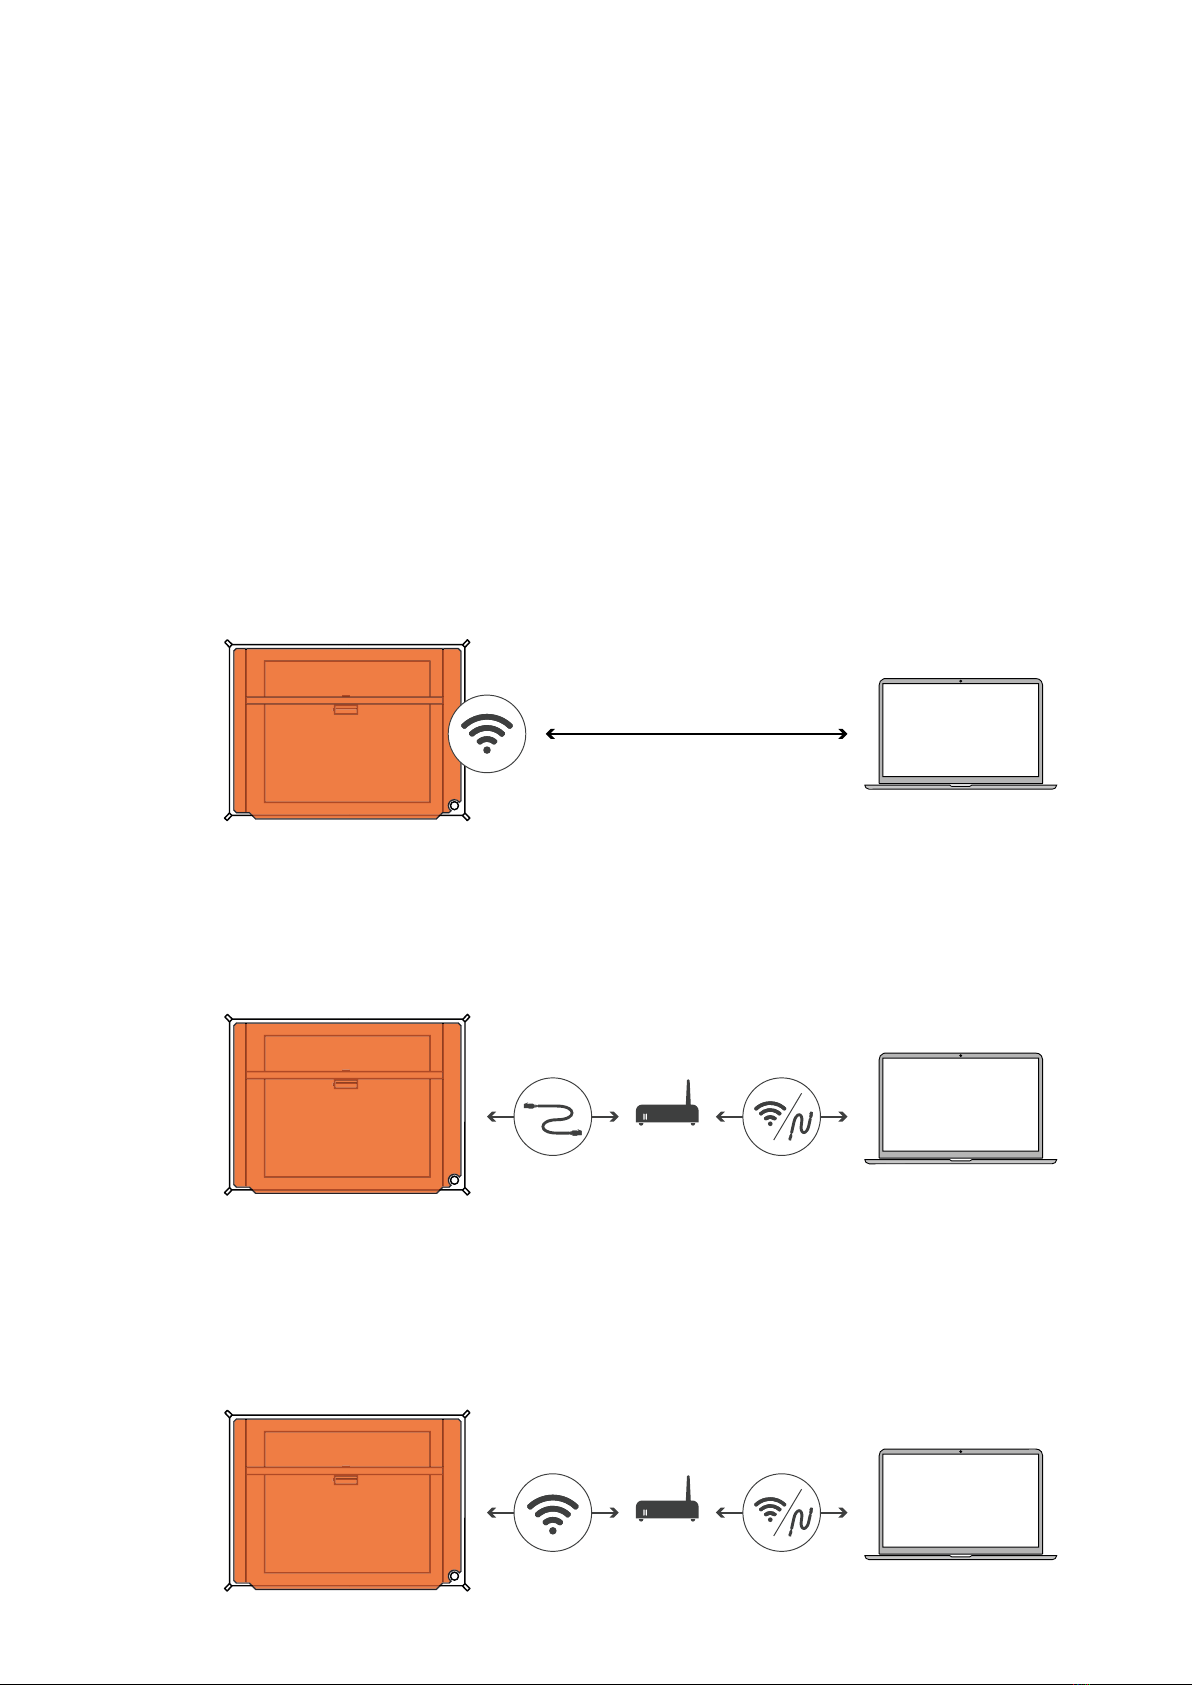
Connection options with Mr Beam
There are three options to connect Mr Beam to your computer or tablet. Choosing the most
appropriate option depends on your personal usage preference and the network available at
the location Mr Beam is set up in. In all cases you need the Google Chrome Browser. Other
Browsers are not supported.
Please choose one of the following connection options and proceed with the installation in the
section “Status Lights“ on the next page.
Option A: Connection via Wi-Fi
Connect your computer directly to the Wi-Fi of your Mr Beam. This is the easiest connection
option. No internet access or network infrastructure is required. You may not be able to use
the internet on your computer while you are connected to Mr Beam. See page 11.
Option B: Connection via network cable (Ethernet) and router
Connect Mr Beam to the network router using a cable. Then, use the find.mr-beam service to
create a connection to your Mr Beam.
This option is particularly stable due to the cable connection. An internet connection is
necessary for the use of the find.mr-beam service. See page 12.
Option C: Connection via Wi-Fi and router:
Connect your Mr Beam to your network via Wi-Fi. To do this, connect Mr Beam to your Wi-Fi
using the Wi-Fi-name and password. For initial setup, you need to connect via Option A or B
first. The initial setup may be a little complicated, but in the long term, this is the most com-
fortable option that many users prefer. See page 13.
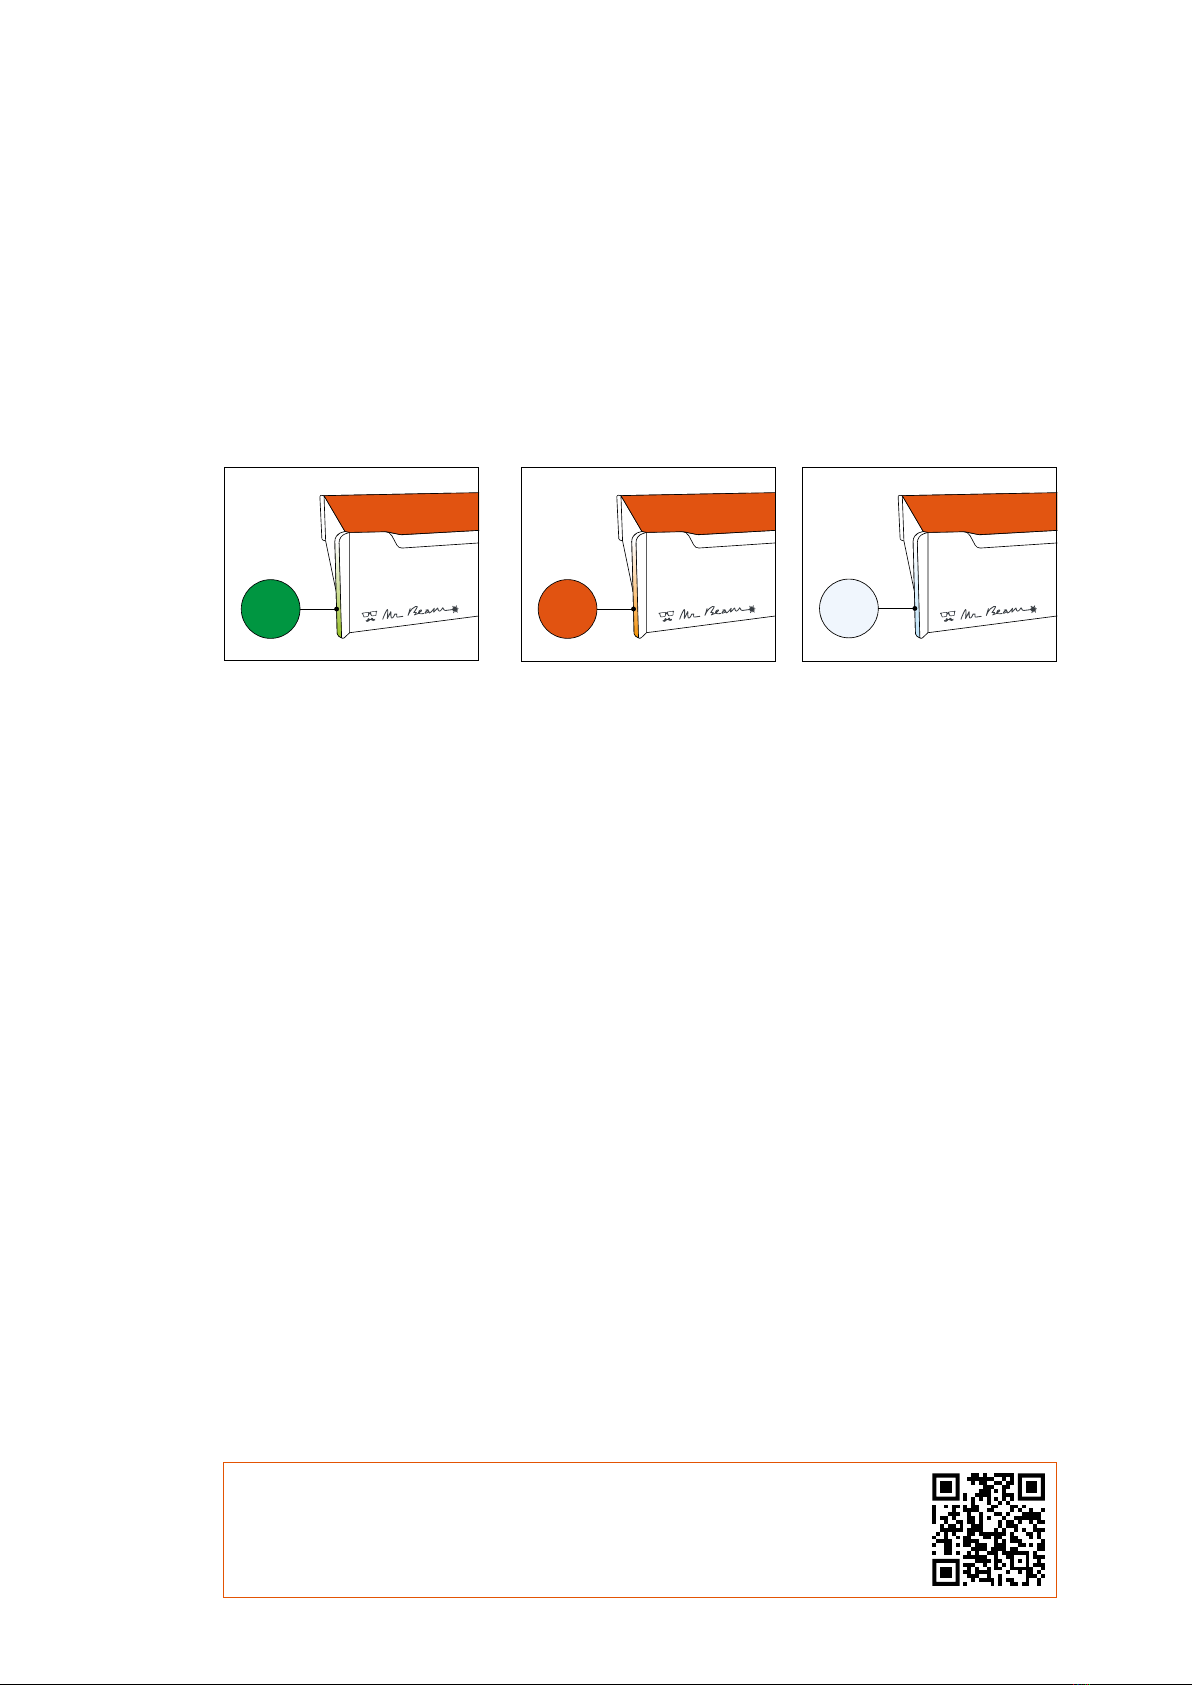
29
Status Lights
Whether you are setting up for the first time or have connected to your Mr Beam many times
before, the Mr Beam Status Lights will show you how to connect to your Mr Beam right now.
For this purpose, the Status Lights pulsate (blink slowly) in different colors.
Orange pulsation:
Your Mr Beam pulses oran-
ge if it has an active internet
connection.
In this case, you can access
your Mr Beam via find.
mr-beam.org in the Google
Chrome browser.
More details about the active
internet connection (via rou-
ter or network cable) can be
found on page 31 and 32.
Green pulsation:
Your Mr Beam pulses green
if a Wi-Fi direct connection
is possible.
The direct connection via
the Wi-Fi of the Mr Beam is
used during the initial setup
and if you want to operate
the Mr Beam without an
active internet connection.
(e.g. at fairs or in the base-
ment).
For more details of the Wi-Fi
direct connection, please
refer to page 30.
White pulsation:
Your Mr Beam pulses white
if it is connected to your
local network but has no
active internet connection.
Visit our online Knowledge
Base to find possible solu-
tions.
When pulsing green and
white at the same time, a
Wi-Fi direct connection is
possible and it is connected
to your network router, but
still cannot be found on find.
mr-beam.org.
CONNECTION WITH MR BEAM
In all cases, you can find more information in our online knowledge base at www.
mr-beam.org/docs/lights.
Questo manuale è adatto per i seguenti modelli
3
Indice
Altri manuali Mr Beam Taglierina


