O2 Xda Orbit Manuale utente

A quick guide to your
Xda Orbit

Contents
Section 1
Getting started 2
Install the memory card
and SIM card 2
Insert the memory
and SIM cards 3
Install and charge the battery 4
Turn on and set up
for the first time 6
Check the battery power 7
Enter your PIN 7
Synchronise with your
PC or laptop 8
Section 2
Using your Xda Orbit 12
Mobile phone 12
A world of connections 12
Internet and messaging 13
Video, pictures and audio 13
Setting up ISP
email accounts 14
Set up a POP3/IMAP4
email account 14
Microsoft Direct Push Email 15
In the Box 16
A tour of your Xda Orbit 20
Status indicators 28
Section 3
Help and troubleshooting 32
General questions 34
2
3
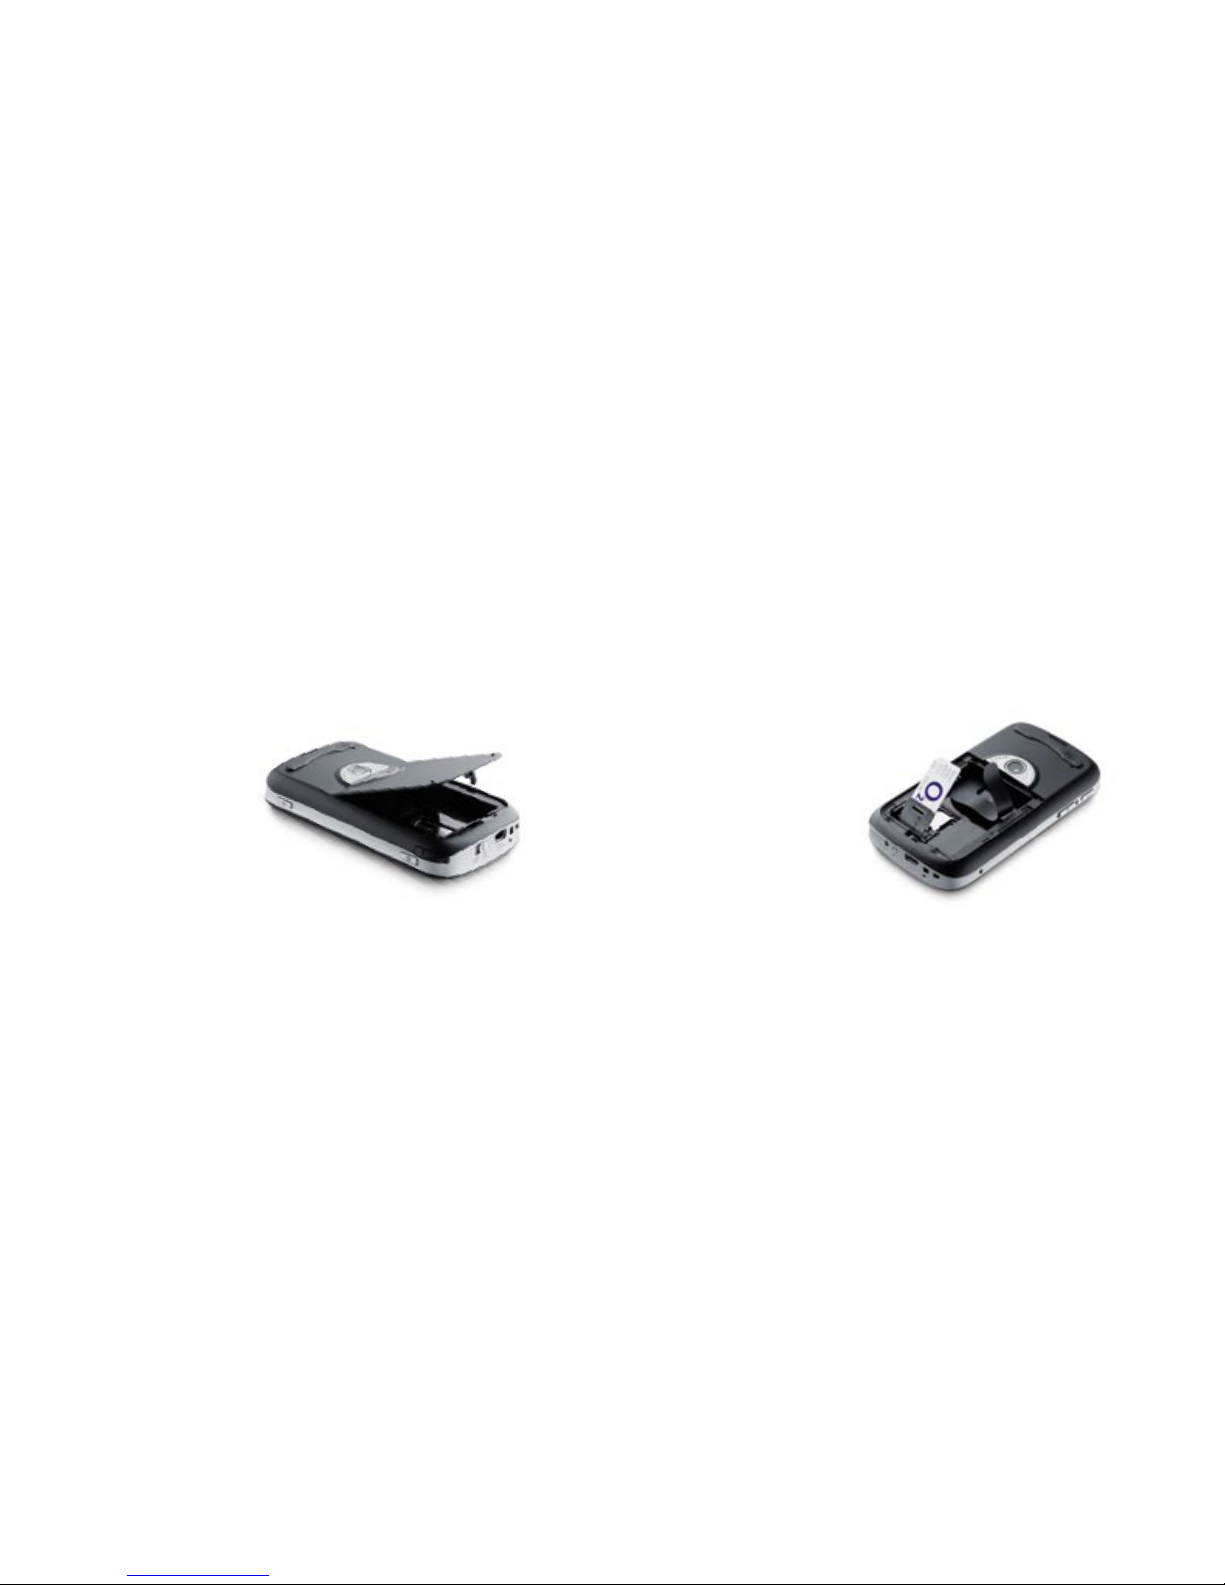
2. Insert the memory*
and SIM cards
Now gently slide both the memory
SD card and the SIM card into
their holders, with their gold
contacts facing down.
(The cut-off corner of the SIM
card should mirror the corner
in the SIM card slot).
Press down the memory card
holder to close and lock it in
place. Then close the SIM card
holder and slide it upwards to
lock it in place.
Finally replace both the battery
(see instructions in the next
section) and the battery cover.
* There is no memory card contained in the standard box.
Getting started
1. Install the memory
card and SIM card
Firstly, make sure your Xda Orbit
is turned off before you install any
cards. Then remove the battery
by sliding the battery cover latch.
You’ll find this at the bottom of
your Xda Orbit. If the battery is
inside, simply remove it with your
finger by lifting the upper right
side of the battery slot.
Slide the SIM card holder
downward to unlock it, then
lightly flip it open. Then open
the memory card holder.

4
5
Top Tip: Some batteries
perform best after several
full charge and discharge
cycles. There’s two ways to
charge the battery:
– you can connect your
Xda Orbit directly to an
electrical outlet using
the AC adapter
– you can plug the sync
cable to the USB port
on your PC and to the
sync connector on your
Xda Orbit.
3. Install and charge
the battery
You will receive the new
batteries partially charged. But
before you start using your Xda
Orbit, you will need to install and
fully charge the battery.
To install the battery, remove the
battery cover first and insert the
battery. The gold connectors on
the battery should meet with the
row of connectors on the left
side of the battery slot. Insert the
left side of the battery first, then
gently push it down into place
(there will be a small click as it is
locked into position) and replace
the battery cover.
Lights on the LED indicator on
your Xda Orbit will show the
battery status:
When your Xda Orbit is off a
solid amber light shows when
it is charging
When your Xda Orbit is on, a
solid amber light and a charging
icon on the Today screen will
show when it is charging
After the battery has been fully
charged, a green light and full
battery icon appears on the
Today screen.

6
7
5. Check the battery power
Tap the battery level icon
on the Today screen. The power
settings screen will open and
display the current battery
power level.
A warning message will show
if the battery power is very
low. If you see this, you should
immediately save your data by
synchronising with your PC, or
back-up data on a secondary
storage card, and then turn off
your Xda Orbit. Do not restart
it until you have connected it
to the power adapter.
Press power again to turn off
your Xda Orbit.
6. Enter your PIN
When your Xda Orbit restarts,
it may ask you to enter the PIN
for your SIM.
Tap in your PIN and select Enter.
If you’re an O2 Ireland customer,
please enter the PUK code
supplied with your SIM or call
Customer Service on 1909
4. Turn on and set up
for the first time
Turn on your Xda Orbit by
pressing the power button on
the right-hand edge.
A welcome screen will appear.
It will prompt you to Tap
the screen to set up your
Xda Orbit. You can do this
by following the on-screen
instructions.
Your Xda Orbit will start to set
itself up and add applications
supplied by O2. After about
two minutes, you’ll see a
customisation screen which lets
you tailor some options on your
Xda Orbit. These are:
Basic: configures your
connection settings and adds extra
touches so that your Xda is even
easier to use. We recommend you
to use this setting as standard.
Corporate: a tailored solution
from O2. No settings or O2
enhancements are installed –
this option is only available if
your Xda Orbit is supplied by
your IT manager.
Now choose your country and
connection settings.
Tap OK to complete your set
up. Your Xda Orbit will then
restart itself.

8
9
Top tip: you’ll block your SIM
card if you enter the wrong
PIN three times. This means
you won’t be able to make
or receive any calls, texts or
picture messages.
Don’t worry – you can easily
sort this out by contacting
your service provider. They’ll
unblock it for you right away.
7. Synchronise with your
PC or laptop
Microsoft® ActiveSync® lets you
synchronise information on your
Xda Orbit with your PC such as
Inbox, Calendar, contacts and
tasks within Microsoft Outlook®.
The software is already installed
on your Xda Orbit but you will
need to install it on your PC if
you haven’t already.
To do this, insert the Getting
Started CD included in your
Xda Orbit box into the CD drive
of your PC and follow the simple
on-screen wizard.
When it’s installed just connect
the USB cable to your PC and
start synchronising.
Now that you’re set up,
let’s get going!

Section 2

12
13
Internet and messaging
Use Outlook Mobile to send and
receive emails with attachments,
keep track of meetings and
events and keep in sync with
Outlook on your PC.
You can also get real time access*
to email using Microsoft Direct
Push Email if your company has
Microsoft Exchange 2003 or
above. This means you can get up
to the minute access to your Inbox,
Contacts and Calendar.
You can download, view and
edit email attachments using
mobile versions of Microsoft
Office applications such as
Word, Excel and Powerpoint.**
And create and send picture
messages or text your contacts
for a fast response.
The Internet Explorer Mobile
gives you fast connection to the
Internet. Do your banking, check
stock prices or catch up with the
day’s news.
Video, pictures and audio
Take detailed pictures or shoot
video with sound. The Xda Orbit
has a high-resolution camera
built-in with flash, and a clear,
high-quality colour screen.
Your Xda Orbit also comes with
FM Radio on board. Plug your
headphones in (they act as an
antenna) and simply select Start
> FM Radio to start listening.
* Subject to coverage and your company’s IT infrastructure, permissions and policies.
** Applies to read only for Powerpoint.
Mobile phone
Use your Xda Orbit just like a
mobile phone to keep in contact,
get in touch with the office or
send text and picture messages.
A world of connections
Xda Orbit supports GPRS and
Wireless LAN so there’s a choice
of connecting to the Internet at a
range of speeds. Just choose the
network that works best wherever
you are. Bluetooth™ means you’re
wire free and can use your Xda
with car kits and headsets.
Your Xda Orbit comes with GPS
(Global Positioning System)
built in. That means that you
can enjoy a wide variety of GPS
services, the most widely known
are Satellite Navigation, Friend
Finder and Find My Nearest.
If you have purchased the
Satellite Navigation solution
with your Xda Orbit, refer to
the instruction manual in the
additional pack. If you would
like to purchase the Satellite
Navigation pack for your Xda
Orbit, please speak to O2.
Using your Xda Orbit

14
15
Microsoft Direct Push Email
Xda Orbit is powered by Windows
Mobile, a pocket-sized version
of Microsoft Windows. It has
all the features of a top of the
range PDA and mobile phone,
and also gives you real-time
access to your Inbox, Calendar,
Contacts synchronised on your
device automatically over the air
with your email account.*
To receive real-time access to
your Outlook files, your company
needs to be running Microsoft
Exchange Server 2003 Service
Pack 2 with your Xda Orbit
which has the latest Windows
Mobile 5.0 software.
Your IT department will need to
enable wireless services on the
Exchange Server and also set up
relevant IT security policies and
permissions such as password
requirements.
To find out how to use Microsoft
Direct Push Email with your O2
Xda Orbit go to our website:
www.o2.co.uk/xda
Setting up ISP
email accounts
The email Setup Wizard
makes it easy and simple to
set up your Outlook email
and POP3/IMAP4 accounts.
Set up ISP email accounts
using email Setup Wizard
1. Tap Start > Messaging.
2. Tap Menu > Tools >
New Account to access
the email Setup Wizard.
3. The email Setup Wizard
guides you step-by-step
through the setup process
Set up a POP3/IMAP4
email account
You can set up a POP3 or IMAP4
email account if you have an
email account with an Internet
service provider (ISP) or an
account that you access using a
VPN server connection (typically
a work account).
1. Tap Start > Messaging.
2. Tap Menu > Tools >
New Account.
3. On the first email Setup
screen, select Other (POP3/
IMAP) from the Your email
provider list, then tap Next.
4. On the next screen, enter your
email address, and tap Next.
Auto configuration will help
you download necessary email
server settings.
5. Once Auto configuration
has finished, tap Next.
6. Enter your name (the
name you want displayed
when you send email) and
your password.
Top Tip: Select the Save
password check box if you
want to save your password.
*Subject to your company’s IT infrastructure, permissions and policies.

16
17
AC Adapter
for recharging your Xda battery.
Connection cable
to connect your Xda to a
PC for synchronising data
and charging.
Hands-free stereo headset
make sure you connect this
headset when you use the
FM Radio as it uses the headset
as an antenna.
In the Box
Xda Orbit
your all in one phone
and GPS PDA
Xda Orbit battery
to power your Xda
Indice
Altri manuali O2 Telefono cellulare


