OrangeCam Orange Box 800 Manuale utente

Orange Box 400/800
User Manual
My handy Smart CCTV
SMART
CAM

01
■ Legend
● When this manual is lost, you can visit http://myorangecam.com for download.
(In order to see PDF documents, your PC has to be with Adobe Reader installed available at http://kr.adobe.com.)
● The appearance designs and dimensions of the product may be subject to change without notice to consumers,
to ensure product quality.
● Non-authorized use or duplication of all or parts of this User Manual without permission is prohibited by law.
● We do not guarantee any accident caused by data loss, and it is recommended to back up your important user data.
● Some parts of this User Manual contains the specifications of a product you have not purchased,
including this product.
● As a video recording device, this product may be used to help case resolution as supplementary means,
but not as main. And we are not obliged for any responsibility for malfunctions or other insufficient functions of
this device at any accident or crime.
● This product is equipped with shock-sensitive HDD. External shock or movement may cause malfunctions. So, make
sure to disconnect the power when you transport it.
● This product may generate heat from itself. Staking more than two products or placing this product on other device
with heat generated, it may cause failure or malfunction. Avoid direct sun light and install it at a well-ventilated place.
For further questions or warranty service, visit http://myorangecam.com or http://orangecam.net.
Part.01 Before you start

02
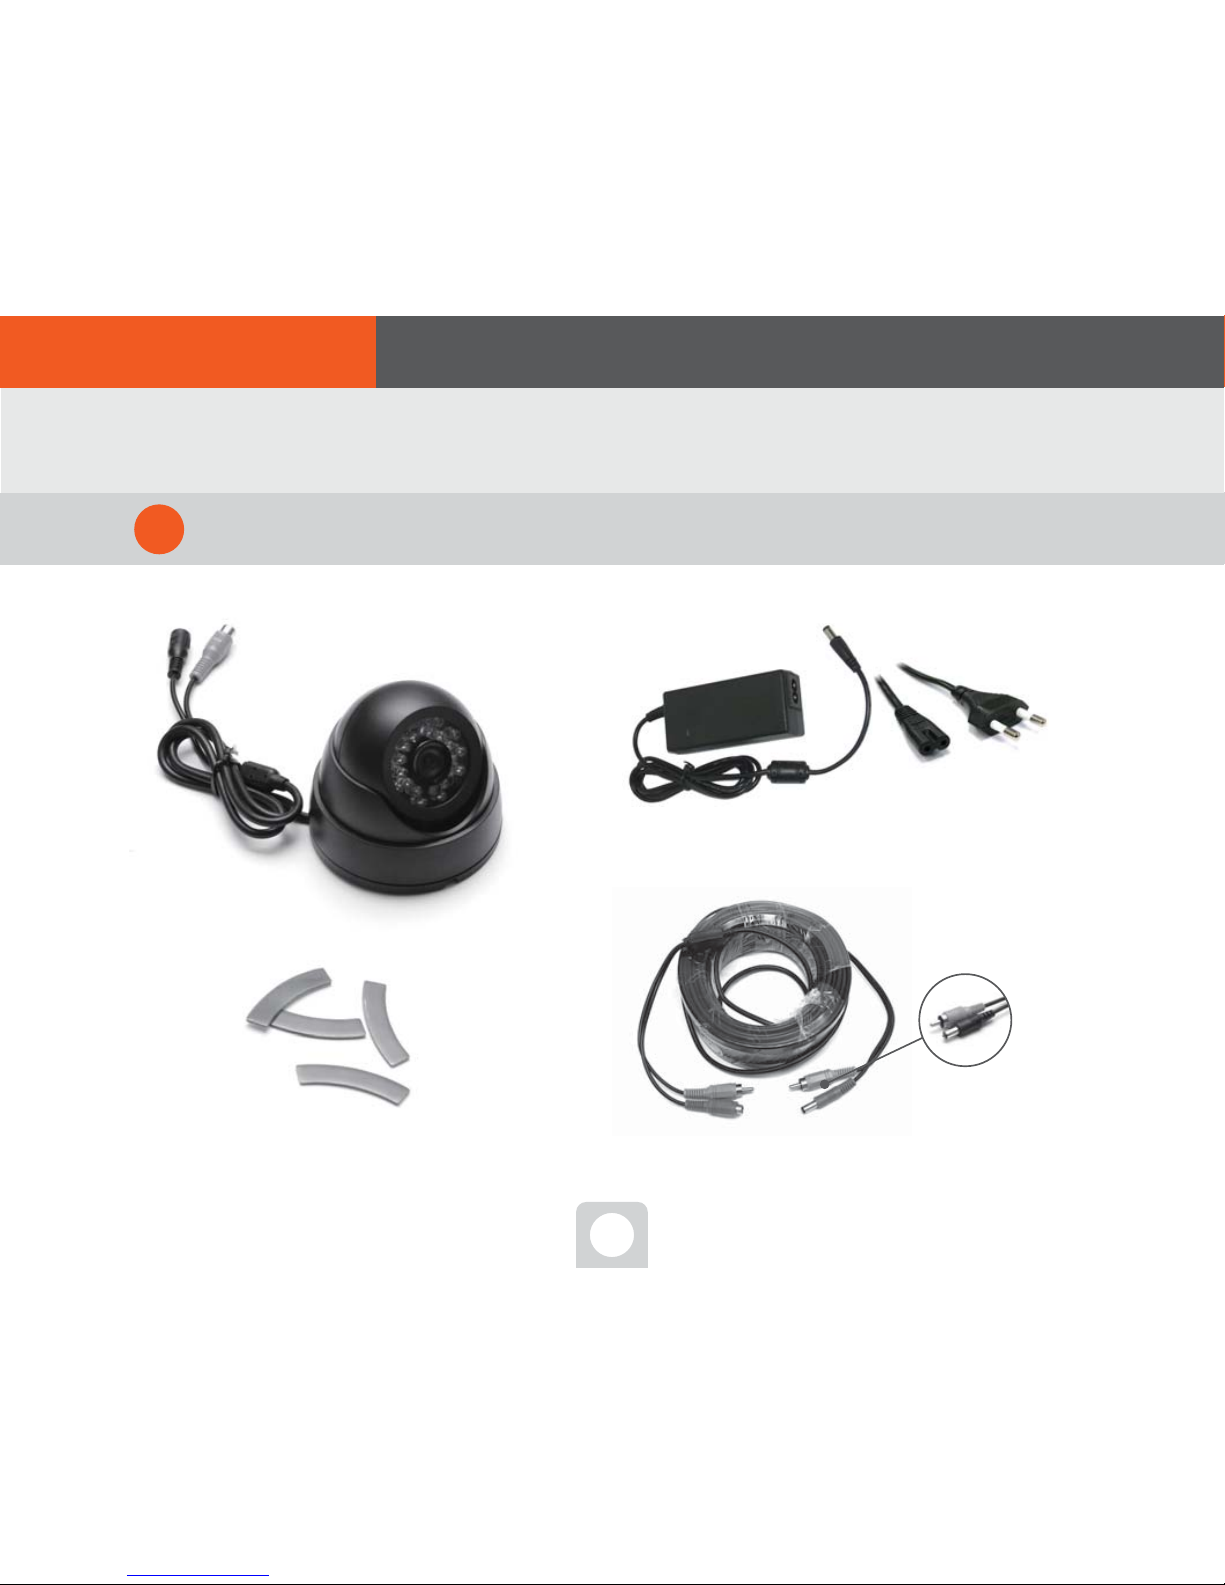
* Orange Box 400/800 Basic components (Camera separately sold)
* Orange Cam SET package (Orange Cam 400/800) components
Basic set package including camera
DVR body box
(Camera separately sold)
Product body(DVR) User Manual
(This Manual)
USB Mouse
Dome infrared camera
Video & power
Connecting cable
Power adapter
2 power adapters
Product body(DVR)
User Manual
(This Manual)
01. Before you start ■ Components checking

03
■ How to install - Simple view
Power
Power Adopter
ip Share
USB Mouse
Monitor
TV
Power Adopter
Video/Power
Connecting Cable
Product body(DVR)
Camera
Part.02 To start

04
power Connect with the
adapter to power
socket, and plug it to
the position as shown in
the Fig., and power will
automatically turn on.
As DVR is connected with
Internet, you may now use
the web service and mobile
phone service.
(However, to connect with
Internet, you need to call
Internet service provider to
apply for the service.)
Turn on power
1Connect with Internet
2
Power
Internet share
software
Connect LAN port
Power Adopter
● Connect with power adapter,
and power will turn on
Connecting the LAN cable and it will be
connected with Internet.
1. Run DVR and connect with Internet
02. To start ■ Order of connect

05
Connect with the mouse.
1Connect with monitor.
2
USB Mouse Monitor
● Now, you can control the screen with the mouse. ● With monitor, you can watch the screen
2. When you use monitor
Plug in the USB terminal of mouse into
position shown as in Fig., you can control DVR
with mouse. With a mouse, you can use VGA
monitor (D-SUB) or TV display.
Plug in the VGAmonitor(D-SUB)
cable position shown as in Fig., you
can display the screen with
monitor and you can directly
control real-time monitoring and
DVR. (Even without a computer, a
monitor will do for this purpose.)
* Monitor cable for sales separately
02. To start ■ Order of connect

06
Connect with TV.
1Change Output
2
TV
● You can watch screen with TV. ● Shift VGA and TV
3. If you use TV
Plug in the video cable to the TV external
input terminal and the DVR TV display
terminal as shown in Fig., you can display
the screen with TV and directly control the
real-time monitoring and the DVR.
However, as the VGA display is basic setting, you
have to, when connecting with TV, shift VGA and TV,
in order to apply TV display.
ENTER
CANCEL
MENU
TV or VGA Moniter
+
CANCELMENU
PWR HDD NET
02. To start ■ Order of connect
07
Check the components to connect with camera
1
4. Connect with camera
Video & power Connecting cable
Power Adopter
Video terminal(yellow)
Power terminal(red or black)
High-strength adhesive sticker
Camera
02. To start ■ Order of connect
08
video/power cable connection
One! Two! Attach the high-strength adhesive
sticker onto the bottom of camera. Hint. Wait a minute!
Did you install the Orange Cam app?
카메라
전원아답터
Video terminal(yellow)
Power terminal(red or black)
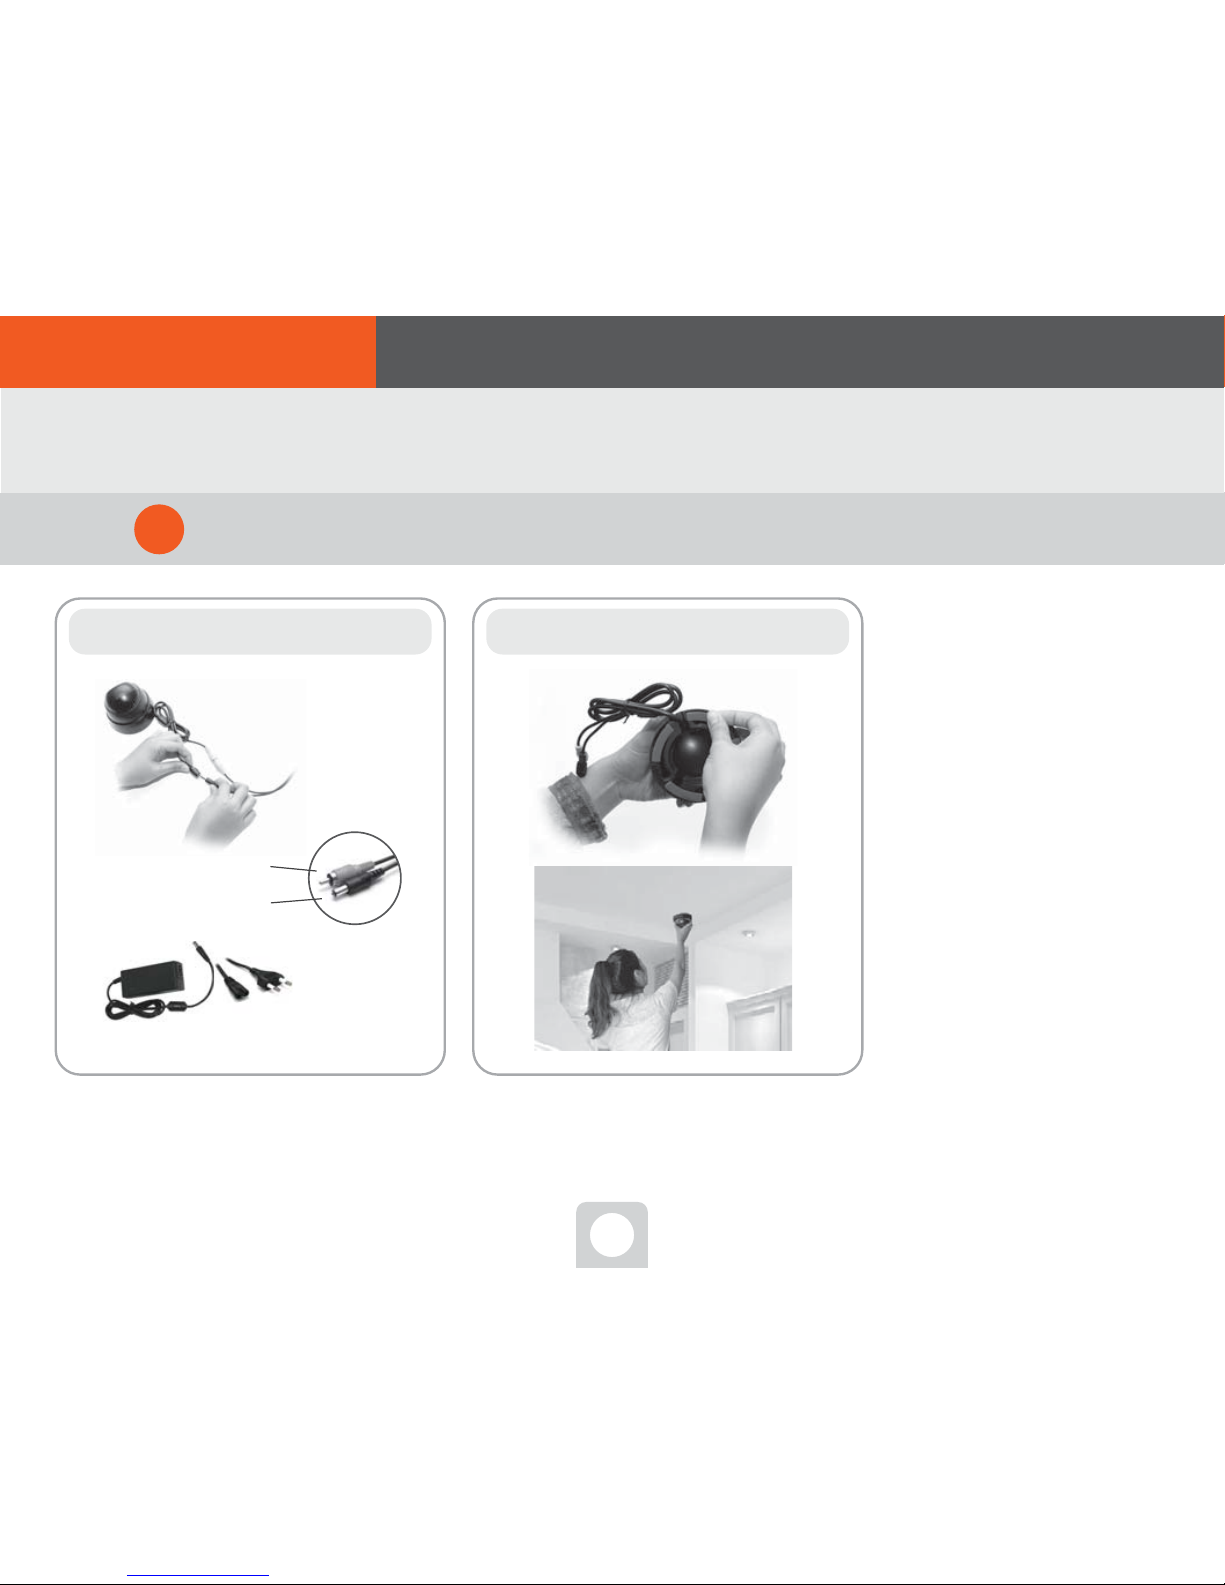
Assemble the components to connect with camera
2
4. Connect with camera
02. To start ■ Order of connect
According to matching colors, connect
[video/power cable] to camera and power
adapter both, for assembling.
Attach high-strength adhesive sticker on
to the bottom of camera and then stick the
camera to the position you want to install.
If you have connected the DVR
with Internet,
It is recommended to first install
the Orange Cam app for smart-
phone before you install the
camera.
Connecting DVR to Orange Cam
app enables you to easily install
a camera, watching the
appeared parts and angles during
the installation.

09
If you have purchased Orange Cam package or bought a
camera separately, use the [video/power cable] enclosed
together to plug in the video terminal(yellow) to the position
shown as in Fig. power terminal(black). Then, connect the
power adapter to give power to the camera, to send the
video to DVR body starting monitoring service.
Wait a minute!
A camera will be in normal operation status,
by only connecting the camera to [video/
power cable] and using the separately
provided power adapter for a camera for
power supply.
Connect the camera to DVR
3
Power Adopter
Video/Power Connecting Cable
Camera
Connect the video/power cable to camera and DVR, both
4. Connect with camera
02. To start ■ Order of connect
Indice


