Osram Claypaky CloudIO Manuale utente

INSTRUCTION MANUAL
ENGLISH

2
INDEX
PAGE
1. Safety Information 03
2. How It Works - Topology 04
2.1 Account Setup - First Registration 04
3. Unboxing - Box Setup 06
4. Cloudio Box Application Launcher 08
4.1 Cloudio Gateway 08
4.2 Fixture Firmware Uploader 09
4.3 Settings 10
4.3.1 General Info - Set Access Pin 10
4.3.2 Wi-Fi -Wi-Fi Settings 11
4.3.3 Ethernet - Ethernet Settings 12
4.3.4 Cloud - Box Paring 12
4.3.5 Cloudio Box Firmware Update 13
5. Cloudio Web Interface 14
5.1 Dashboard 15
5.2 Overview 16
5.3 Fixture Detailed Info 17
5.3.1 Log Overview 17
5.3.2 Firmware Details 18
5.3.3 Fixture Properties 18
5.4 Operations 19
5.4.1 Cloudio Box Selection 19
5.4.2 Batch Overview + Functionality Batch Overview 20
Parameter Factory Default 21
Movement Reset 21
Clear Errors 21
Smart Notepad 21
Smart Coding 22
Start Locate 23
5.4.3 Firmware Update 23
5.4.4 Dmx Settings 25
5.4.4.1 Rdm Live Menu 25
5.5 Smart Notepad 27
5.6 Users 29
5.7 Settings 30
5.7.1 Change Password 30
5.7.2 General Setup 31
5.7.3 Line Setup 31
5.7.4 Smart Coding 32
6. F.A.Q. 34
7. Trouble Shooting 36

EN
IT
DE
ES
FR
RU
3
1. SAFETY INFORMATION
Congratulations on choosing a Claypaky product! We thank you for your choice.
Please note that this product, as all the others in the rich Claypaky range, has been designed and
made with the highest quality to ensure excellent performance and to meet your expectations and
requirements.
In this instruction manual you will nd a careful explanation of all the components that make up CloudIO.
You will be guided step by step from hardware installation to software use.
The rst part will show you an overview of CloudIo, in the second part you will nd quick tutorials that will
show you how to carry out the different features that CloudIO offers.
SAFETY INFORMATION
IMPORTANT: Claypaky recommends you carefully read and keep t he s afety information on this p roduct, also
available in digital format at the following link:
www.claypaky.com
FIS01X - Safety Information CloudIO
INFORMAZIONI DI SICUREZZA
IMPORTANTE: Claypaky raccomanda di leggere accuratamente e conservare le informazioni di sicurezza relative
a questo prodotto, sempre reperibili in versione digitale al seguente link:
www.claypaky.com
FIS01X - Safety Information CloudIO
INFORMATIONEN ZUR SICHERHEIT
WICHTIG: Claypaky empfiehlt, die Sicherheitsinformationen bezüglich dieses Produkts genau zu l esen und
aufzubewahren. Sie sind in Digitalversion immer unter folgendem Link auffindbar:
www.claypaky.com
FIS01X - Safety Information CloudIO
INFORMACIONES DE SEGURIDAD
IMPORTANTE: Claypaky recomienda leer detenidamente y conservar la información de seguridad relativa a este
producto. Además, está disponible una versión digital de la misma en el siguiente enlace:
www.claypaky.com
FIS01X - Safety Information CloudIO
CONSIGNES DE SÉCURITÉ
IMPORTANT: Claypaky recommande de lire attentivement et de conserver les informations de sécurité relatives à
ce produit, disponibles en version digitale au lien suivant:
www.claypaky.com
FIS01X - Safety Information CloudIO
: Claypaky
, :
www.claypaky.com
FIS01X - Safety Information CloudIO

SLAVEMASTER
CLOUD
2. HOW IT WORKS - TOPOLOGY
2.1 ACCOUNT SETUP - FIRST REGISTRATION
4
CloudIO is a compact IoT device capable of offering a whole world of xture information, diagnostics and remote assistance.
topology of CloudIO
CLOUD DATA
COLLECTION
COMPACT HARDWARE
CloudIO box is a very
compact device, that allows
the connection between the
moving heads and the cloud,
through a smart user interface
based on a web interface.
SMART WEB APP
INTERFACE
The web interface works with
any browser. A user-friendly
interface gives an overview of all
xtures and allows you to select
information, statistics, rmwares
to update, errors and solutions.
All the information is stored in
the cloud. Statistics and analysis
on the connected xtures will be
available for the user, offering a
complete monitoring of your xture
inventory or on installed xtures.
To start using CloudIO the rst thing to do is register your account. Follow these simple steps:
FIRST REGISTRATION
Visit the webpage https://www.cloudiobox.tech/
Press the button login/register
On the login page, click on “Don’t have an account? Register”
Fill out the registration form and click on submit
You will receive an e-mail after you click submit in which you will be asked to conrm your e-mail
address.
Please click on the link in the e-mail to conrm.
Claypaky will then validate your registration.
Your account is not yet active until you receive another e-mail from Claypaky, within 48 hours from
the registration submission, with the account activation conrmation.

5
login/register CloudIO webpage, screen_1
login/register CloudIO webpage, screen_2
user and company registration Cloudio
Only the Admin, responsible for the company, should do the “First Registration”, the remaining components will not
have to worry about creating any account or waiting for a verication email, it will be the Admin’s task to go to the
dedicated section “USERS” (p. 28) to create a new user inside the company.
The user will receive an email that will notify him that an account has been created for him, the user must go to the
login page and log in by entering the username and password that can be found in the email.
NOTICE

6
3. UNBOXING
DMX OUT: used to connect the controlled lighting xtures
DMX IN : used to connect a Lighting Control Console
WiFi: used to connect the CloudIO Box to a local AP WiFi for Cloud Service Connection
Ethernet 1: Fast Ethernet for Art-Net connection
Ethernet 2: GbE to be used to connected the CloudIo box to a local AP Ethernet for Cloud Service Connection
Main Switch: used to power on/power off the CloudIO box
PowerCon IN: Main power input
USB IN: Used to connect eternal USB keyboard, mouse or USB Mass-storage key
Inside the box there you will nd:
x2 WiFi antennas, x1 power cable, x4 rubber feet for the CloudIO box, the instruction manual and the safety.
information
packing contents
legend parts and components
Ethernet 1
DMX OUT DMX IN
Ethernet 2
Gigabit
PowerCon IN Main Switch
Antenna
Wi-Fi USB IN
Encoder Wheels

DMX cable
DMX cable
Ethernet
cable
LOCAL
NETWORK
7
3. BOX SETUP
To setup the box, attach the 2 WiFi antennas onto the back of the box. Install provided feet onto the bottom of the box
connection diagram
connection instructions step_1
instruction rubber feet assembly
connection instructions step_2

CloudIO Gateway Settings
Fixture Firmware Uploader
ENABLED
Sending firmware...
Internet Cloud
WAREHOUSE 1
CLOUDIO GATEWAY
DISABLED
Swipe right to enable CloudIO
CONNECTIVITYCLOUDIO GATEWAY
Internet Cloud
WAREHOUSE 1
4. CLOUDIO BOX APPLICATION LAUNCHER
4.1 CLOUDIO GATEWAY
8
At power up CloudIO presents the “Applicaton Launcher” page, this is where we can nd the 3 main apps:
- CloudIO Gateway: by launching this app, the user can enable or disable the CloudIO Gateway feature.
- Fixture Firmware Uploader: by launching this app the user can upload, a FW from an external storage device.
- Settings: by launching this app, the user can congure all the parameters such as connection and cloud settings.
home view CloudIO box
The CloudIO Gateway app, allows the management of the xtures connected
to the DMX OUT output through the services provided by the CloudIO platform.
When the Cloudio Box is enabled, the DMX IN /DMX OUT digital short-cut is
opened and the CloudIO Box takes the control of the Fixture as the Master DMX/
RDM device excluding any other control device connected on DMX IN.
CloudIO box must be rst paired to the user account.
To pair your account to the CloudIO box please refer to the instruction (p.12)
screen view CloudIO gateway enabled screen view CloudIO gateway disabled

FIXTURE FIRMWARE UPLOADER
Attention
The user is aware of the damage
that a not compatible firmware
can cause on the fixtures.
All the operations are intended under
user's own responsability
ACCEPT
BACK
Please insert USB Key in the USB slot
and then press "Continue"
OFFLINE FIRMWARE UPDATER
CONTINUE
2.21.004
2.22.000
2.21.011
0.14.210
CONTINUE
FIXTURE FIRMWARE UPLOADER
Firmware successfully sent
REBOOT
Click "Reboot" to reboot the fixtures
FIXTURE FIRMWARE UPLOADER
Click "send firmware" to continue
Attention
The fixtures will be updated following
the current firmware selection
AX_301.kdf
SEND FIRMWARE
BACK
FIXTURE FIRMWARE UPLOADER
Firmware update successfully done
CONTINUE
FIXTURE FIRMWARE UPLOADER
4.2 FIXTURE FIRMWARE UPLOADER
9
xture rmware uploader screen _1
xture rmware uploader screen _3
xture rmware uploader screen _5
xture rmware uploader screen _2
xture rmware uploader screen _4
xture rmware uploader screen _6
The Fixture Firmware Uploader app, allows you to update the rmware of any
Claypaky xture.
User can upload the ‘’.img le’’ of the new rmware in the root folder of a
USB KEY and press CONTINUE in order to activate the update procedure:
all Claypaky lights connected to the DMX OUT output, if compatible with the
rmware version present selected, will be updated to the new rmware version.
To download the rmware versions of the Claypaky products refer to www.
claypaky.it
CloudEthernetWi-FiGeneral Info CloudIO Update
SETTINGS
00-E0-18-98-56-35
Ethernet 1 MAC
50-Q0-48-27-56-15
Ethernet 2 MAC
00-D0-78-75-16-14Wi Fi MAC
AI000001
1.02
RYK-WUBT236ACNBT
CloudIO Serial Number
CloudIO Fw Version
Contains FCC ID
GENERAL INFO
BACK
GENERAL INFO
BACK
AI000001
1.02
7500ms
RYK-WUBT236ACNBT
CloudIO Serial Number
CloudIO Fw Version
FFU Delay
Contains FCC ID
Settings PIN CHANGE PIN
LICENSING
General Info
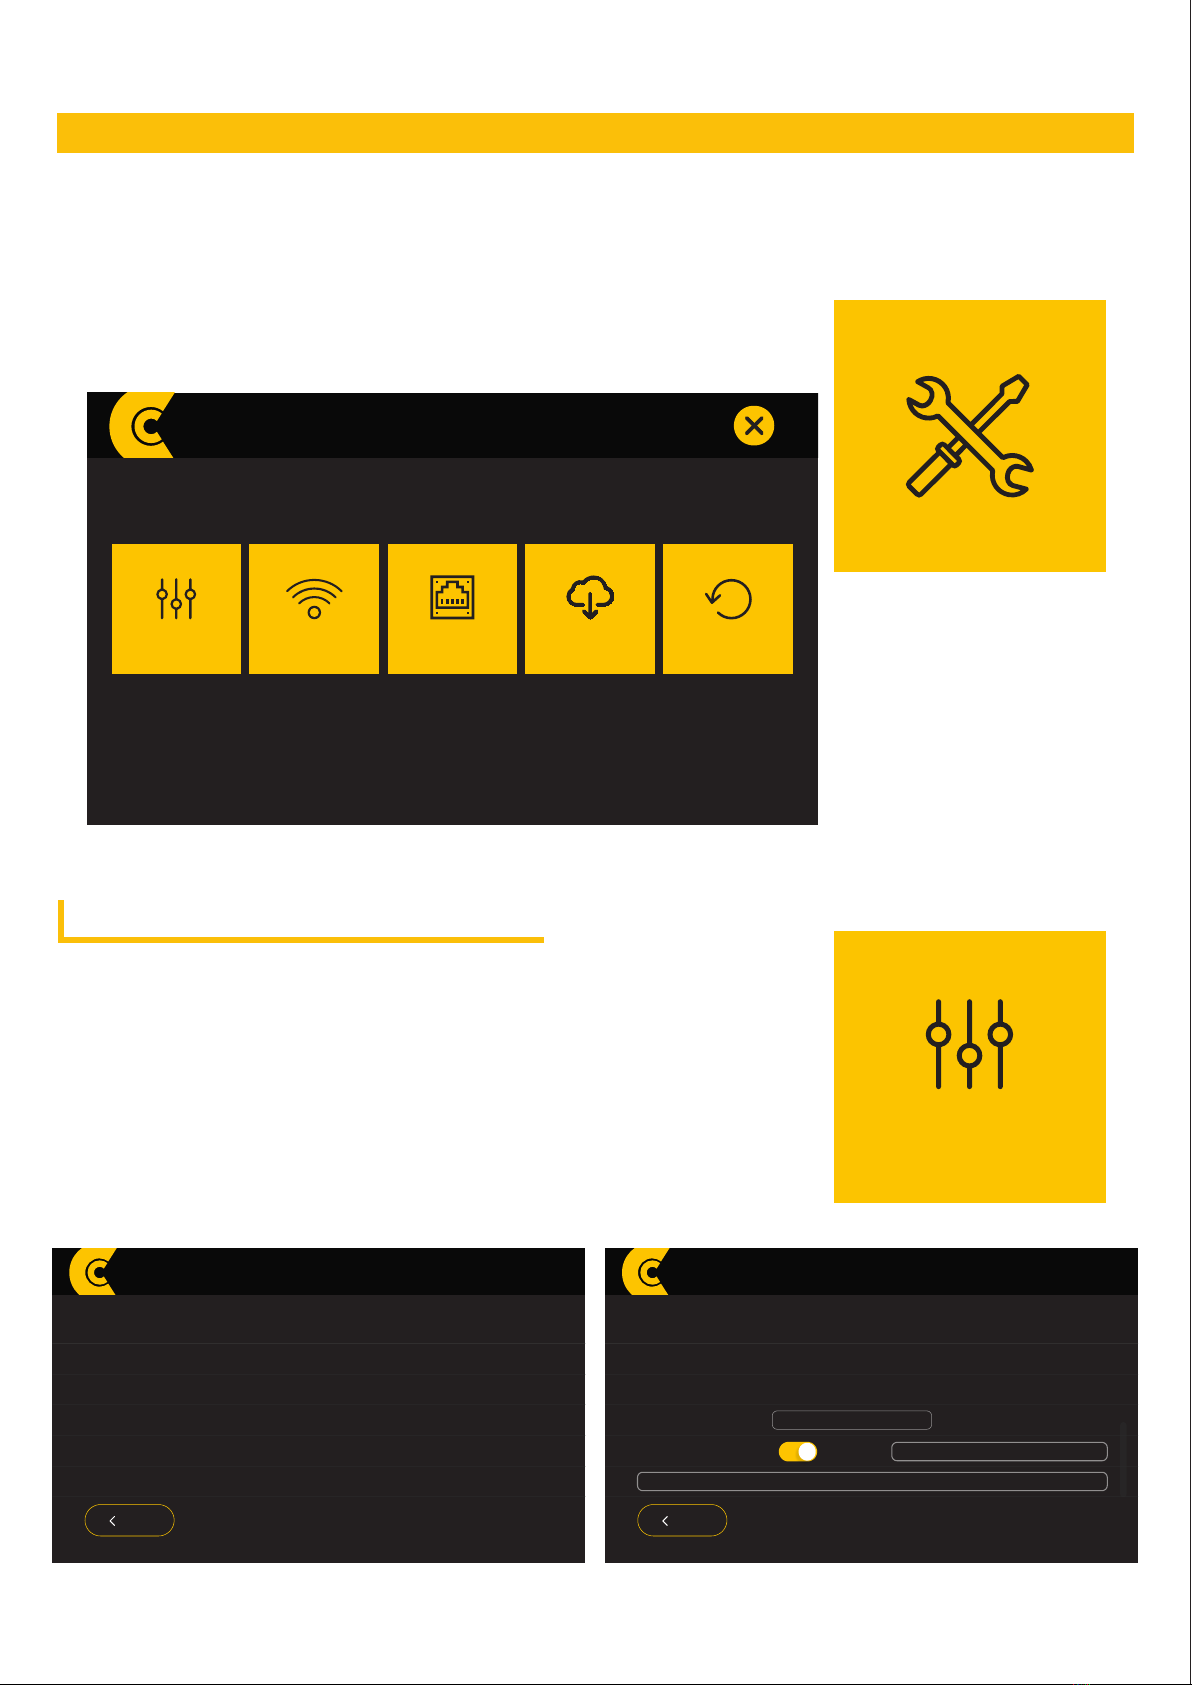
4.3 SETTINGS
10
In this screen a second application launcher screen is displayed, here the user can congure all the parameters
such as connection and cloud settings. There are 5 apps:
General Info / WiFi / Ethernet / Cloud / CloudIO Update
In this app, the user can view all of the general information relating to the
CloudIO box, such as internet connection info, serial number, rmware version
and a readable version of the licensing. It is also possible to set an FFU Delay
and a PIN for access and protection. The FFU allows you to set a delay between
the start of the rmware update process and the sending of the rmware data le,
necessary to allow the xture to enter the rmware update mode.
screen home CloudIO with applications
general info screen_1 general info screen_2
4.3.1 GENERAL INFO - SET ACCESS PIN
Altri manuali per Claypaky CloudIO
2
Indice
Altri manuali Osram Apparecchiature diagnostiche


