P1 W1MAX DV-230 Manuale utente

DV-230 Trouble Shooting Guide v1.0
May. 15
P1 W1MAX Desktop Modem with WiFi Function (DV-230)
A) Box Contents
B) Modem Overview

DV-230 Trouble Shooting Guide v1.0
May. 15
C) Modem Minimum System Requirements
D) Modem Specifications
This information can e found at the ottom of your P1
W1MAX Modem (DV-230).
•Serial Num er S/N
•MAC Address
Operating System
: Any Operating System that has been configured to operate a
network card. (Windows/Linux/ ac)
Hardware : Computer with at least one network card installed.
Software : IE, ozilla, opera or any web browser.
Device : +12V power adapter, P1 W1 AX odem (Provided by P1)
Your P1 W!MAX Modem (DV
-
230)
is a Plug and Play device.
No configuration is needed.
DV-230 Trouble Shooting Guide v1.0
May. 15
P1 W1MAX Desktop Modem (DV-230) T oubleshooting Guide
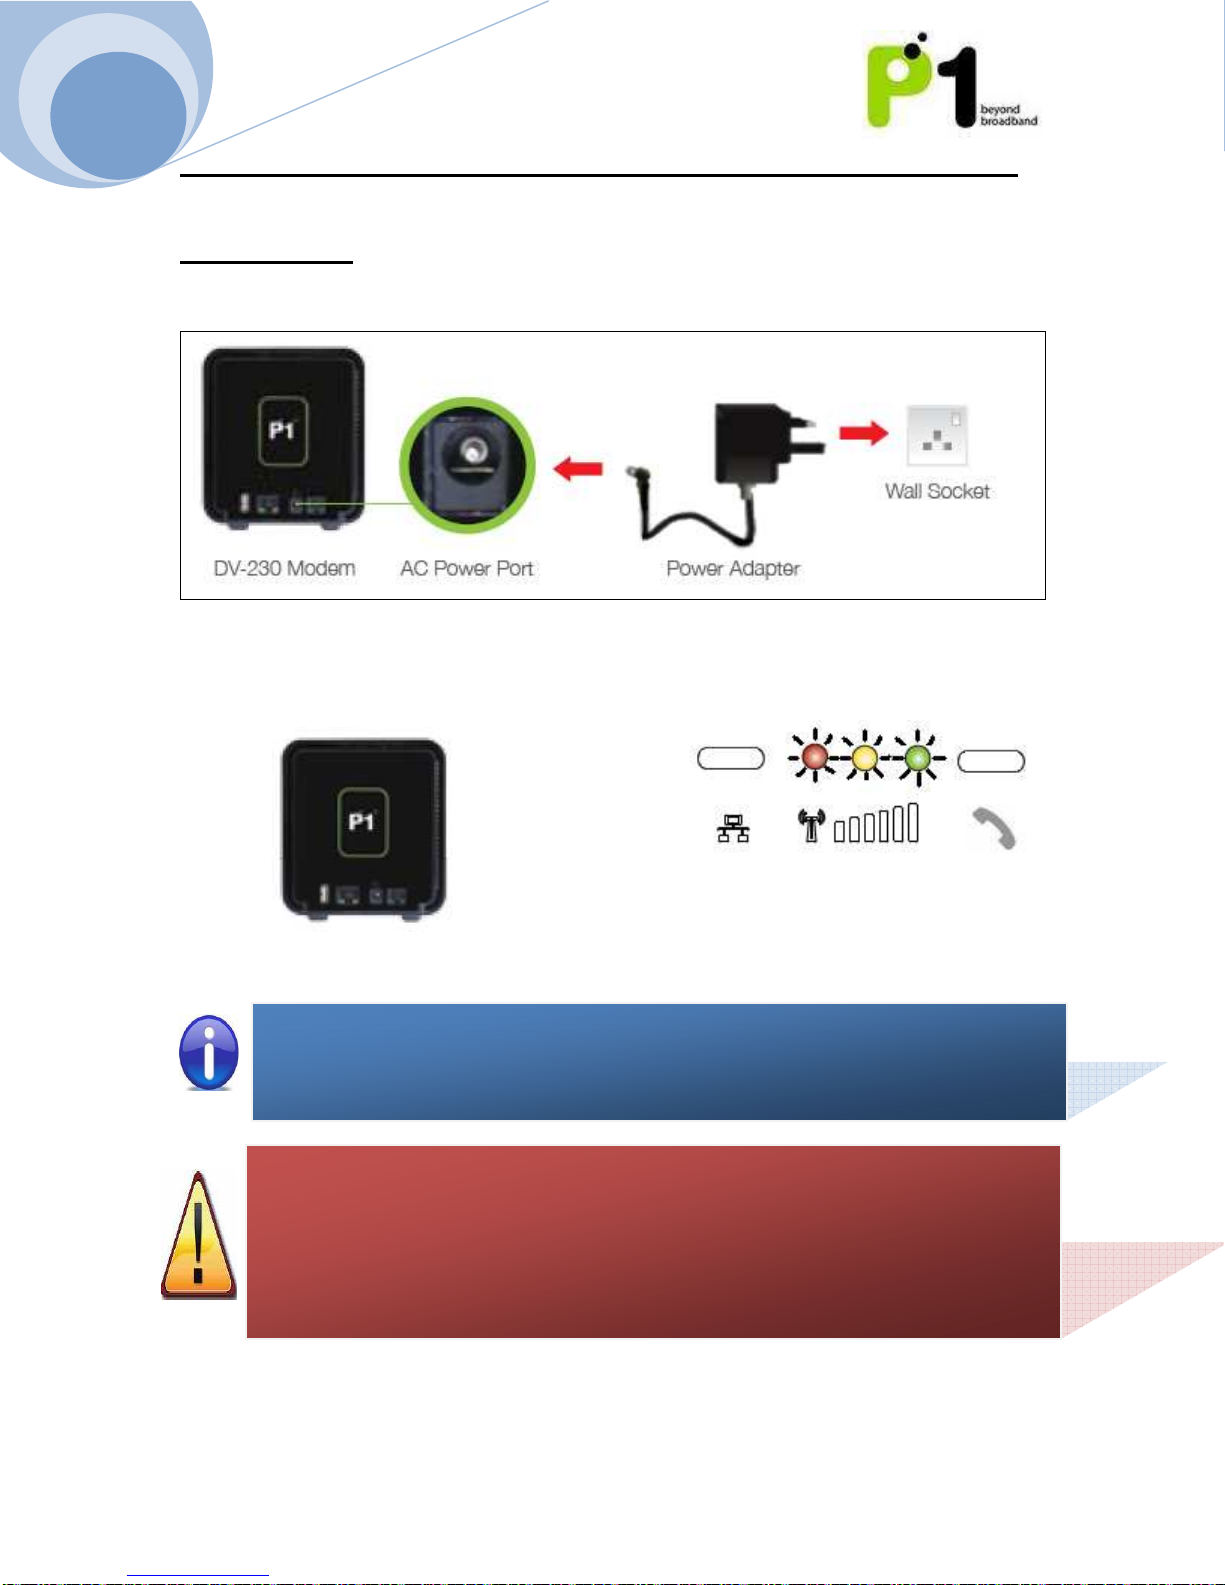
MODEM SETUP
1. Plug the Power Adapter into the plug point and the Adapter’s DC tip into your
Modem’s AC Power Port.
2. Switch on the power. Wait three seconds for the P1 Logo and all three LED
lights to light up.
If the P1 Logo and all three LED lights do not light up, thes
e are the possible problems
and solutions:
1) The plug point is faulty. Switch to another plug point to confirm.
2) The AC Power Adapter is faulty. Replace your power adapter.
Should the problem persist, please contact the P1 Care Line at 1 300 800 888 for
assistance.
Power requirement: +12V, 1A
Please use the power adaptor supplied by P1 for guaranteed performance.
Back View

DV-230 Trouble Shooting Guide v1.0
May. 15
3. Please wait 25 seconds for the Modem to oot up. The RED LED will start
linking, indicating P1 Network Initialization.
4. If your Modem is within coverage, the Yellow LED will start linking. This
indicates that the Modem is getting Authentication from the P1 Network.
If the RED LED does not start blinking after 2 minutes, please contact the P1 Care Line
at 1 300 800 888 for assistance.
If the RED LED ke
eps blinking, please reposition your odem in another direction or
near a window. Ensure that the front of the odem is facing outwards.
If problem still persist, please contact P1 Care Line.
If the RED and YELL
OW LED keeps blinking in sequence after 2 minutes, please
contact our P1 Care Line at 1 300 800 888 for assistance.

DV-230 Trouble Shooting Guide v1.0
May. 15
5. Once Authentication is successful, the GREEN LED will start linking. Your
Modem is requesting the DHCP IP from the P1 Network.
1. One of the following LED lights will then remain lighted up. The type of colour
indicates the signal strength.
Red LED: Weak Signal
Yellow LED: Good Signal
Green LED: Excellent Signal
Modem position guide:
Condominiums/Apartments: Modem must face window
Houses: Modem must e on top floor, facing window
If the Green LED keeps linking, this indicates a pro lem in o taining the
DHCP IP from the P1 Network. This may e a temporary network pro lem.
Please contact our P1 Care Line at 1 300 800 888 for assistance.

DV-230 Trouble Shooting Guide v1.0
May. 15
6. Connect one end of the Ethernet ca le to your Modem’s LAN port and the other
end to your computer/laptop’s LAN port.
7. If the Ethernet ca le is connected the LAN Blue LED will light up. The LED may
link, indicating that there is data transferring activity etween your
computer/laptop and the Modem.
The P1 W1MAX Modem (DV
-
230) requires a straight Ethernet Ca le to
work. For optimum connection, please use Ethernet ca le provided y
P1.
If the Blue LED does not light up:
Step 1: Please check to ensure that the Ethernet Ca le is connected
securely. If the pro lem persists, proceed to Step 2.
Step 2: Check if your computer’s Ethernet Port is ena led and
functional.

DV-230 Trouble Shooting Guide v1.0
May. 15
WIFI CONNECTION SETUP
1. Plug in the USB WiFi adapter into the modem. The USB WiFi adapter Blue LED
will light up and the Blue LED will e linking, indicating data is eing
transmitted.
2. Switch on the WiFi adapter on your laptop.
3. Right-click the Wireless Network Connection icon at the ottom-right of the
screen and select View Available Wireless Networks.

DV-230 Trouble Shooting Guide v1.0
May. 15
4. Select the “SSID” that is printed on your USB WiFi adaptor. Click Connect.
5. You will e prompted to key in the WEP password. The WEP password is printed
on your USB WiFi Adapter.

DV-230 Trouble Shooting Guide v1.0
May. 15
6. Once connected, ensure that your laptop has o tained the correct DHCP IP and
SSID. Check for signal quality and readjust the position of your Modem
accordingly.
7.
8. Note: This step is optional. If you want to change the default SSID or WEP key,
open any Internet rowser and type in the URL address for Customer We
GUIDE at http://10.1.1.254
Username : admin
Password : admin123
DV-230 Trouble Shooting Guide v1.0
May. 15
CONNECTIVITY ISSUES
No
Description
Suggested Solution
1.
Your laptop/desktop cannot
detect the Modem’s WiFi
Signal/SSID.
I.
Ensure that the modem is switched on
and that the USB WiFi Adapter is
properly plugged into the modem.
II. Make sure that user “start” the wifi at
“networking -> Wifi” at We GUI. In
addition, Disable the Hide SSID option.
III. Check that your laptop/desktop has its
WiFi function turned on. Ensure that it
can detect WiFi 11 frequencies and is
a le to support B, G and B/G mix
mode.
IV. To ensure that it is not an issue of
weak service signals, position your
laptop/desktop near to the Modem.
V. Make sure that the SSID you are
searching for through the WiFi search
network menu matches the SSID that
has een set in the Modem.
2.
Your laptop/desktop can
detect the Modem’s WiFi
signal and SSID ut una le
to connect to it.
I.
Ensure that you are connected to the
correct SSID.
II. Check your WiFi Security Mode as
some security modes may require
Radius Server Authentication.
III. Ensure you key in the correct and
matching security key/mode in the
laptop/desktop and Modem.
IV. Disa le Access Control at the P1
W1MAX Modem (DV-230) WiFi ta on
the we GUI.
3.
You are connected to the
Modem’s WiFi SSID ut
una le to get an IP or has
limited connection.
I.
Check that you have keyed in the
correct and matching security key
mode in the laptop/desktop and
Modem
II. Check that the Modem’s DHCP server
is ena led at Networking - DHCP
Server. Ensure that the DHCP IP range
is igger than the amount of
desktop/laptop connected to it via
wired or wireless to DV230.
Altri manuali per W1MAX DV-230
2
Indice
Altri manuali P1 Modem


