Parrot Products IP0065 Manuale utente

User Manual
LED Touch Panel
IP0065, IP0075, IP0086
Tel: (RSA) 010 140 4900 / Email: [email protected] / www.parrot.co.za
For further information, please visit / contact us on:
1.1 System Home Page
1.2 Sidebar
1.3 Notication Panel
1.4 Status bar
1.5 System setting
2 Software Description
Writing Whiteboard
2.1.1 Interface Display
2.1.2 Menu
2.1.3 Aid tools
2.1.4 Code scanning and sharing
2.1.5 Common Function
2.2 Document Management
2.2.1 Interface Introduction
2.2.2 Classication Display
2.2.3 Extended Menu
2.2.4 Display Method
2.2.5 Toolbar
2.3 VIP Reception
2.3.1 Interface Description
2.3.2 Functional Application
2.4 More Applications
2.4.1 APK Application APK
2.4.2 Floating Menu
1
1
2
3
3
10
10
10
10
13
18
19
23
23
23
25
26
26
27
27
27
29
29
29
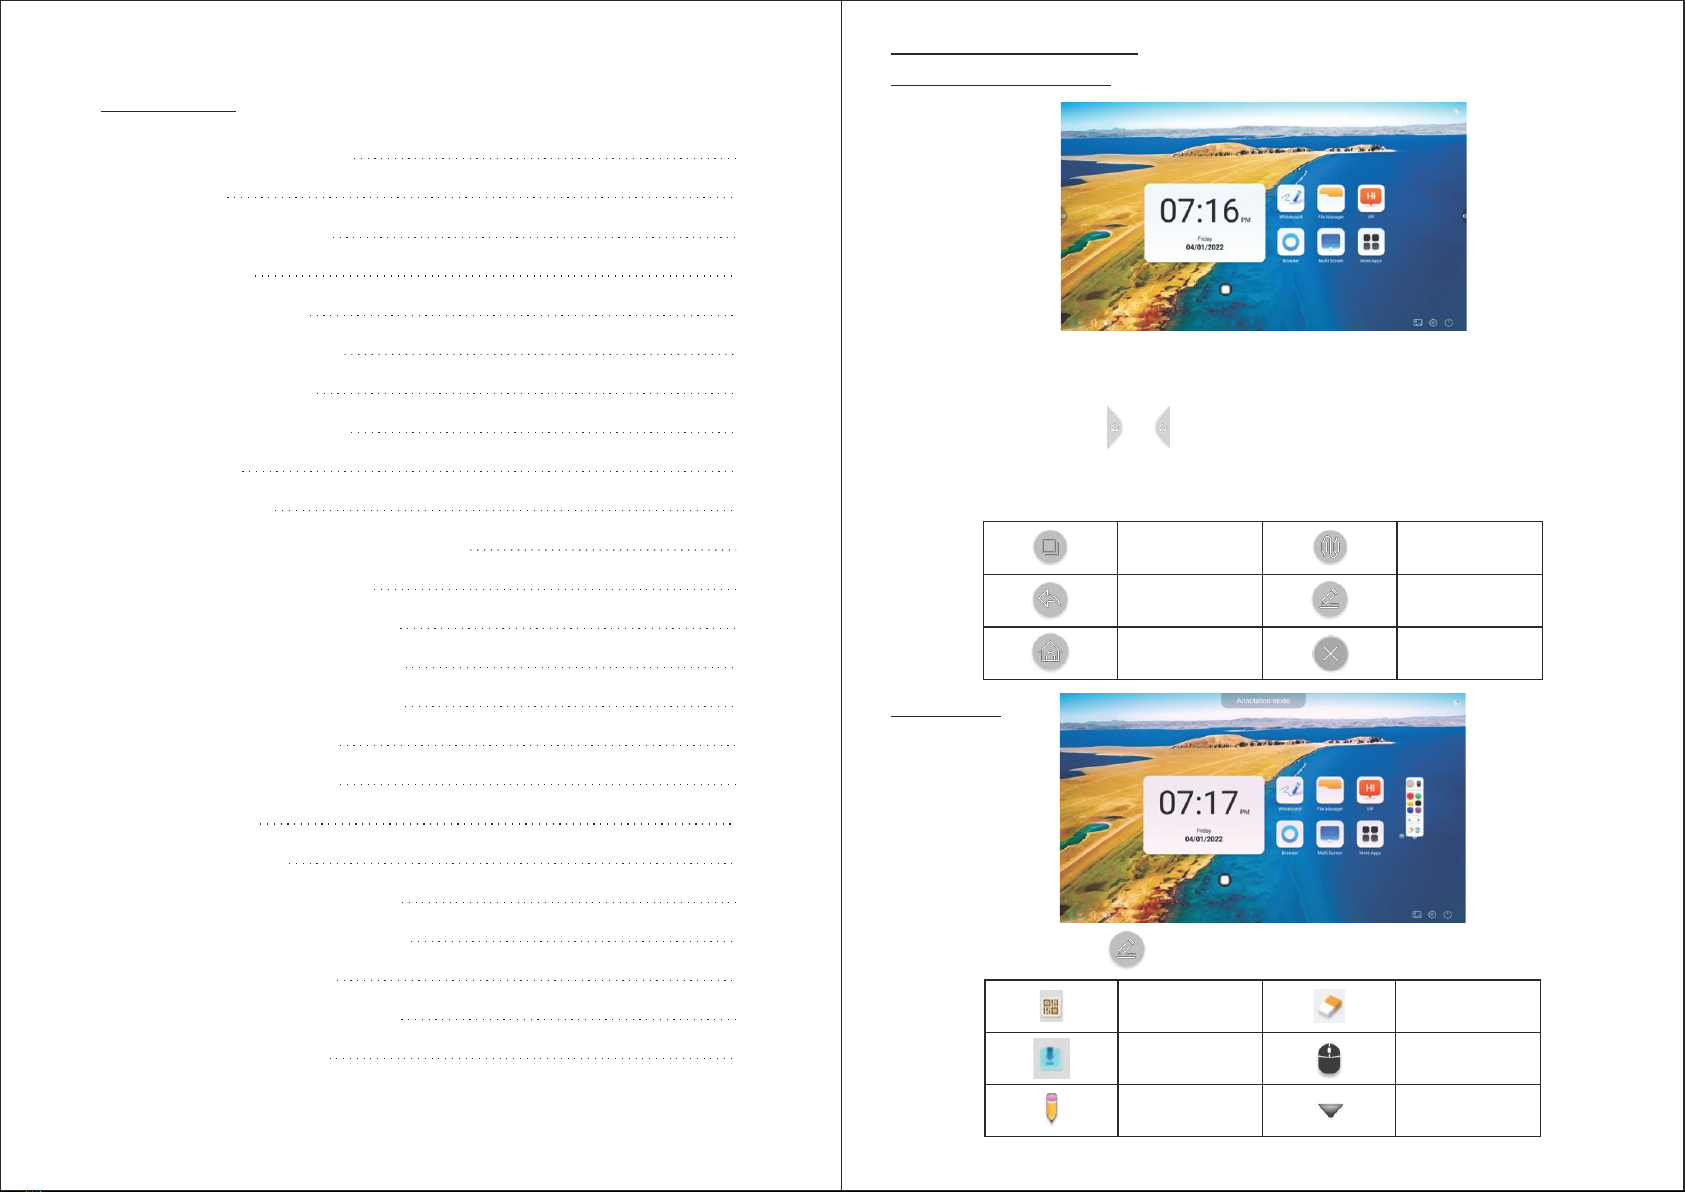
1.1 System Home Page
System Description
• After the boot is completed, the system will enter the main interface by default.
• The sidebar is divided into left and right sidebars, click on the icon that is hovering on the left/right
side of the screen, such as to bring up the sidebar. The function keys in turn that are
expanded are: return, home page, task, annotation, signal source, and notication center. The sidebar
will be hidden automatically after 5S without any operation.
To return or exit the current
page
Enter system home page
Task management interface List of signal source channels
Open the comment
Exit Annotation
Contents
1
QR code sharing
Import Whiteboard
Brush mode
Enable eraser
Annotation mode
Comment drop-down menu
Click The icon to open the comment menu window
1.2 Sidebar

32
Click icon to pop up the side menu, as shown in the gure below. The panel contains widget
display, common application shortcut function, custom add application, brightness, sound, and notication
center information
Open the calender
Lock Screen Mode
Unlocking ways are as follows:
(1) Password unlock: Click and enter
2580 in turn, and click OK to unlock.
(the initial password is 2580, the user
can enter the settings to change the
password.
(2) Remote unlocking: Press F9 to
unlock quickly.
(3) Combination key unlock: Press
the signal source key twice, and then
press the sound plus and sound decrease.
Note: It is necessary to press the sound
addition and subtraction in the signal
source interface.
Take Photos
Achive full screen capture
Eye protection
Spotlight Function - Highlight
Content
Custom
Energy Saving Mode
Curtain - Block screen
content with background
template
Click to customize shortcut apps according to your preferences
1.3 Notication Panel 1.4 Status bar
Shutdown
Adjust Screen Brightness
Wallpaper Interface
Settings Interface
Sound Adjustment
Machine Temperature
Connection Status
Unconnected State
Switch To Built-In Computer
1.5 System Settings
1. Basic
Device name: Displays the current name of the machine, and the user can customize the name of the device.
Network MAC: Displays the MAC address of the currently connected network.

54
2. Theme
Humanized design, you can change the theme style. Topics include regular themes and style themes. Regular
themes include: classic theme, conference theme, education theme, science and technology theme.
Classic Theme Science & Technology Theme
Meeting Theme Educational Theme
Style theme is: National style theme, nancial theme, party building theme, medical theme, industrial theme,
transportation theme, cartoon theme, enterprise theme; each style theme includes three different pages of
the application theme.
3. Wallpaper
Wallpaper is divided into static wallpaper and dynamic wallpaper. Click the corresponding wallpaper image to
change the wallpaper. Static wallpaper can be added by yourself. Pictures of built-in storage and external storage
can be added. The added wallpaper is displayed after the static wallpaper. Click the icon to execute the deletion
function.
4. Wireless network
Turn on the wireless network switch button, and the available wireless network will be obtained and displayed
automatically.
5. 2.4 / 5G hotspots
Under the 2.4 hotspot / 5G hotspot setting interface,user can change the hotspot name, security, password and
other parameters. Note: 2.4G hotspot and 5g hotspot cannot be opened at the same time. After modication, you
must click save.

6
6. Bluetooth
- When the integrated machine supports Bluetooth function, Bluetooth pairing can be implemented here to
achieve Bluetooth transmission function.
- When the integrated machine does not support the Bluetooth function, the Bluetooth function switch will be
grayed out and unavailable.
6. Power management
Under the power management interface, there is power button mode, system start mode, computer start mode,
energy saving mode and timing switch functions.
Energy saving mode
Set the hibernation time of the machine, set the resting screen state or screensaver state, screensaver can be
customized.
After clicking to change the screensaver, you can customize the screensaver (picture is static screensaver,
video is dynamic screensaver), which can be deleted by clicking the delete icon.
Timed switch machine
After setting the boot time and shutdown time, the system will automatically turn on or shut down when the set
time arrives.
7. Channel Settings
Intelligent recognition: When the intelligent recognition is turned on, the channel automatically jumps to the
channel when it detects a signal.
8. Security Settings
USB lock, screen lock, application lock and touch lock.You can also set the corresponding unlock password, the
initial password is 2580. Click to change the password, to change the corresponding password.
7

8
9. More multi-functional
There is suspension menu, sidebar, pull up menu, environmental sensitivity, centralized control, ve ngers
screen out, three ngers screen out and other functions.
9
10. Language and input method:
Click the arrow to set the language (Chinese, traditional Chinese, English, Arabic, Spanish, French, Italian,
Japanese, Portuguese, Russian, etc.) and input method.
11. Time and date:
Turn on the automatic setting time. If the networking is successful, the current network time will be automatically
synchronized. When the automatic setting time is off, the date and time can be set manually.
12. Sound
Adjust sound and set sound mode & output device. Sound mode: Standard, news, music, cinema, sports, user.
13. System information
You can view the system version information and the usage of built-in storage.
14. System update:
- Restore factory settings: Click Reset to restore the factory settings.
- Local upgrade: Copy the rmware to the root directory of the U disk, insert the USB ash disk into the multimedia
USB interface of the all-in-one machine, and select local upgrade and update

10 11
Software Description
2.1 Writing Whiteboard
2.1.1 Interface Display
- Click whiteboard icon in the main interface to start the whiteboard software
- The whiteboard is selected by default and can be written directly.
- Support single point mode and multi-point mode, multi-point supports up to 20 points.
- Single point mode, two ngers or more to perform zoom roaming function. It supports single stroke mode and
double stroke mode, and the double pen mode is for stroke writing.
- Support small tools, insert pictures and shapes, draw lines and arcs. You can also use some of the system's
small tools, such as camera, calendar, calculator, etc
2.1.2 Menu
- Click (menu icon) in the lower left corner of the interface, pop up display and display the lower content menu.
Open A File
- Click icon to open and save the le under the whiteboard le directory (the default path directory is built-in
storage / writeboard), click the le to open directly, and you can edit and save again.
Save A File
- Click icon to save the current writing content. The default time is named and saved. The user can
customize the name to save. The user can select the built-in storage or U-disk to save the whiteboard le.
Export
- Click the icon to export the content written on the whiteboard in the image format *. Jpg. The storage location
of the exported image can be selected as built-in storage or USB ash disk

12 13
Info
- Click icon to view version information.
Exit
- Click icon to exit the whiteboard, when there is content on the whiteboard. A prompt will pop up: the
whiteboard has not been saved. Do you want to save the whiteboard and exit the whiteboard. According to
whether to operate the function or not; if the whiteboard has no content, click exit whiteboard to exit directly.
- The whiteboard comes with a ruler, compass, protractor, and insert table widget, and can quickly call to start
applications, such as: calculator, curtain, timer, calendar, camera, spotlight, multi-screen, grouping, etc.
Insert
- Click icon to open the local storage or U disk image le, the user can select the image to insert on the
whiteboard, and the picture can be marked and written.
Email
- Click icon. When using the email sending function for the rst time, you need to set the email sender's
email information in the email login interface, as shown in the gure:
a. Use Tencent enterprise email, enter the account number and password, and click login.
b. After successful login, the user enters the email address of the recipient, and then click send to record the
contents on the whiteboard.Pdf format le is sent to the recipient's mailbox, and click settings to modify and
replace the current account number.
Settings
- Click settings Icon to enter the network sharing settings and writing mode settings.
a. Network sharing settings are divided into network sharing and local sharing functions.
b. The writing mode is divided into standard mode (single pen mode) and two-pen mode.
c. Other options are side write side wipe and nger wipe.
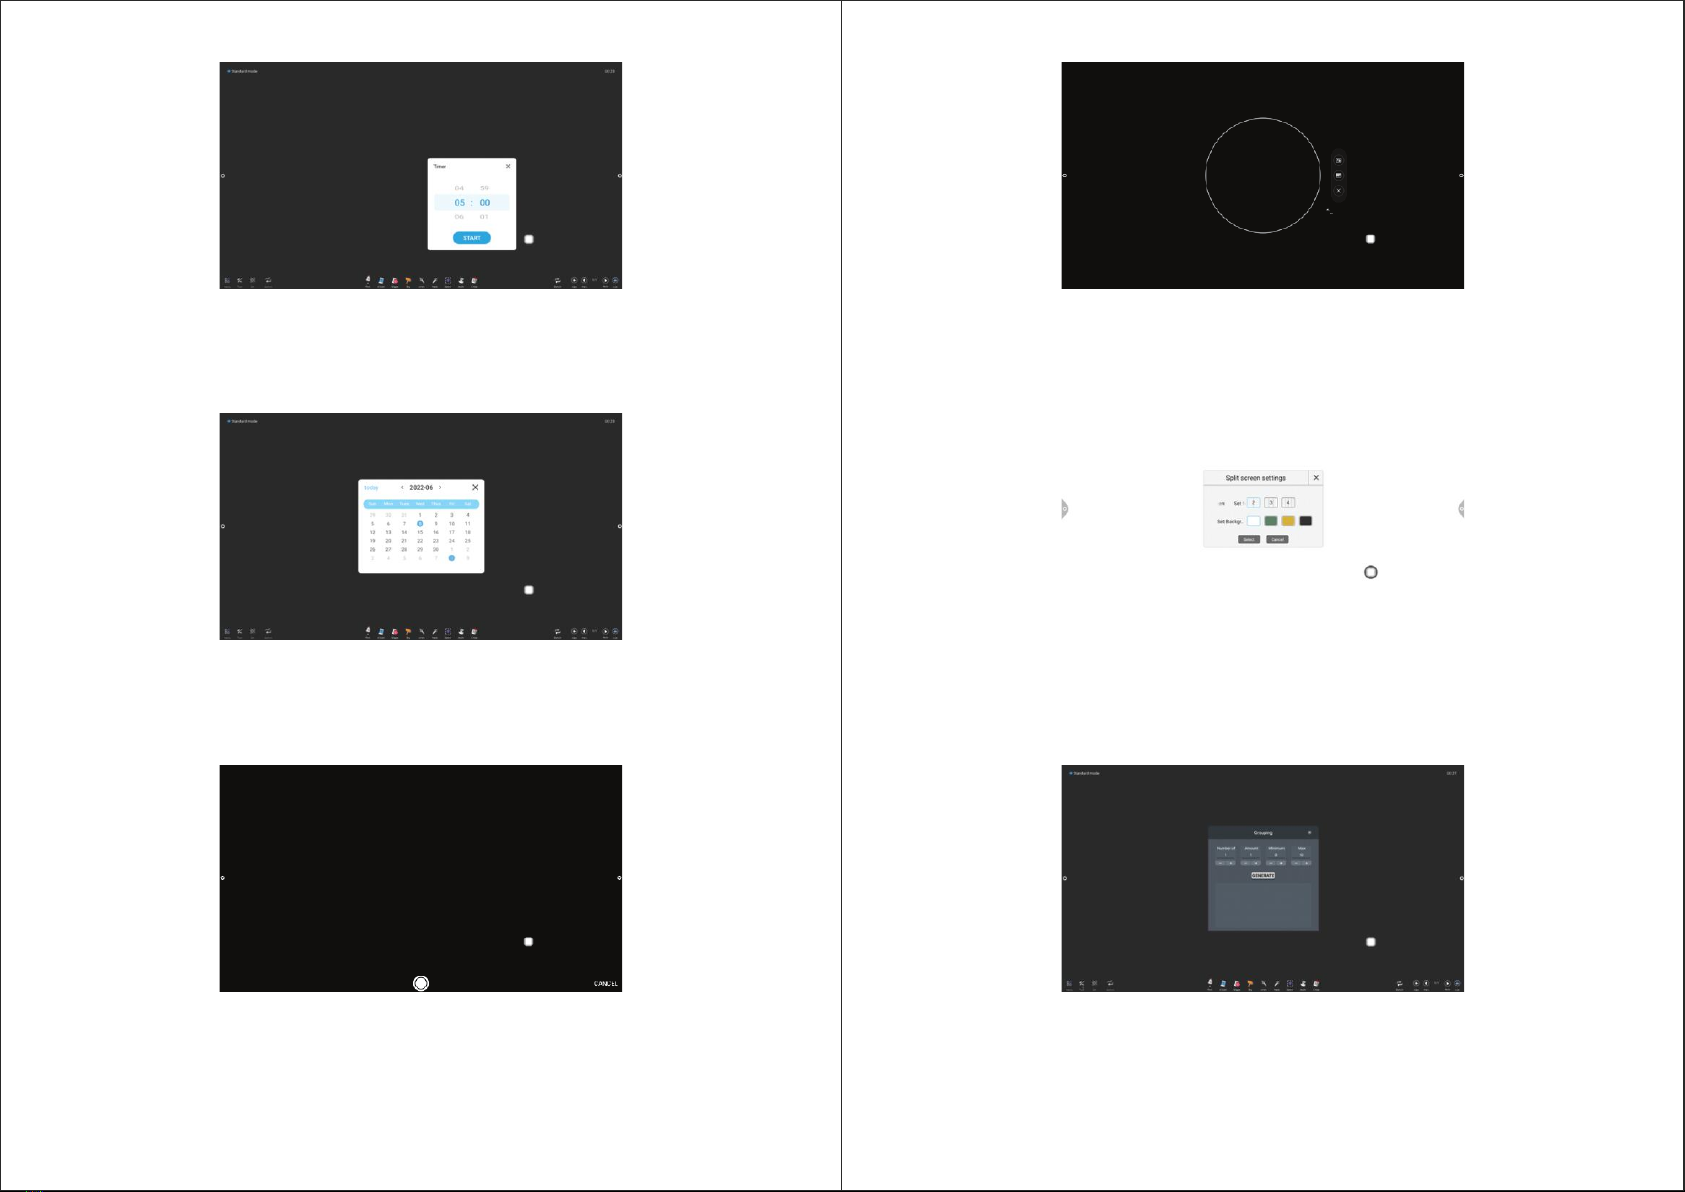
2.1.3 Aid Tools

14 15
Table
- Select Insert Table to insert a table on the screen.
Calculator
- The Select the Calculator to open it on the screen.
Ruler
- Select the ruler, the ruler widget appears on the screen. You can draw the line and mark the scale of the line.
Compass
- Choose a compass to draw a circle or arc on the screen.
Protractor
- Select the protractor to measure the corresponding degrees on the screen.
Curtain
- Select the screen that can open on the screen.
16 17
Spotlight
- Select the spotlight to turn it on on the screen.
Multiple Screens
- Select multiple screens, select the set split screen on the screen.
Timer
- Select a timer to open it on the screen.
Calender
- Select Calendar to open it on the screen.
Camera
- Select the camera to open the camera on the screen.
Group
- Select Group, to select set Group on the screen.
Questo manuale è adatto per i seguenti modelli
2
Indice


