Pedego Trail Tracker Guida rapida

PEDEGO ELECTRIC BIKES
TRAIL TRACKER
ASSEMBLY INSTRUCTIONS AND OWNERS MANUAL

Pg. 2 Pg. 3
Carton Contents 2
Assembly Instructions 4
Safety 6
Operating Procedures 7
Battery and Charger Care 8
To Recharge the Battery 8
Hand Throttle Control 10
Tires 10
Keys 11
Kickstand 11
Brakes 12
Additional Passengers 13
Appearance Care 13
Fuse 13
Warning 14
Commonly Asked Questions 15
Warranty 16
Serial Number 18
Your Bike Information 19
Carton contents
1. Trail Tracker Bike
2. Pedals (2)
3. Owner’s Manual/Assembly Instructions
4. Lithium Ion Battery
5. Keys for Battery
6. Tool Kit
7. Battery Charger
Table of Contents

Pg. 2 Pg. 3
Pedego Electric Bikes
Welcome to the POG
First, we would like to thank you for choosing the Pedego electric bike.
We believe this technology, with the benefits of electric propulsion,
provides you with the perfect vehicle to increase your personal mobility.
Our brushless, electric hub motor allows you to run errands
or commute to work while saving money on gas and reducing your
environmental impact on our world. It also gives you the opportunity
to pedal if you want to get exercise along the way.
All this and it is just plain fun to ride!
If you have any concerns, questions or suggestions about the Pedego electric bike,
please contact us at support@pedego.com. Again, thanks for choosing Pedego!
PLEASE NOTE:
This manual is not intended as a detailed user, service, repair or maintenance manual.
Please seek assistance from qualified technician for service, repairs or maintenance.

Pg. 4 Pg. 5
Your bike has been pre-assembled and requires only a few simple steps to get
it ready for you to ride:
1. Remove the outside carton after cutting the nylon bands by lifting o the entire
box from the tray at the bottom.
2. Remove all the inside cardboard protection and bubble wrap.
3. Please locate and set aside the pedals, battery charger, and tool kit.
4. Carefully remove your bike from the bottom tray and gently rest it in place.
5. Install the front wheel by aligning the brake and fork and tightening the axle
nuts with the 15mm wrench provided with your kit. Make sure that the hooked
washers are on the outside of the fork and are properly secured.
If the disc brake is rubbing after installation, refer to Customer Help on our web-
site at www.pedegoelectricbikes.com/faqs/customerhelp/
6.If necessary, align the stem with the front wheel and tighten the top stem bolt
enough to hold the stem in place. Once the handlebars are aligned and the top
bolt is slightly secured, firmly tighten the 2 side bolts on the stem. After tighten-
ing the 2 side bolts, firmly tighten the top bolt. After all 3 bolts have been securely
fastened, make sure there is no play in the headset.
Be careful to not tighten the top bolt too much as the steering will feel rigid and
sluggish.
Assembly Instructions
3
3
3
Top Bolt
Side Bolt
Side Bolt

Pg. 4 Pg. 5
7. Make sure the seat stem is clamped tight enough so that you can’t twist it out of
alignment. Pull the seat clamp handle away from the seat post and slide the seat up
or down to adjust the height. Move the clamp handle inward toward seat post so
post is held tight by the clamp.
If necessary, tighten the clamp by twisting the handle clockwise while in the un-
clamped position. Then fold the handle in toward the seat post. This should require
a fair amount of force to insure the seat post is held tight.
Make sure seat is not set with the vertical maximum height marks above the clamp.
8. PLEASE NOTE – the pedals are marked “L”
for Left and “R” for Right. Using the wrench
provided in the tool kit, attach and tighten the
pedals. The left pedal is attached by turning it
counter clockwise and the right pedal is tight-
ened by turning it clockwise.
9. Plug the cord that comes out from underneath the rear rack into
the battery. Turn the key to the “on” position by turning it clockwise.
Assembly Instructions
3

Pg. 6 Pg. 7
Safety
Helmet:
Always wear an approved helmet when riding your Pedego and follow the helmet
manufacturer’s instructions for fit, use and care of your helmet. It’s your respon-
sibility to familiarize yourself with the laws of the areas where you ride and to
comply with all applicable laws.
Mechanical Safety Check:
Routinely check the condition of your bicycle before every ride. Make sure no nuts
or bolts are loose. Do a quick visual inspection of the whole Pedego before every
ride. Make sure tires are correctly inflated with 30 psi air pressure and check the
brakes for proper operation.
Your First Ride:
When you buckle on your helmet and go for your first ride, be sure to pick an area
away from cars, other cyclists, obstacles or other hazards in order to become
familiar with the controls, features and performance of your new Pedego. We sug-
gest you start riding with the electric motor turned o until you are comfortable,
then push the red button on the right handle to turn the motor on.

Pg. 6 Pg. 7
Operating System
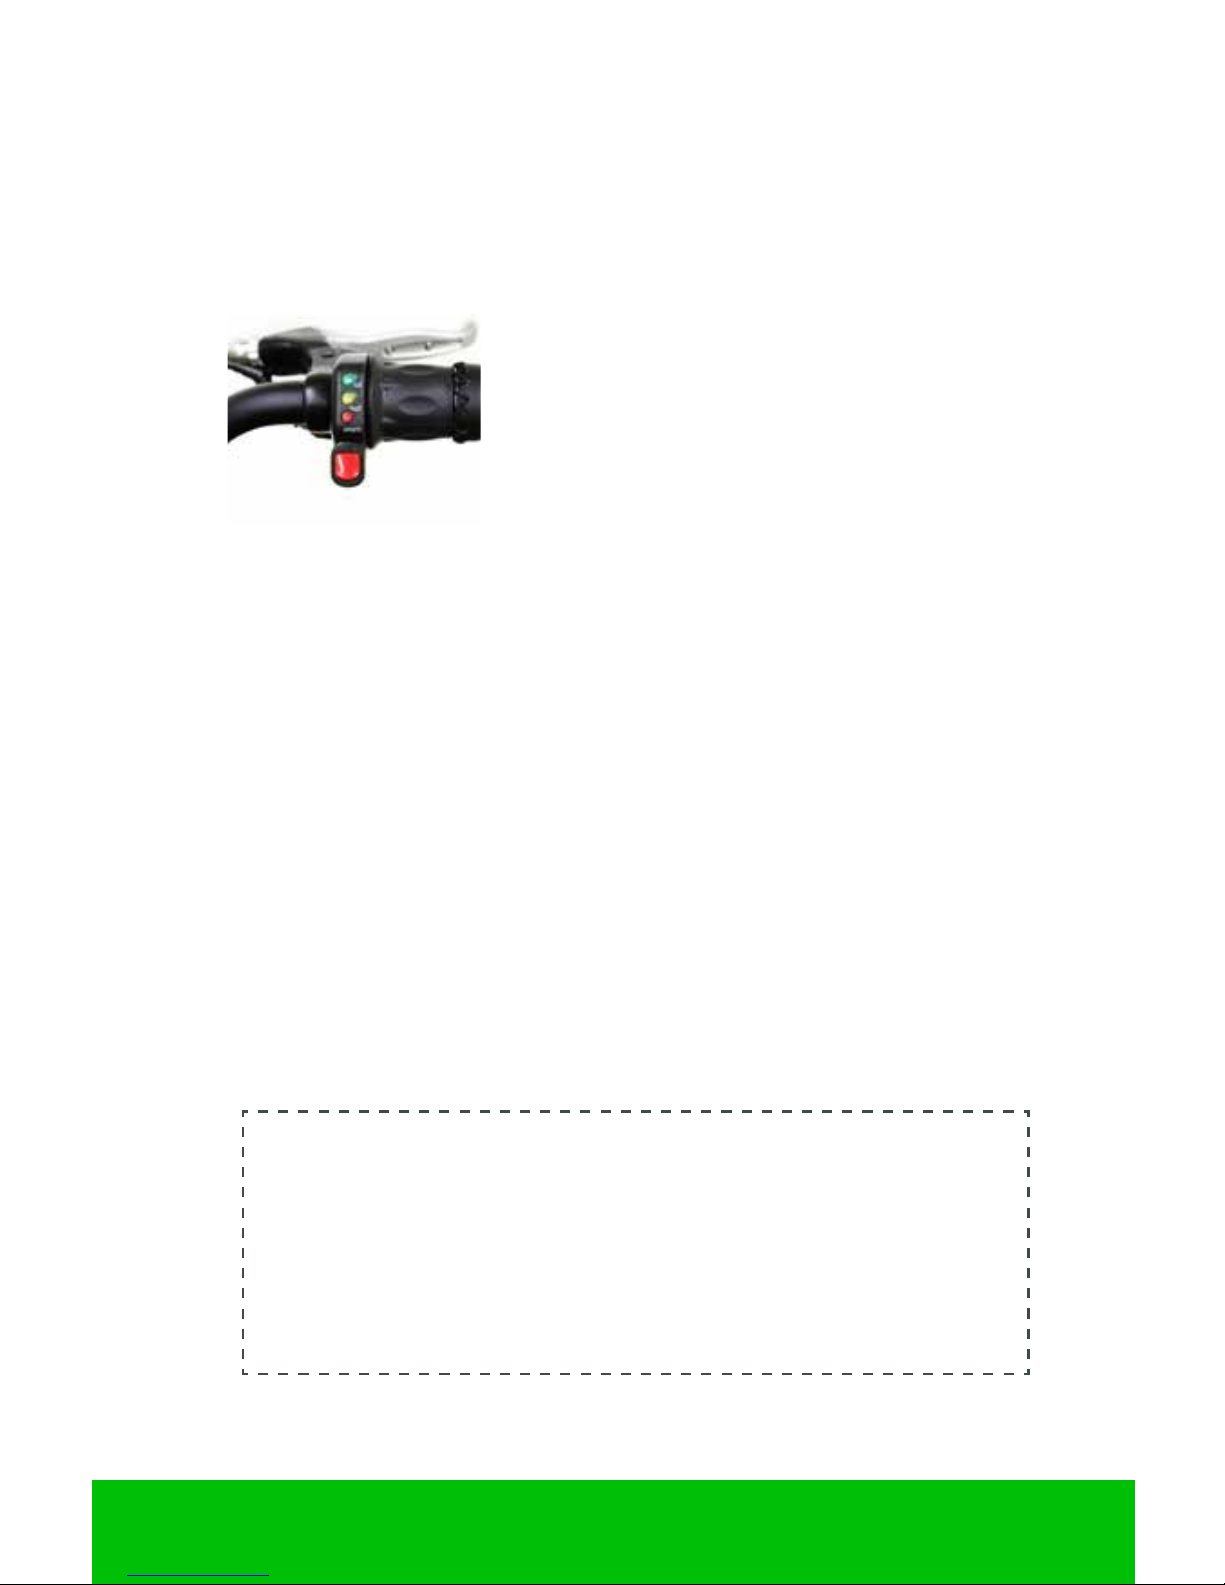
The red power button located on the right handle toggles on-o.
You can ride the Pedego as a normal bike by just leaving the switch o.
RED POWER BUTTON
To be able to use the electric motor, the battery must be mounted by sliding the fully
charged battery forward onto the rear rack, over the rear wheel, through the channels
on the battery while the carry handle is positioned at the rear. The key switch posi-
tion must be in the “unlock” position to slide the battery on.
UNLOCK OFF ON
The key switch locks the battery in position when the key
is turned clockwise to either OFF or ON.
Plug the power cord into the battery. Turn the key to the “on” position, then press
the red power button on the right handlebar grip so that the battery charge indicator
lights are lit. Be sure to turn o the power when the Pedego is not in use or is recharg-
ing by pressing the red power button again. When the power is o, the indicator lights
will not be lit.

Pg. 8 Pg. 9
Battery and Charger Care
Included with your new Pedego is a lithium ion battery, along with a charger,
which plugs into a standard 110 volt household electric receptacle.
A lithium ion battery requires specially designed chargers. You should never charge
your battery with a substitute charger that is not designed for this use. Use of an
unsuitable charger to charge a lithium ion battery will result in over-heating, fire or
even explosion.
The Pedego battery may be charged while on the bike or removed and charged at a lo-
cation away from the Pedego in a dry location. The battery is easily removed by mov-
ing the key switch to the “unlock” position, unplugging the power cord and grasping
the handle at the rear of the battery and sliding the battery to the rear of the Pedego.
Recharge the Battery

Pg. 8 Pg. 9
To charge the battery, plug the charger into an AC outlet.
The LED indication light should be green showing the
charger is working normally. Then plug the charger into
the charging port located on the side of the battery under-
neath the battery handle. The charger will charge up the
battery in 4—6 hours. The indicator light on the
charger will be red when battery is charging and will turn green when fully charged.
Recharge the battery after every use or when lights next to throttle control shows
a low charge.
Do not open or alter the battery or the battery charger.
Do not place the battery near fire or corrosive substances.
Do not immerse in water or other liquids.
Avoid subjecting the battery to high temperature, such as directly under the hot sun,
for prolonged periods of time.
Recharge the battery before it becomes completely discharged. Completely discharg-
ing will reduce the number of recharging cycles during the battery’s life and limit the
capacity. Never store the battery in a discharged state.
After much use, your battery’s charge-holding capacity will decrease. If you find that
your battery does not hold sucient charge even for short trips, you should contact
your dealer to order a replacement.
If the battery will not be used for an extended period of time, charge it fully and
recharge it every 3 months. Store it in a cool, dry place. Your Pedego battery is
engineered with precision for high capacity and a long, useful life. Do not use it to
power other electrical devices. Improper use of the battery will damage the bat-
tery and shorten its useful life and may cause fire or an explosion. If you experience
unusual sounds or odors coming from the charger or the battery, unplug the charger
immediately and contact Pedego customer service at 1-800-646-8604 or e-mail at
support@pedego.com.

Pg. 10 Pg. 11
Tires
To minimize tire wear and for maximum riding safety, comfort and handling,
maintain front and rear tire air pressure at 30 psi. Use a reliable tire air pressure
gauge to check for proper inflation before every ride. At the same time, inspect
tires for excessive wear and cracks in sidewalls. Replace tires if necessary.
Hand Throttle Control
The throttle control is operated with the right hand. It is located immediately to the
right of the battery charge indicator lights
You control the throttle by twisting it from its resting position.
The farther the throttle switch is from its resting position the
more power is delivered to the motor to accelerate the Pedego.
When you want to slow down, you simply release the throttle
and let it return to its resting position, and simultaneously
apply the brakes if necessary.
In case of an emergency, the brakes will cut o the power even when the throttle is
twisted.
You do not need to pedal the Pedego if you use the hand throttle. However, you can pedal
while commanding power assist. If you do pedal to help the movement, you conserve en-
ergy and the charge in the battery will last longer.
DO NOT DISASSEMBLE, MODIFY
OR REPLACE ELECTRICAL PARTS.
Altri manuali per Trail Tracker
1
Indice
Altri manuali Pedego Scooter