Pilot-1 Aeronca Champ Guida rapida

1
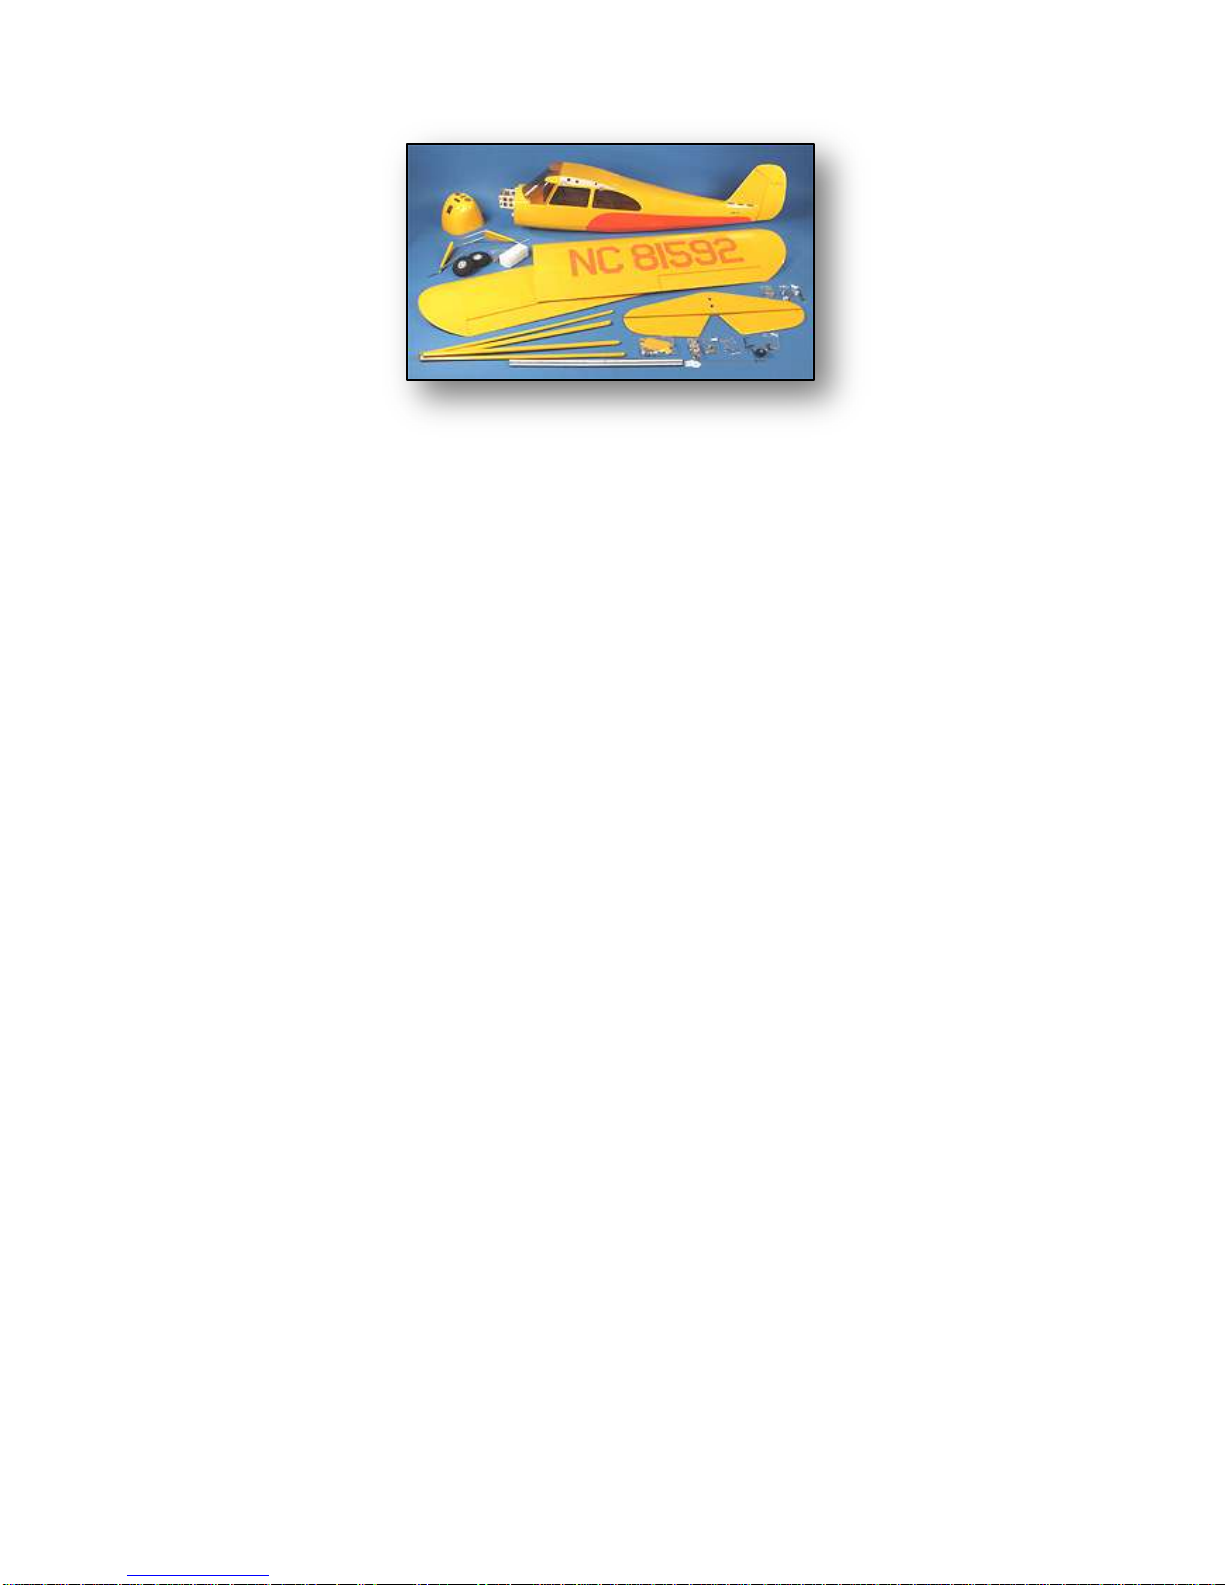
1/4 scale “Aeronca Champ”ARF
Wingspan: 105 in. (2667mm)
Length: 65 in. (1651mm)
Wing Area: 1542 in². (995dm²)
Weight RTF (electric): 15.5 lbs. (7kg)

2

3
Introduction & History
The full-scale Aeronca Champion, or “Champ,” was manufactured by the Aeronca
Aircraft Corporation, in Middletown, Ohio between 1944 and 1951. Over 10,000 were
built. In 1946, it was marketed as “the newest in aerodynamic design! . . . It’s the easiest
plane you’ve ever flown. ”Like the Piper Cub with which it competed, the Champ also
featured tandem seating. While the Piper Cub is soloed from the rear seat, the Champ
can be soloed from the front seat, giving improved forward visibility on the ground, and
during takeoffs, climbs, landings. Although the Aeronca Champ has a wider cabin than
the Piper Cub, the Champ’s cruise speed was about 15mph faster. Its Continental 65hp
engine powered it to a top speed of 100 mph.
Pilot-1 is pleased to announce the 1/4 scale Aeronca Champ as part of the Golden Age
Civilian Series. The Pilot-1 “Champ” encompasses the same attributes in quality
construction and handling that made the original Aeronca Champ a favorite for over 50
years. Our engineers have spent countless hours developing a true-to-scale ARF that
looks and flies like the full-scale Champ. We know you will be pleased with its scale
looks and balanced maneuverability. In fact, our local model airplane pilots formed a
line so they each could get a chance to fly the prototype. All agree, for scale aircraft, it
may very well be the “easiest plane you’ve ever flown!”
Hobby Lobby International, Inc.
5614 Franklin Pike Circle
Brentwood, TN 37027
1-866-WE-FLY-RC
(1-866-933-5972)
www.hobby-lobby.com
4
Before starting, use the Contents list to take an inventory and make sure it is complete.
If any parts are missing or are not of acceptable quality, contact Hobby-Lobby.com
Support at 1-866-WE-FLY-RC (1-866-933-5972)
Contents List
Fuselage
Battery Hatch
Engine Cowl
Landing Gear
Wheels, Velcro, Misc Hardware packages
Wings
Wing Center Section
Tube Wing Joiners
Wing Struts and Wing Jury Struts
Horizontal Tail
Vertical Tail
Pushrods
Additional Items Required (electric version)
4-channel Aircraft Radio w/ Receiver (minimum)
(2) 6000mah, 4-cell, 14.8v LiPo batteries
(4) Hitec HS-635HB servos (or equivalent)
Duralite 6v Voltage Regulator and LiPo Receiver Battery
77 amp Jeti SPIN Brushless ESC
Jeti SPIN Box Programmer
AXI 5320/28 Brushless Motor
AMM111 Aluminum Motor Mount Kit
APC 20x12W “E” Propeller
5-minute Epoxy Glue
Thin CA Glue
Small Phillips screwdriver
Needle Nose Pliers
Hobby Knife
Soldering Iron and Electrical Solder
5
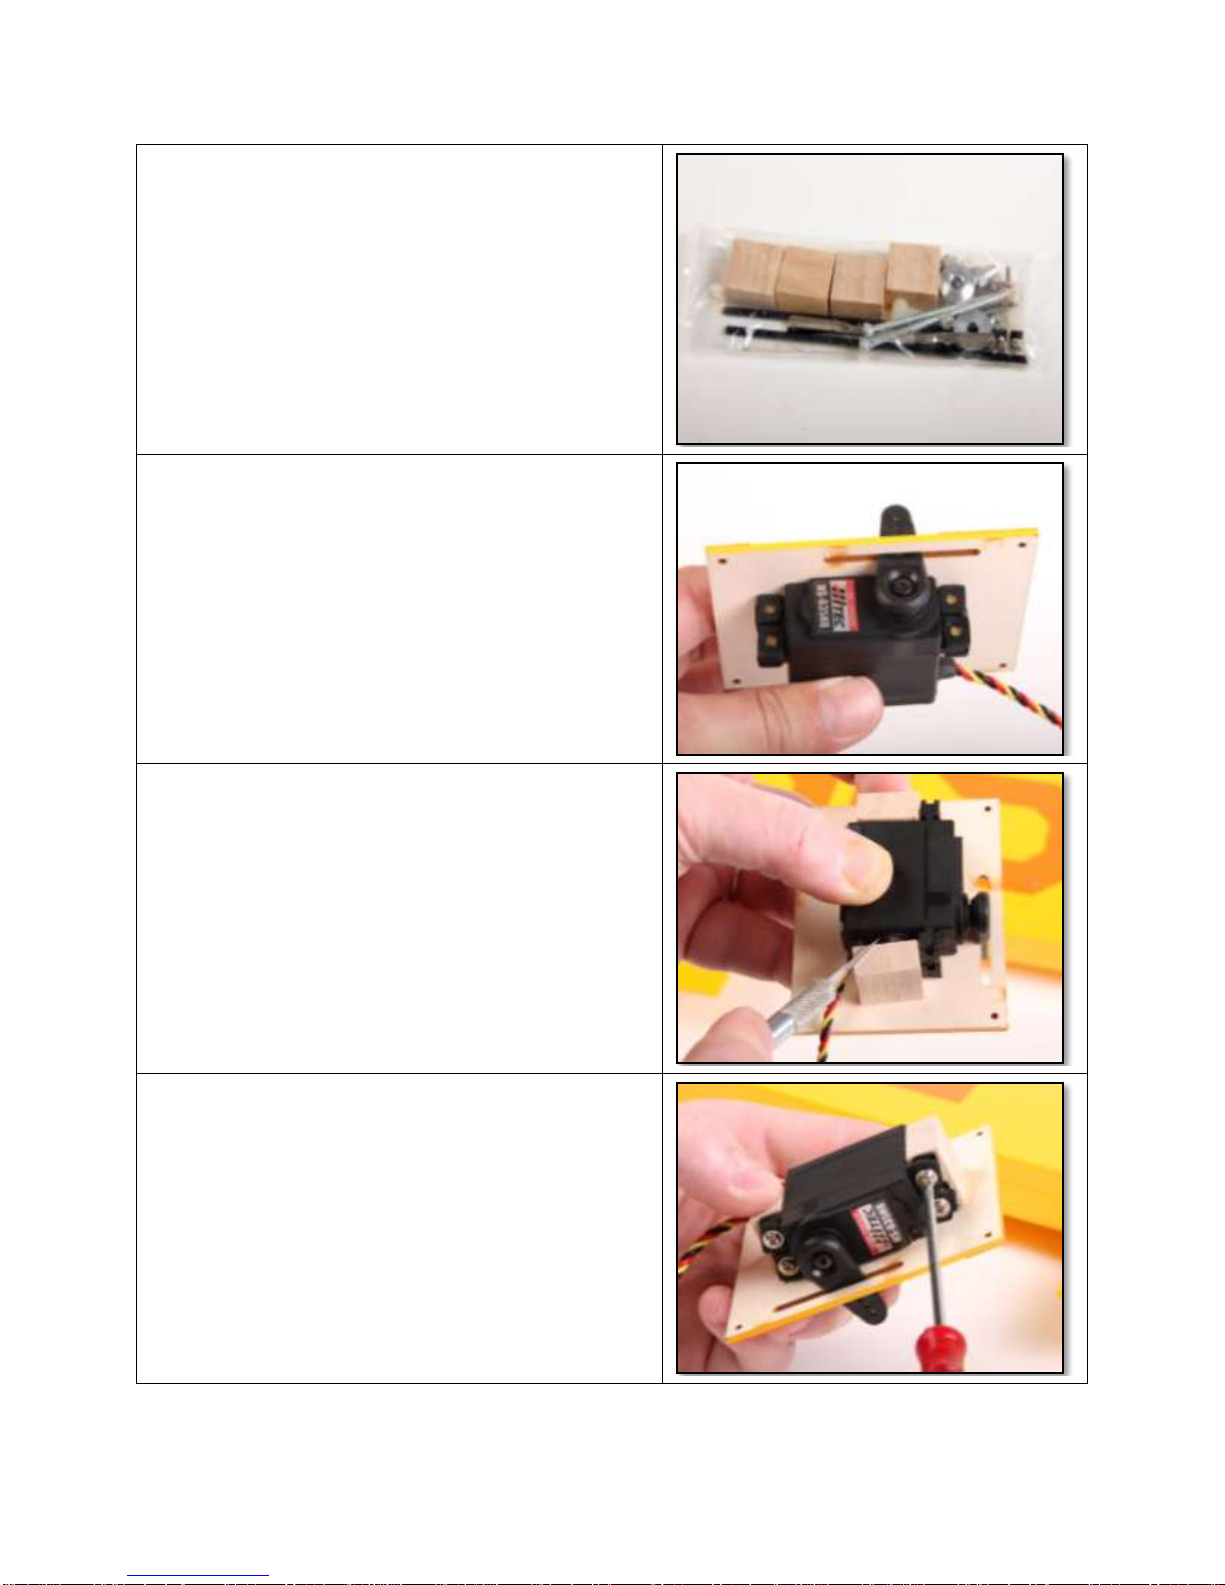
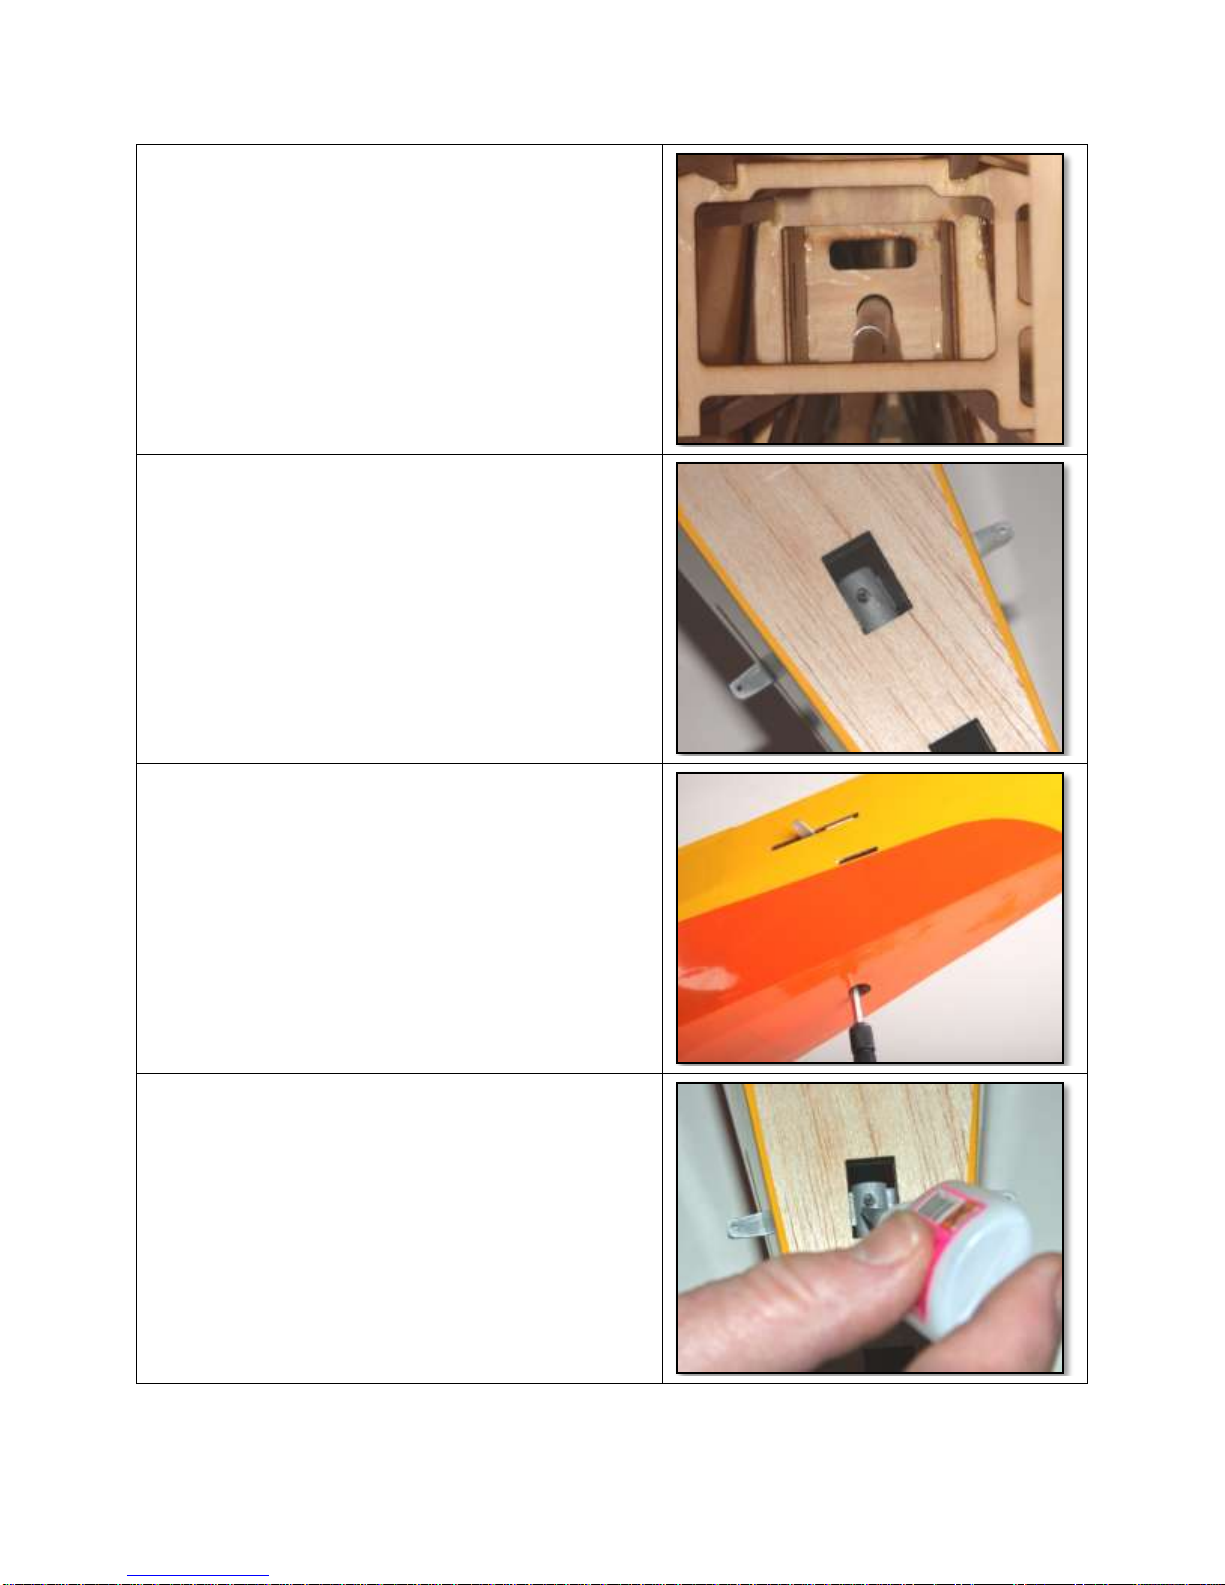
1. Locate the aileron assembly bag for the next
few steps.
2. Use your radio or our Manual Servo
Adjuster (p/n MSA725) to make sure the
aileron servo is centered. Install the servo
arm 90º to the servo and in the center of the
slot as shown.
3. Prepare servo attachment blocks for gluing.
Some trimming may be necessary.
4. While holding servo on plate, use 5min
Epoxy to glue blocks in place. Once dry, drill
(4) pilot holes in the wood blocks, then use
servo screws and rubber grommets to
secure servo in place.
6
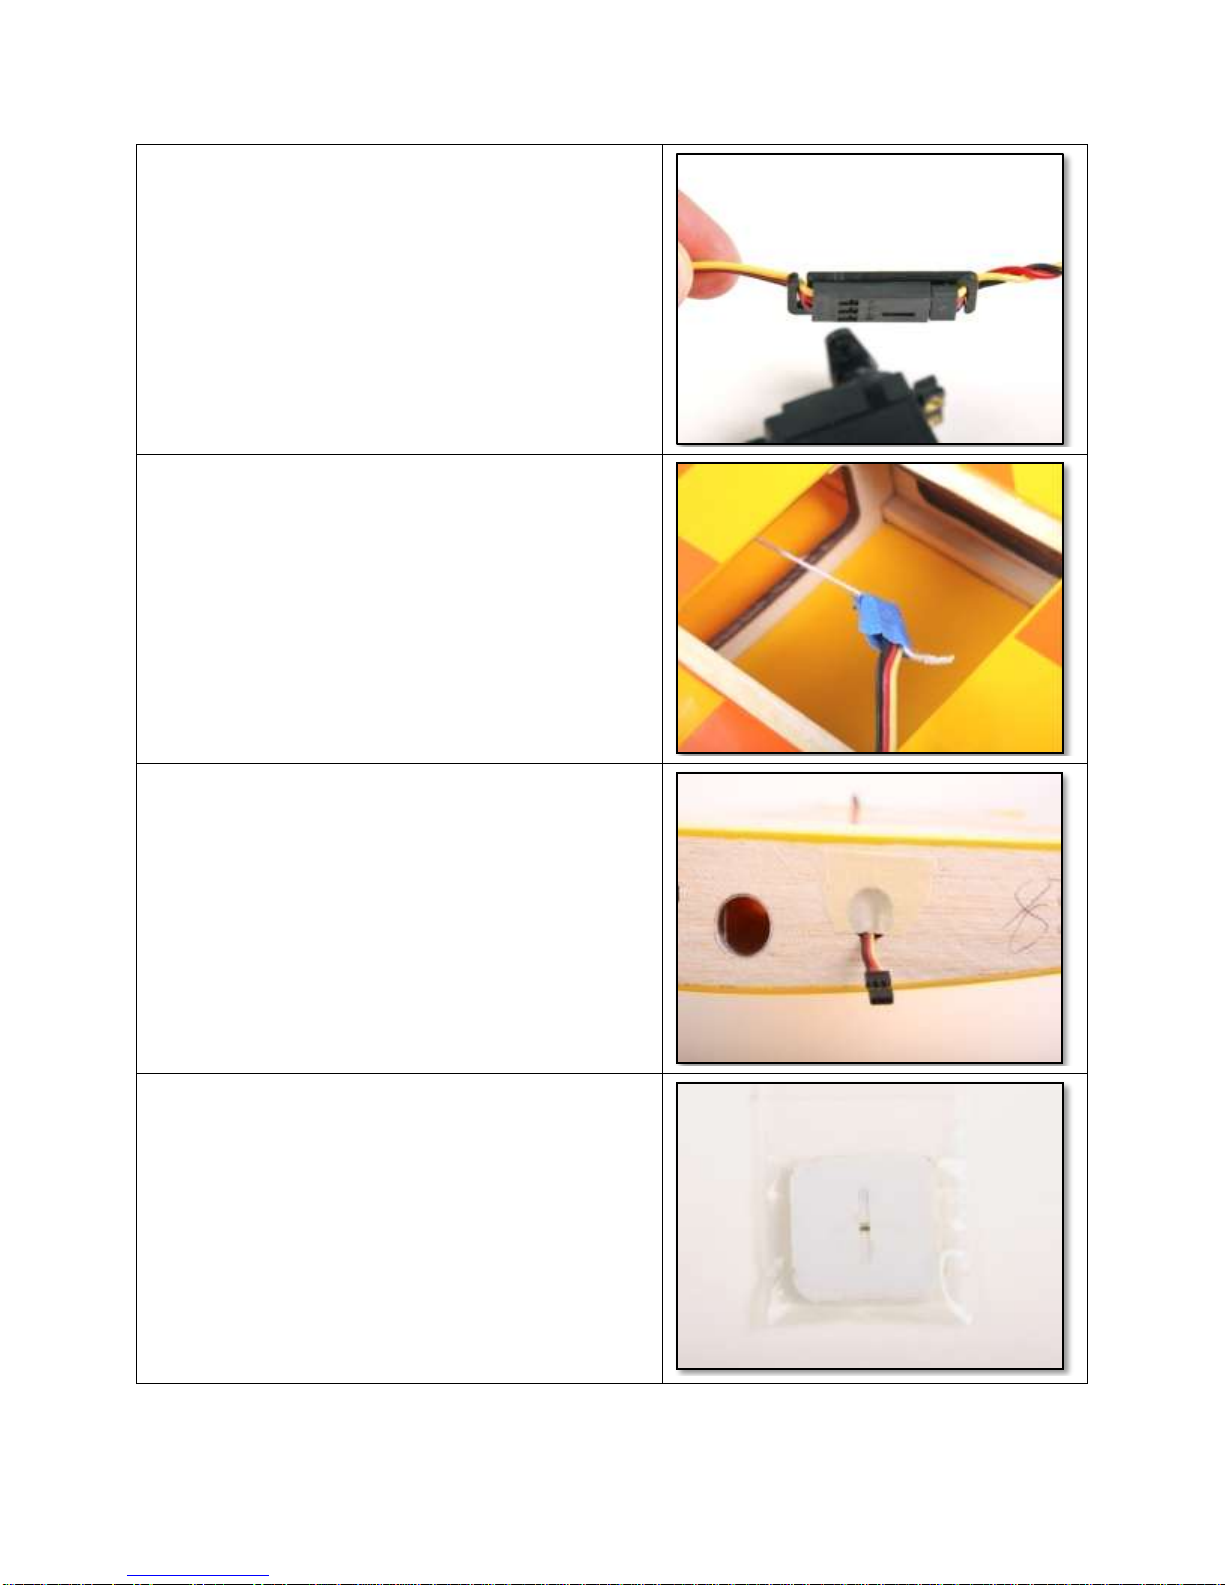
5. Attach 24” servo wire extension to aileron
servo lead and secure with tape, heat shrink
tubing, or Graupner servo retaining clips
(p/n GR3503).
6. Break string loose from aileron servo bay
and tape to servo wire. Use this string to pull
wire through wing. Insert finished servo and
hatch cover into wing and secure with small
sheet metal screws.
7. Use tape to keep aileron servo wire from
falling into wing.
8. Locate the “CA” hinges bag. These will be
installed using thin CA glue.
7
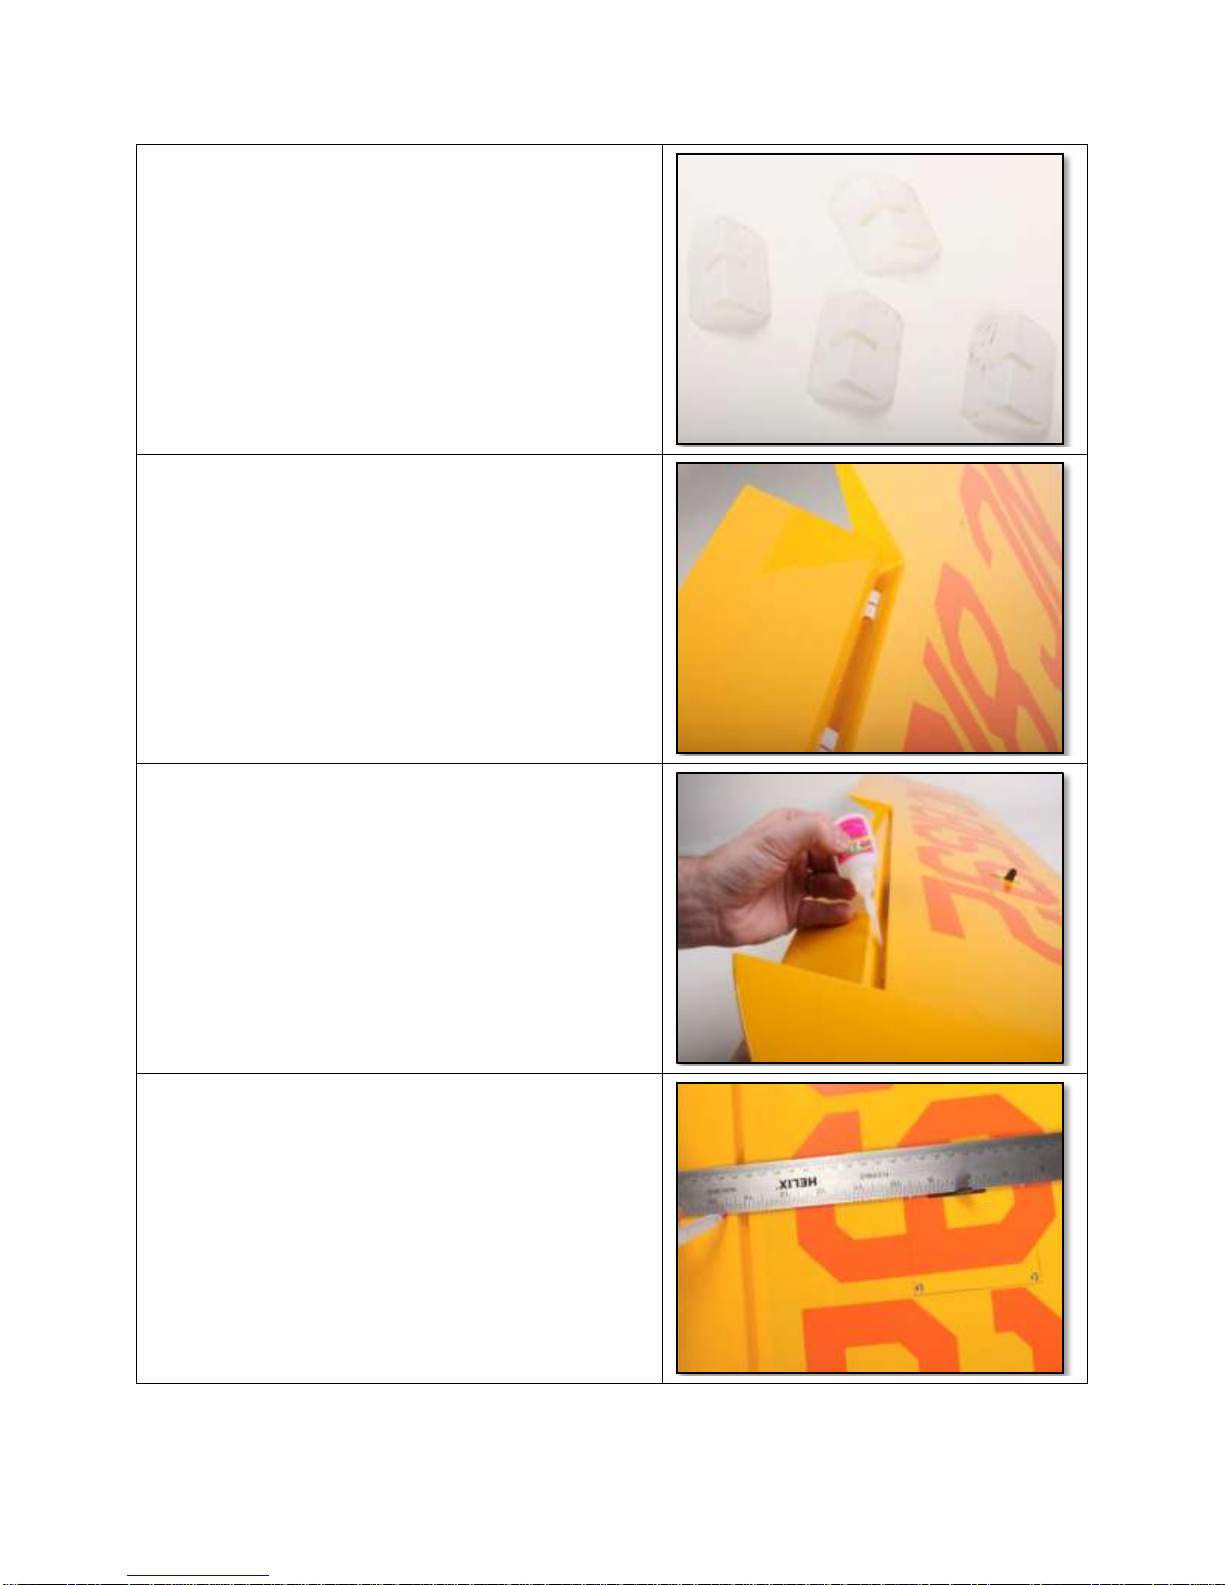
9. Prepare the CA hinges by folding in half as
shown. This technique helps keep the
hinges centered during installation.
10.Trial fit aileron in place before gluing.
Careful attention should be placed on gaps
at ends of aileron.
11.With the aileron tight and deflected
downward, use 2 to 3 drops per hinge of thin
CA to assure strong bonds. Use paper towel
to remove any excess CA before it dries.
Then flip wing over and repeat for opposite
side of hinge, again 2-3 drops of thin CA per
hinge.
12.The Aileron Horn needs a hole to be drilled
through the aileron. Use a pen and straight
edge to mark aileron parallel to the hatch
cover slot.
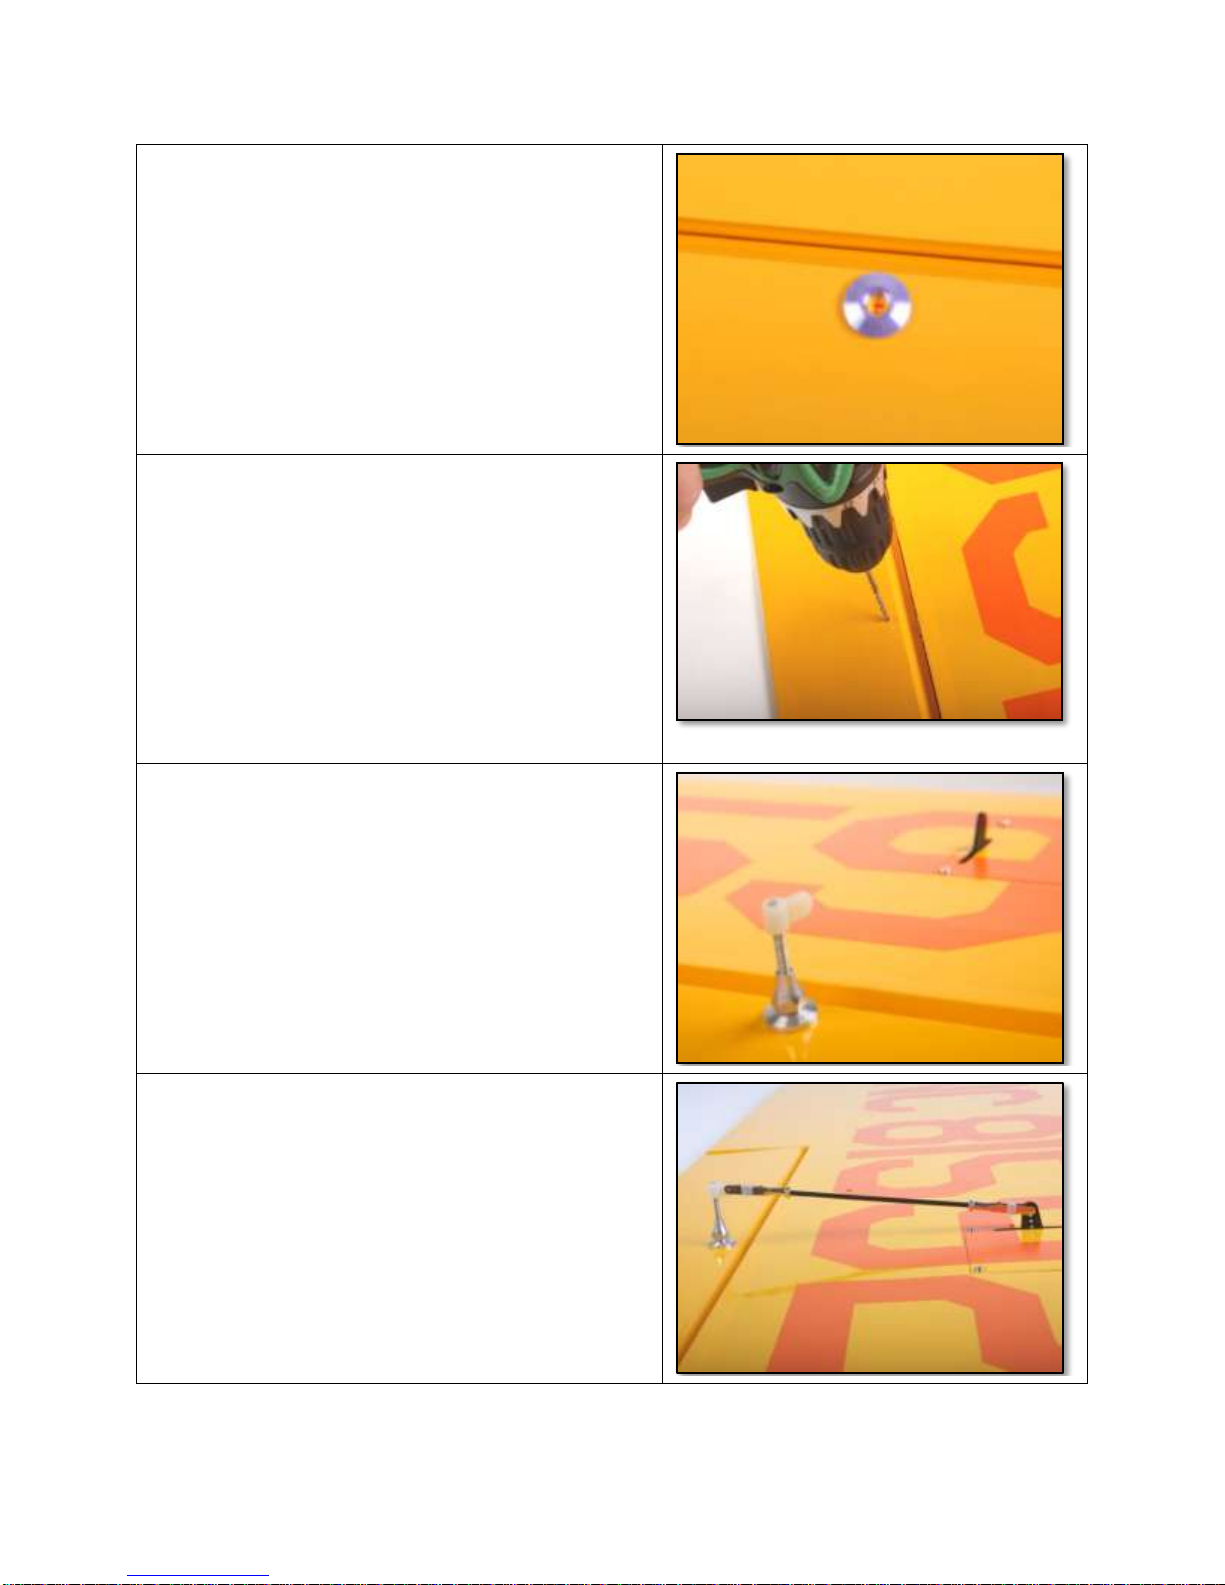
8
13.Use aileron horn washer as a guide to how
far back on aileron to drill. Mark center on
washer with pen.
14.Drill a 1/8” hole through wing. Take special
care to keep drill straight.
15.Install washer on screw, then insert through
aileron. Then insert another washer, tapered
nut, and nylon horn as shown. Tighten snug
but do not crush wood.
16.Install aileron pushrod, nut, clevis, and
clevis safety tubing as shown. With servo
centered, adjust pushrod length to level
aileron.
9
17. Repeat for opposite wing panel.
18.Install the Elevator servo. The servo is
centered and control horn should be
installed as shown.
19.Prepare the Elevator pushrod for
installation.
20.Insert elevator pushrod through front of
plane making sure to position it below
bulkhead horizontal braces.
10
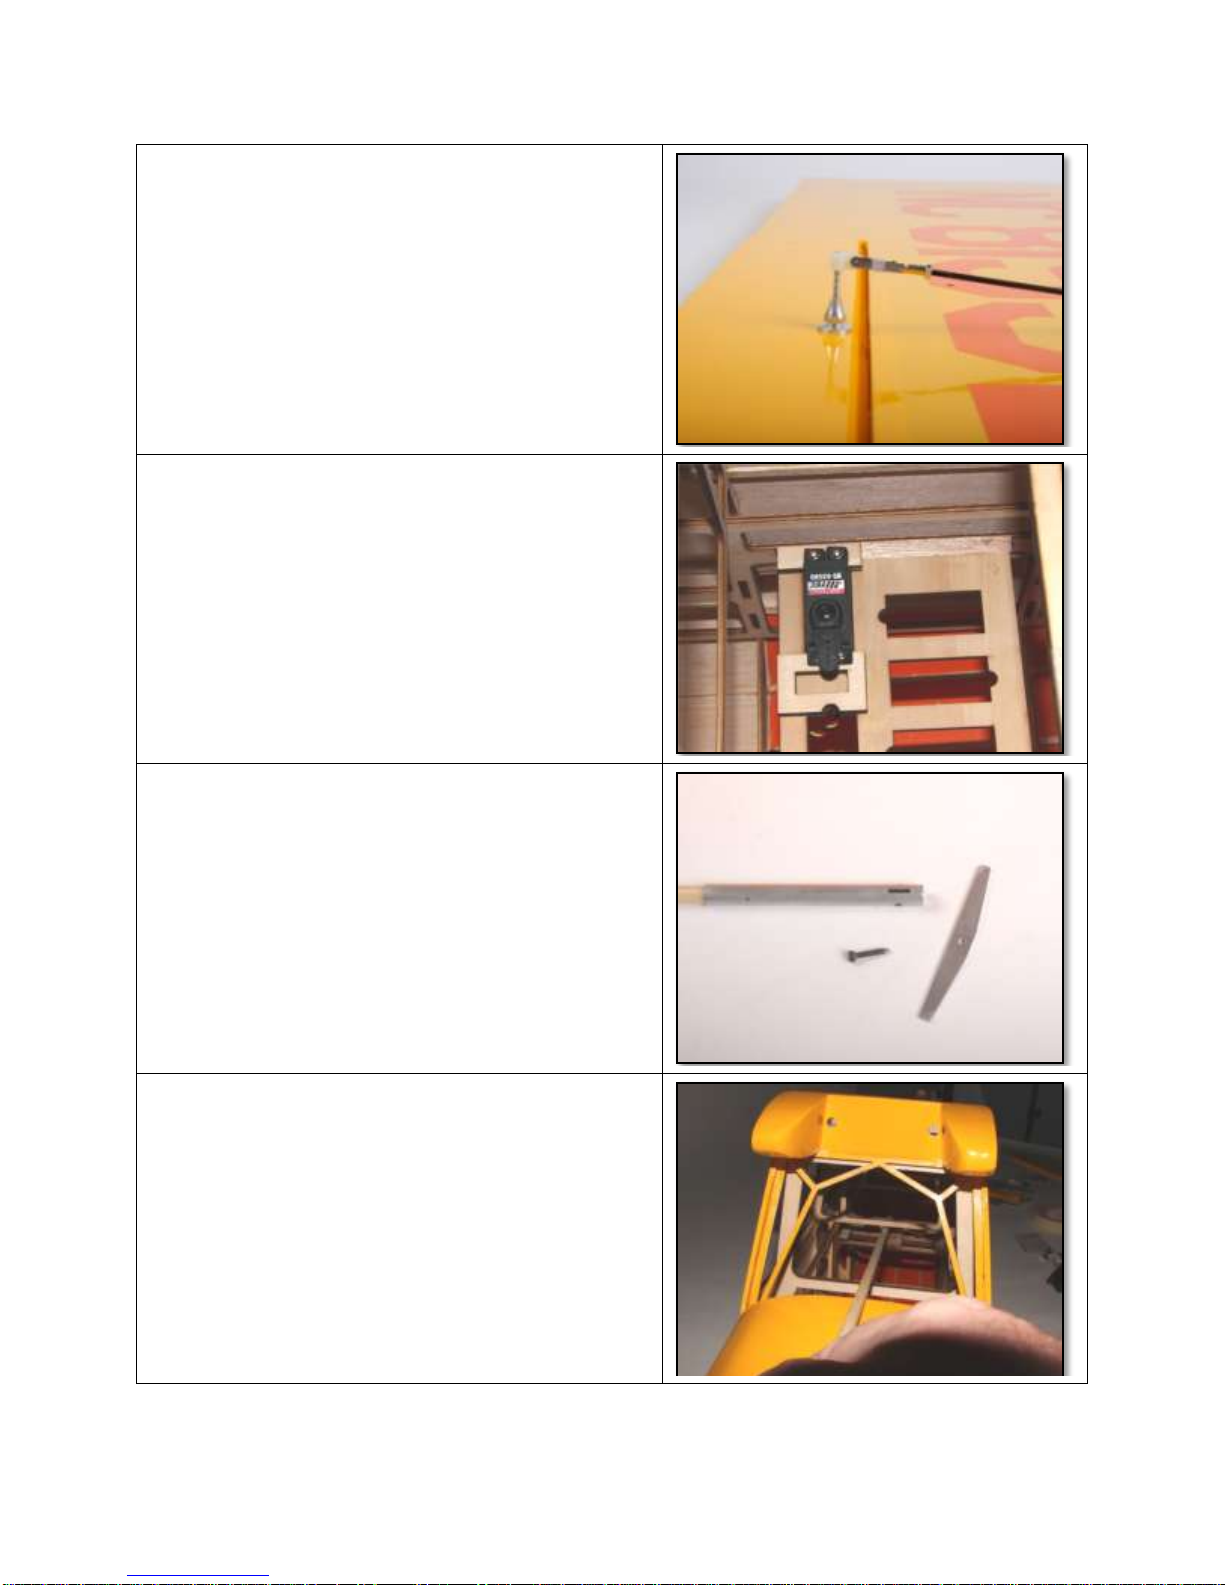
21.Insert pushrod into hole at rear of fuselage.
This photo is looking aft inside fuselage.
22.Install aluminum cross piece and sight
through hole for alignment.
23.Use masking tape to hold cap screw on ball
driver. Insert screw through hole in bottom
of fuselage.
24.Apply a small drop of CA or blue locktite to
hold screw in place.
Indice
Altri manuali Pilot-1 Giocattolo


