5
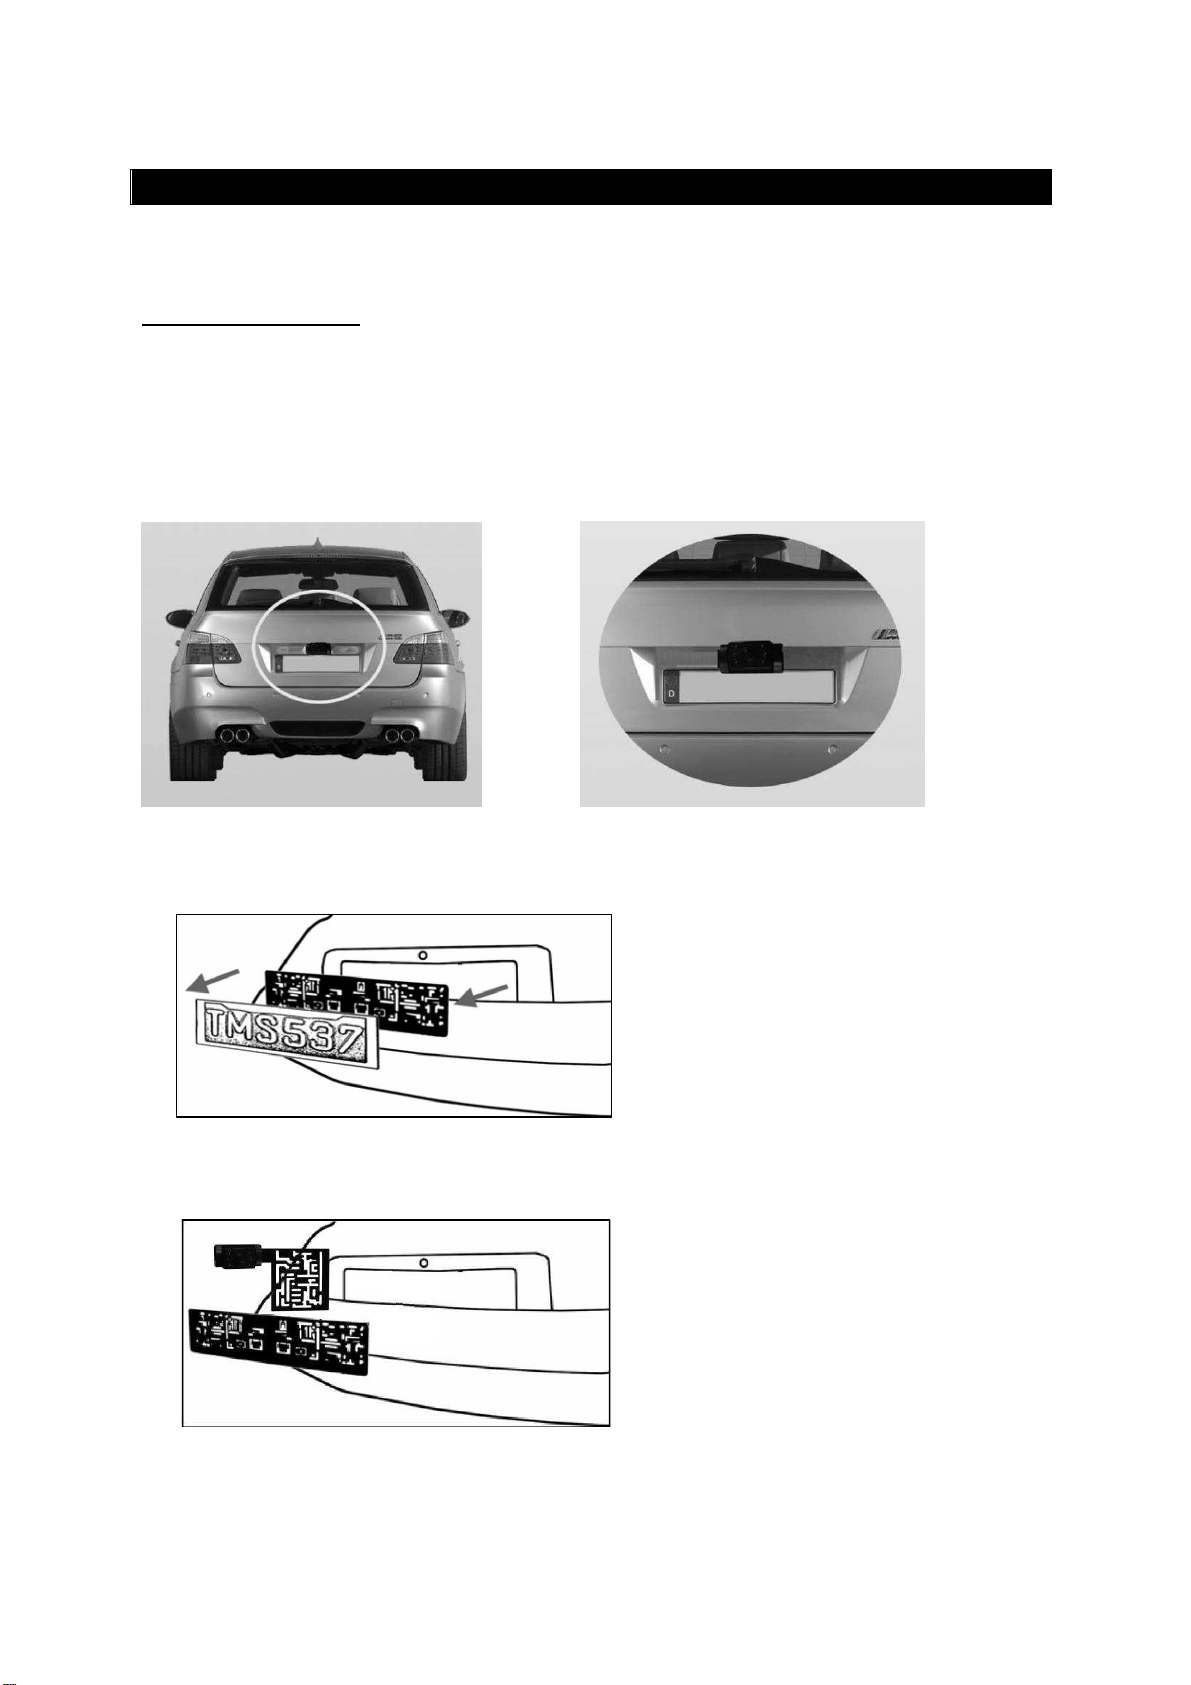
3. Mount the license late on the license late bracket.
4. Choose a routing ath for the camera’s ower cable through the vehicle’s body to the
reverse light circuit. If in doubt, seek rofessional installation assistance.
5. Some vehicles may have a hole available to ass the wire through, such as where the
license late light is mounted, or you can drill a hole close to where the ower cable
is attached to the camera. Once you have chosen where the cable will enter the
vehicle’s body, remove the camera. If you are able to use an existing opening, skip
the next two steps.
6. Before you drill a hole you MUST CHECK and see WHAT IS BEHIND WHERE YOU ARE
DRILLING. If there are any vehicle com onents, such as electrical arts or fuel
system com onents behind where you are drilling, you must take whatever
recaution is necessary not to damage them. Remove the license late and camera
before drilling.
7. After you have drilled the hole, insert the su lied grommet, then ass the camera
cables through the grommet into the vehicle. You must use the grommet to revent
the metal edge of the hole from cutting the camera cable.
8. Next you’ll need to find the vehicle’s reverse lights. Turn the vehicle’s ignition key to
the accessory osition, engage the arking brake and ut the car in reverse. Look at
the vehicle’s tail lights to see where the reverse lights are located, they are the white
lights. To locate the reverse light’s 12V/24V + wire it will be necessary to gain access
to the rear of the vehicle’s tail light. For hel locating the vehicle’s reverse light circuit
contact your vehicle’s manufacturer for vehicle s ecific wiring diagrams.
9. Once you have located the reverse light circuit you will have to route the camera
cable to that location. You must securely fasten the ower cable to revent it from
being caught on any vehicle com onent such as the trunk hinge. Never route the
cable on the outside of the vehicle!
10. The reverse light sockets on most vehicles
have two wires connected to them.
Usually the negative wire is black and the
ositive wire is a colored wire. If you are
uncertain about the wiring, you can use a
12V/24V multimeter available at most
auto arts stores to determine which is
the ositive wire. Follow the
manufacturer’s instructions for the safe
use of the multimeter.
11. After determining which wire is the
ositive and which is the negative, turn off the ignition key, then remove the
battery’s negative cable.
12. S lice the red wire using the su lied in-line wire connectors to the reverse light’s
ositive (+) wire. Use a set of sli joint liers to squeeze the TAP and insure good
connection.