PURE DIVERTER SYSTEM
page 3 of 4
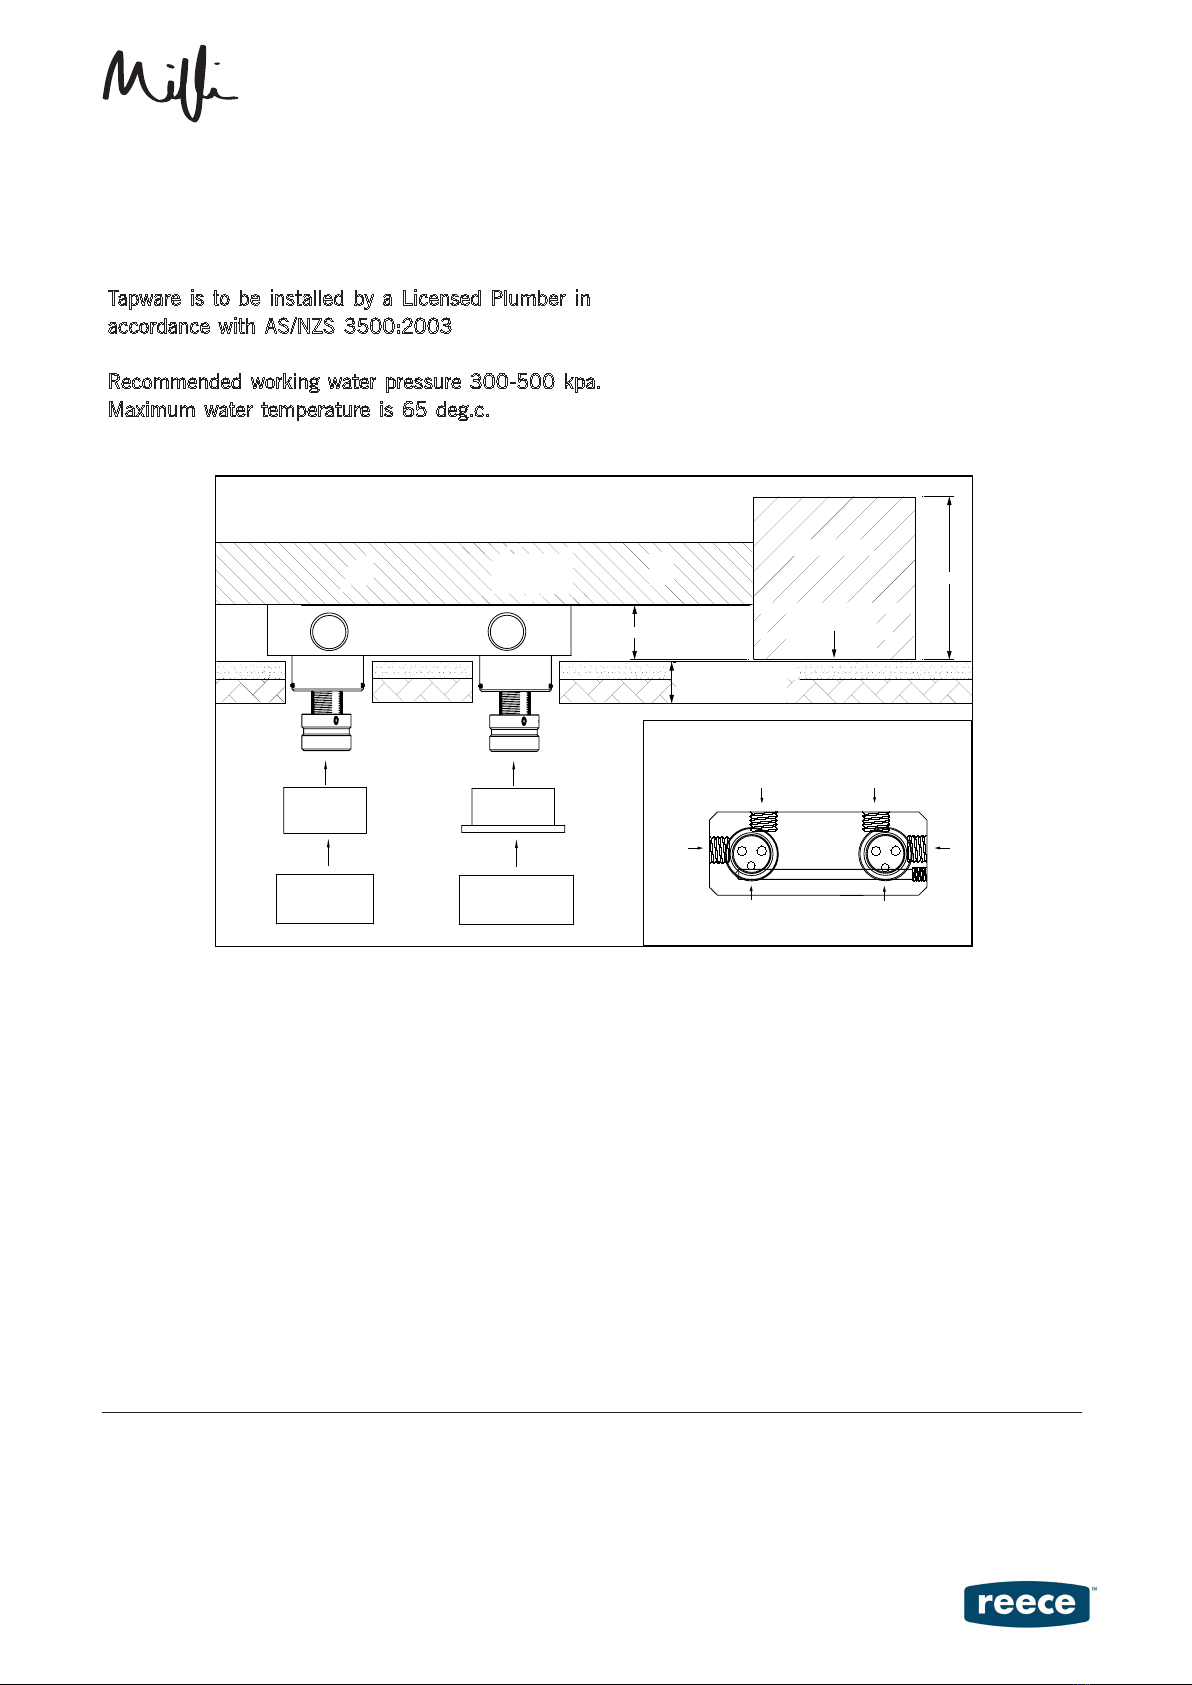
Masterfit
NOGGING
28-32
Wall Covering
Max. 25mm
View from above
90
Stud face
Pipe Connections
This
side
UP
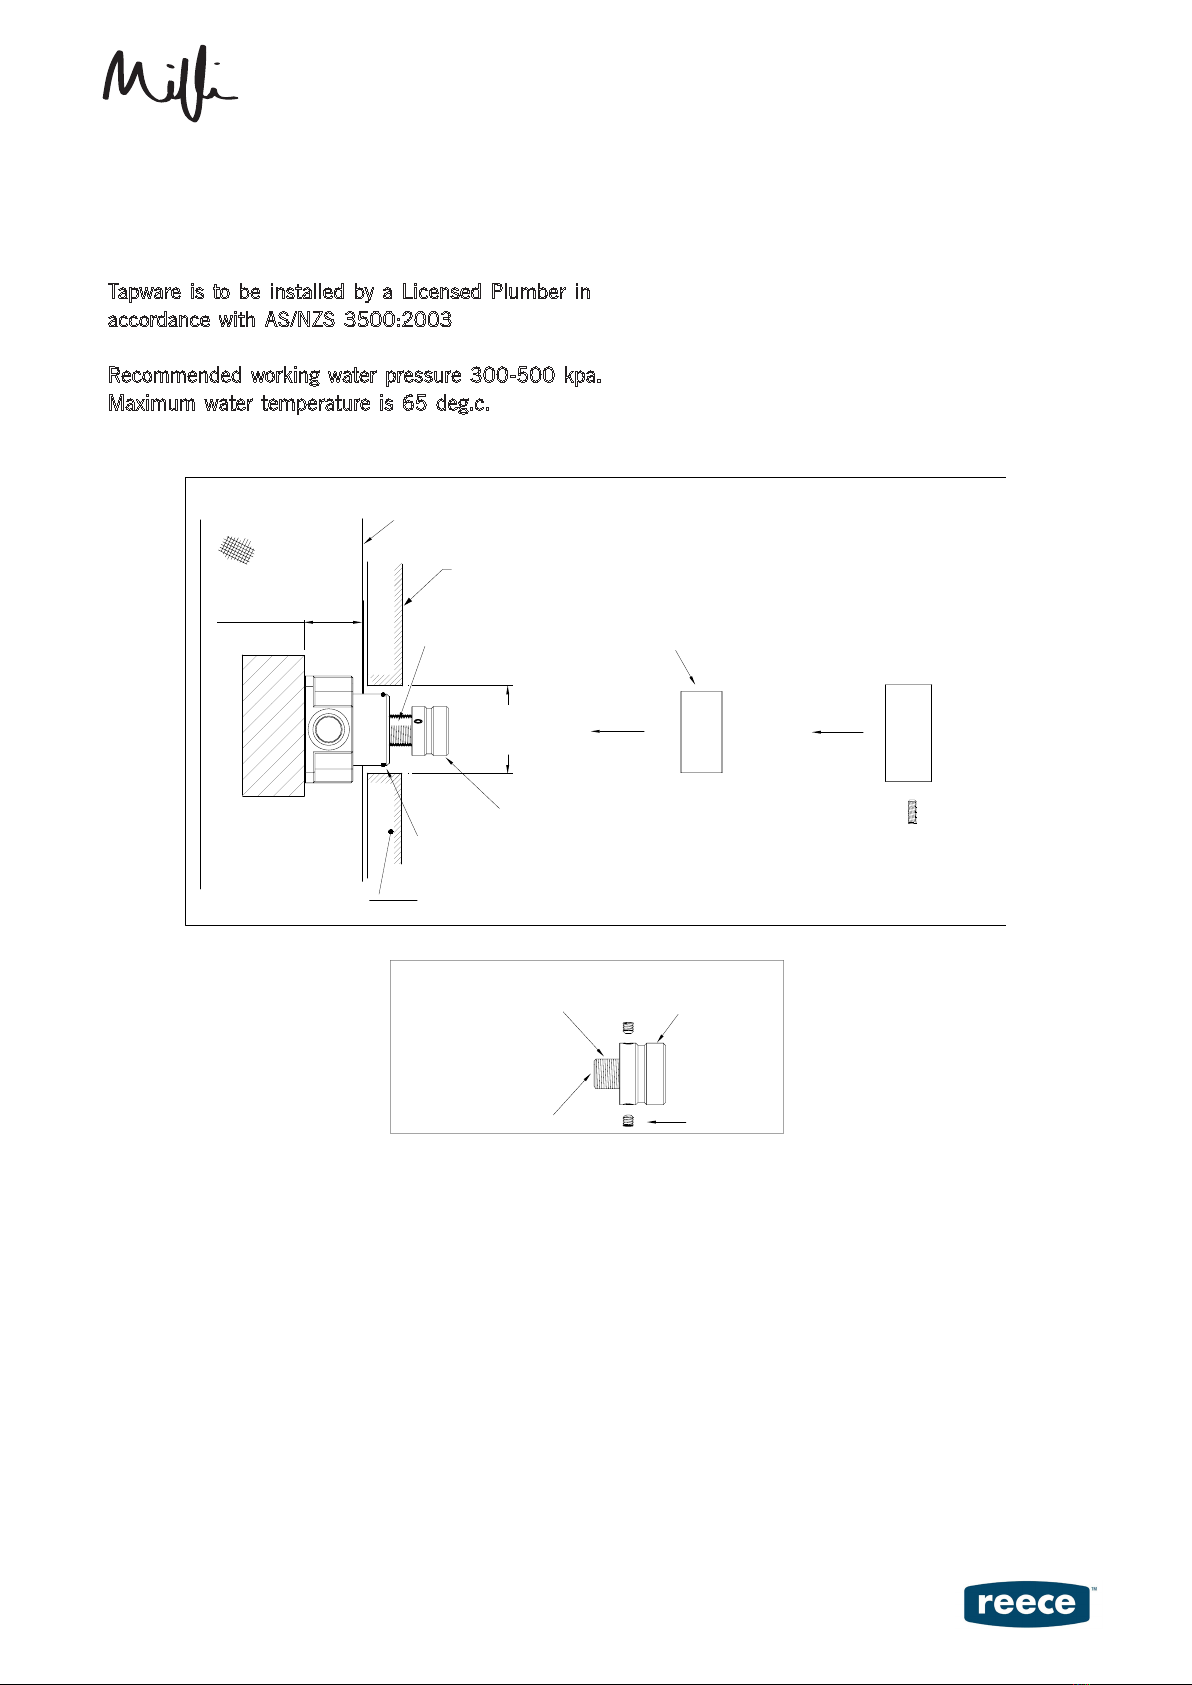
Handle
Body
Cover
Flange
Hot
Cold
Outlet 1
Outlet 2
DIVERTER
PROGRESSIVE
MIXER
DIVERTER
PROGRESSIVE
MIXER
INSTALLATION INSTRUCTIONS
Tapware is to be installed by a Licensed Plumber in
accordance with AS/NZS 3500:2003
Recommended working water pressure 300-500 kpa.
Maximum water temperature is 65 deg.c.
ROUGH IN PLUMBING
- Prior to installing, calculate the nished wall thickness to ensure enough adjustment is available when tting the Handle.
- The Mixer is supplied with a plastic cover to protect the Mixer during Plastering and Tiling.
- The “Mixed In” and Outlet Ports are marked on the shoulder of the Mastert body to indicate the correct conncection.
Note: Do not cross Hot/Cold connects from Mixer 1 to Mixer 2 (See Pipe Connections).
- Set a Nogging between 28 - 32mm back from the face of the wall stud. (see Fig. 1).
- Using the screws provided, x the Mixer to the Nogging.
- Ensure the Mixer is aligned square and well secured.
- Flush all water feed lines. Pipes and ttings must be free from any dirt and debris before connecting to the Mixer.
- Once all water ttings are connected, check Hot/Cold water ow by operating the Mixer.
- Check for any water leaks.
- Once all checks have been made, leave the Mixer in the closed position and replace the protective cover.
- Store remaining parts in a safe place until wall coverings have been completed and nal t-o is required (see Dress nishing)
PLUMBER NOTE:
- On-site high pressure line testing must be conducted with the Mixer in the closed position. (STATIC TEST ONLY )
- Under no circumstances is the Mixer to be opened when exceeding the maximum stated water pressure.
- At the completion of the testing, do not relieve any high pressure by opening the Mixer.
- Exposing the internals of the Mixer Cartridge to higher than specied water pressures, will void the manufacturer’s warranty.