Revo REHCUW-1 Manuale utente
INSTRUCTION MANUAL
REHCUW-1
REVO ELITE HD
Mini Cube
Network Camera
Please read this manual thoroughly before use, and keep it handy for future reference.

WARNING
TO REDUCE THE RISK OF FIRE OR ELECTRIC SHOCK, DO NOT EXPOSE THIS
PROCUCT TO RAIN OR MOIST URE. DO NOT INSERT ANY MET ALLIC OBJECT
THROUGH THE VENTILATION GRILLS OR OTHER OPENINGS ON THE EQUIPMENT.
APPARATUS SHALL NOT BE EXPOSED T O DRIPPING OR SPL ASHING AND THAT NO
OBJECTS FILLED WITH LIQUIDS , SUCH AS VASES, SHALL BE PL ACED ON THE
APPARATUS.
CAUTION
EXPLANATION OF GRAPHICAL SYMBOLS
The lightning flash with arrowhead symbol, within an equilateral triangle, is
intended to alert the user to the presence of uninsulated "dangerous
voltage" within the product’s enclosure that may be of sufficient magnitude
to constitute a risk of electric shock.
The exclamation point within an equilateral triangle is intended to alert the
user to the presence of important operating and maintenance (servicing)
instructions in the literature accompanying the appliance.
2

FCC COMPLIANCE STATEMENT
FCC INFORMATION: THIS EQUIPMENT HAS BEEN TESTED AND FOUND TO COMPLY WITH THE
LIMITS FOR A CLASS B DIGITAL DEVICE, PURSUANT TO PART 15 OF THE FCC RULES. THESE LIMITS
ARE DESIGNED TO PROVIDE REASONABLE PROTECTION AGAINST HARMFUL INTERFERENCE IN A
RESIDENTIAL INSTALLATION. THIS EQUIPMENT GENERATES, USES AND CAN RADIATE RADIO
FREQUENCY ENERGY AND, IF NOT INSTALLED AND USED IN ACCORDANCE WITH THE
INSTRUCTIONS, MAY CAUSE HARMFUL INTERFERENCE TO RADIO COMMUNICATIONS. HOWEVER,
THERE IS NO GUARANTEE THAT INTERFERENCE WILL NOT OCCUR IN A PARTICULAR INSTALLATION.
IF THIS EQUIPMENT DOES CAUSE HARMFUL INTERFERENCE TO RADIO OR TELEVISOION
RECEPTION, WHICH CAN BE DETERMINED BY TURNING THE EQUIPMENT OFF AND ON, THE USER IS
ENCOURAGED TO TRY TO CORRECT THE INTERFERENCE BY ONE OR MORE OF THE FOLLOWING
MEASURES:
-- REORIENT OR RELOCATE THE RECEIVING ANTENNA.
-- INCREASE THE SEPARATION BETWEEN THE EQUIPMENTAND RECEIVER.
-- CONNECT THE EQUIPMENT INTO AND OUTLET ON A CIRCUIT DIFFERENT FROM THAT TO WHICH
THE RECEIVER IS CONNECTED.
-- CONSULT THE DEALER OR AND EXPERIENCED RADIO/TV TECHNICIAN FOR HELP
CAUTION:CHANGES OR MODIFICATIONS NOT EXPRESSLY APPROVED BY THE PARTY
RESPONSIBLE FOR COMPLIANCE COULD VOID THE USER'S AUTHORITY TO OPERATE THE
EQUIPMENT.
THIS CLASS B DIGITALAPPARATUS COMPLIES WITH CANADIAN ICES-003.
CET APPAREIL NUMÉRIQUE DE LA CLASSE B EST CONFORME À LA NORME NMB-003 DU CANADA.
TO COMPLY WITH RF EXPOSURE COMPLIANCE REQUIREMENTS, THE ANTENNA USED FOR THIS
TRANSMITTER MUST BE INSTALLED TO PROVIDE A SEPARATION DISTANCE OF AT LEAST 20cm
(7.9in) FROM ALL PERSONS AND MUST NOT BE CO-LOCATED OR OPERATING IN CONJUNCTION
WITH ANY OTHER ANTENNA OR TRANSMITTER.
3

HEREBY, REVO AMERICA CORP DECLARES THAT THIS PRODUCT IS IN COMPLIANCE WITH THE
ESSENTIAL REQUIREMENTS AND OTHER RELEVANT PROVISIONS OF DIRECTIVE 1999/5/EC.
A COPY OF THE ORIGINAL DECLARATION OF CONFORMITY MAY BE OBTAINED FROM REVO
AMERICA CORP 700 FREEPORT, PKW #100, COPPELL, TX, USA
THIS DIGITAL EQUIPMENT FULFILLS THE REQUIREMENTS FOR RF EMISSION ACCORDING TO THE
CLASS B LIMIT OF EN 55022.
THIS PRODUCT FULFILLS THE REQUIREMENTS FOR IMMUNITY ACCORDING TO EN 55024 OFFICE
AND COMMERCIAL ENVIRONMENTS.
CAUTION
RISK OF EXPLOSION IF BATTERY IS REPLACED BY AN INCORRECT TYPE.
DISPOSE OF USED BATTERIES ACCORDING TO THE INSTRUCTIONS.
4

IMPORTANT SAFETY INSTRUCTIONS
1. Read these instructions.
2. Keep these instructions.
3. Heed all warnings.
4. Follow all instructions.
5. Do not use this apparatus near water.
6. Clean only with dry cloth.
7. Do not bloc k any ventilation openings. Install in accor dance with the manuf acturer’s
instructions.
8. Do not install near any heat sources such as radiators, heat registers, stoves, or other
apparatus (including amplifiers) that produce heat.
9. Do not defeat the safety purpose of the polarized or grounding-type plug. A polariz ed plug
has two blades with one wider than the other. A grounding type plug has two blades and a
third grounding prong. The wide blade or the third prong are provided for your safety. If the
provided plug does n ot fit into y our outlet, consult an electrici an for replacement of the
obsolete outlet.
10. Protect the power cor d from being walked on or pinched particularly at plugs, con venience
receptacles, and the point where they exit from the apparatus.
11. Only use attachments/accessories specified by the manufacturer.
12. Use only with the cart, stand, tripod, bracket, or table specified
by the manufacturer, or sold with the apparatus. When a cart is
used, use caution when moving the cart/apparatus combination
to avoid injury from tip-over.
13. Unplug this apparatus during lightning storms or when unused
for long periods of time.
14. Refer all ser vicing to qualified servic e personnel. Servicing i s
required when the app aratus has been damaged in any way,
such as power-supply cord or plug is damaged, liquid has been
spilled or objects hav e fallen into the apparatu s, the apparatus has been exp osed to rain or
moisture, does not operate normally, or has been dropped.
15. CAUTION – THESE SERVICING INSTRUCTIONS ARE FOR USE BY QUALIFIED
SERVICE PERSONNEL ONLY. TO REDUCE THE RISK OF ELECTRIC SHOCK DO
NOT PERFORM ANY SERVICING OTHER THAN THAT CONTAINED IN THE
OPERATING INSTRUCTIONS UNLESS YOU QRE QUALIFIED TO DO SO.
16. Use satisfy clause 2.5 of IEC60950-1/UL60950-1 or Certified/Listed Class 2
power source only.
17. ITE is to be connected only to PoE networks without routing to the outside plant.
5

Contents
1. Description ------------------------------------------------------------------7
1.1 Components - ------------------------------------------------------------------------------------------ 7
1.2 Key Features - ------------------------------------------------------------------------------------------ 7
1.3 Over View ---- ------------------------------------------------------------------------------------------ 9
2. Installation ----------------------------------------------------------------- 10
2.1 Connection ---- ----------------------------------------------------------------------------------------- 10
2.2 Network Connection and IP Assignment ---------------------------------------------------------- 11
3. Operation -------------------------------------------------------------------- 12
3.1 Access from a browser -------------------------------------------------------------------------------- 12
3.2 Access from the internet ------------------------------------------------------------------------------ 13
3.3 Setting the admin password over a secure connection ------------------------------------------- 13
3.4 Live View Page ----------------------------------------------------------------------------------------- 14
3.5 Network Camera Setup-------------------------------------------------------------------------------- 16
3.5.1 Basic Configuration ---------------------------------------------------------------------------- 16
1) Users------------------------------------------------------------------------------------------ 17
2) Network -------------------------------------------------------------------------------------- 18
3) Video & Image ------------------------------------------------------------------------------ 19
4) Audio------------------------------------------------------------------------------------------ 21
5) Date & Time --------------------------------------------------------------------------------- 23
3.5.2 Video & Image---------------------------------------------------------------------------------- 24
3.5.3 Audio--- ------------------------------------------------------------------------------------------ 30
3.5.4 Event---------------------------------------------------------------------------------------------- 31
1) Event-In -------------------------------------------------------------------------------------- 31
2) Event-Out ------------------------------------------------------------------------------------ 37
3) Event Map------------------------------------------------------------------------------------ 45
3.5.5 System ------------------------------------------------------------------------------------------ 47
1) Information ---------------------------------------------------------------------------------- 47
2) Security--------------------------------------------------------------------------------------- 48
3) Date & Time --------------------------------------------------------------------------------- 51
4) Network -------------------------------------------------------------------------------------- 52
5) Language------------------------------------------------------------------------------------- 64
6) Maintenance --------------------------------------------------------------------------------- 64
7) Support --------------------------------------------------------------------------------------- 65
3.5.6 About --------------------------------------------------------------------------------------------- 65
3.6 Playback----------------------------------------------------------------------------------------------------66
3.7 Help ------------------------------------------------------------------------------------------------------ 68
3.8 Resetting to the factory default settings ------------------------------------------------------------- 69
4. Appendix -------------------------------------------------------------------- 70
4.1 Troubleshooting ----------------------------------------------------------------------------------------- 70
4.2 Preventive Maintenance -------------------------------------------------------------------------------- 71
4.3 Product Specification ----------------------------------------------------------------------------------- 72
6
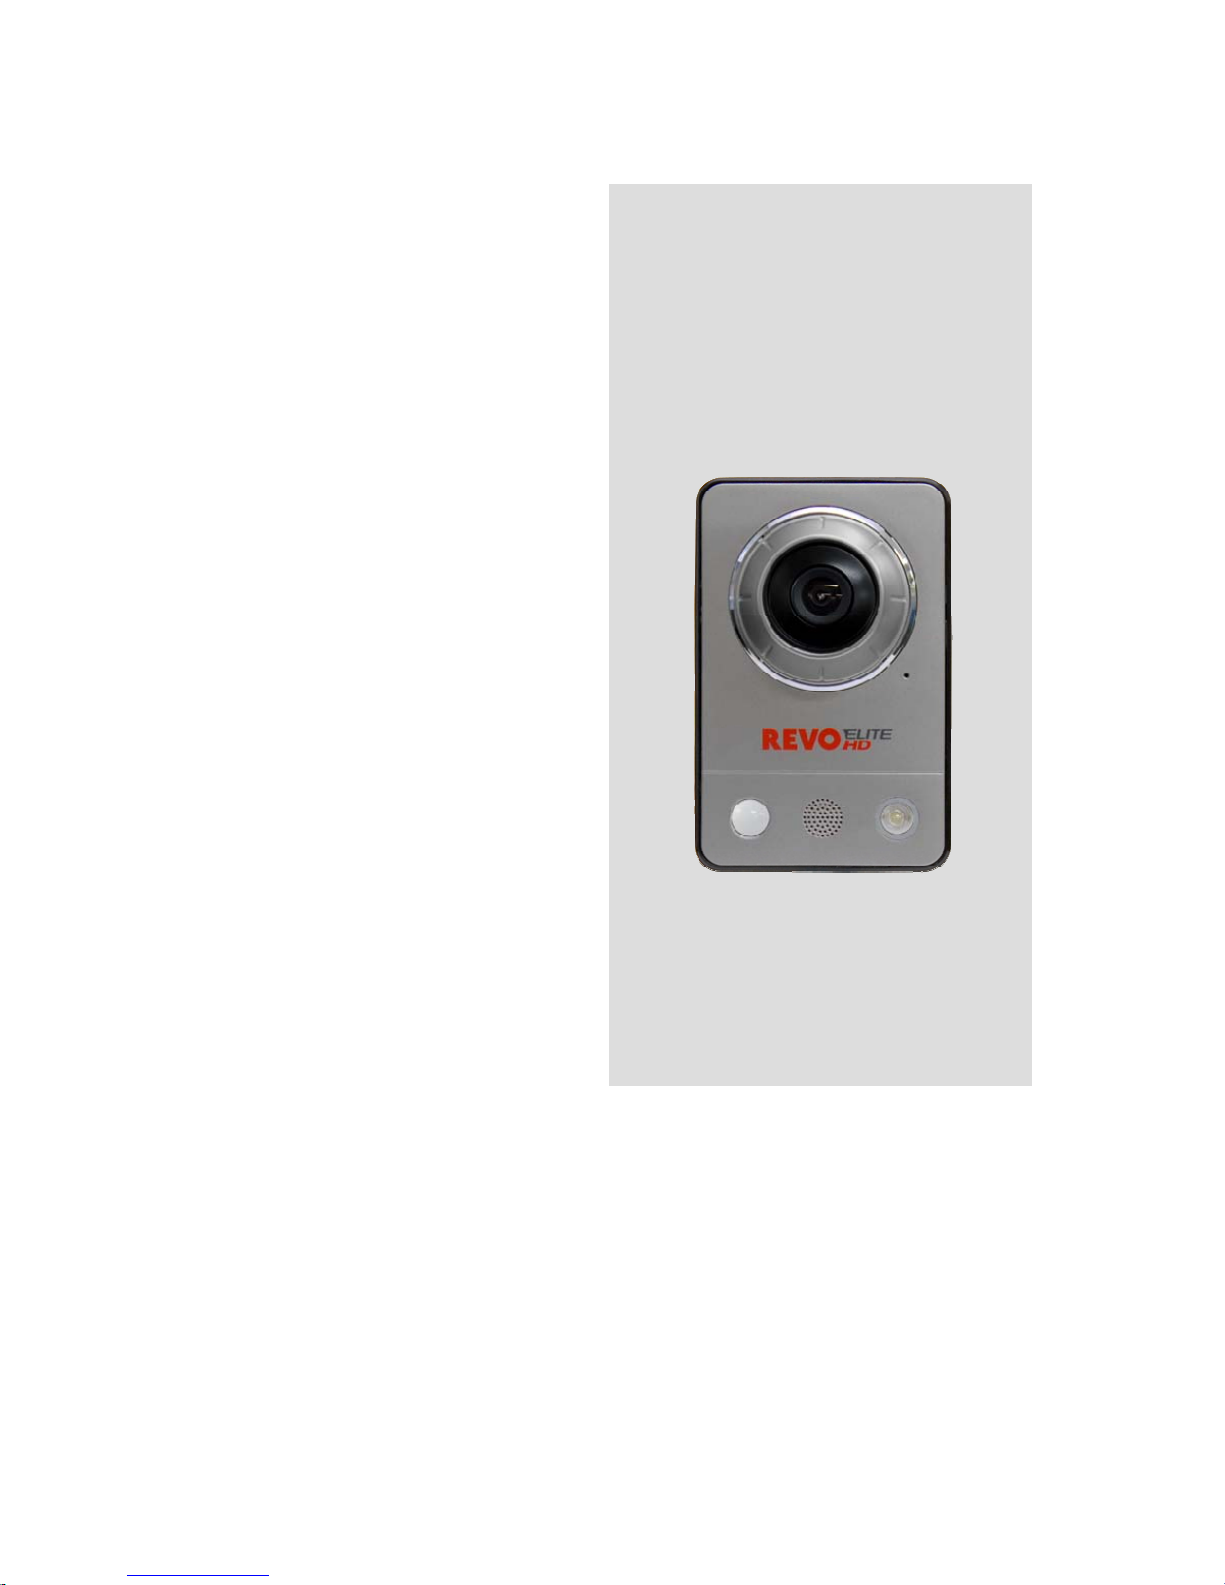
1. Description
The Network Camera provides a network service for a progressive scan sensor that can be monitored
on a real-time screen regardless of distance and location. By using its dedicated program, many users
are able to access the Network Camera at once, or a single user can monitor various network cameras
at the same time. It also enables users to play, store and retrieve a monitored image by using a PC.
All the settings and real-time monitoring screens are also provided through web access.
The Network Camera is fully featured for security surveillance and remote monitoring needs. It is
based on a DSP compression chip, and makes it available on the network as real-time, full frame rate
Motion JPEG and H.264 (or MPEG-4) video streams.
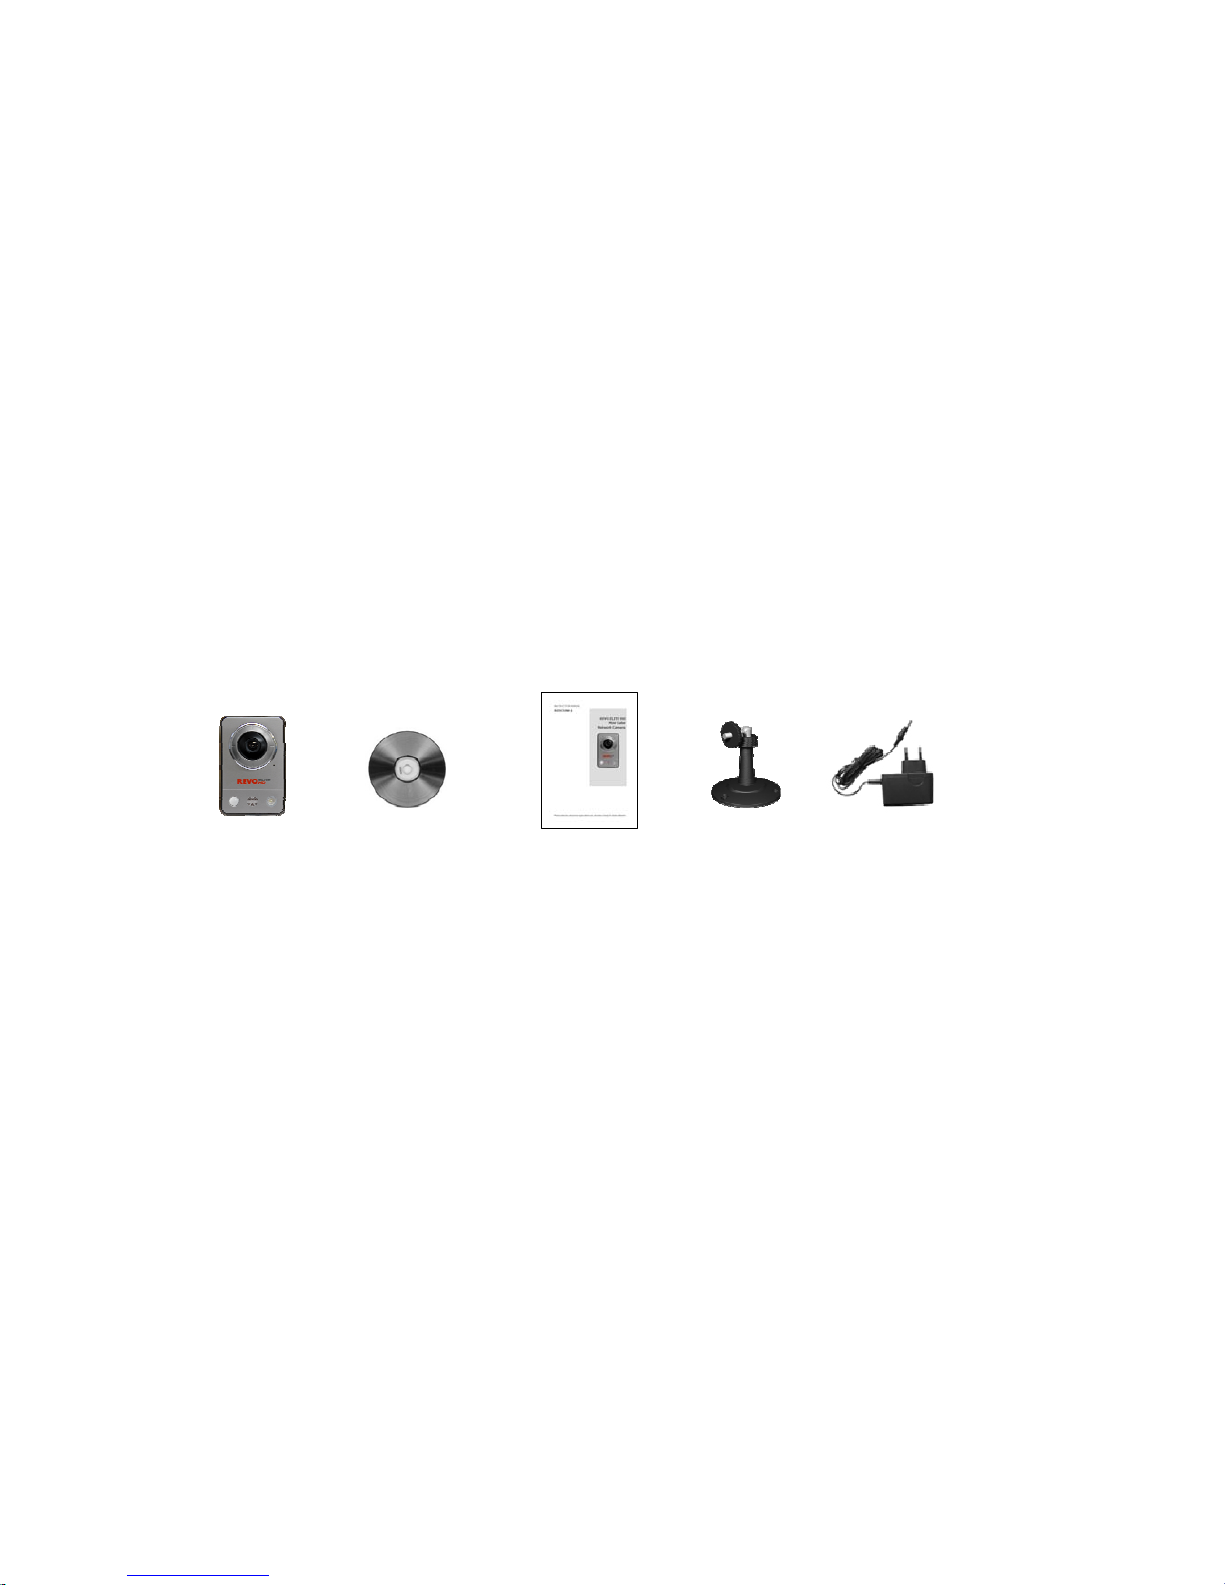
1.1 Components
The system comes with the following components:
Cube
Camera Installation CD Installation Guide Stand Adaptor
NOTE: Check your package to make sure that you received the complete system, including all
components shown above.
1.2 Key Features
• Brilliant video quality
The Network Camera offers the highly efficient H.264 video compression, which drastically
reduces bandwidth and storage requirements without compromising image quality. Motion JPEG
is also supported for increased flexibility.
• Dual or triple streams
The Network Camera can deliver dual or triple video streams simultaneously at full frame rate in
all resolutions up to 2M(1600 x 1200) using Motion JPEG and H.264 (or MPEG-4). This means
that several video streams can be configured with different compression formats, resolutions and
frame rates for different needs.
7

• Image setting adjustment
The Network Camera also enables users to adjust image settings such as contrast, brightness
and saturation to improve images before encoding takes place.
• Intelligent video capabilities
The Network Camera includes intelligent capabilities such as enhanced video motion detection.
The network camera’s external inputs and outputs can be connected to devices such as sensors
and relays, enabling the system to react to alarms and activate lights or open/close doors.
• Micro-SD Recording support
The Network Camera also supports a micro-SD memory slot for local recording with removable
storage.
• Improved Security
The Network Camera logs all user access, and lists currently connected users. Also, its full frame
rate video can be provided over HTTPS.
• PIR Sensor (Full- featured model only)
Complementing the video motion detection capability of the camera, the camera additionally
integrates a PIR Sensor for detecting movements - even in the dark.
• Illuminations
The camera offers a white LED for illuminating the scene automatically at an event or when
requested by the user.
• Microphone and speaker
The camera provides two-way audio support with integrated microphone and speaker, allowing
remote listening in on an area as well as communication with persons entering the scene. An
event can trigger the sound of an audio clip, stored in the camera, to be emitted through the
speaker.
• Megapixel Resolution
2 Megapixel, Max 15fps@1600x1200
• PoE
The camera can be powered through PoE, which simplifies installation since only one cable is
needed for carrying power, as well as video controls.
• ONVIF
This is a global interface standard that makes it easier for end users, integrators, consultants,
and manufacturers to take advantage of the possibilities offered by network video technology.
ONVIF enables interoperability between different vendor products, increased flexibility, reduced
cost, and future-proof systems.
8

1.3 Overview
• Front View
[BASIC MODEL] [FULL-FEATURED MODEL]
• Rear View
NO Name Description
1 PIR Sensor(option) The camera is equipped with a PIR Sensor that has a maximum range of
5 meters for detecting movement in the dark.
2 Microphone/Speaker
(option)
The camera is equipped with a Microphone and Speaker. Two-way audio
support allows for remote users to listen in on an area and communicate
with visitors or intruders.
3 Light(option) The camera is equipped with White LED that illuminates the scene.
4 Network Connector Ethernet, RJ-45 port compatible with 10/100Mbps having PoE functionality.
Modular Jack
5 Power Connector For connection with a 5V power adapter (included).
6 Reset Button Press and hold the Reset Button for one second using a paper clip or thin
object. Wait for the camera to reboot before releasing.
7 Network LED (Green) Steady for connection to a 100Mbit/s network. Flashes for network
activity.
8 Power LED (Green) Steady green for normal operation or booting.
Flashes green during firmware upgrade.
9 Status LED (Red) Steady red for failure to upgrade or boot.
Camera Dimension
9
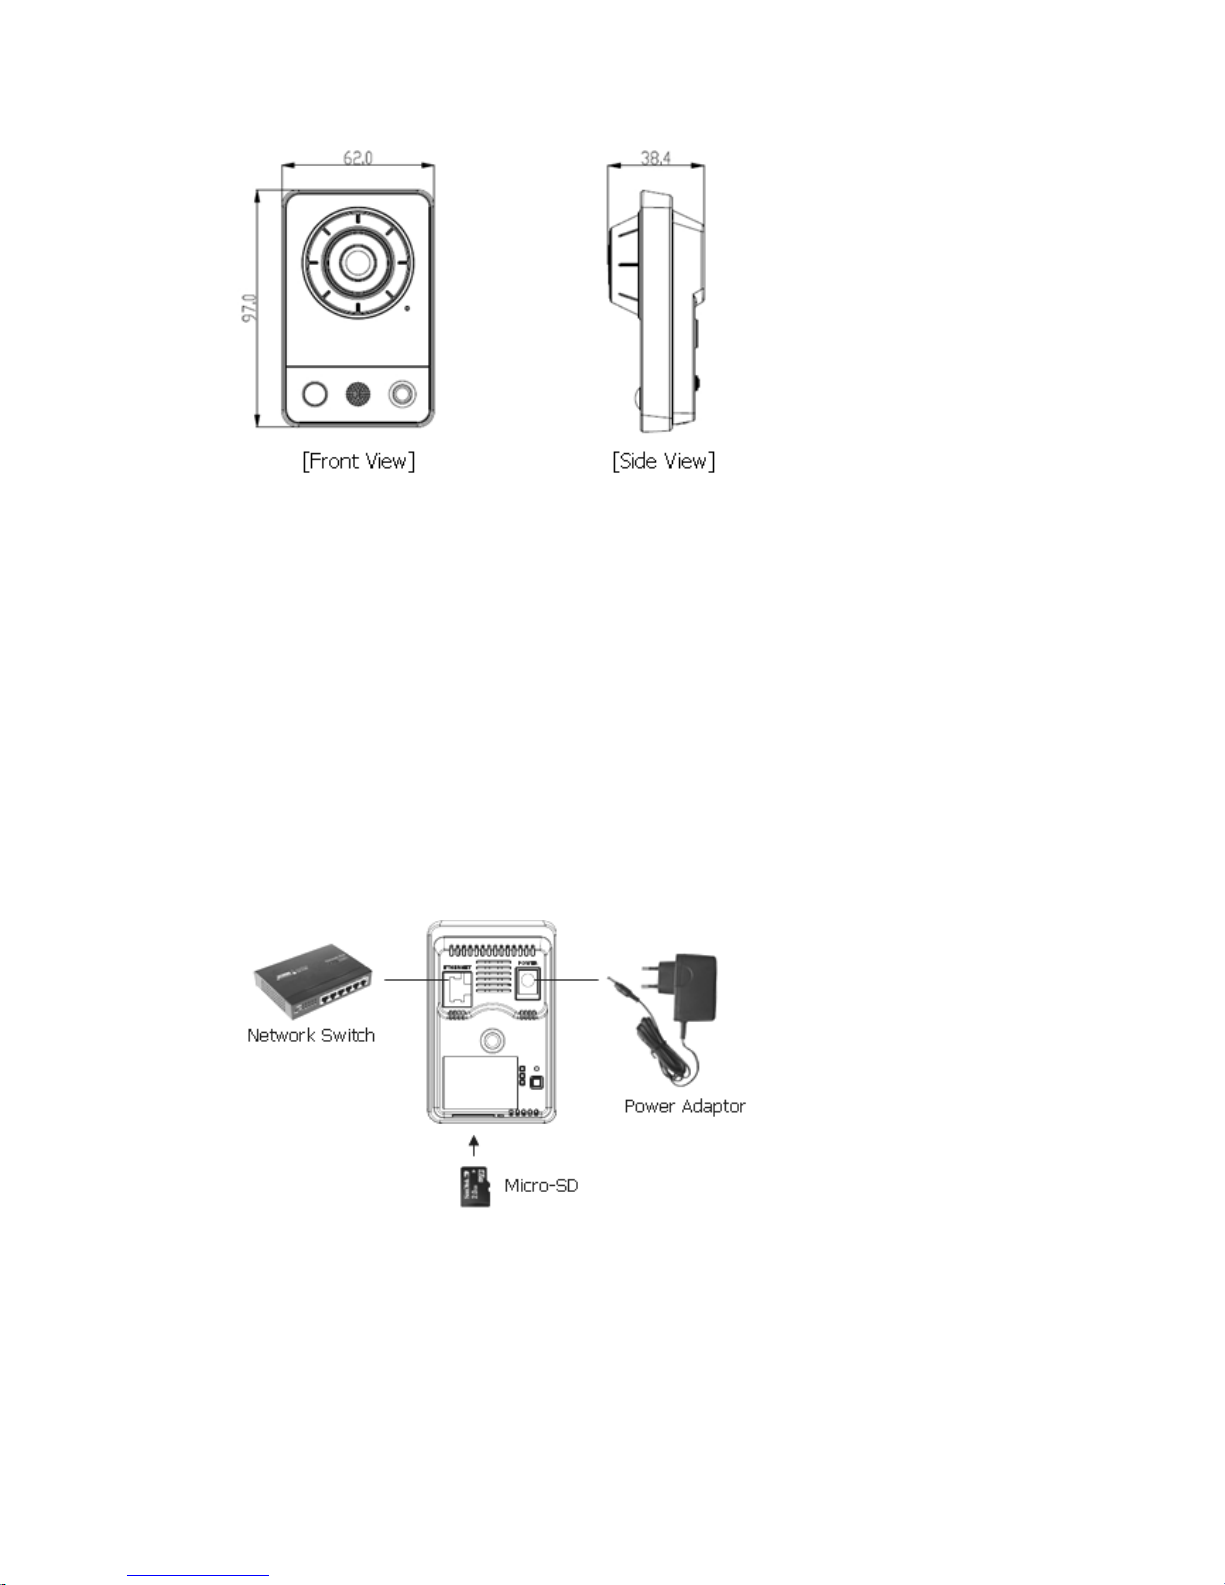
Dimensions Unit: mm
2. Installation
2.1 Connection
• Connecting to the RJ-45
Connect a standard RJ-45 cable to the network port of the network camera. Generally a
cross-over cable is used for direct connection to a PC, while a direct cable is used to connect to a
hub.
Micro SD memory slot
Insert the SD memory card.
• Connecting the Power
Connect the supplied DC 5V power adaptor to the camera.
10
Indice
Altri manuali Revo Telecamera di sicurezza

Revo
Revo REHXN0412-1 Manuale utente

Revo
Revo RESPTZ36-3 Manuale utente

Revo
Revo REHVDPTZ12-1 Manuale utente

Revo
Revo RETRT700-1 Manuale utente

Revo
Revo RCPTS700-1 Manuale utente

Revo
Revo REHXT0550-1 ELITE HD Manuale utente

Revo
Revo RECDH2812-3 Manuale utente

Revo
Revo REHVDPTZ22-1 Manuale utente

Revo
Revo RECBH0550-1 Manuale utente

Revo
Revo RBULRJCAM Manuale utente

Revo
Revo RESPTZ37-SERIES Manuale utente

Revo
Revo RELPTZ22-3 Manuale del proprietario

Revo
Revo RCHD24-1 Manuale utente

Revo
Revo RCHB24-1 Manuale utente

Revo
Revo REHSPTZ30-1 Manuale utente

Revo
Revo REXT700-2 Manuale utente

Revo
Revo RECBH36-1 Manuale utente

Revo
Revo REHB0309-1 Manuale utente

Revo
Revo RECLP36-1 Manuale utente

Revo
Revo NTSC Manuale utente


