SHARE 102S PRO V2 Manuale utente

SHARE 102S PRO V2
User Manual V1.4
2022.05
SHENZHEN SHAREUAV TECHNOLOGY Co., Ltd.


Disclaimer and Warning
Please read this entire document carefully to ensure proper configuration before use. The
copyright of this document and all other collateral documents belong to SHENZHEN SHARE
UAV TECHNOLOGY CO., LTD. (abbreviated as “SHARE UAV”). SHARE UAV has the final
interpretation right of this document and all other collateral documents.
SHARE UAV has right to update, modify or terminate the content of this document without
prior notice. For update information, visit website http://www.shareuavtec.com/en/ and click
on the product page for this product.
Do not allow people under the age of 18 to use the SHARE 102S PRO V2 .
Do not modify or disassemble the SHARE 102S PRO V2. SHARE UAV accepts no liability for
damage, injury or any legal responsibility incurred directly or indirectly from the use of this
product. The user shall observe safe and lawful practices including, but not limited to, those
set forth in this manual.
By using SHARE UAV products, you hereby signify that you have read this disclaimer and
warning carefully and that you understand and agree to abide by the terms and condition
herein.
You agree that you are solely responsible for your own conduct while using this product, and
for any consequences thereof. You agree to use this product only for purposes that are proper
and in accordance with all applicable laws, rules, and regulations.

Contents
1. Product Overview............................................................................................................................1
1.1 Introduction...........................................................................................................................1
1.2 Features.................................................................................................................................2
1.3 In the box...............................................................................................................................3
1.4 Camera Parameters...............................................................................................................3
2. Installation....................................................................................................................................... 4
2.1Camera Introduction.............................................................................................................. 4
2.2 Installation.............................................................................................................................5
2.3 Camera Connection...............................................................................................................6
3. Camera Operation........................................................................................................................... 6
3.1 Powering On.......................................................................................................................... 6
3.2 Taking Photos........................................................................................................................ 8
3.3 DJI Pilot Setting......................................................................................................................9
3.4 Repair...................................................................................................................................11
3.5 Data Copying and Deleting..................................................................................................11
4. Camera Maintenance.................................................................................................................... 12
4.1 Precaution........................................................................................................................... 12
5. After Sales......................................................................................................................................13
5.1 Delivery................................................................................................................................13
5.2 After-sales Service...............................................................................................................14

1
1. Product Overview
The SHARE 102S PRO V2 aerial oblique camera is equipped with five individual
24.3-megapixel sensors, which can break through the limitations of single-angle images on
traditional mapping camera.
By mounting multiple camera sensors on the same flying platform, it will acquire imagery
with more spatial information from multiple angles, vertical and tilt providing more details
and textures of captured features.
The 3D data of obtained from the SHARE 102S PRO V2 can realistically reflect the appearance,
position, height and other attributes of ground features. Enhancing immersion and making
up for the shortcoming of low artificial simulation of traditional modeling.
It can bring revolutionary efficiency improvements to the mapping field by using UAV and
automatic modeling systems.
1.1 Introduction
Manufacturer
SHARE UAV
Camera Type
Oblique Camera
Model No.
SHARE 102S PRO V2
Effective Pixels
120 Megapixel
Size
150 x150 x 115mm
N.W.
≈880 g
Focal Length
Nadir: 25mm
Oblique: 35mm
Exposure Interval
≥0.6s
Sensor Size
23.5*15.6mm
Storage
1280GB
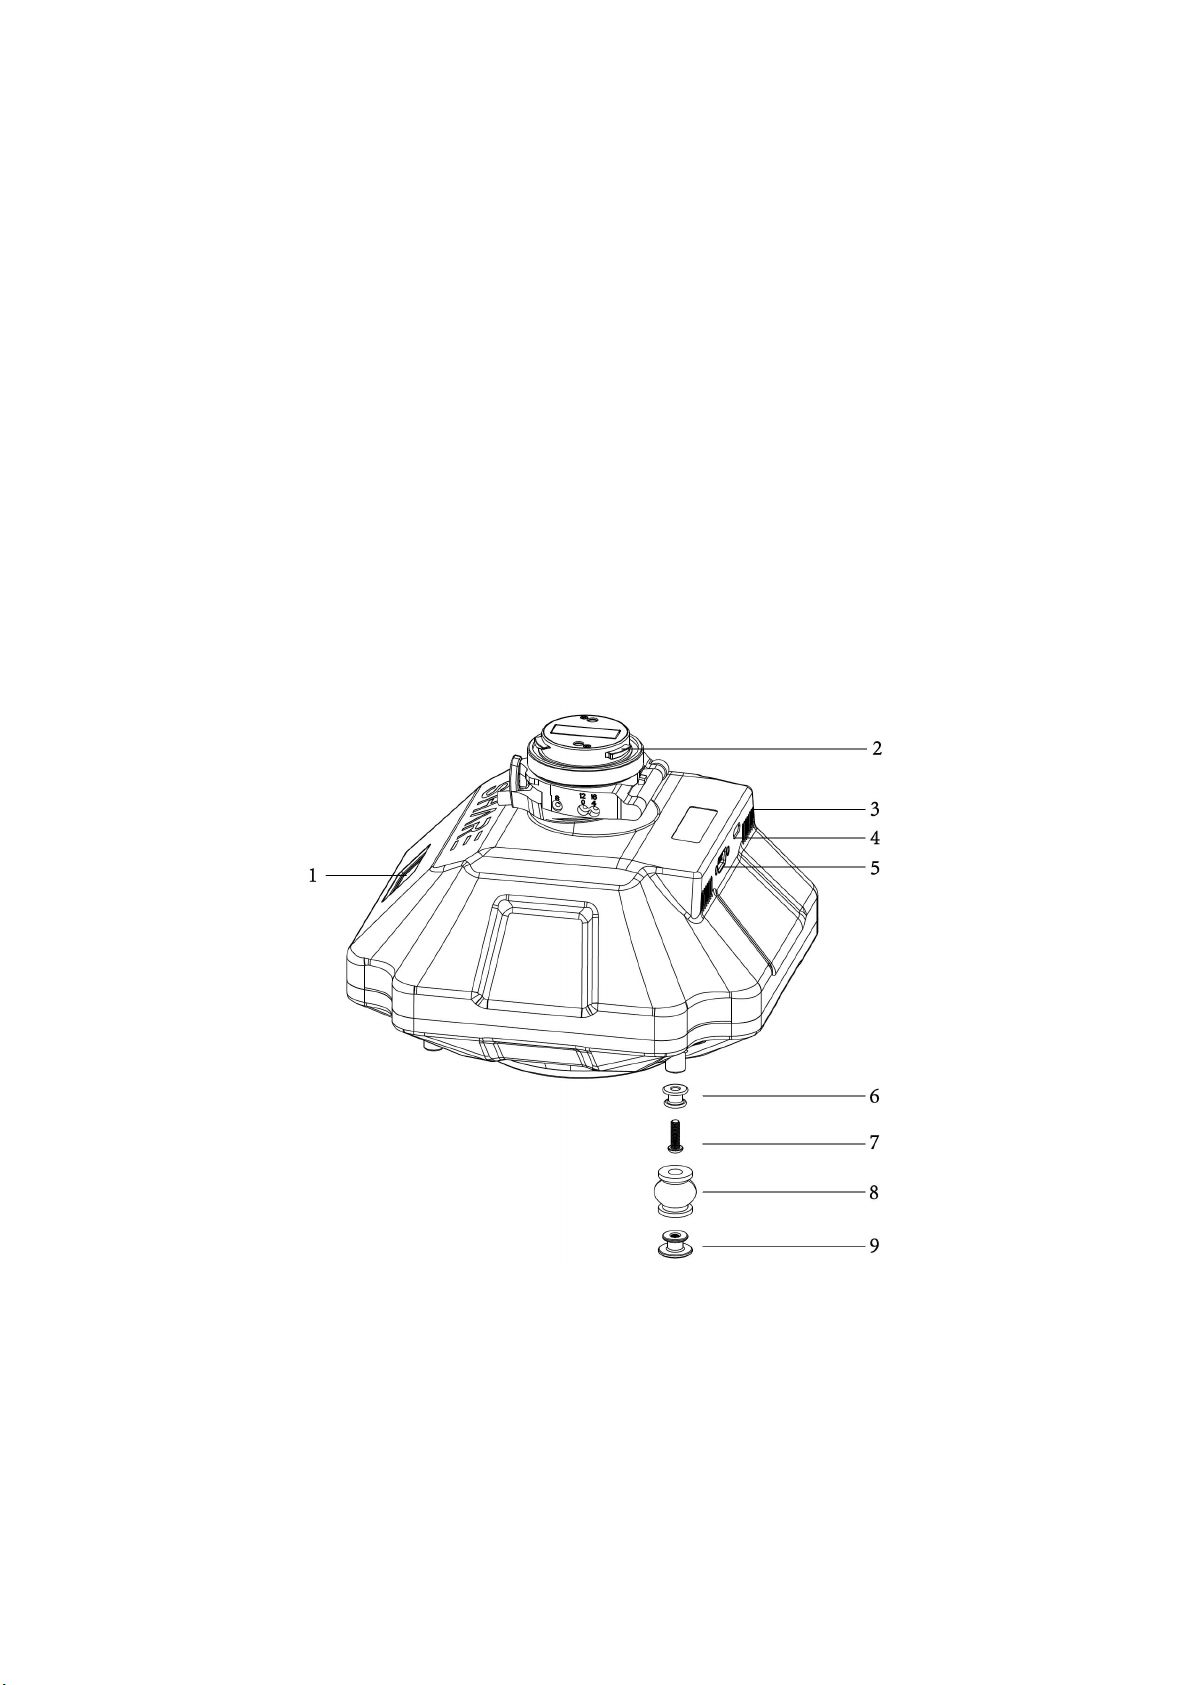
The SHARE 102S PRO V2 features five professional mapping sensors with a total pixel
count of 120 million. It uses an advanced and professional integrally-formed structure in this
industry.
Through excellent shape 、
structural design and manufacturing, it creates a professional
5 sensor oblique camera. The body of the camera uses both aluminium alloy and composite
material, which is strong structurally while being light weight. The camera only 880 g and has
an operating temperature range of -10 ~40℃.
The camera has the best performance in electromagnetic interference resistance, heat
resistance and dissipation, water resistance, drop resistance, UV resistance and dust
resistance.
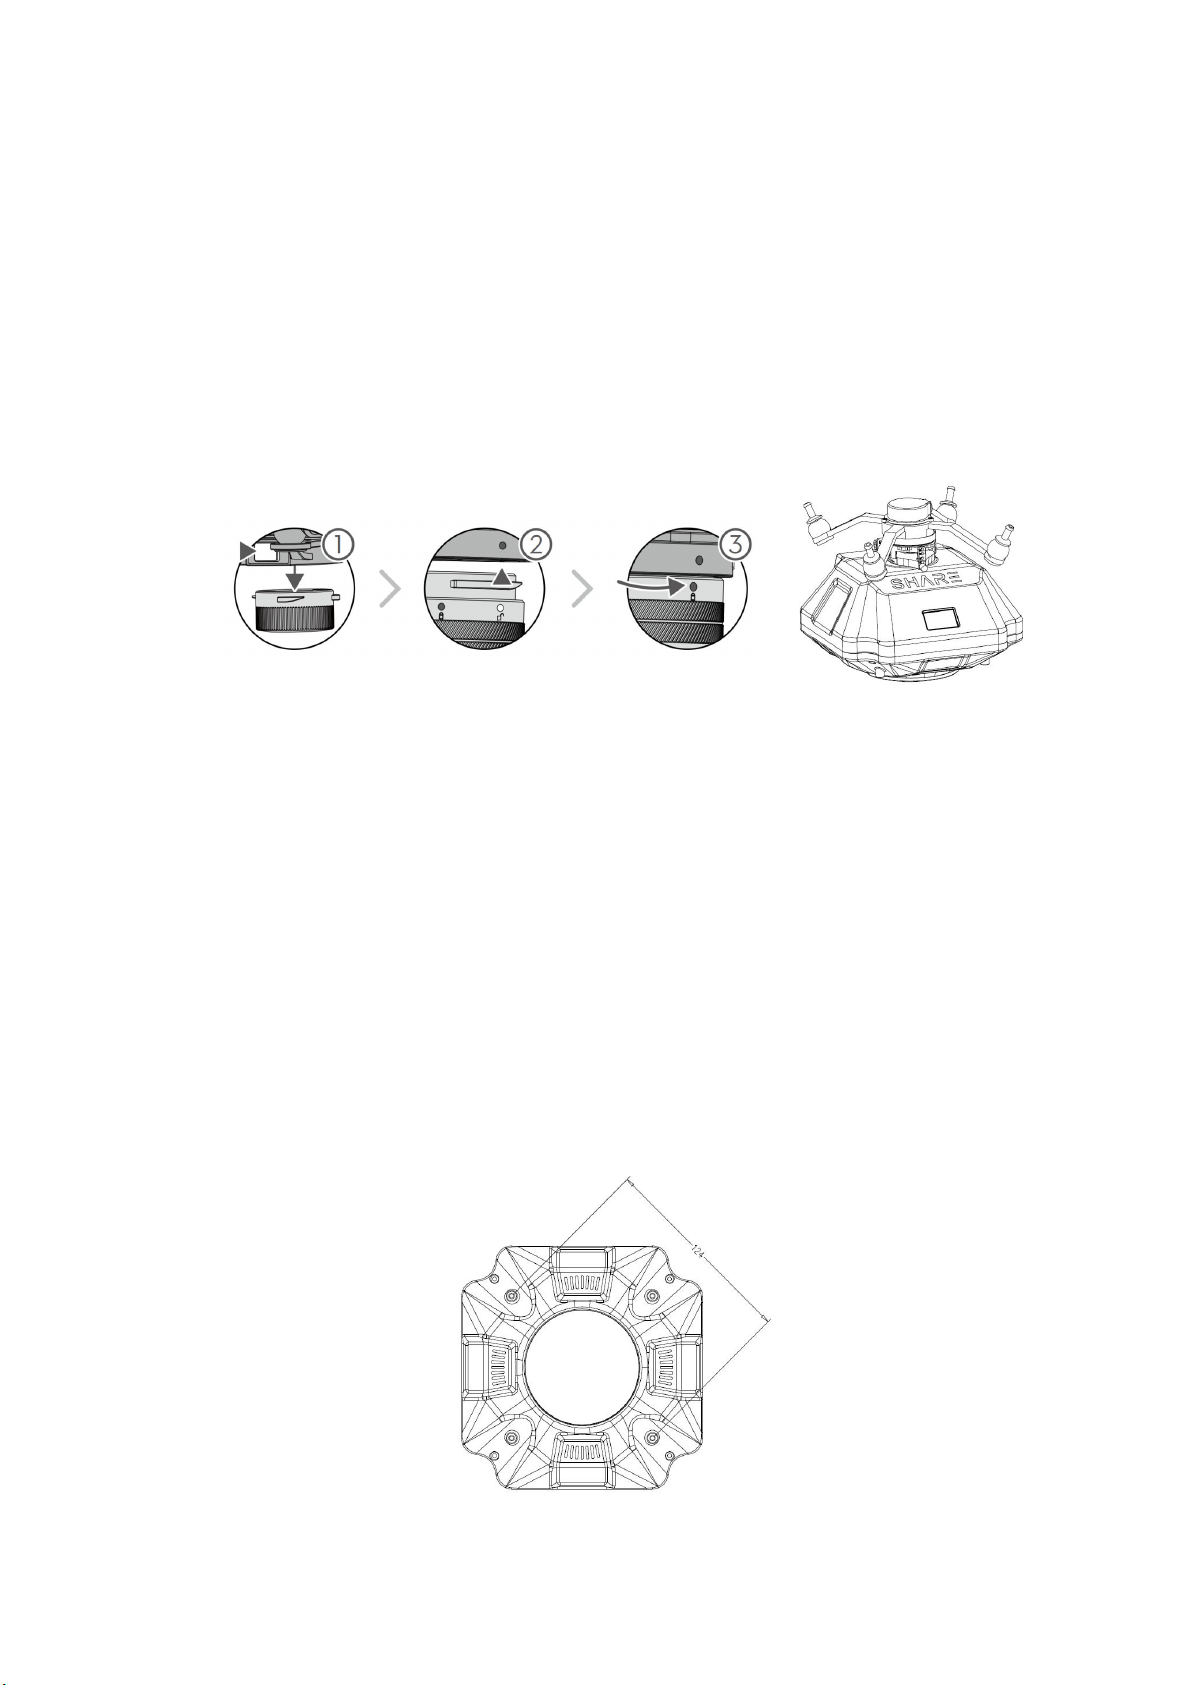
Small and exquisite body, metal connector integrated with a variety of signal lines, and
automatic identification of flight control signals, can be highly compliant to most
high-performance UAVs, achieving multi-purpose user needs. Open mounting and fixing
holes can meet the installation integration of different flight platforms.

2
Type-C interface for fast data transfer without requiring the camera to be powered on
greatly improves workflow efficiency.
1.2 Features
* Mounting via DJI SkyPort 2.0 and common interface, compatible with DJI M300 RTK drones
and other VTOL drones
* Automatically recognize photo signal, highly compatible with various flight control, support
serial communication, can be deeply developed
* Support DJI Terra, achieving GCP free with high precision
* Camera firmware is automatically upgraded online through Share UAV Data Manager
* SHARE UAV Data Manager software provides flight data management of captured imagery
* 1.14 inch TFT screen showing working status instantly.
* Real-time image transmission display with higher definition
* Five fully closed-loop intelligent detection system
* 12-48V wide voltage can be compliant to more drones
* Type-C interface for fast data transfer of captured imagery
* Professional mapping system provides a high capture rate of imagery

3
1.3 In the box
Name
Camera
Interface
Case
Protection
Case
Camera
Lens
Cover
Wipe
Cloth
Damping
Ball
User
Manual
Phillips
Screwdriver
Quantity
1 pc
1 pc
1 pc
1 pc
1 pc
2 pcs
4 pcs
1 pc
1 pc
1.4 Camera Parameters
SHARE 102S PRO V2 Camera Parameters
Camera
Parameters
Power Supply
DC 12 ~ 48 V
Endurance
Power Supply By Drone
Power On/Off
Auto On/Off
Data Transfer
Type - C Cable
Storage
1280 GB
Effective Pixels
Single Lens :24 Million (Total 120 Million Pixels)
Sensor Size
APS-C (23.5*15.6mm)
Pixel Size
3.91 um
Image Resolution
3:2 (6000 × 4000)
Tilt Degree
45°
Lens Qty
5 Pcs
Focal Length
Nadir: 25 mm,Oblique: 35 mm
Exposure Time
≥0.6 s
Exposure Mode
Flight Control Trigger
Operating Mode
Trigger by Flight Controller, Isometric photography, and
Isochronous photography
Working
Environment
Working
Temperature
-10 ℃~ 40 ℃
Humidity
≤95%
General
Parameters
Size
150 × 150 × 115 mm
Weight
≈880 g

4
2. Installation
2.1Camera Introduction
The SHARE 102S PRO V2 has an TFT display on the front. When installing the camera, ensure
that the display is aligned with the aircraft nose. The lens near the front of the camera is the
back-view, and the drive letter is named after the lens Angle orientation, which is opposite to
the lens mounting position.
The top of the camera is equipped with DJI SkyPort 2.0 interface, which is compatible with
DJI M300 RTK. There are 4 M3 threaded holes at the bottom of the camera to connect the
fixed mount between camera and drone.
The camera also has a 15 Pin Connector which integrates power supply, triggering, hot
shoe , serial port and other functions.
Pic 1 Camera interface
1. Display Screen
2. Skyport 2.0 Interface
3. The wind hole
4. Type-C Interface
5. Camera Cable Interface
6. Through-hole Damping Ball Connector× 4
7. Set Screws × 4
8. Rubber Damping Ball × 4
9.Threaded Hole Damping Ball Connector ×4

5
2.2 Installation
Installation Method 1:
(1) To remove SkyPort cover of the drone, press and hold the release button and turn the cover
so it can be removed.
(2) Remove SkyPort cover of the camera, align the white point of the camera with the red point
of the drone, and embed it in the installation position.
(3) Rotate the camera to the lock position, align the red dots, the camera is installed.
Pic 2 Skyport Installation
Removal steps:
(1) To remove camera, press and hold the release button, rotate the camera in the opposite
direction until the red point is aligned with the white point, then remove the camera;
(2) Replace the SkyPort cover and lens cover.
Installation Method 2:
(1) There are four M3 threaded holes at the bottom of the camera with 6 mm depth, and the
threaded hole center is located on the outer circle with the diameter of 124 mm. The bottom of
the mounting hole is equipped with 4 damping balls.
(2) Users can design installation structures according to flight platforms of different structures,
and the installation methods are flexible and diverse.
Pic 3Camera Fixing Hole Position

6
2.3 Camera Connection
Pic 4Camera Cable
J30J-15P Definition:
3. Camera Operation
3.1 Powering On
The camera is powered directly from the drone and is switched on and off automatically. The
suggested power supply voltage is DC 12V-48V. When the camera is working, the instantaneous
power of the power supply must reach more than 60 W to ensure the normal operation of the
device.
Indice
Altri manuali SHARE Macchina fotografica digitale


