SitOnit Seating EDGE MOUNT Manuale utente
C6453 Rev. C
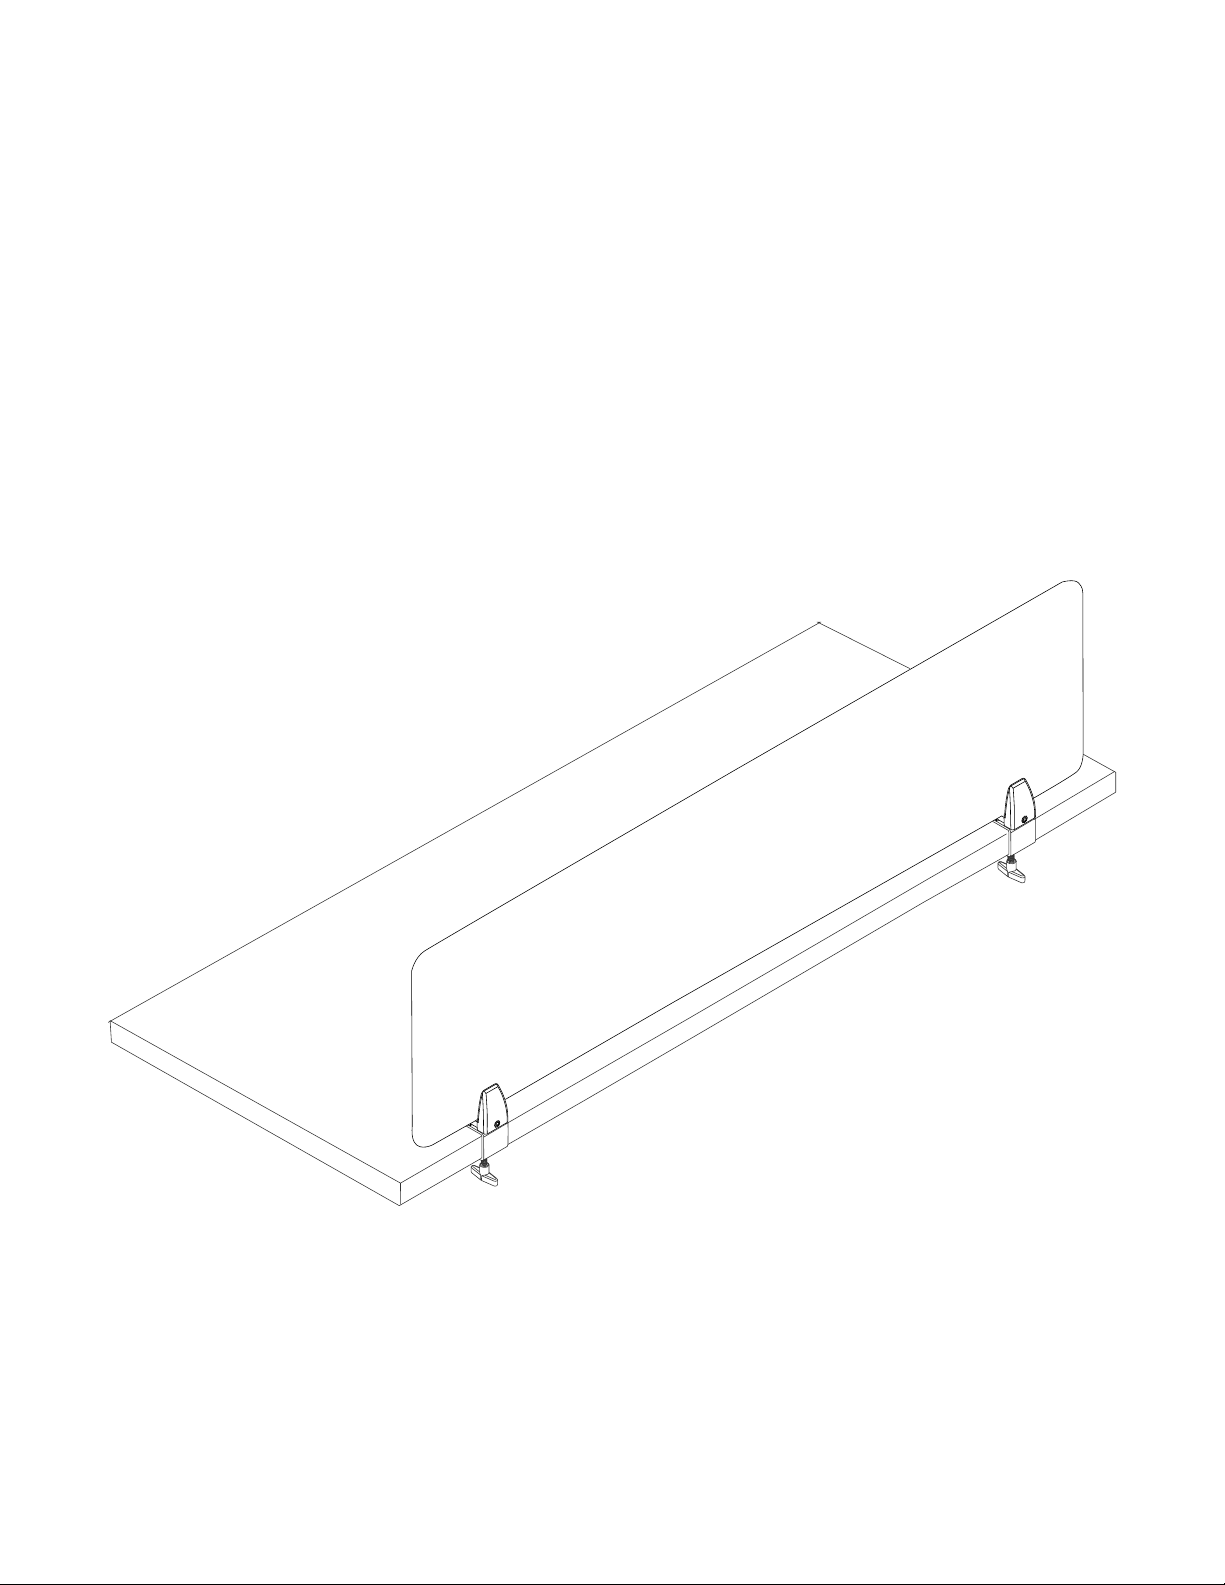
EDGE MOUNT
SCREEN ASSEMBLY INSTRUCTIONS
Now more than ever, our workspaces should be safe—free from distractions, contagions
and anything that gets in the way of productivity. This collection of clear and frosted
acrylic, fabric and whiteboard screens stands ready to provide the privacy, protection and
peace of mind you need in a landscape where the way we interact changes every day.
To report any issues with this product, please contact our customer service department at (888) 274-8664.
For more information, visit www.sitonit.net
EDGE MOUNT SCREEN ASSEMBLY INSTRUCTIONS
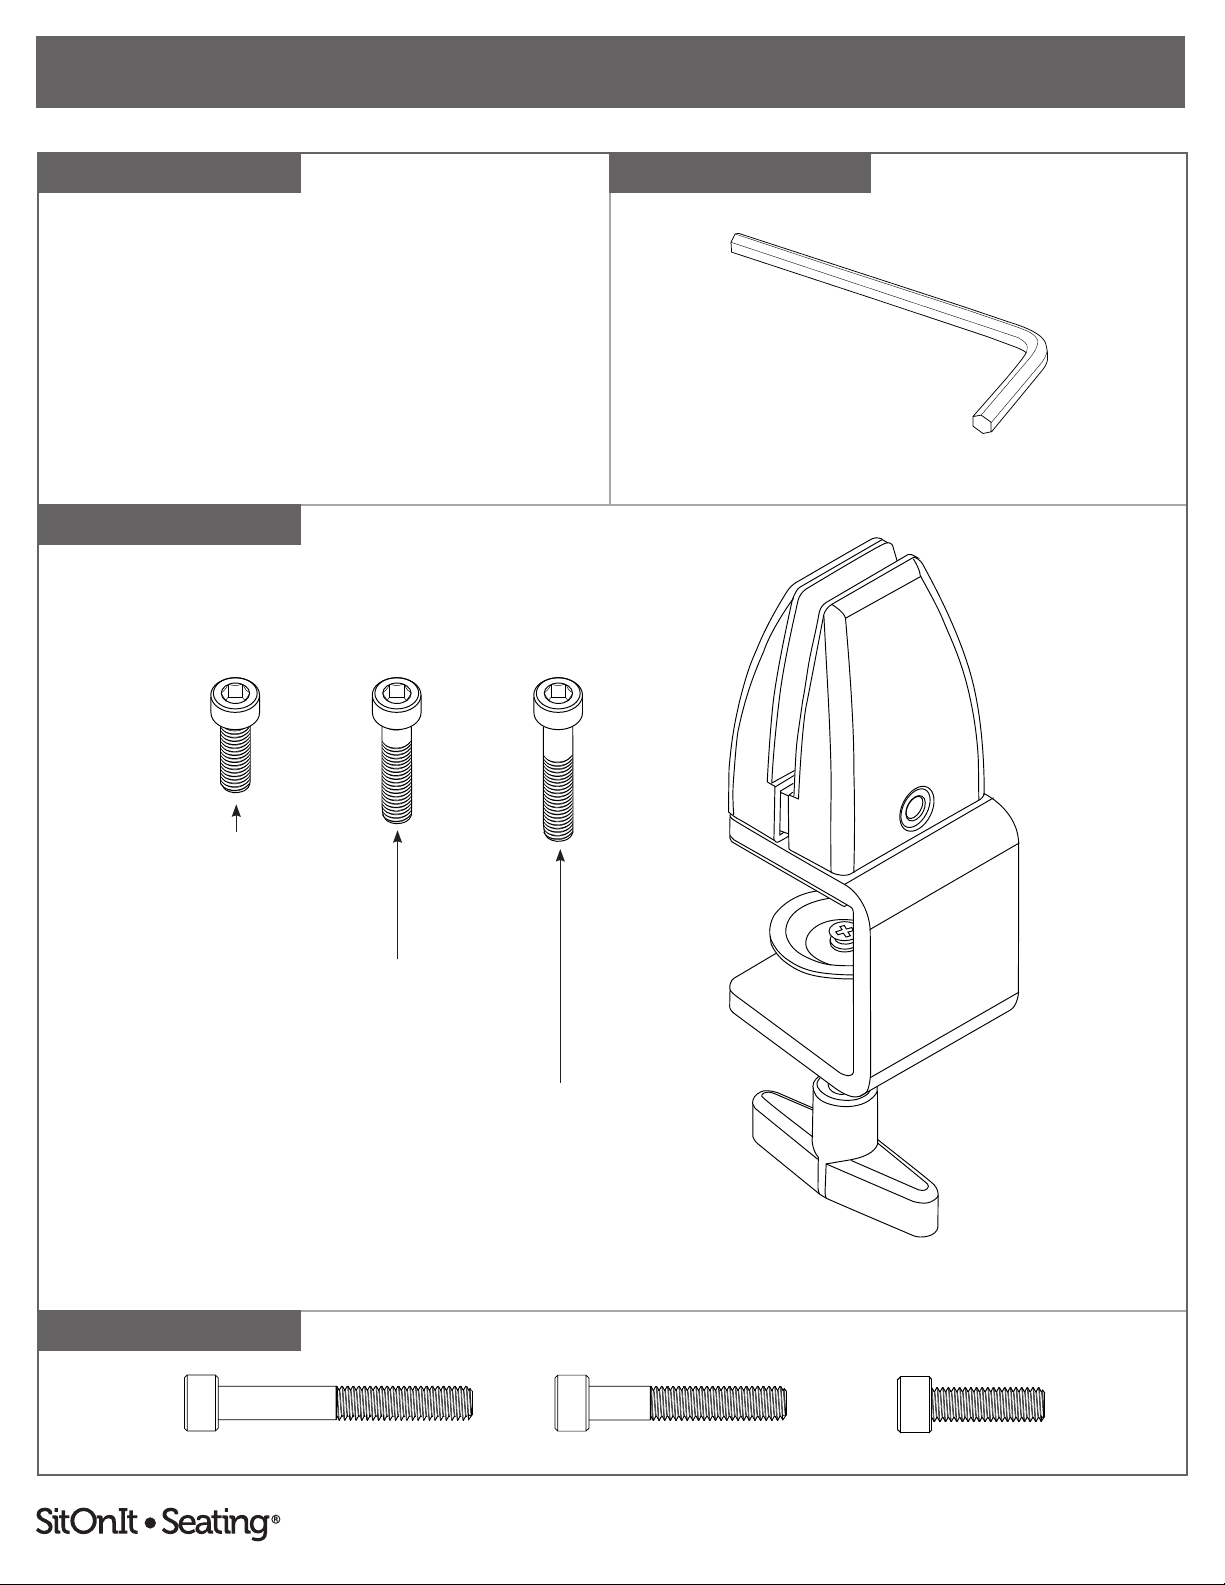
REQUIRED TOOLSCOMPONENT LIST
COMPONENTS
1:1 SCALE
2
EDGE MOUNT PARTS
Hex L-Key, 5 mm Size
M6 × 45 mm Screw M6 × 35 mm Screw M6 × 20 mm Screw
Per Mount:
• Edge Mount (1)
• M6 × 20 mm Screw (1)
• M6 × 35 mm Screw (1)
• M6 × 45 mm Screw (1)
(The M6 × 45 mm screw is located in a separate kit with fabric screens.)
Edge Mount
M6 × 20 mm Screw
M6 × 35 mm Screw
M6 × 45 mm Screw
To report any issues with this product, please contact our customer service department at (888) 274-8664.
For more information, visit www.sitonit.net
EDGE MOUNT SCREEN ASSEMBLY INSTRUCTIONS
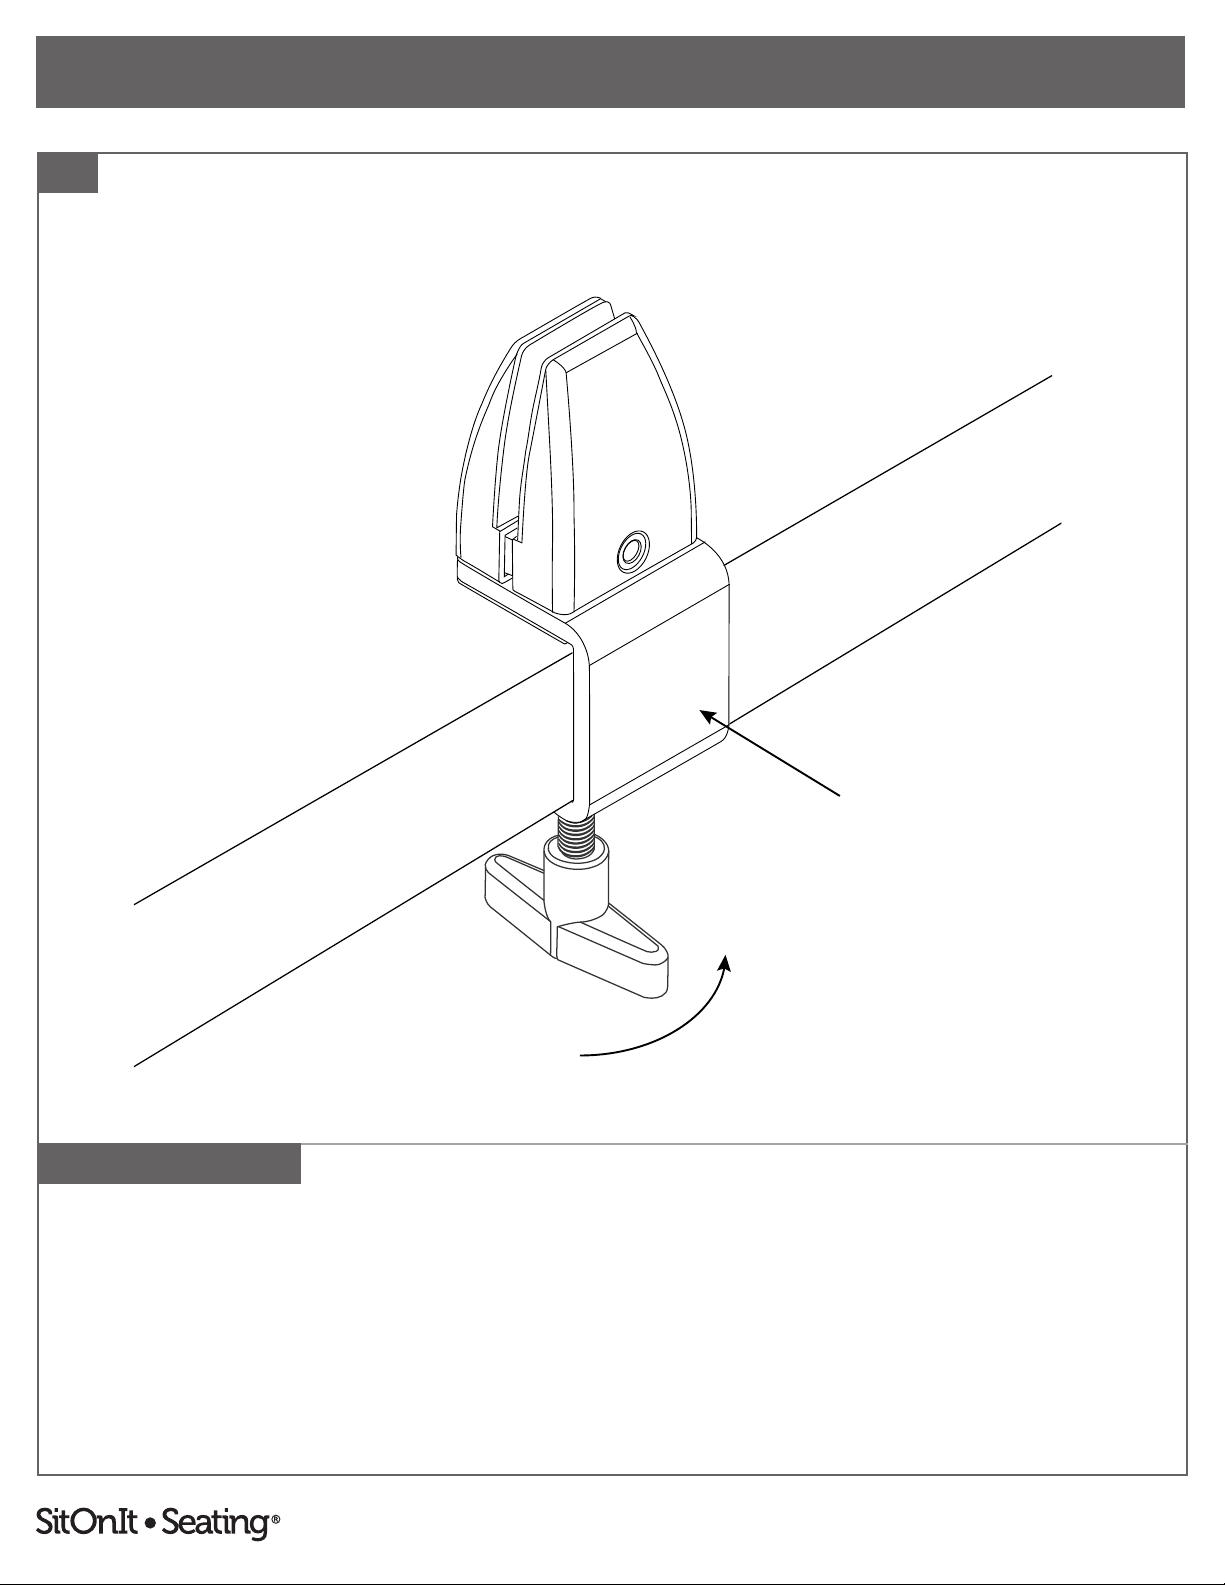
STEPS
1
3
1. Use the knob to loosen the edge mount's C-bracket, slide the mount onto the edge of the desk
and retighten to attach the mount securely.
Parts and instructions are per mount. There are two mounts included with 17"–54"
screens or three mounts included with 60"–72" screens.

To report any issues with this product, please contact our customer service department at (888) 274-8664.
For more information, visit www.sitonit.net
EDGE MOUNT SCREEN ASSEMBLY INSTRUCTIONS
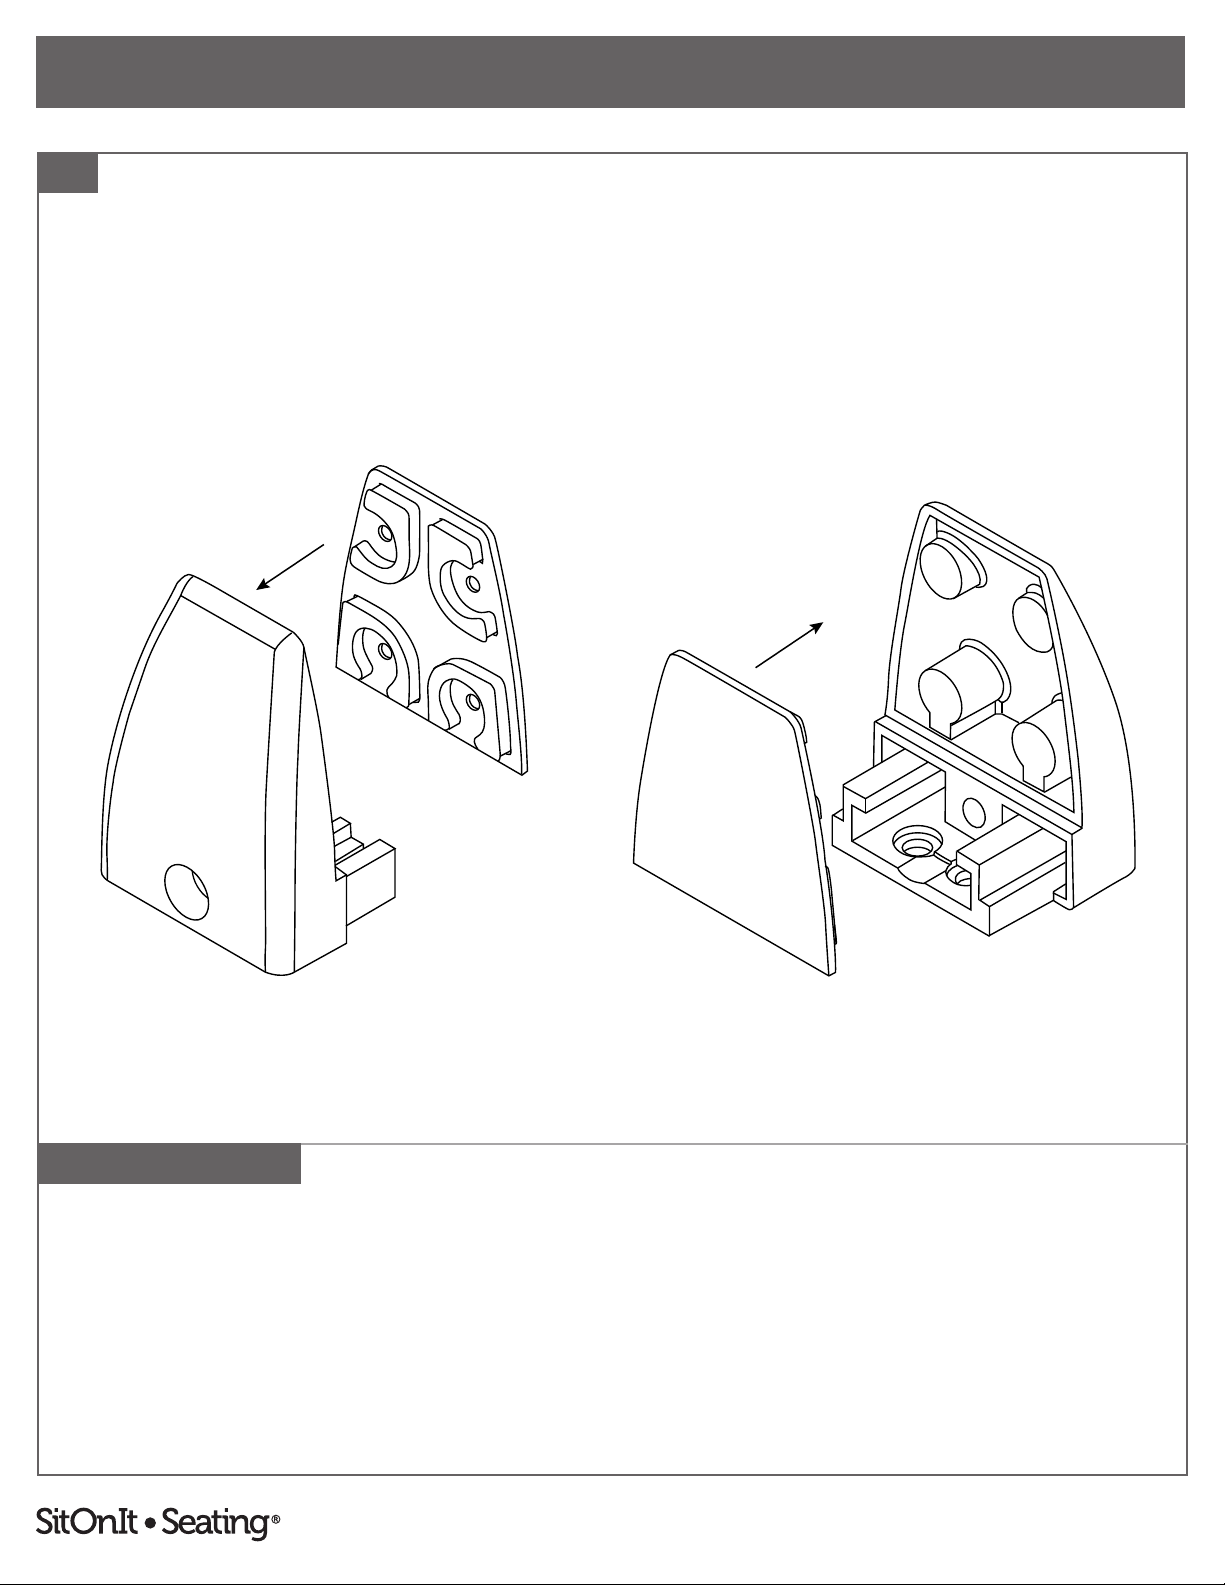
STEPS
2
4
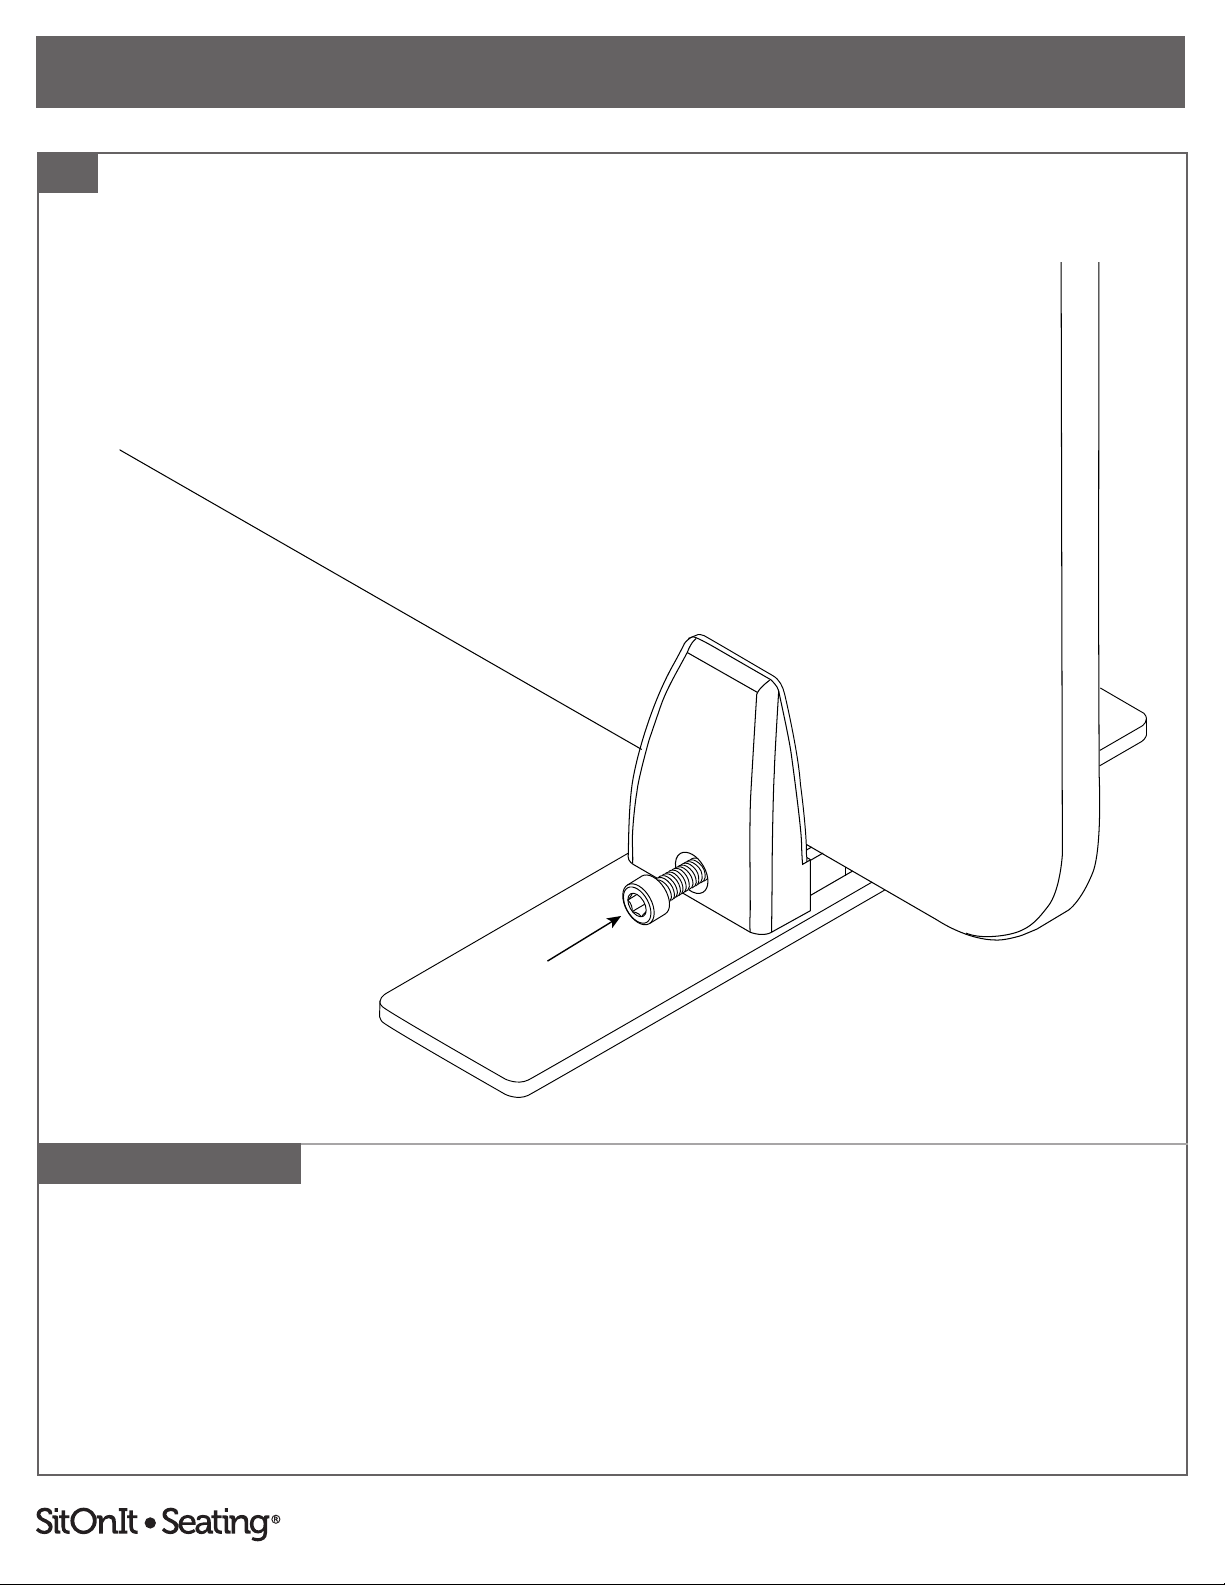
2. Insert screen into edge mount. Tighten the edge mount using the M6 screw that is appropriate
for the screen material and a 5 mm hex L-key. Do not close. Make sure to leave a gap for
the screen.
Use a M6 × 45mm screw for fabric screens, a M6 × 20 mm screw for acrylic screens or a
M6 × 35 mm screw for whiteboard screens. Note: M6 × 45 mm screws come in a separate kit
with fabric screens.
Parts and instructions are per mount. There are two mounts included with 17"–54"
screens or three mounts included with 60"–72" screens.

C6450 Rev. B
FREESTANDING MOUNT
SCREEN ASSEMBLY INSTRUCTIONS
Now more than ever, our workspaces should be safe—free from distractions, contagions
and anything that gets in the way of productivity. This collection of clear and frosted
acrylic, fabric and whiteboard screens stands ready to provide the privacy, protection and
peace of mind you need in a landscape where the way we interact changes every day.

To report any issues with this product, please contact our customer service department at (888) 274-8664.
For more information, visit www.sitonit.net
FREESTANDING MOUNT SCREEN ASSEMBLY INSTRUCTIONS
REQUIRED TOOLSCOMPONENT LIST
COMPONENTS
1:1 SCALE
2
FREESTANDING MOUNT PARTS
Hex L-Key, 5 mm Size#2 Phillips Screwdriver
M6 × 45 mm Screw M6 × 35 mm Screw M6 × 20 mm Screw M4 × 6 mm Screw
Per Mount:
• U-Bracket (2 Halves)
• Gasket (2)
• Rectangular Base (1)
• M4 × 6 mm Screw (2)
• M6 × 20 mm Screw (1)
• M6 × 35 mm Screw (1)
• M6 × 45 mm Screw (1)
(The M6 × 45 mm screws are located in a
separate kit with fabric screens.)
M4 × 6 mm Screws
U-Bracket (Side A) U-Bracket (Side B)Gaskets
Rectangular Base
M6 × 20 mm Screw
M6 × 35 mm Screw
M6 × 45 mm Screw
To report any issues with this product, please contact our customer service department at (888) 274-8664.
For more information, visit www.sitonit.net
FREESTANDING MOUNT SCREEN ASSEMBLY INSTRUCTIONS
STEPS
1
3
Parts and instructions are per mount. There are two mounts included with 17"–54"
screens or three mounts included with 60"–72" screens.
1. Apply one gasket to each side of the U-bracket.

To report any issues with this product, please contact our customer service department at (888) 274-8664.
For more information, visit www.sitonit.net
FREESTANDING MOUNT SCREEN ASSEMBLY INSTRUCTIONS
STEPS
2
4
Parts and instructions are per mount. There are two mounts included with 17"–54"
screens or three mounts included with 60"–72" screens.
FIGURE A
Fabric
FIGURE B
Acrylic/Whiteboard
2. One side of the U-bracket (side A) has screw holes. Attach the A side of the U-bracket to the
rectangular base using two M4 × 6 mm screws and a #2 Phillips screwdriver.
Note: The base is drilled asymmetrically. For fabric screens, the xed half of the U-bracket will
face towards the long side (see gure A). For acrylic or white board screens, the xed half of
the U-bracket will face towards the shortside (see gure B).

To report any issues with this product, please contact our customer service department at (888) 274-8664.
For more information, visit www.sitonit.net
FREESTANDING MOUNT SCREEN ASSEMBLY INSTRUCTIONS
STEPS
3
5
Parts and instructions are per mount. There are two mounts included with 17"–54"
screens or three mounts included with 60"–72" screens.
3. Slide the B side of the U-bracket onto the A side. Attach the two sides together using the M6
screw that is appropriate for the screen material and a 5 mm hex L-key. Do not close. Make
sure to leave a gap for the screen.
Use a M6 × 45mm screw for fabric screens, a M6 × 20 mm screw for acrylic screens or a
M6 × 35 mm screw for whiteboard screens. Note: M6 × 45 mm screws come in a separate kit
with fabric screens.
To report any issues with this product, please contact our customer service department at (888) 274-8664.
For more information, visit www.sitonit.net
FREESTANDING MOUNT SCREEN ASSEMBLY INSTRUCTIONS
STEPS
4
6
Parts and instructions are per mount. There are two mounts included with 17"–54"
screens or three mounts included with 60"–72" screens.
4. Insert the screen into the assembled freestanding mounts and close the U-brackets by
tightening the M6 screws with the 5 mm L-hex key. Continue until the screen is secure.
Altri manuali SitOnit Seating Attrezzature per ufficio


