SOLGAARD HomeBase Manuale utente

HomeBase
WELCOME TO

Product Detail ...............................................................................................
Safety Instructions .......................................................................................
Package Contents .......................................................................................
Installation Guide .......................................................................................
Setup Guide ..................................................................................................
Charging Detail ...........................................................................................
Specifications ...............................................................................................
Warranty .........................................................................................................
Important + FCC Warning .......................................................................
1
2
3
4
5
6
7
8
9
1
Index
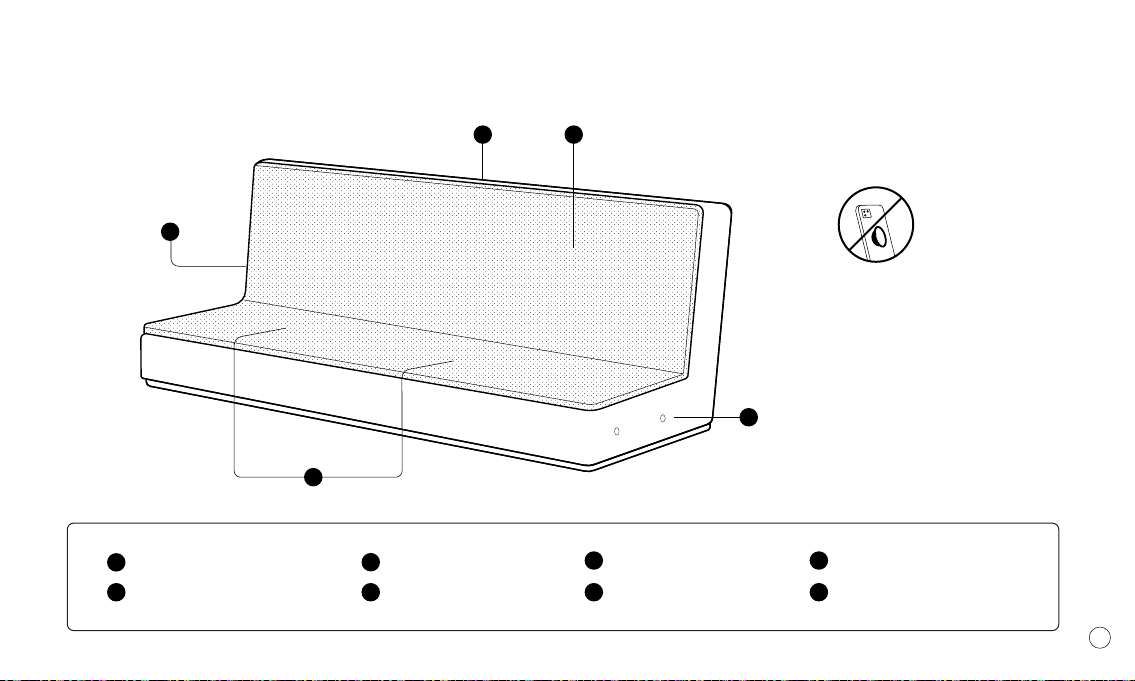
Compatible Phone Cases
1
HomeBase can charge your phone with
cases up to 3 mm thick. Some phone
cases accessories will interfere with
wireless charging technology. These
must be removed before charging
(these include a metal cases).
LED Lights
USB-C Charging Port
2 x 3 Coil Pads
1
2
3
AC Adapter
Magneticv
Acoustic Chamber
4
5
6
Magneticv
Acoustic Chamber
5
6
Product Detail
1
1
1 1
1
IMPORTANT
Read all instructions and warnings before using this product. Improper use may
result in product damage, excess heat, toxic fumes, fire or explosion, for which
damages Solgaard is not responsible.
1. In order to achieve the best charging eect, please place your device at the
correct position to charge.
2. This charger is only suitable for indoor use, beware of rain and exposure.
3. Please use the original charger to charge or other adapter with output over 30W.
4. Avoid placing metal objects in the working area when charging, and do not let
the charger drop o or put heavy objects on it.
Install HomeBase according to instructions provided. We are not responsible for
injury or damage resulting from incorrect installation or use. Our products are for
use only as wall-mounted shelves and are not intended for any other purposes. For
assistance with installation or missing parts, please contact us.
WIP
WIP
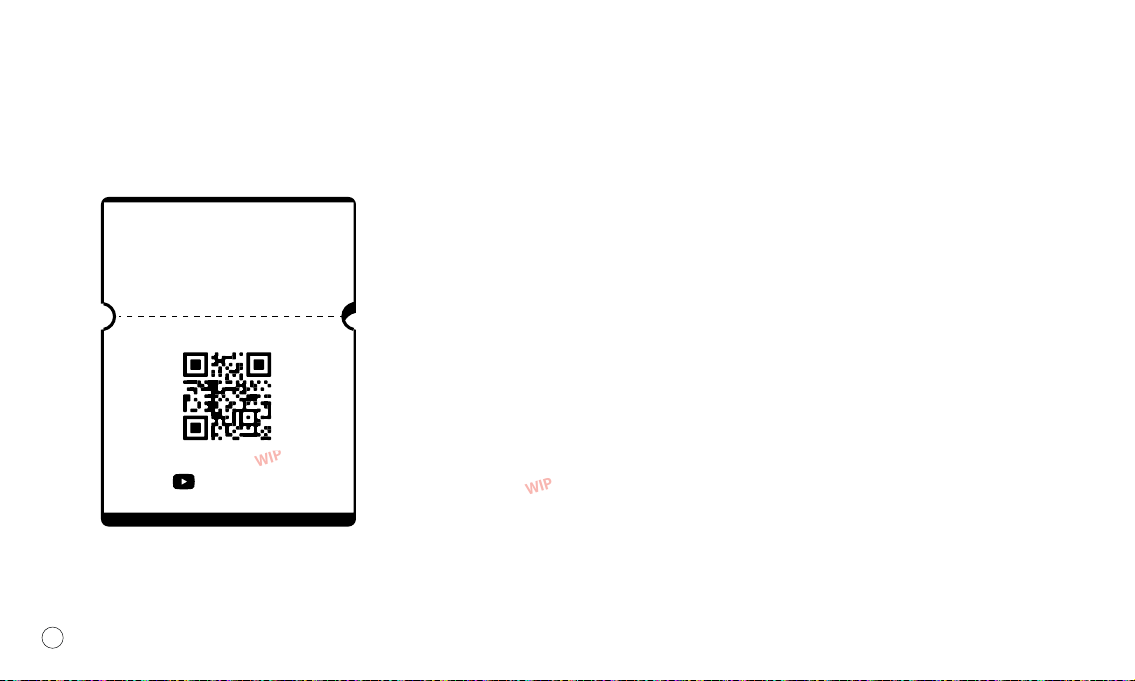
Quick Setup
Video Tutorial
1x HomeBase
Safety Instructions
1
need ref image
1
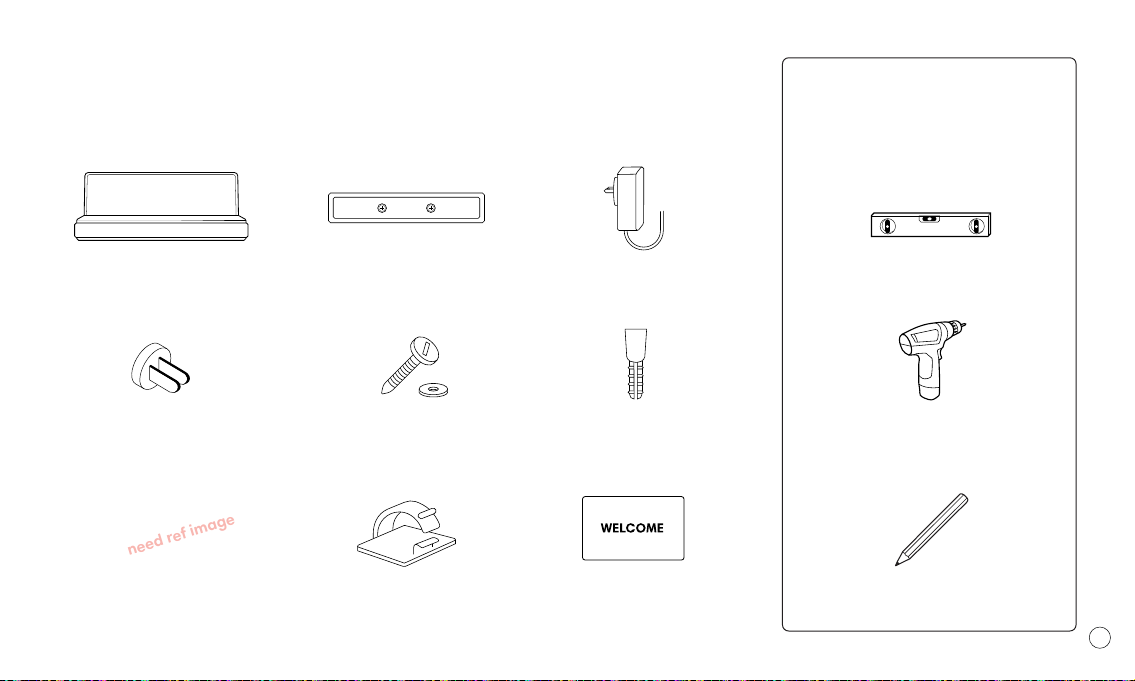
1x HomeBase 1x Wall Mount 1x Charger
3x International Adapters 2x Screws + Washers 1x Expansion Bolt
1x Apple Watch Puck 1x Cable Tie 1x User Manual Pencil
Level
Tools suggested for
this installation
(not included)
Power Drill / Screwdriver
Package Contents

1
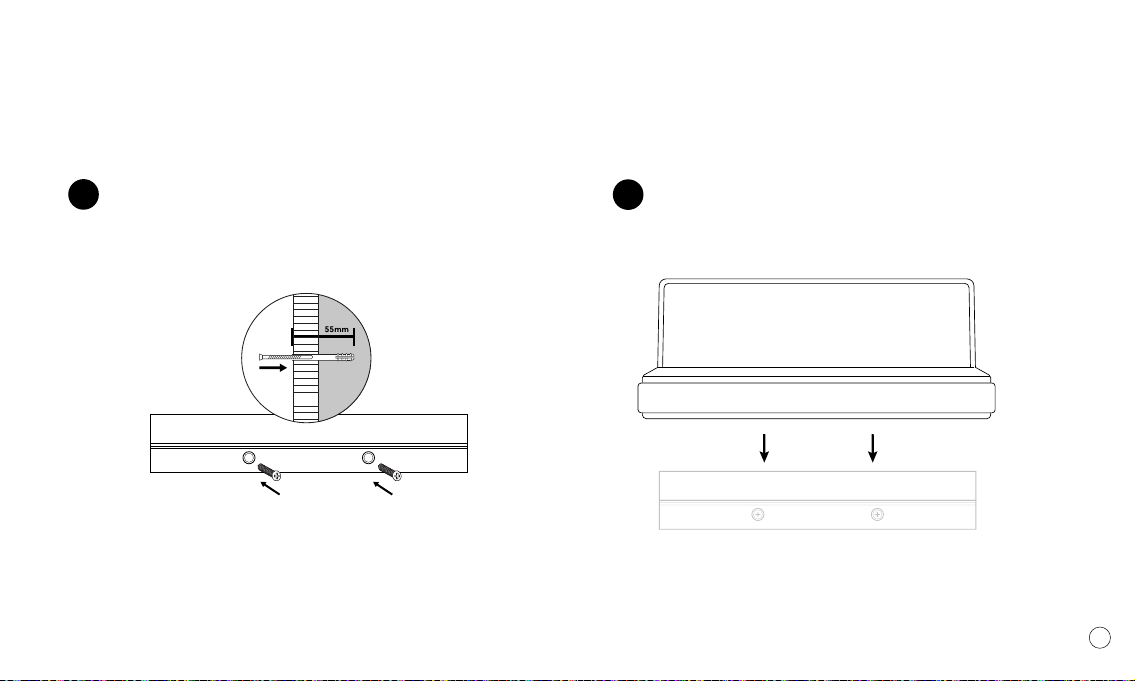
Installation Guide – Wall Mounting
Choose the desired position to mount the Homebase to
the wall and make marks on the wall through the two oval
holes on the wall mount.
Using a power drill (Screwdriver?), drill holes into the wall
at the pencil marks and insert the drywall anchors with a
hammer until they are securely in place flush with the face
of the wall.
1
Tip: Use a pencil and level Tip: Ensure the holes are level
2
Wall Mounting Continued
1
4
3Place the wall mount on the wall, then tighten the screws
firmly into the pilot holes till they are flush.
Slide HomeBase into the wall mount from above until it
hooks onto the back of the homebase ridge.
Tip: Do not over-tighten screw. Improper tightening could
reduce the holding power of wooden screw
55mm
wall

1
Show watch being
installed
Mention here about storage of the cable and how to
connect the puck to the top of the unit.
Connecting The Apple Watch Puck
HomeBase comes with mutli-national adapters. Select your
adapter and attach to the underside of the plug and enter
the plug into an electrical outlet. Plug the power cord into the
side of your HomeBase.
Once power is connected, the two LEDs on the shelf will
illuminate for several seconds. Once these turn o you are
now ready to start charging.
Connect The Adapter
Setup Guide
Power Cord

Cable Ties
We designed homebase to eliminate the cable clutter,
inside the box you can use the 3M adhesive cable ties to
organise and cleanly run the cord down the wall.
1
Using The Key Magnets
Using Solarbank / Speaker Grill
Mention there are magnets on either side. Keep organised
when returning home with the magnetic hook for keys and
a home for your everyday tech.
HomeBase includes a built-in amplifier - when the Solar
Boombox plays into the shelf it amplifies the sound for an
enriched audio experience.
Setup Guide

The indicator light will be a
breathing, white light when
charging is initiated.
Indicator light will be solid white
when fully charged.
10W
7.5W
5W
2.5W
2.5W
Samsung
iPhone
Google / Huawei / Other
Airpods
Apple Watch (wired)
WattageCompatible Device
HomeBase can power up to four devices at once. Two wirelessly
and two wired. To charge wirelessly, simply place your device
flat on the fabric and it will begin charging.
1
Homebase is equiped with 6 premium copper coils for maximum
charging. These are separated into sets of two on either side of
the shelf. LEDs indicate the charging state.
Charging Wirelessly
LEDs Breathing LEDs Solid
Wireless Charing works on any rotation.
Charging Orientation
Indice


