SoundEar SoundEar 3 Series Manuale utente
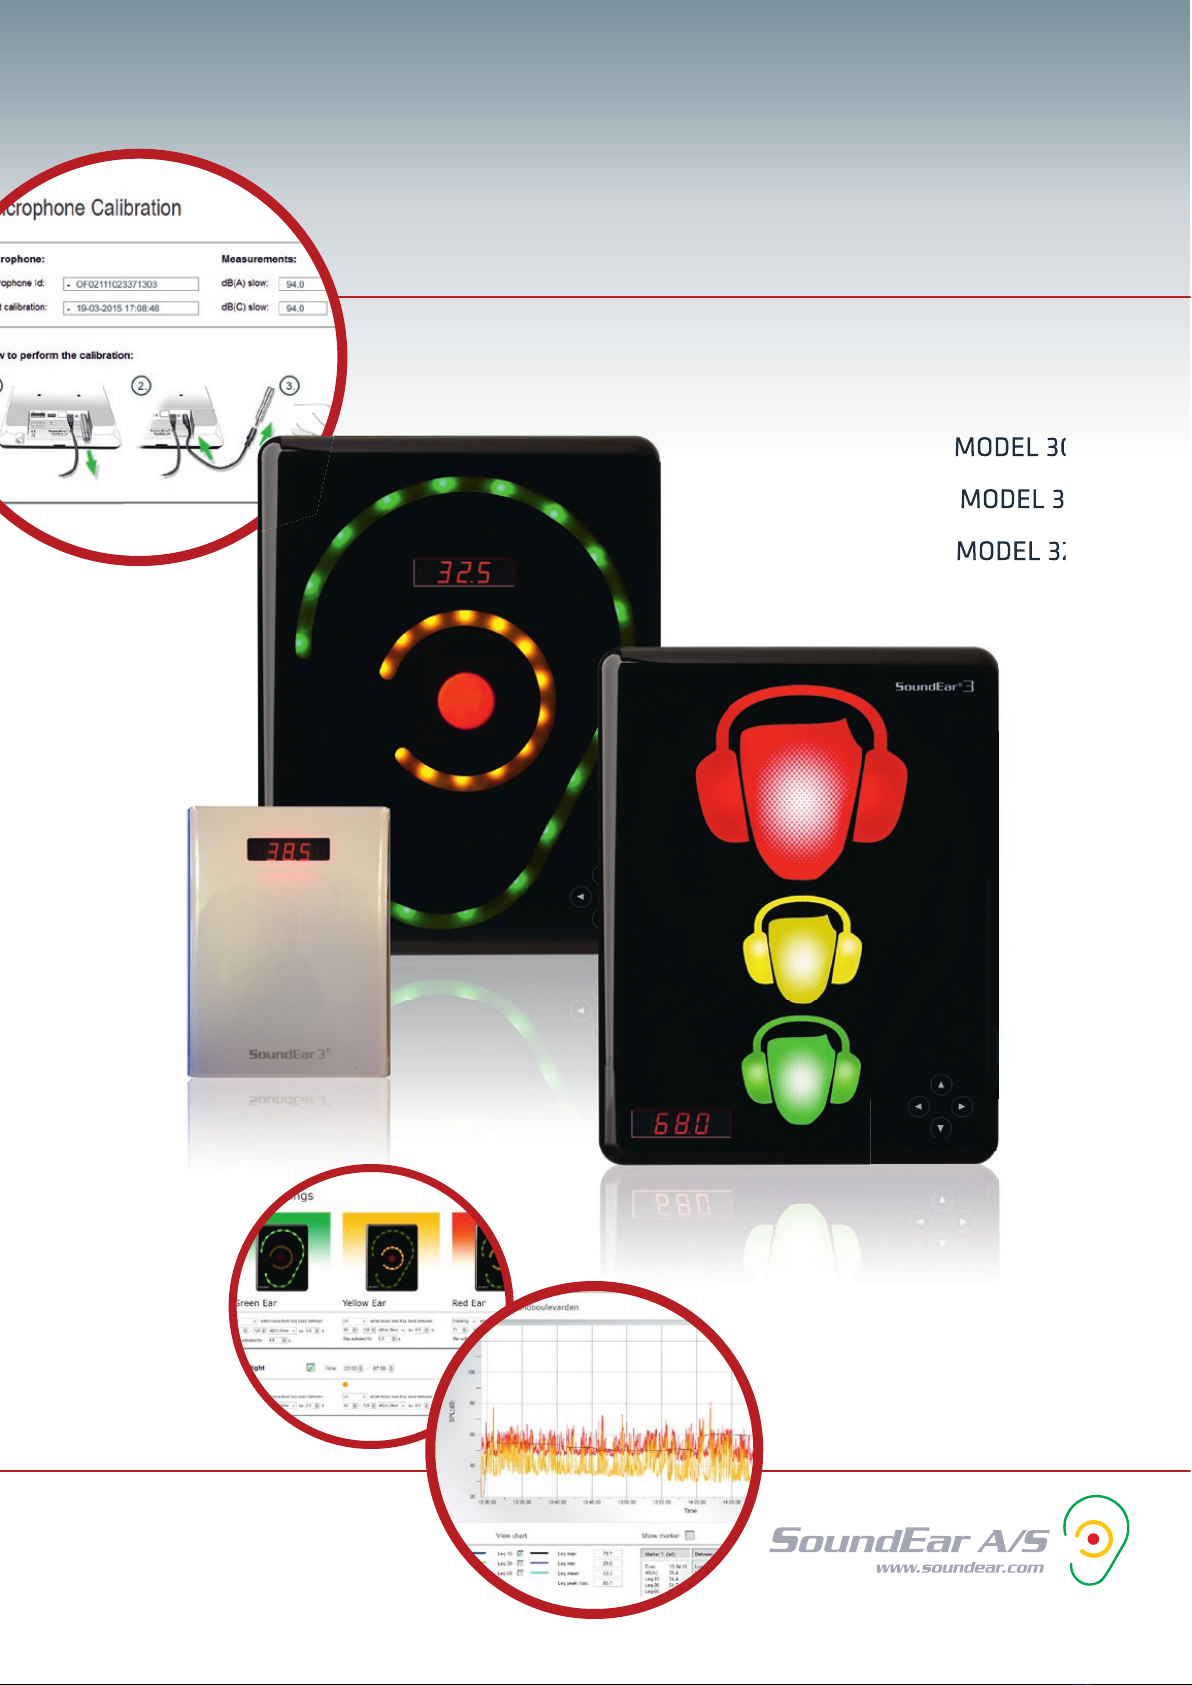
SoundEar®3
MANUAL – UK
MODEL 300
MODEL 310
MODEL 320
MODEL 300
MODEL 310
MODEL 320

2
TABLE OF CONTENTS
CONGRATULATIONS ON YOUR NEW SOUNDEAR®3 3
Box Contents 4
BEFORE YOU START 5
SoundEar®3 model 300 and 310 5
SoundEar®3 model 320 6
Mounting SoundEar®3 on wall 7
· Model 300 or model 310 7
· Model 320 7
Set time 7
Formatting the USB key 8
TOUCH DISPLAY 9
SOFTWARE 11
Software installation 11
Configuration of devices 12
Navigating the software 13
File 17
· Live measurements 17
· Open measurements 17
· Import from USB 19
· Save Settings 20
Log/Settings 20
· Device Info 20
· Log Settings 21
Display 22
· Display Settings 22
Light Settings 23
· Standard/ Day 23
· Night Settings 24
Advanced Settings 25
· Analog Output 25
· Microphone Calibration 27
SoundEar®3 User Manual 30
About SoundEar®3 30
Factory Settings 30
CHOOSING ALARM LEVELS 31
MAINTENANCE 31
· Disinfection / cleaning 31
APPLIANCES FOR SOUNDEAR 3 32
· SoundBuster 32
TECHNICAL SPECIFICATIONS 32
· SoundEar®3 33
SoundEar®3 – manual RetuRn to table of Contents
CONGRATULATIONS ON YOUR NEW
SoundEar®3
We are pleased that you selected one of our products to help you create
a better auditive environment for yourself and others. This instruction
manual provides information on how to take advantage of your product to
the fullest.
In order to fully understand the features and possibilities of SoundEar®3,
we advice you to read this manual carefully before you start using your
SoundEar®3.
Please find the latest updates for software and the manual on our web site
www.soundear.dk
For any questions or comments, please contact at: soundear@soundear.dk
Yours sincerely,
SoundEar A/S
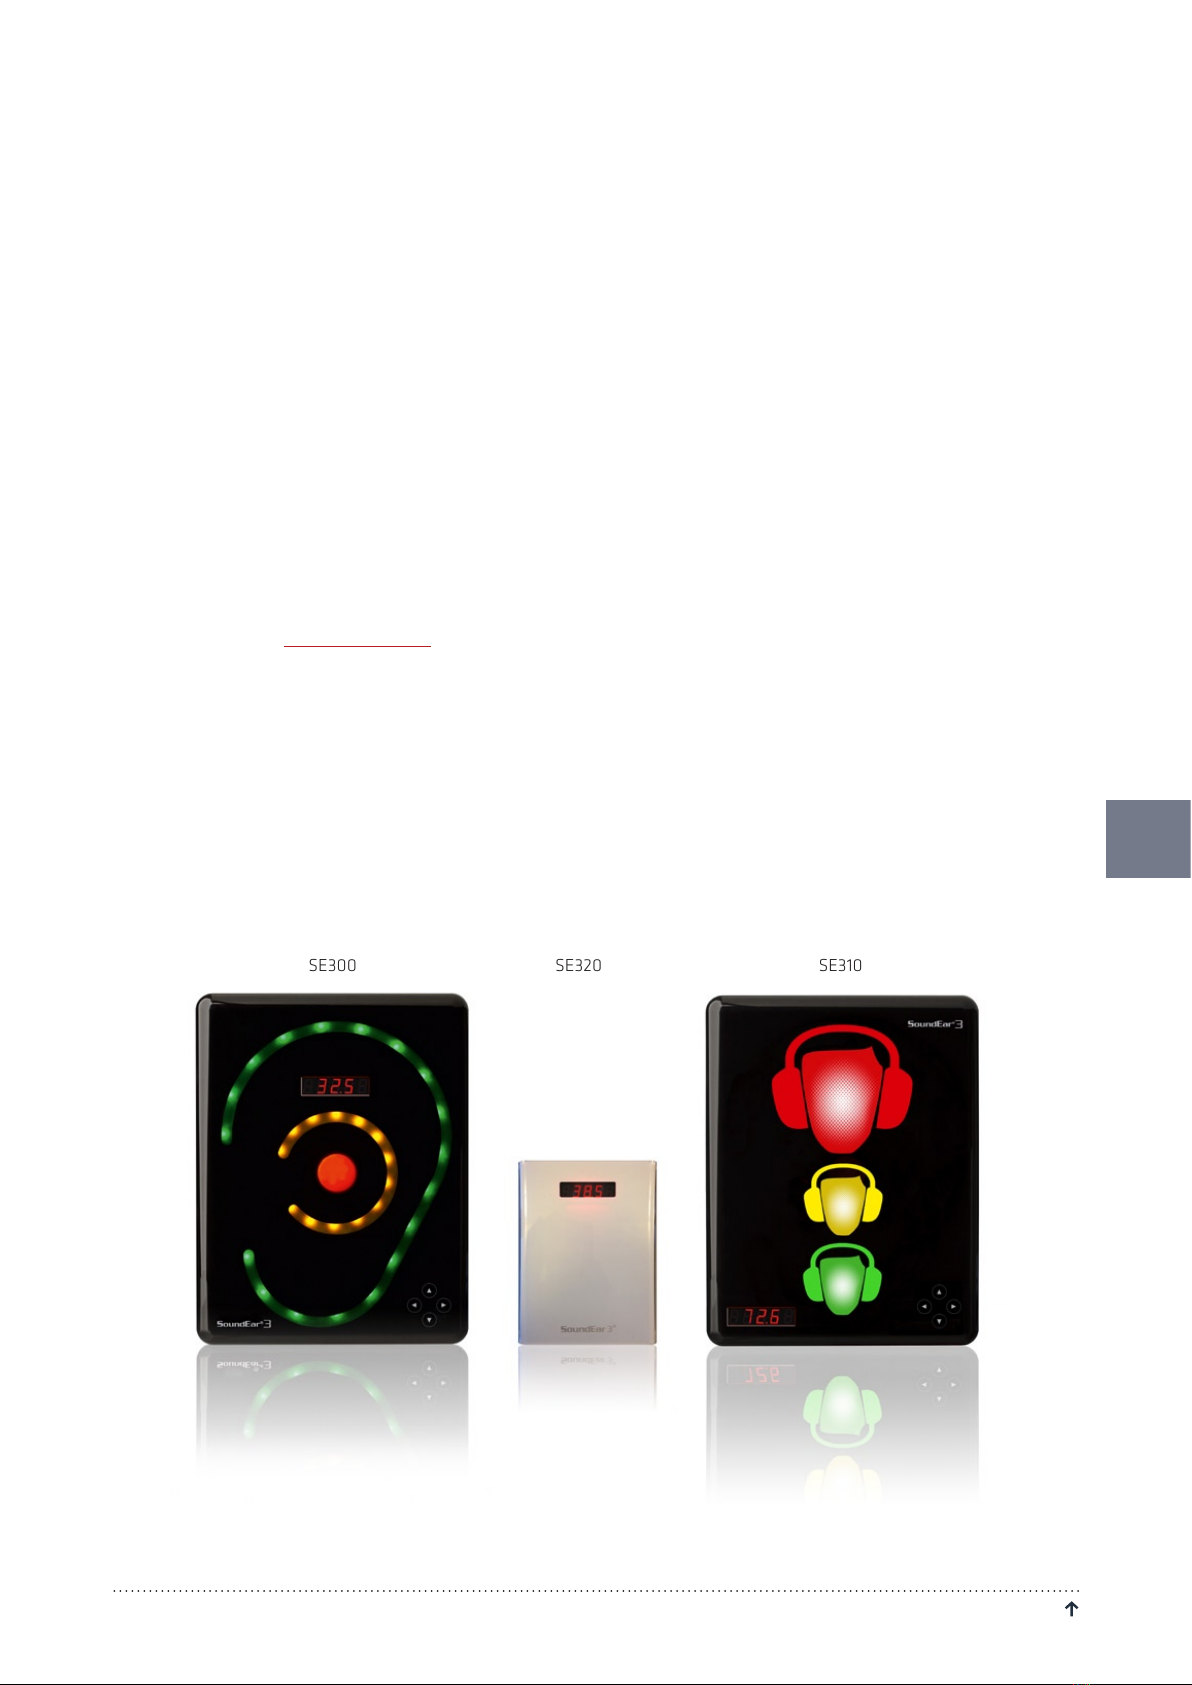
SE300 SE320 SE310
3
3 300 3 320 3 310
4
RetuRn to table of Contents S o u n d E a r ® 3 – m a n u a l
4
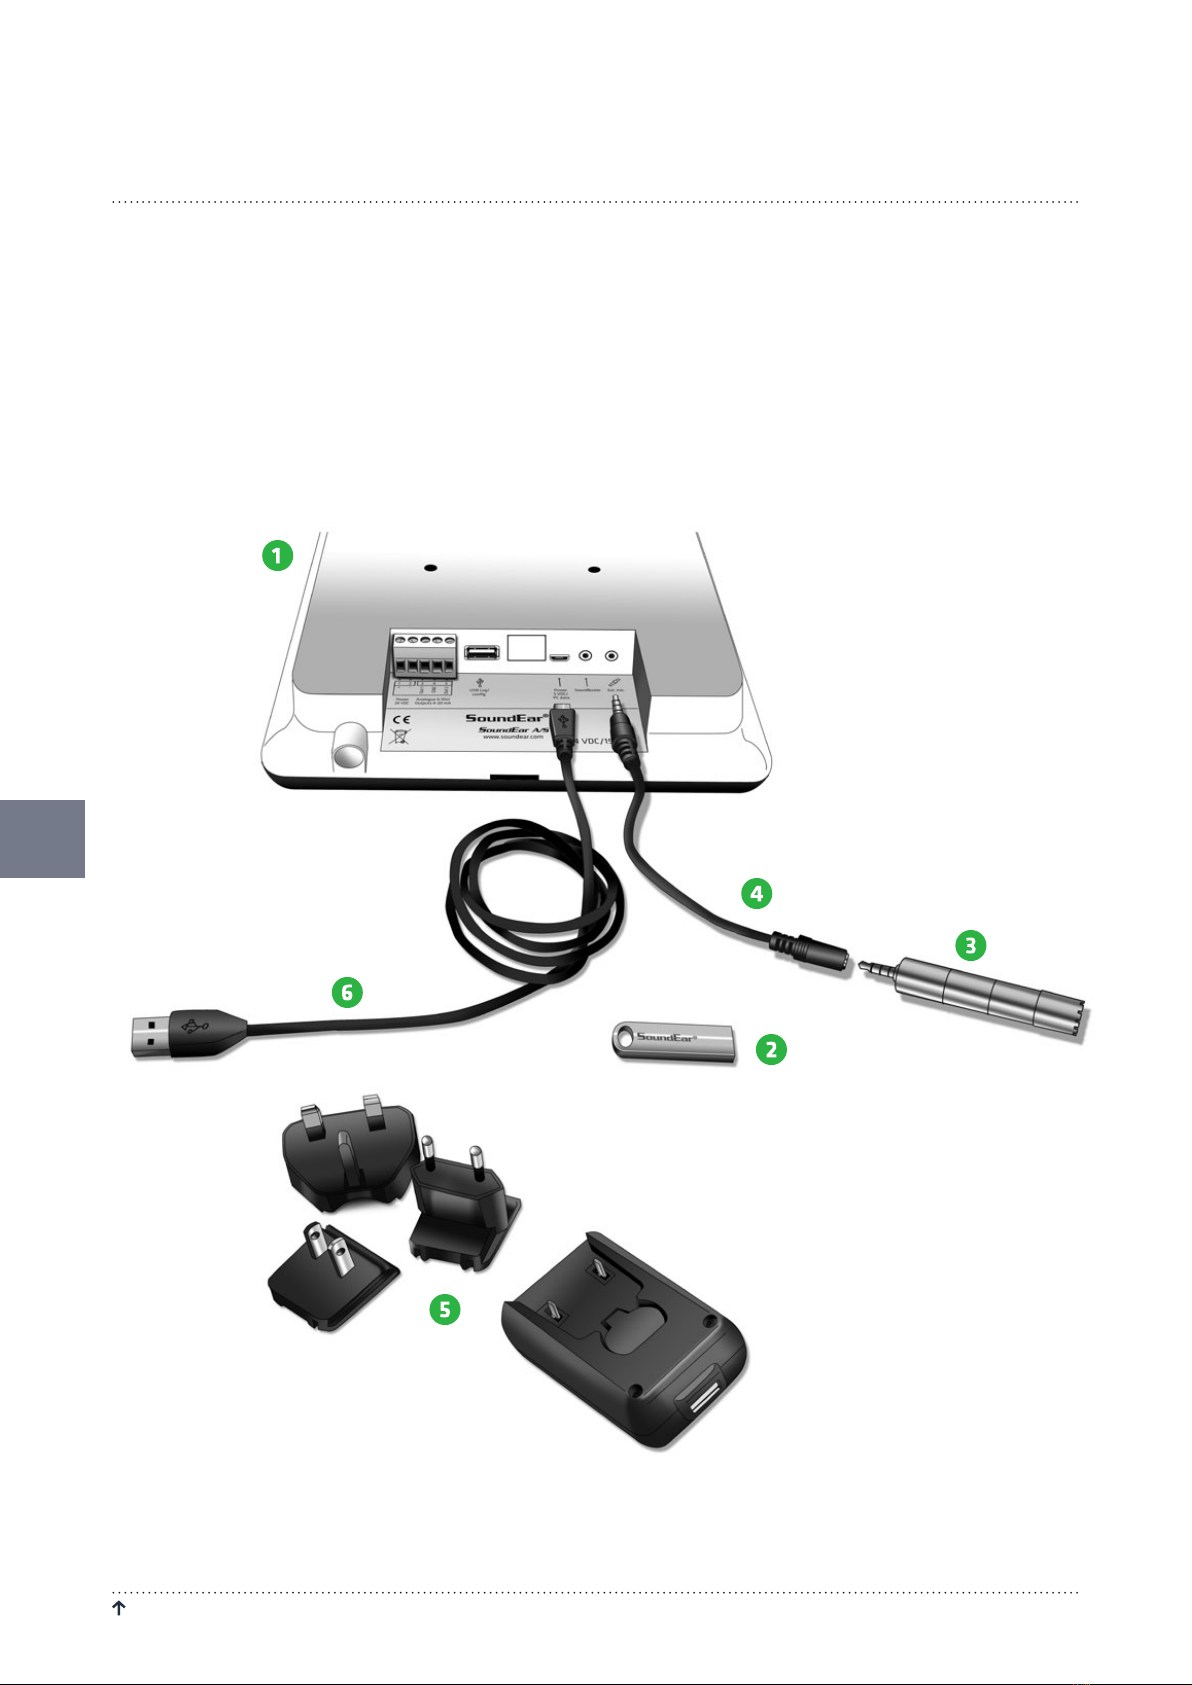
BOX CONTENTS
Check package contents depending on the package purchased.
1 SoundEar®3
2 USB key with software
3 External microphone
4 4 pole extension cable for calibration
5 Power adaptor with EU, US og UK plug
6 USB adaptor cable (A-plug or micro-B)
BEFORE YOU START
5
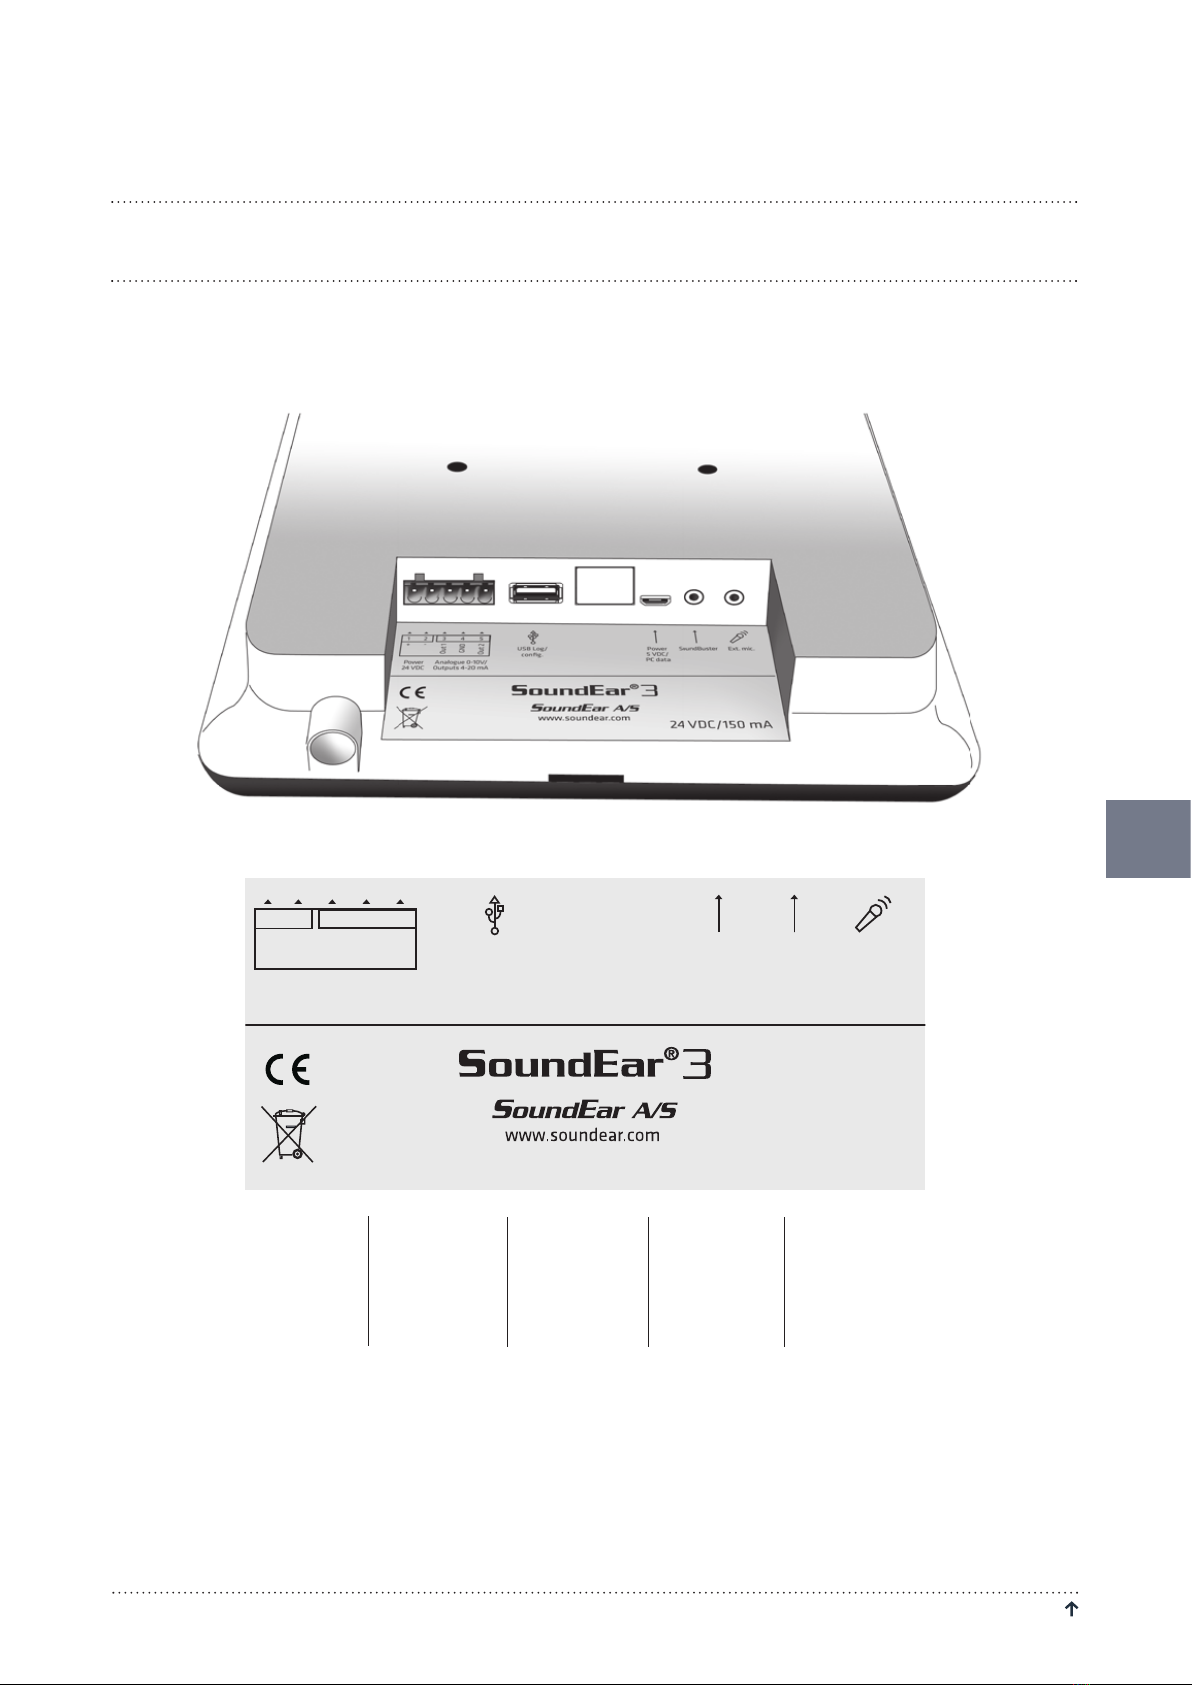
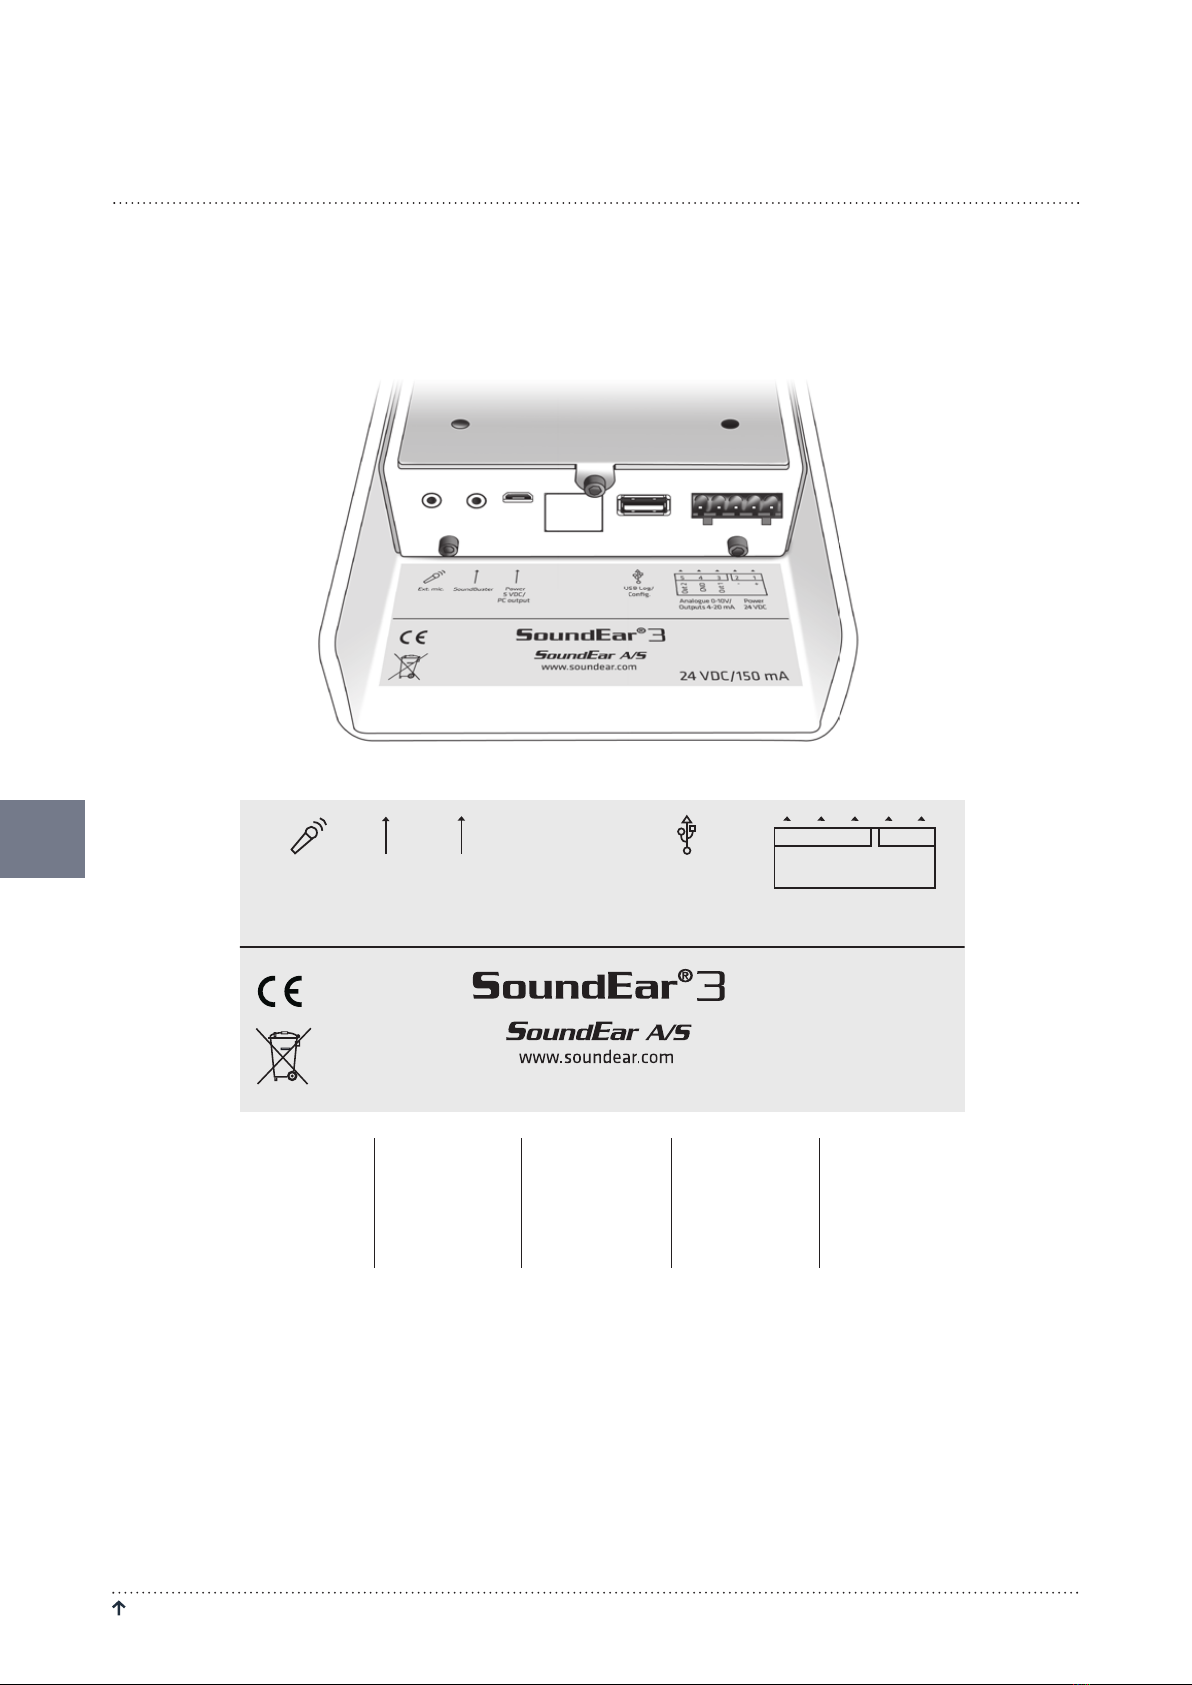
SOUNDEAR®3 – MODEL 300 AND 310
24 VDC/150 mA
USB Log/
config.
SoundBuster
Power
5 VDC/
PC data
Ext. mic.
Power
24 VDC
Analogue 0-10V/
Outputs 4-20 mA
3 4 5
+ -
Out 1
GND
Out 2
1 2
Analog output
for connection
to an external
system.
Export data
from the
internal memory.
Software
configuration.
Micro USB to
power adaptor
or PC.
SoundBuster
is a relay used
for controlling
connected
sound systems,
lamps etc.
Microphone
input.
SoundEar®3 – manual RetuRn to table of Contents
6
RetuRn to table of Contents S o u n d E a r ® 3 – m a n u a l
6
SOUNDEAR®3 – MODEL 320
24 VDC/150 mA
USB Log/
config.
SoundBuster Power
5 VDC/
PC data
Ext. mic.
Power
24 VDC
Analogue 0-10V/
Outputs 4-20 mA
5 4 3 2 1
- +
Out 2
GND
Out 1
Microphone input. SoundBuster is
a relay used for
controlling
connected sound
systems, lamps
etc.
Micro USB to
power adaptor
or PC.
Export data
from the internal
memory.
Software
configuration.
Analog output for
connection to an
external system.
SoundEar®3 – manual RetuRn to table of Contents
7
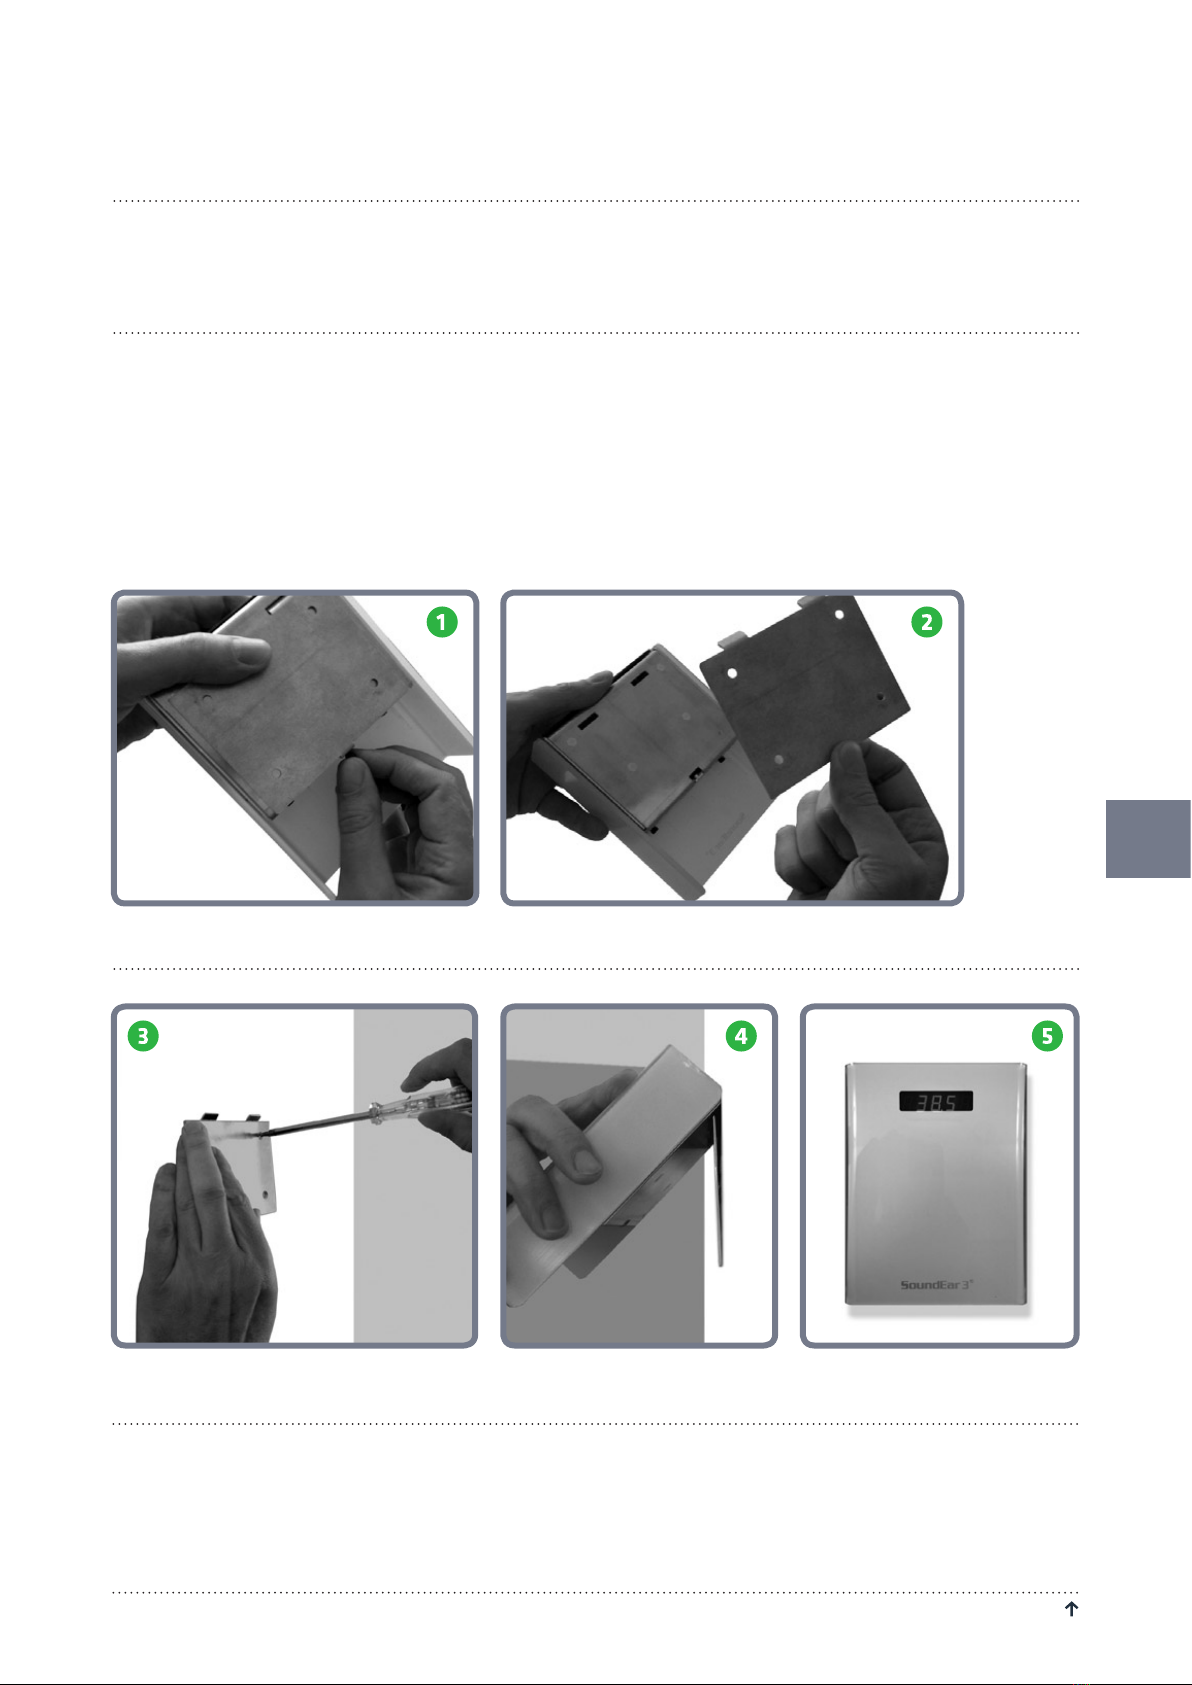
MOUNTING SOUNDEAR®3 ON WALL
When choosing a location for your SoundEar®3, please make sure to follow the instructions below:
1. Make sure not to cover the microphone at the bottom of the device.
2. Avoid placing SoundEar®3 close to sound absorbing materials.
DIRECTLY ON THE WALL:
Model 300 or 310
Check if there is an available plug socket nearby. Fasten a screw (diameter 8-9mm.) to the wall 150-200 cm above the
floor. Check if the cabinet is attached securely. If you are using a Vesa wall mount, please consult the included user
manual.
Model 320
Loosen the screw to remove the wall mount.
Fasten the wall mount to the wall with 4 screws. Hang SoundEar®3-320 onto the wall mount and fasten it with the
screw.
SET TIME
SoundEar®3 has a built-in time and date function that will
set automatically when you connect the device to your PC.
8
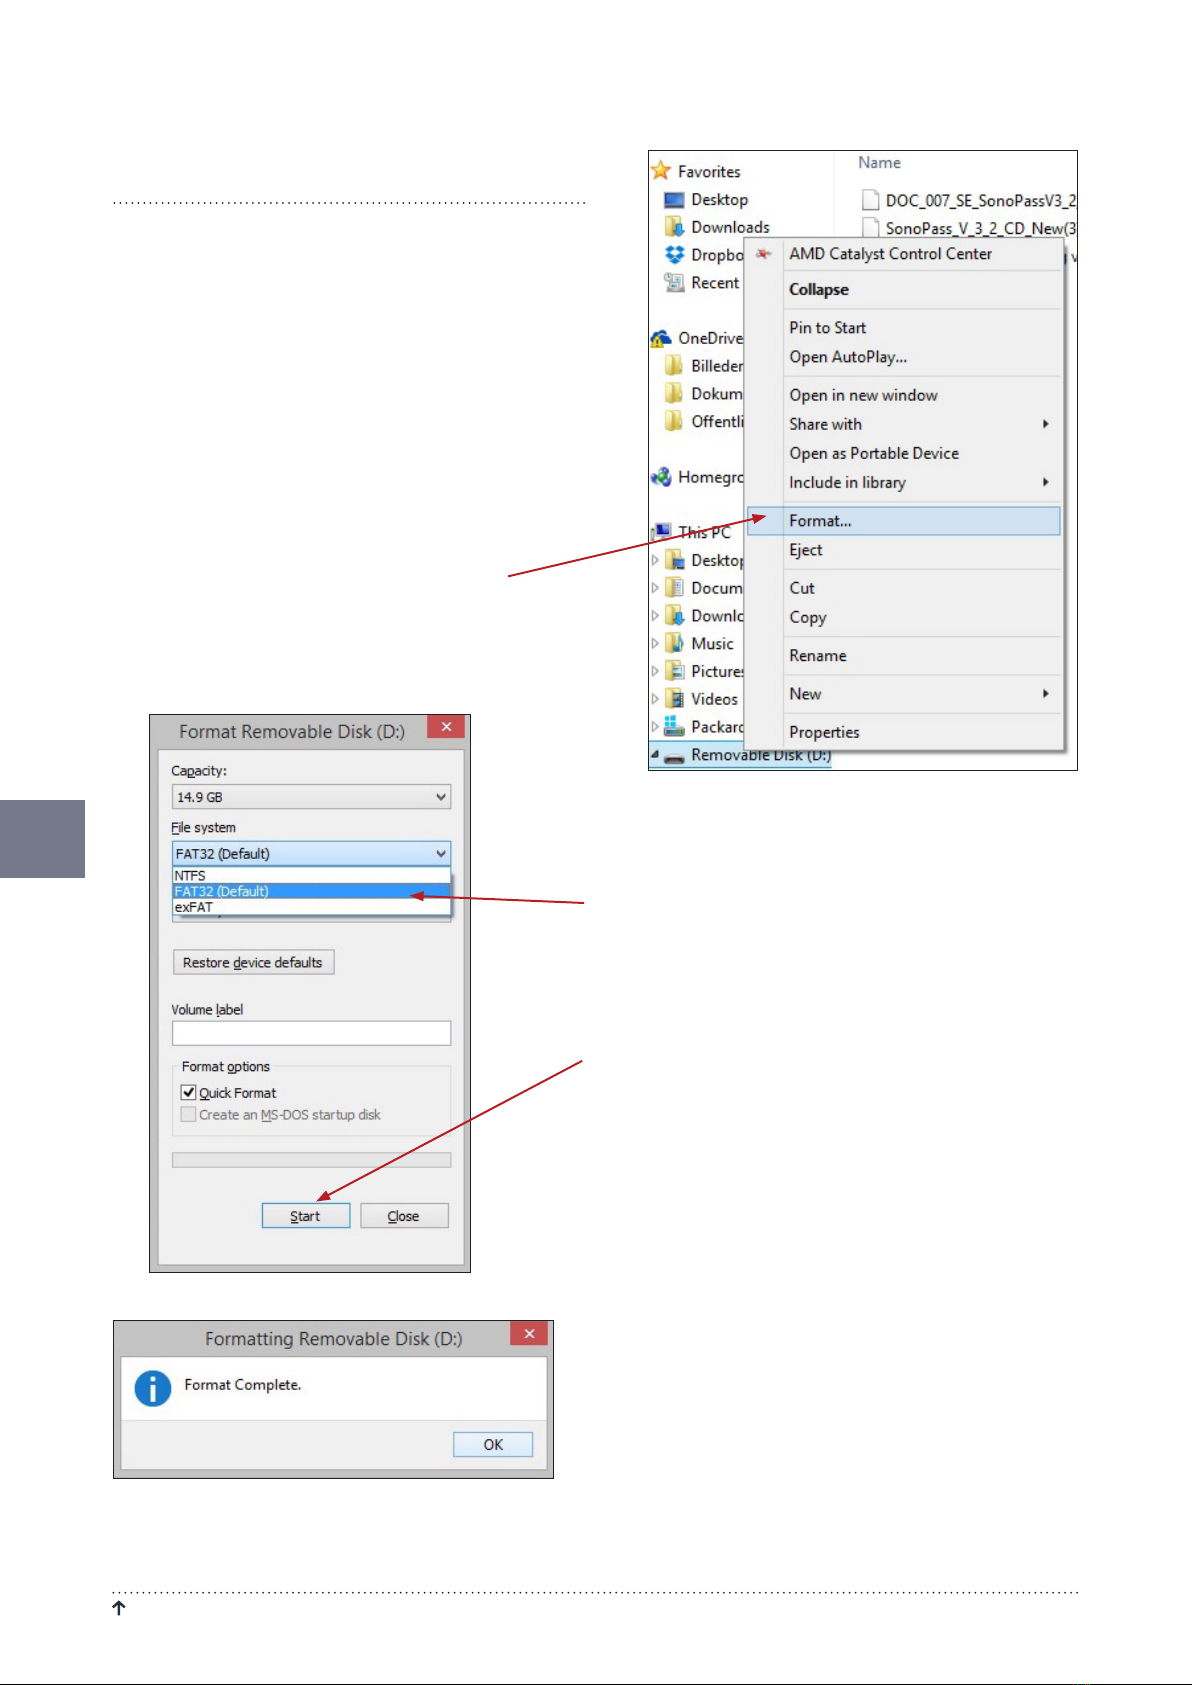
FORMATTING THE USB KEY
The USB key included is formatted in the format called
”FAT32”.
If you wish to use an alternative USB key with a larger
memory, it is important that it has the same format.
Please follow the steps below to format your USB key.
NOTE! Remember to export any files you may have on
your USB key before formatting, as the formatting will
override any existing files.
1. Connect the USB key to your PC.
2. Right-click on the USB drive.
3. Select “Format” from the drop-down menu.
4. Select “Fat 32” under File System.
5. Check the box “Express formatting”
6. Click “Start”
RetuRn to table of Contents S o u n d E a r ® 3 – m a n u a l
8
4. Select “Fat 32” under File System.
5. Check the box “Express formatting”
6. Click “Start”
7. The USB key is now ready for use.
SoundEar®3 – manual RetuRn to table of Contents
9
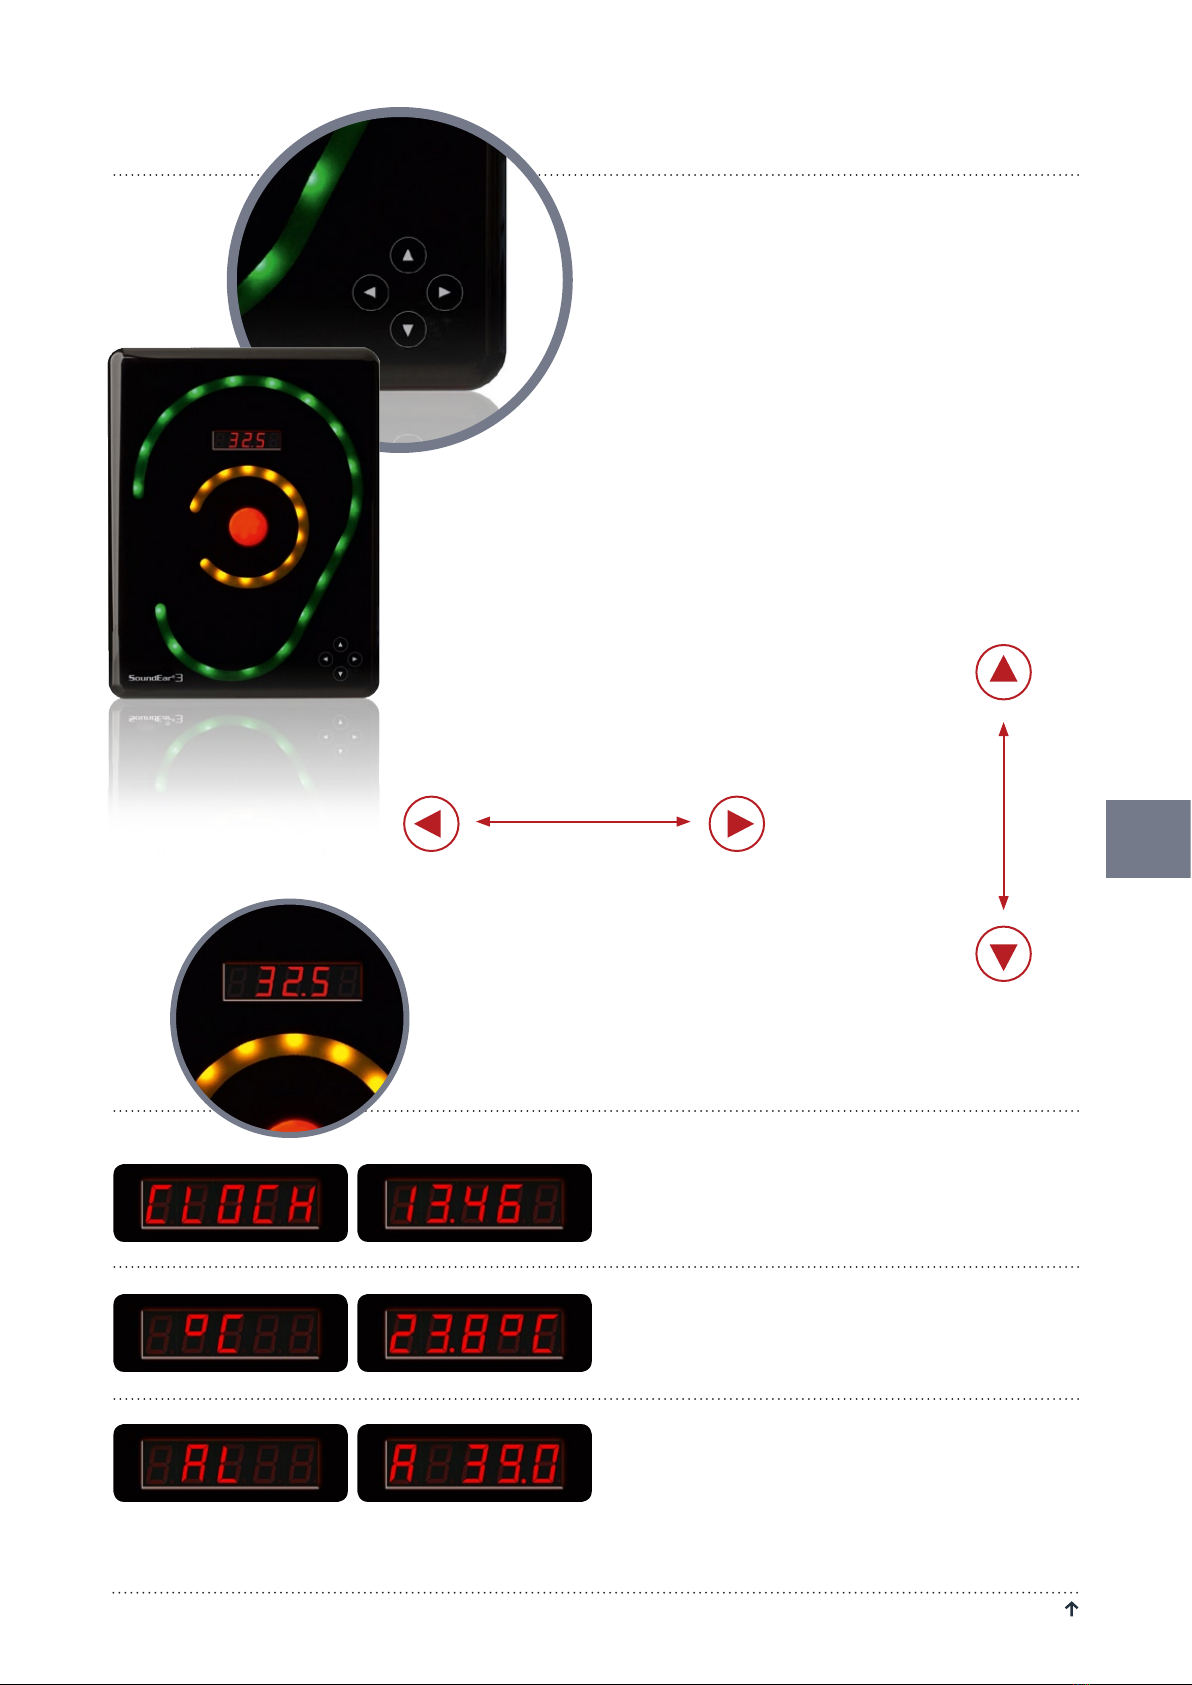
Located on the front of SoundEar®3 you will find a touch
display from which you can control the device manually.
The functions of the touch display include setting alarm
levels, time, noise level, temperature, Leq15 and on/off
function for the mini display.
Use the horizontal arrow heads to navigate between the
different options.
Use the vertical arrow heads to set the alarm level.
PLEASE NOTE! To lock the touch display, please go to
”Display Settings” in the software.
TOUCH DISPLAY OPTIONS
Clock – See the time in the mini display.
The time settings will sync automatically when you
connect SoundEar®3 to your PC for the first time.
°C – Shows the room temperature.
AL – Set alarm level.
Set the visual alarm level.
With the horizontal arrow heads select the ”AL” function.
Place a finger on either of the vertival arrow heads to set
TOUCH DISPLAY
Set the alarm level.
Navigate between
the different options.

10
RetuRn to table of Contents S o u n d E a r ® 3 – m a n u a l
10
the alarm level. Hold your finger down until the desired
alrarm level is reached.
Example: If the alarm is set to 80 dB, the red light will be
lit when the noise level reaches 80 dB. As a standard set-
ting, the yellow light will be lit 5 dB before the alarm level
is reached, in this case at 75 dB. These standard settings
can be changed under ”Light Settings” in the software.
PLEASE NOTE! Changing the alarm level on the touch
display will override any special settings made in “Light
Settings” in the software.
Leq 15 – Shows the average noise level in the past 15
minutes.
dB.A S – Shows the current noise level in dB (A) Slow.
OFF – Turn off the mini display. When turned off, a
small red light will be lit to indicate that the device is
turned on.
Altri manuali per SoundEar 3 Series
1
Questo manuale è adatto per i seguenti modelli
3
Indice
Altri manuali SoundEar Controllori


