Source Audio HOTHAND3 Manuale utente

USER’S GUIDE
SA115
Universal Wireless Effects Controller

2 | Welcome
Welcome
Thank you for purchasing this Hot Hand 3 Universal Wireless Effects
Controller. We hope that the new functionality of the Hot Hand 3 unit
gives you even greater freedom of use and expressive control over all
of your effects. Please save this manual for your reference.
Your Hot Hand 3 kit includes:
• Hot Hand wireless sensor ring
• Receiver base station
• DC adapter power supply (used for ring charging and external
power for receiver unit)
• SA160 sensor cable
If possible, dispose of the device at a recycling center. Do not dispose of
the device with the household waste.
Charging the ring | 3
Charging the ring
Before using your new Hot Hand 3 Universal Wireless Effects Controller
you should fully charge the ring battery. The ring uses a small and
lightweight Lithium Polymer rechargeable battery. To charge the ring
battery, first plug the DC adapter power supply into a standard electri-
cal outlet. Next plug the DC adapter into the small jack on the plastic
end of the ring. When fully charged, the ring will operate for around
6 hours. Charging time will be between 1 and 1.5 hours. While the ring
is charging, the blue LED on the top will blink quickly. When the charge
is completed the LED will turn off.
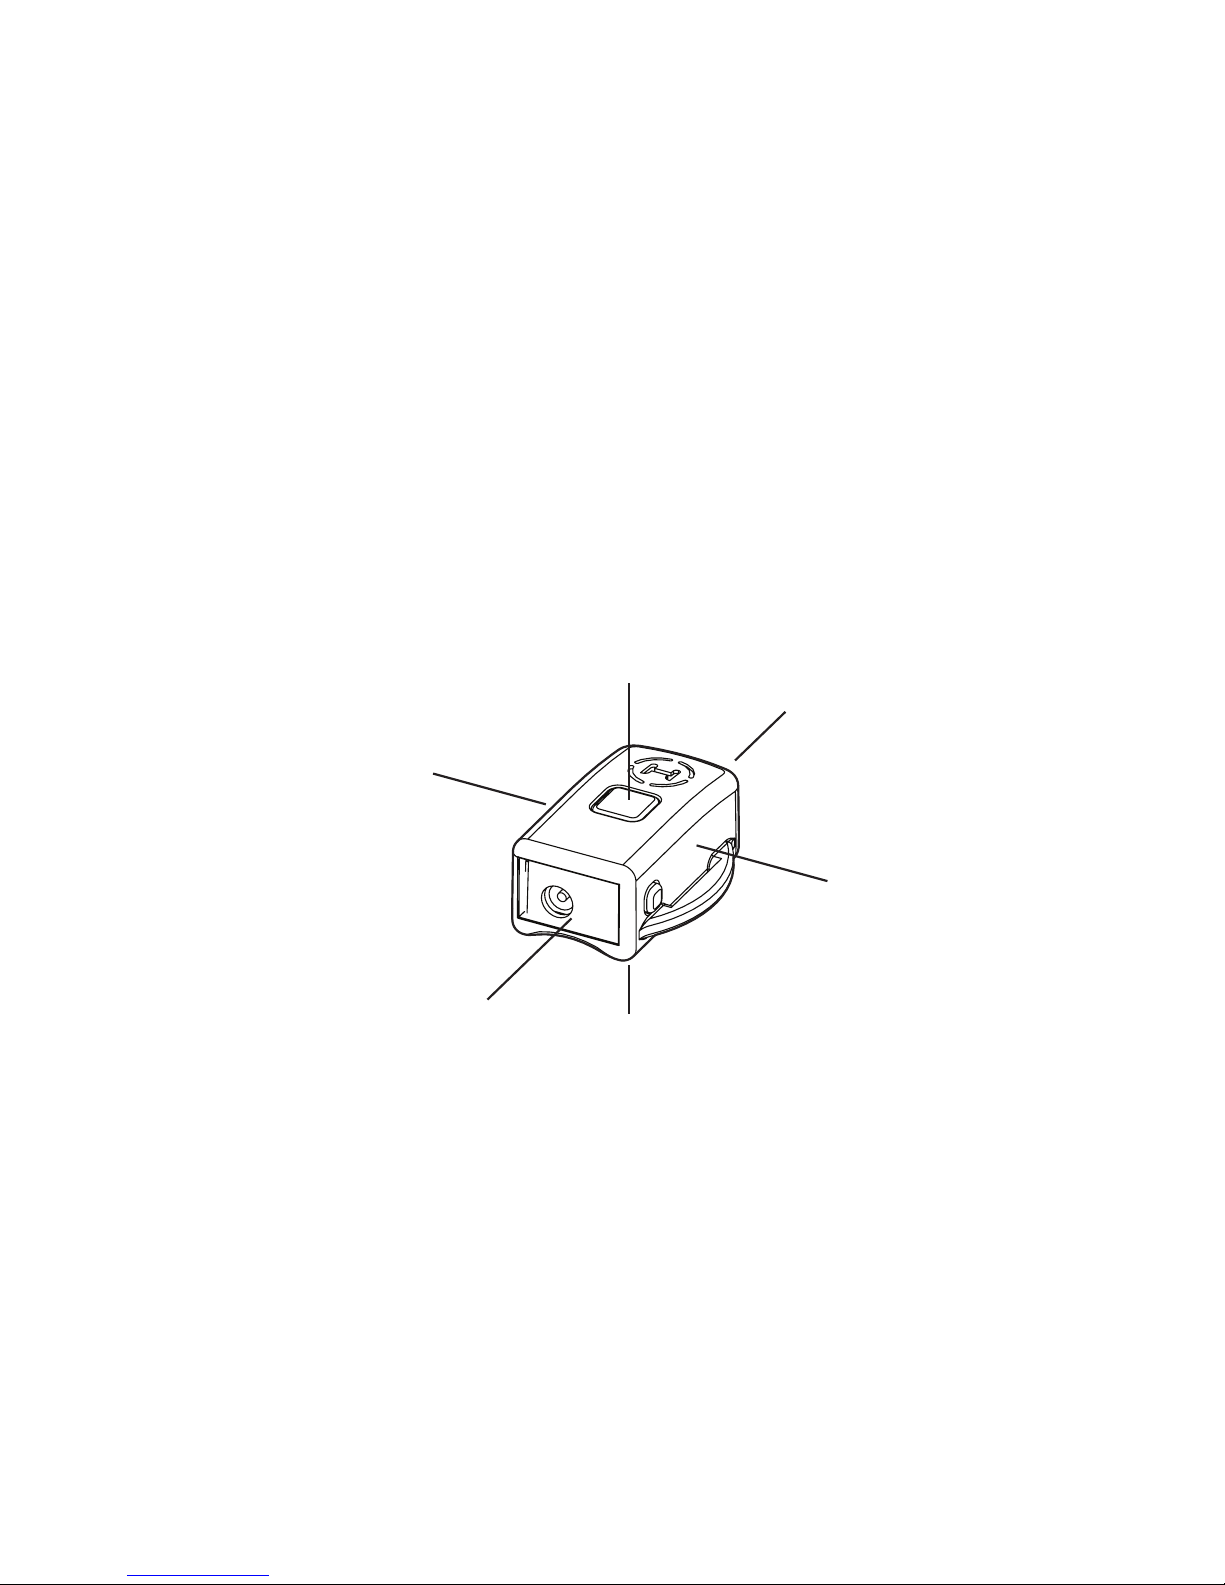
Status LED
DC Adapter
Jack
ON/OFF Button
4 | Connections
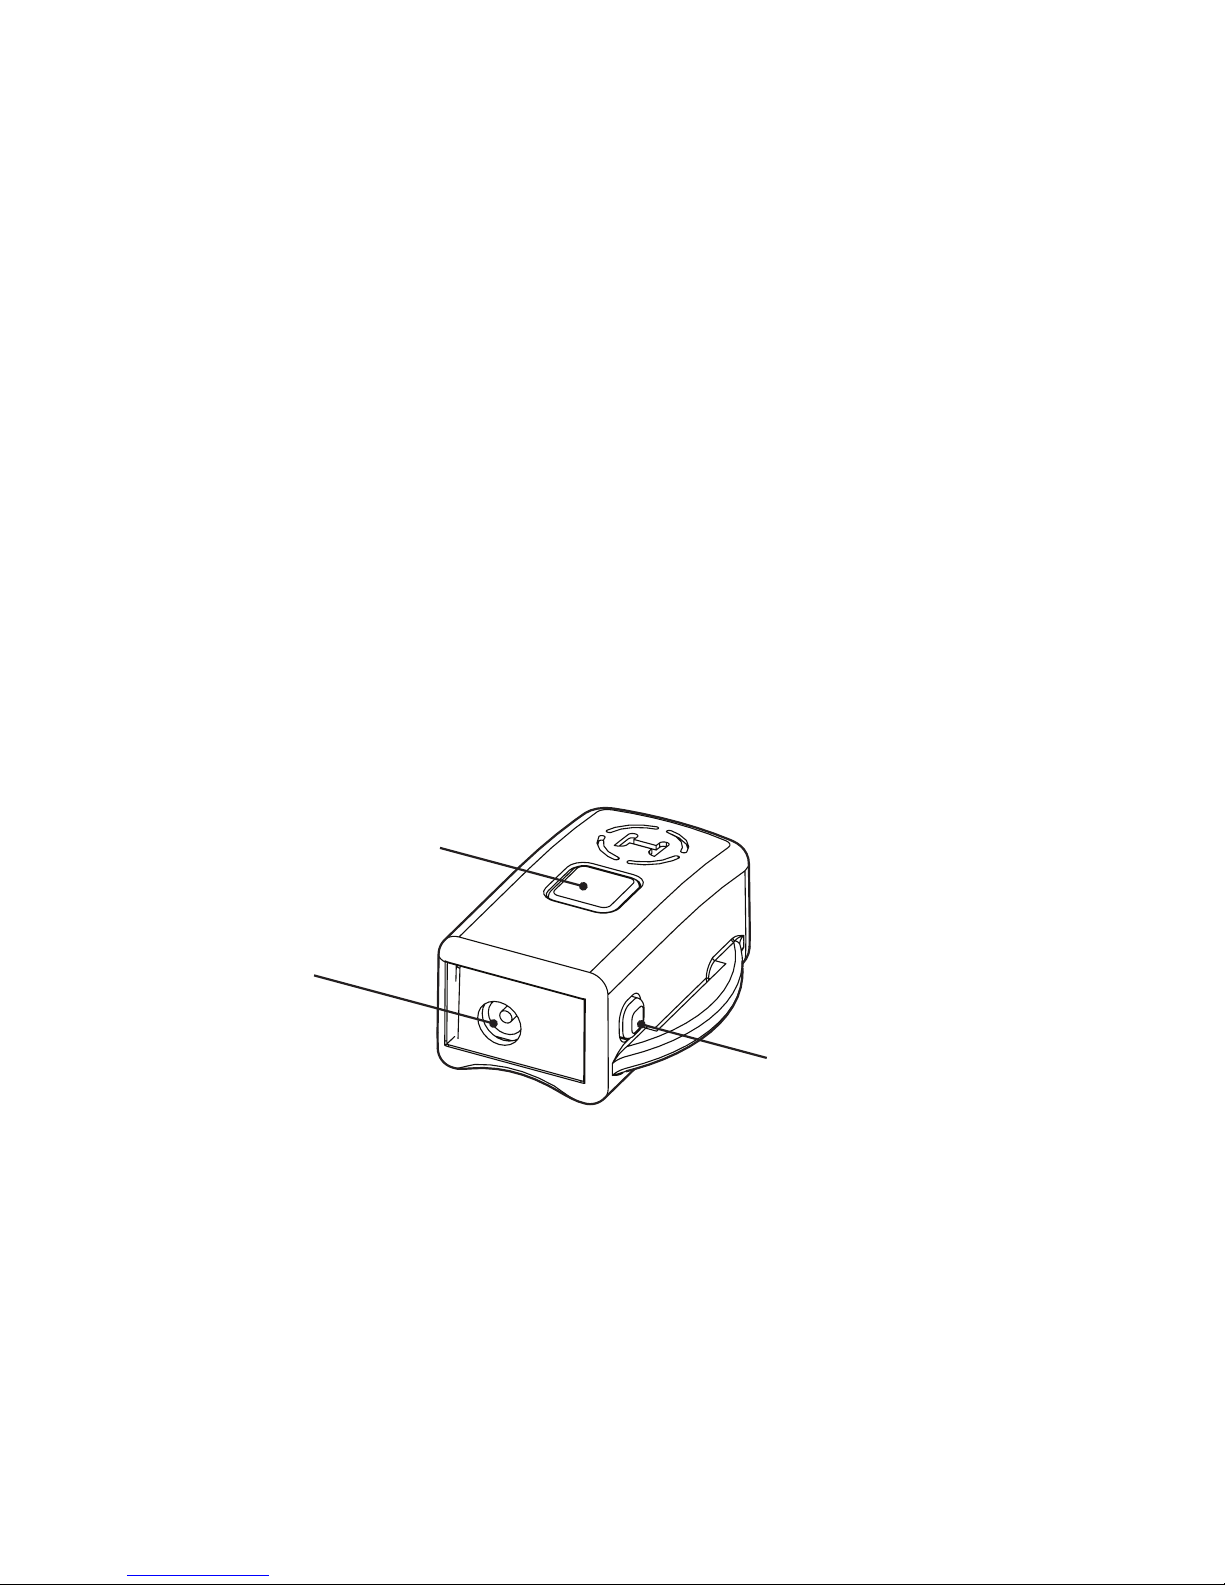
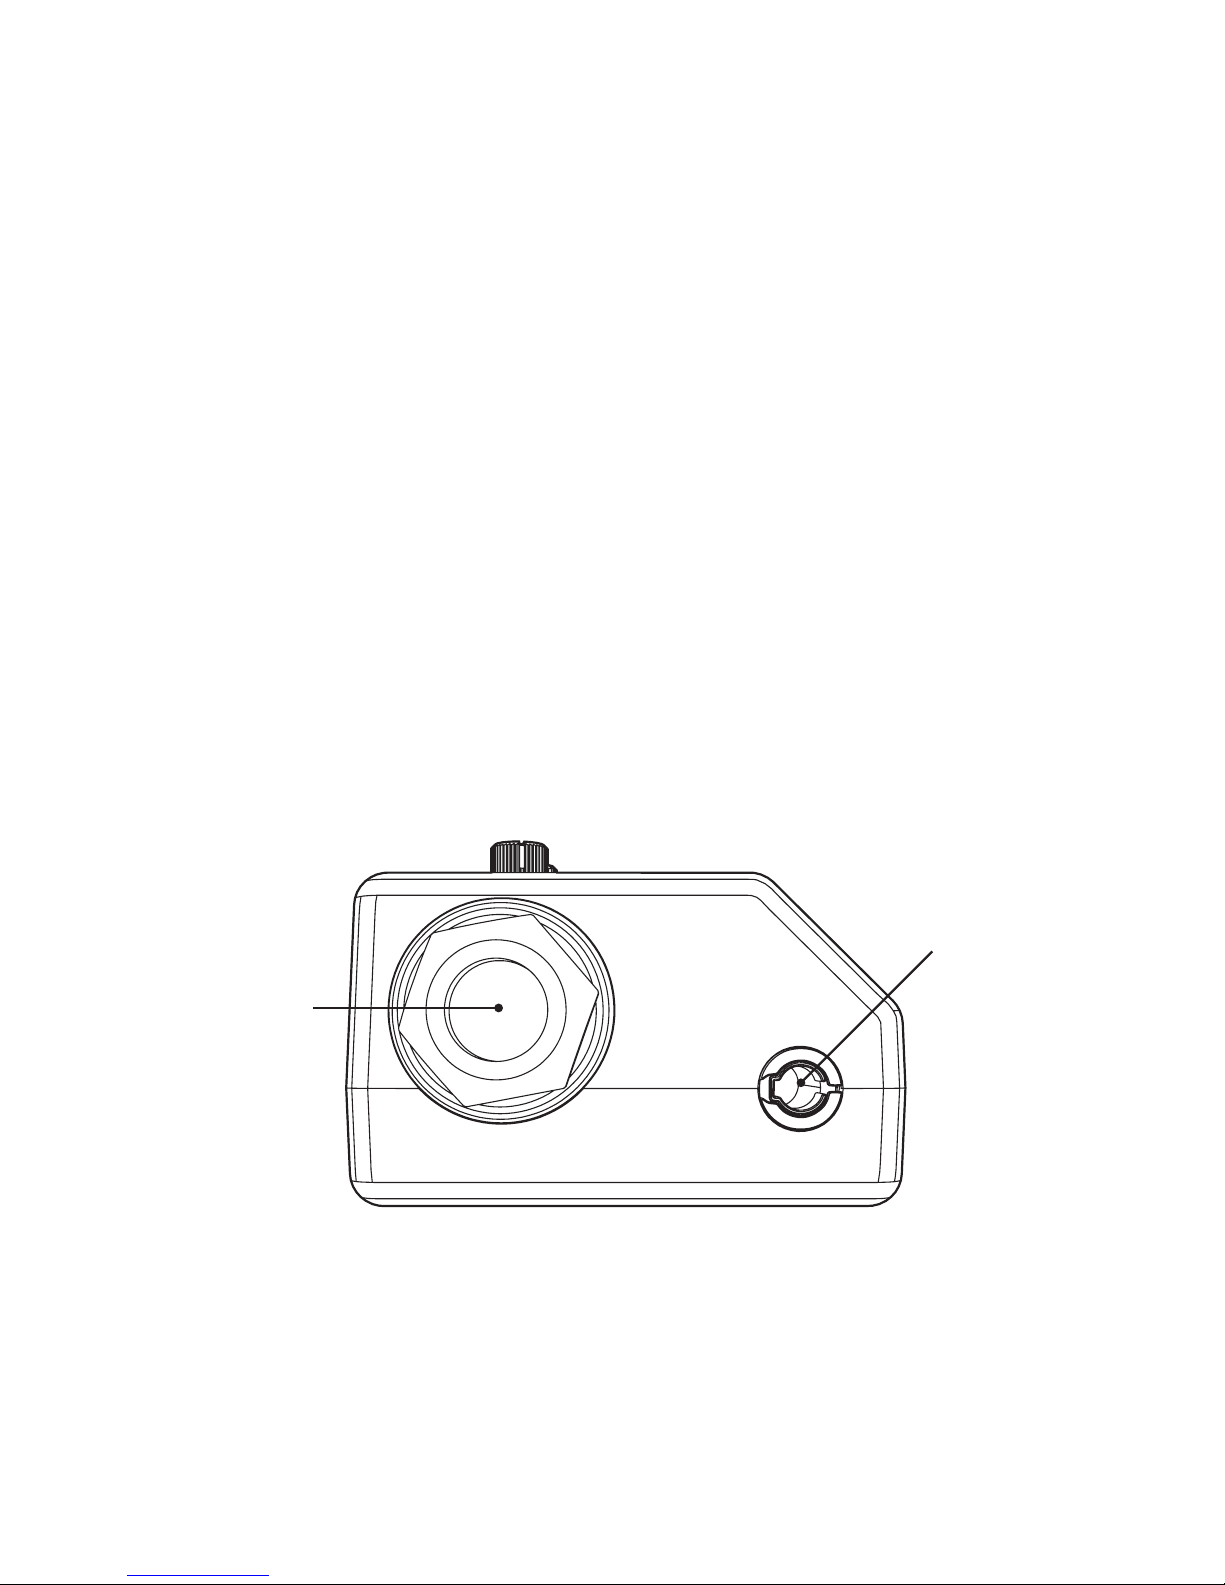
Connections
The receiver can be connected to any effects pedal that has the ap-
propriate input jacks. This includes the Sensor Input or Multi-Function
Input on all Soundblox pedals and any other manufacturer’s pedal
that has a 1⁄4-inch expression input. If the receiver is connected via
the SA160 sensor cable, it will be powered through this connection. In
order to send an output signal on the Expression Output, the receiver
unit will need powered by the included DC adapter power supply.
The knobs and MODE LED will be illuminated when the receiver is
powered. The blue STATUS LED on the face of the receiver will blink
indicating that the receiver is looking for a ring to pair up with.
1⁄4-inch
Expression
OUTPUT
1⁄8-inch Sensor
OUTPUT

1⁄4-inch Expression
Cable (TRS)
Connecting a Third-Party pedal
Connections | 5
Connecting a Soundblox® pedal
Hot Hand 3
Receiver
DC Adapter
Soundblox® Pedal
Third-Party Pedal
1⁄8-inch Sensor Cable
Hot Hand 3
Receiver

6 | Connections
Connecting Soundblox® and Third Party pedals
1⁄8-inch Sensor
Cable
1⁄4-inch Expression
Cable (TRS)
Hot Hand 3
Receiver
Soundblox® Pedal
Third-Party Pedal DC Adapter
Using the wireless ring | 7
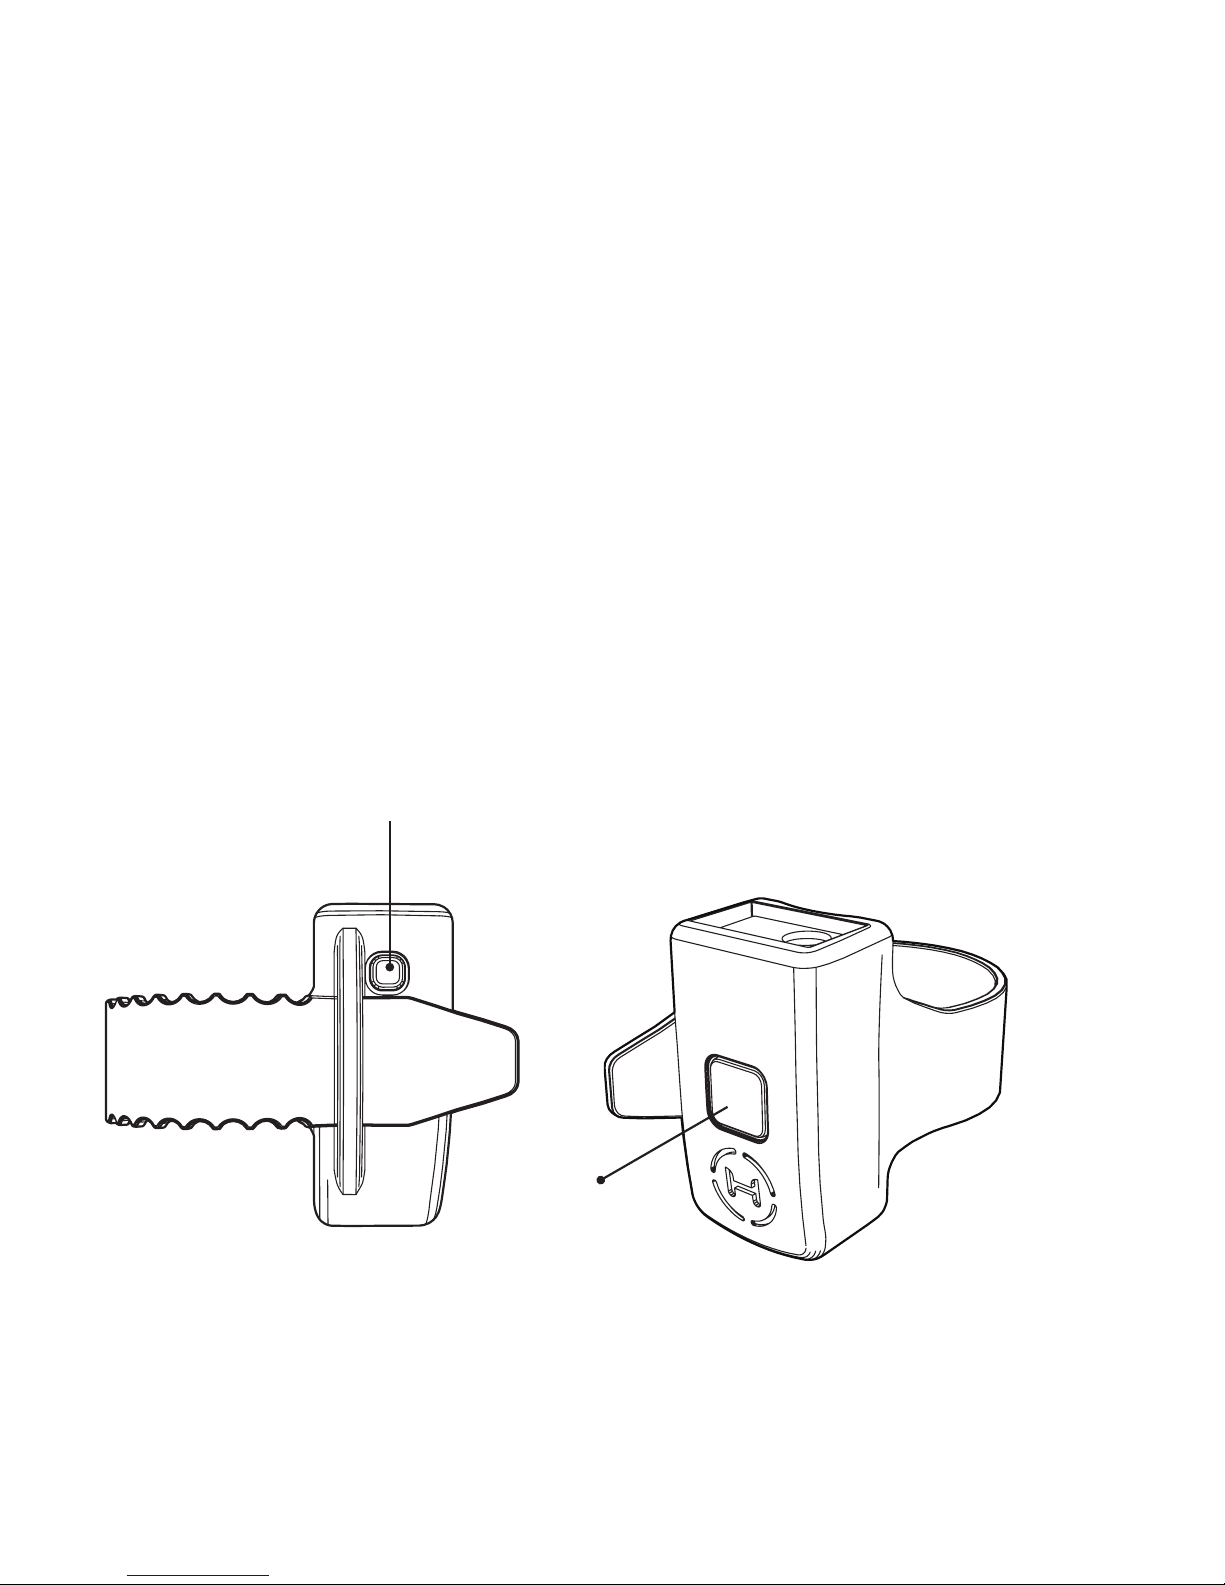
Using the wireless ring
Once the ring is fully charged and the receiver is powered, you can
turn on the ring. Gently press the ON/OFF switch (A) on the side of the
ring. If the link between the ring and the receiver is working, the blue
STATUS LED on the receiver and the blue LED (B) on the ring will both
turn on solidly (not blinking). Your Hot Hand Wireless Adapter is now
ready to use!
Note: Resetting the receiver is necessary to link with a new or different
ring. This can be done by either disconnecting the power or by pressing
and holding the CALIBRATE button for two seconds.
A
B

8 | Adjustments
Adjustments
Most Source Audio Soundblox pedals have built-in controls for adjust-
ing the Hot Hand input, however, some do not and it may be useful to
adjust the parameters on the Hot Hand 3 receiver itself. The Expres-
sion Output is ALWAYS affected by the knobs. By default, the DEPTH
and SMOOTH controls will NOT have an effect on the Sensor Output.
You can choose whether the knobs also apply to the Sensor Output by
selecting the appropriate Output Mode.
The two knobs on the interface of the receiver can be used to adjust
the response of the Hot Hand signals. They are the DEPTH knob (A)
and the SMOOTH knob (B). The DEPTH knob controls the range of the
output Hot Hand control signal. It’s divided into two regions, minus
and plus, so the current axis control signal can be inverted if desired.
Set this knob to its maximum clockwise or counter-clockwise setting
for the largest range of movement. The SMOOTH knob controls the
sensitivity of the Hot Hand to movement. Set this knob to its maximum
clockwise setting for the most smoothing and reduced sensitivity.
A B

Calibration | 9
Calibration
Calibration is used to set the control output level when the ring is in
the middle of its range. Depending on your set up, it may be useful to
adjust the calibration to get the desired response.
Set the angle of the ring to your desired midpoint and press the
CALIBRATE button (A). The MODE LED (B) will blink to indicate it has
received the new calibration setting. The calibration will be saved to
memory. The same calibration will be used the next time the receiver
is powered up.
A
B
Selecting an output mode
The Hot Hand 3 Receiver can output a total of three control signals:
two on the Sensor Output and one on the Expression Output. By
default, the X-axis signal of the Hot Hand ring is processed and sent
to the Expression Output and the Sensor Output sends X and Y-axis
signals without any processing. There are six different output modes
available to select between the three axis outputs as well as a selec-
tion to enable or disable processing on the Sensor Output signals.
To enter the output selection mode, press and hold CALIBRATE while
powering on the receiver until the green MODE LED begins to blink.
Alternatively, when the unit is powered on normally you can press and
hold the CALIBRATE unit to perform a RESET and continue to hold the
button to get into the editing mode.
10 | Selecting an output mode
y
y
z
z
x
x
Indice


