Technogel FREEZER 200/1 Manuale utente

I
IN
NS
ST
TR
RU
UC
CT
TI
IO
ON
NS
S
F
FO
OR
R
T
TH
HE
E
I
IN
NS
ST
TA
AL
LL
LA
AT
TI
IO
ON
N,
,
U
US
SE
E
A
AN
ND
D
M
MA
AI
IN
NT
TE
EN
NA
AN
NC
CE
E
Ed 2013
GB
FREEZER 200/1

2
Introduction
Thank you for choosing a Technogel machine. To ensure trouble-free operation of your machine, please
read the Instructions for the Installation, Use and Maintenance very carefully.
The descriptions and illustrations contained in this manual are not binding. Technogel Spa reserves the
right to make any changes to the machine for constructional and/or commercial reasons that the company
feels necessary at any time and without prior warning.
CAUTION
In compliance with current Standards regulating personnel safety in the workplace,
the instructions given in the next two sections must be followed very closely.
Authorized personnel
Please note the symbols which appear at the side of each description of work to be carried out in installation,
use and maintenance of the machine:
= Technician = User
Where the Technician symbol is given (either an electrician, a plumber, a refrigeration expert or a mechanic)
this means that the work must only be carried out by these people. If the work is attempted by the user it
could prove dangerous and is to be avoided at all costs.

3
Instructions for unpacking the machine
FREEZER 200/1 - GROSS WEIGHT 585 KG. NET WEIGHT 460 KG.
Remove all wood packing panels from the sides
and top
Lift the machine using a fork lift truck, inserting the forks
between the base of the machine and the bottom of the
crate
Unscrew the four bolts on the base of the crate which
hold the machine locked in position
CAUTION !
Once the bolts have been removed, the bottom of the
crate will detach from the machine base.
After removing the bottom of the crate, lower the fork lift
carriage and rest the machine on the ground.
THE TYPE OF WOOD USED FOR THE CRATE IS NATURAL PINE AND DOES NOT
CONTAIN ANY CHEMICALS WHATSOEVER. IT CAN THEREFORE BE RECYCLED

4
Instructions for lifting the machine
FREEZER 200/1 - NET WEIGHT = 460 kg.
Raise the machine using a fork lift truck, inserting
the forks under the sides of the machine between
the front and rear wheels.
Lift the machine using belts as shown in the figure
positioned close to the front and rear wheels. The cable
used to raise the machine must be positioned exactly in
the center of the machine.
HOW TO MOVE THE MACHINE
Move the machine using a manual pallet trolley.
Insert the trolley forks either under the side or the
front of the machine.
After positioning the machine, make sure all four legs
rest on the ground. Regulate the feet so that the
machine tilts forward slightly.

5
Positioning of different facilities
CAUTION:
For trouble-free operation of the machine it is not necessary for the machine to be anchored to the floor, nor
are any special measures necessary to limit vibration.
A number of important points should, however, be borne in mind:
- Leave a space of at least 50 cm around the machine. This is indispensable to ensure
maintenance work can easily be carried out on the machine.
- Connect the machine to the electricity supply at point Fwith a cable coming from above to avoid
any danger of crushing underfoot. For power data, please see page 7.
- Make sure the floor is strong enough to take the weight of the machine.
- Check the machine is stable by making sure that the four legs are firmly resting on the floor.
- Connect the machine to the water supply at points Dand Ewith firmly fitted piping which will
withstand a minimum pressure of 10 Bar. For data regarding consumption please see page 8.
- Connect the machine to the compressed air at point AC. For data regarding consumption
please see page 9.
Dimensions of the machine:
A
Width in mm
B
Depth in mm
C
Height in mm
Weight
Kg.
700
1050
1480
460

6
Machine identification
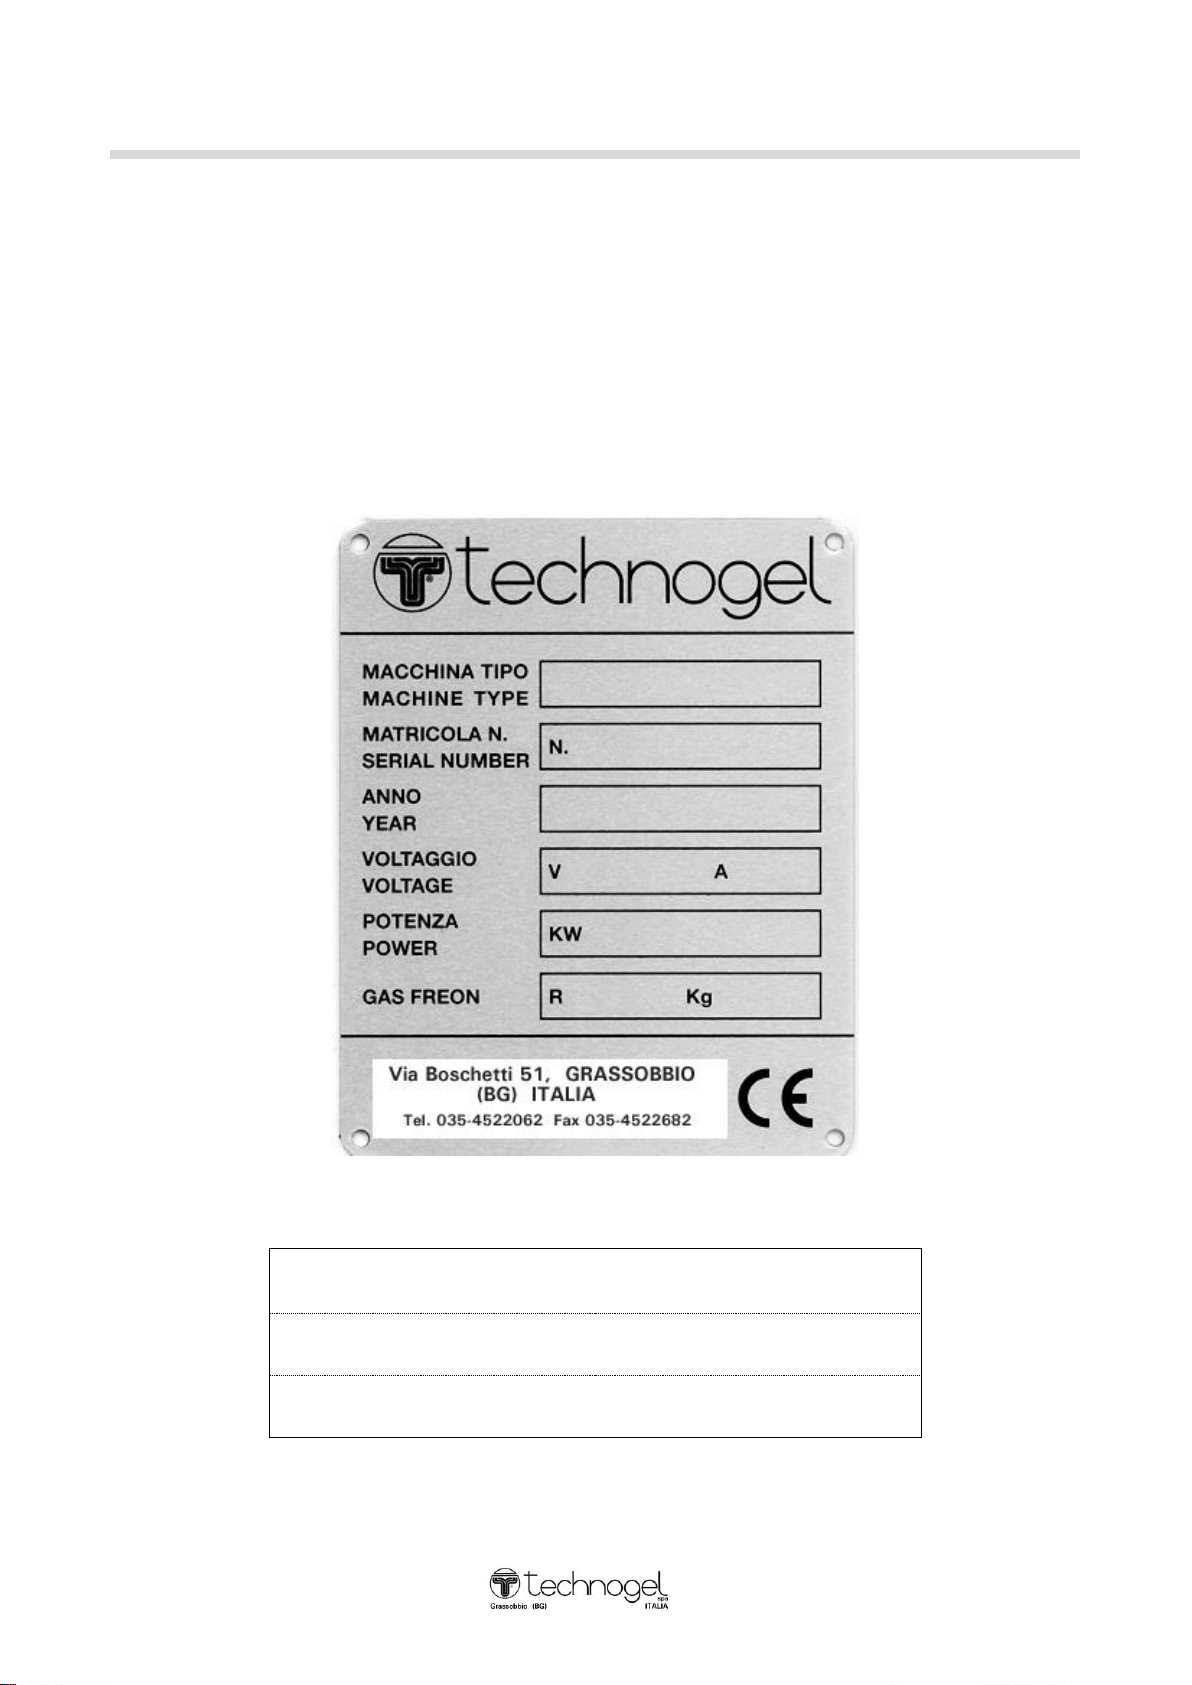
Each machine is fitted with a plate giving the following information:
type of machine
serial number
year of manufacture
voltage, and absorption
electrical power
type and quantity of refrigerating gas
The plate is applied to the rear of the machine. The plate for this machine is as indicated below:
When ordering spare parts and applying for technical assistance, please give the data indicated on the serial
plate to ensure precise identification of the machine:
MACHINE TYPE
FREEZER 200/1
SERIAL N°
VOLTAGE
V._____________ HZ ________

7
Electrical installation
The electrical installation to which the machine is connected must be in compliance with standards
and the electrical work required must be carried out by a qualified electrician. An efficient electrical
installation with adequate earth is of primary importance to ensure trouble-free operation of your
machine.
We recommend installation of a suitable wall mounted differential circuit-breaker. See table (A) for power
supply and absorption data
Check that the power supply is correct for the machine details as indicated on the plate (see page 6).
The machine’s power cable has 4wires: the yellow/green wire is the earth –the other three are the three
phases.
Table (A)
FREEZER 200/1
220 V
50 Hz
220 V
60 Hz
200 V
50/60Hz
400 V
60 Hz
380 V
50 Hz
415 V
50Hz
Total power kW.
8,9
8,9
8,9
Max absorption A.
34
22
22
Power cable
N° of wires and cross section
4 x 6
mm²
4 x 6
mm²
4 x 2,5
mm²
4 x 2,5
mm²
4 x 2,5
mm²
TECHNOGEL DISCLAIMS ALL RESPONSIBILITY FOR DAMAGE ARISING FROM INCORRECT
ELECTRICAL INSTALLATION OR FAULTS IN THE POWER SUPPLY

8
Connection of water supply
The refrigerating system has a water-cooled condenser and it is therefore necessary to connect the pipe
coming from the mains water supply or from the tower water system at the point where the WATER INLET
connection is located on the back of the machine at the bottom and to connect the drainage pipe or pipe
recycling to the water tower system where the WATER OUTLET connection is located.
Please note that it is important to use rubber piping for the water supply connection which is designed to
withstand a pressure of at least 10 bar, with an internal diameter of approx. 21 mm (suitable for the
connectors supplied with the machine).
If there are no labels indicating the water supply INLET and OUTLET, please note that the INLET pipe is
the one that connects to the pressure valve.
- WATER PRESSURE AND CONSUMPTION
If the machine operates on mains water, make sure that the water going into the machine is at least
1 Bar in pressure.
If the machine operates on tower water, make sure that the water going into the machine is at least
2 Bar in pressure with a maximum temperature of 29°C.
In both cases maximum pressure for water entering the machine must not exceed 4 Bar.
WATER TOWER - The average consumption with the refrigerating system in operation is as follows:
FREEZER 200/1 = 1800 litres/hour*
*depending on the temperature of the water on entry
The quantity of water (max. temperature +29°C and minimum pressure 2 Bar) which must circulate in one
hour of the machine.
WATER CITY - The average consumption with the refrigerating system in operation is as follows
FREEZER 200/1 = 350 litres/hour*
In the case of water containing impurities, it is necessary to position a purifying filter to avoid
clogging and/or damage to the pressure valve. If the water is very hard it should be softened with a
special water softening system.

9
Pneumatic connection
Connect filtered and de-humidified compressed air to the special rapid connector AC (see please page 9)
located on the rear of the machine at the top.
The compressed air must be at least 7 Bar in pressure.
The quantity of air required: suction of 11 liters per minute
“Ice-cream mixture” connection
As indicated on page 5, connect a rubber pipe with internal diameter 25 mm and max. 4 metres in length to
point H(rubber holder supplied with machine).
NB Do not use a rigid steel tube
If the maturation tank from which the mixture is taken is over 4 metres away, it is possible to deliver the
mixture using a pump providing the pressure of the mixture on arrival does not exceed 0.5 Bar.
If the pipe leading to the machine is made of steel, the last half metre of pipe must be rubber.

10
Initial start-up
CAUTION IMPORTANT
TO CARRY OUT INITIAL START-UP, PRESS THE “START”
BUTTON AND THEN WAIT FOR AT LEAST 60 MINUTES BEFORE
ACTIVATING THE REFRIGERATOR COMPRESSOR.
IF THE MACHINE IS DISCONNECTED FROM THE POWER SUPPLY
FOR ONE DAY OR MORE, AFTER PRESSING THE “START”
BUTTON, IT IS NECESSARY TO WAIT FOR AT LEAST 60 MINUTES
BEFORE ACTIVATING THE REFRIGERATOR COMPRESSOR.
IF THE MACHINE IS NEVER DISCONNECTED FROM THE POWER
SUPPLY NO WAITING PERIOD IS NECESSARY.
COMPRESS
Indice