Testrite Visual Charisma SEG 3D Lit XS Series Manuale utente
Page 1 of 2Version: 1
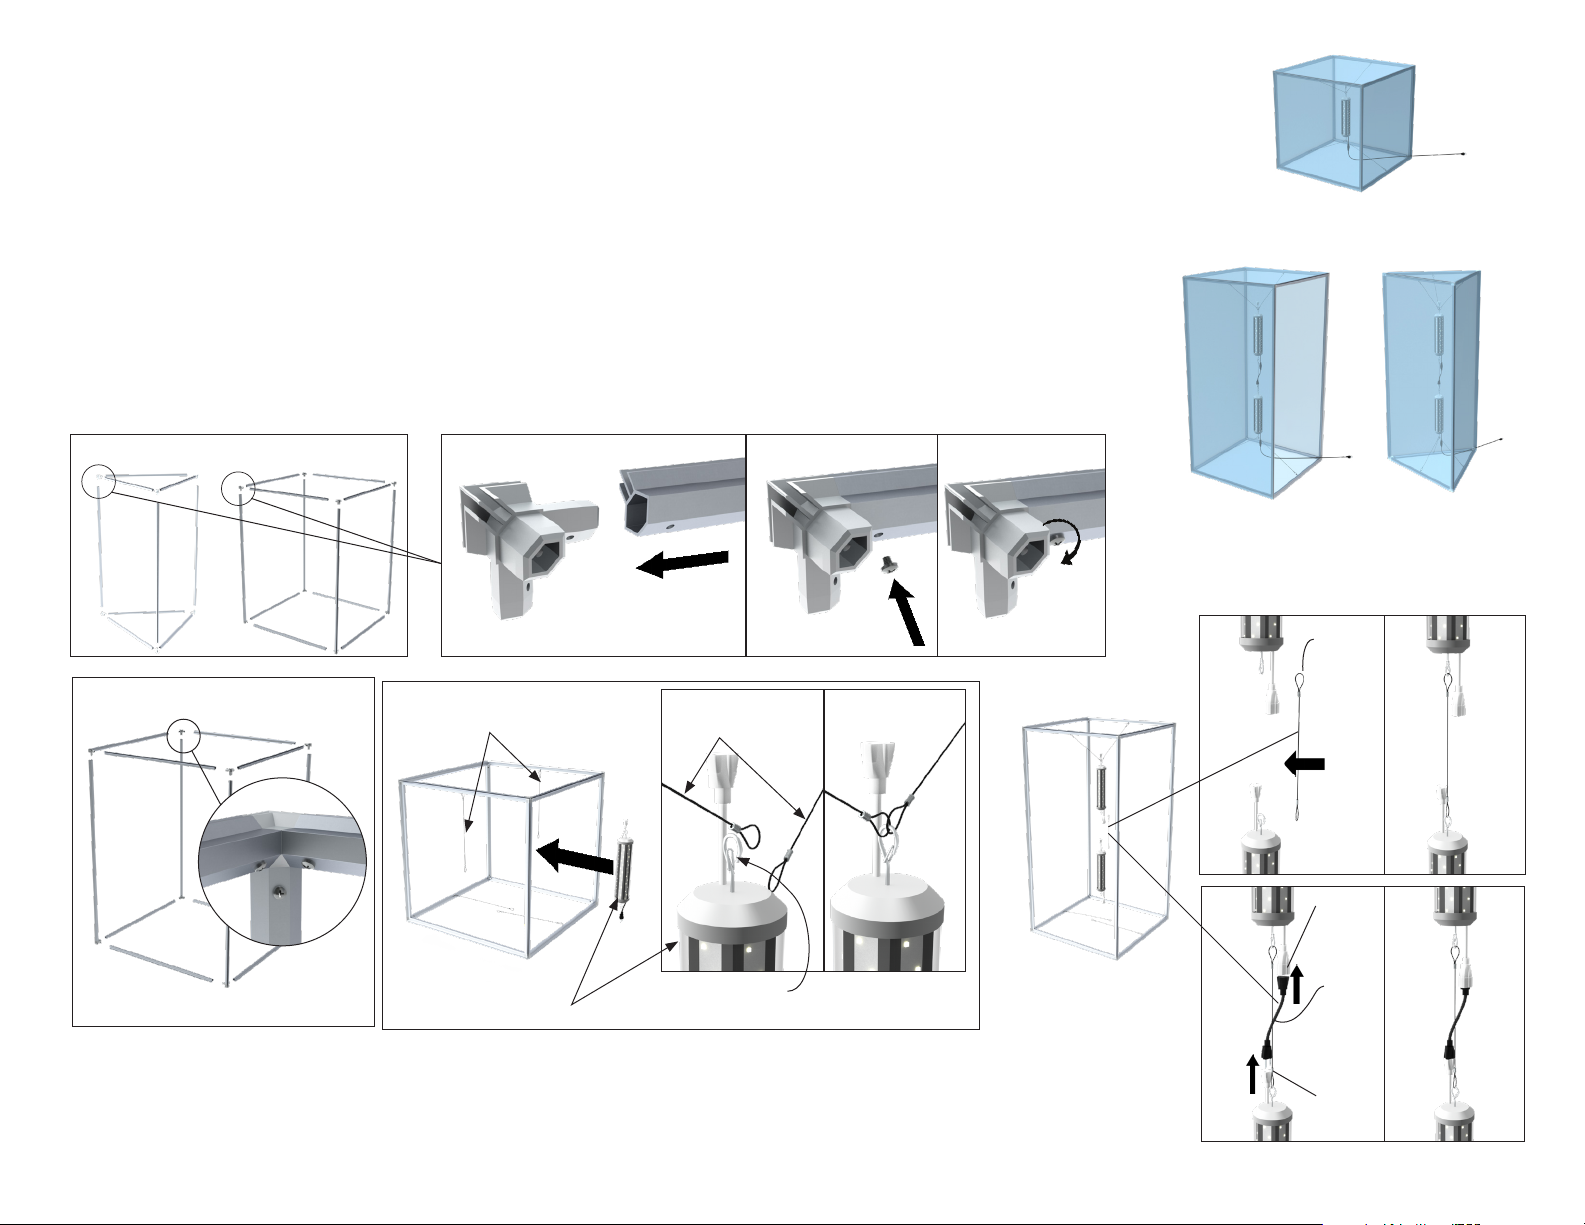
Frame Assembly
Triangular towers have fewer parts than rectangular or cube units, but assembly steps are the same.
1. Connect each frame side to the plastic corner, then fasten using the screws provided. If corners are labeled, connect like numbers,
1 to 1, 2 to 2, etc.
2. Repeat step 1 for each frame side.
3. If using single Light module: The light is designed to be hung vertically (hanging horizontally can decrease the unit’s lifespan)
from the wires at the top and wires on the bottom. Each end of the light module has a hook with a spring loaded latch. Depress
the spring loaded latch at the top of the light module and hang the top wires to the top hook.
4. For connecting additional Light modules on larger models: A wire is included to hang one light from the next. Depress the
spring loaded latch of the bottom hook on the 1st light, and connect the provided wire to the bottom hook of the 1st light.
Depress the spring loaded latch on the top hook of the 2nd light, and connect the free end of the wire to the top hook of the 2nd
light. Connect the short power cord to the bottom covered male plug of the 1st light and top female plug of the 2nd light.
Charisma SEG 3D Lit™ - XS Series
XS3T-LED shown XS3G-LED shown
1. Triangular Cube/Rectangular
Top hanging wires for light
Light module
Top hanging
wires for light
Latch hook
2.
Rectangular Tower Triangular Tower
3.
XS3C-LED shown
Cube
4A.
4B.
Joining
hanging
wire
Short
Joining
power
cord
Covered
male
plug
Female
plug
Page 2 of 2Version: 1
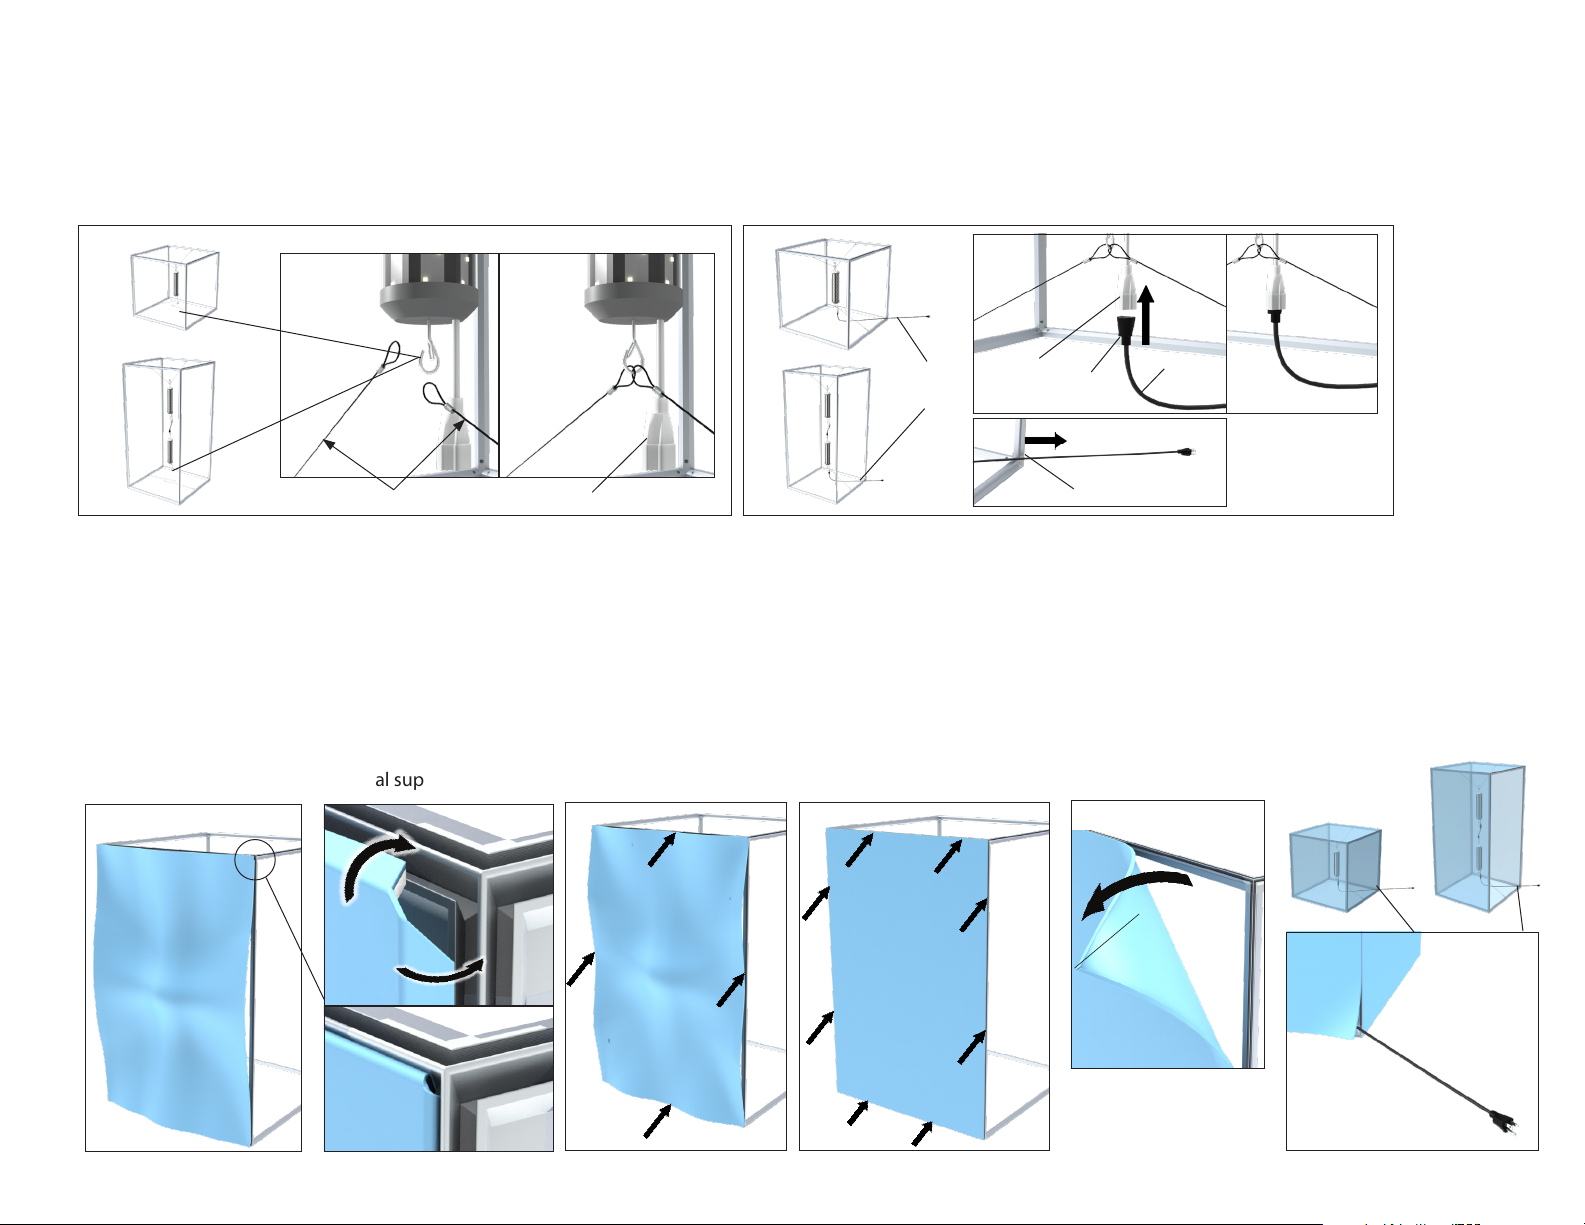
Graphic Installation
7. To install the graphic, take Corner A with the pull tag on it and press about 6”-10”of silicone into the frame channel. Repeat for the opposite Corner B. Repeat for
Corner C. Lastly, repeat for the nal corner.
8. After all corners are pressed in, press the silicone into the frame channel at the mid-points on all four sides. This prevents the graphic from bunching up or stretching
too much and will ensure a smooth and tight t.
9. Press silicone into frame evenly between the corners and midpoints.
10. To remove the graphic from the frame, simply pull up on the pull tag.
11. Repeat graphic installation for remaining sides (not shown).
12. Note – One side or corner of the graphic may need to be not be fully installed to allow power cable to exit the light box
13. Connect power cord to electrical supply.
Charisma SEG 3D Lit™ - XS Series
12.
13.
Frame Assembly (continued)
5. Connect the bottom of the last light module (or single light module) to the bottom hanging points. All light modules should have a vertical orientation.
6. Plug the female end of the included long AC power cord into covered male end of the last light module. Identify where the power cable will exit the 3D box, and place cord
through that point before installing graphics. Plug cable into power before installing graphics to ensure light is working, then unplug from power while installing graphics.
8. 9. 11.
Pull tag
7.
(A)
(B)
(C)
(D)
6A.
Female
plug
Covered
male plug
Covered male plug
Power
cord
Power
cord
6B. 6C.
6A.
6.
6A.
6B. 6C.
6C.
6B.
5.
Bottom hanging wires for light
Cord shown
exiting near corner
Questo manuale è adatto per i seguenti modelli
1
Indice
Altri manuali Testrite Visual Attrezzatura di illuminazione

Testrite Visual
Testrite Visual Charisma Inside-Out Light Box XSIO Series Manuale utente

Testrite Visual
Testrite Visual Charisma SEG XSL Series Manuale utente

Testrite Visual
Testrite Visual SupraSlim SnapFrame SUL Series Manuale utente

Testrite Visual
Testrite Visual XSD Series Manuale utente

Testrite Visual
Testrite Visual Charisma XBX Series Manuale utente


