© Satellite Solutions Worldwide Ltd 2013
Top Pole Antenna
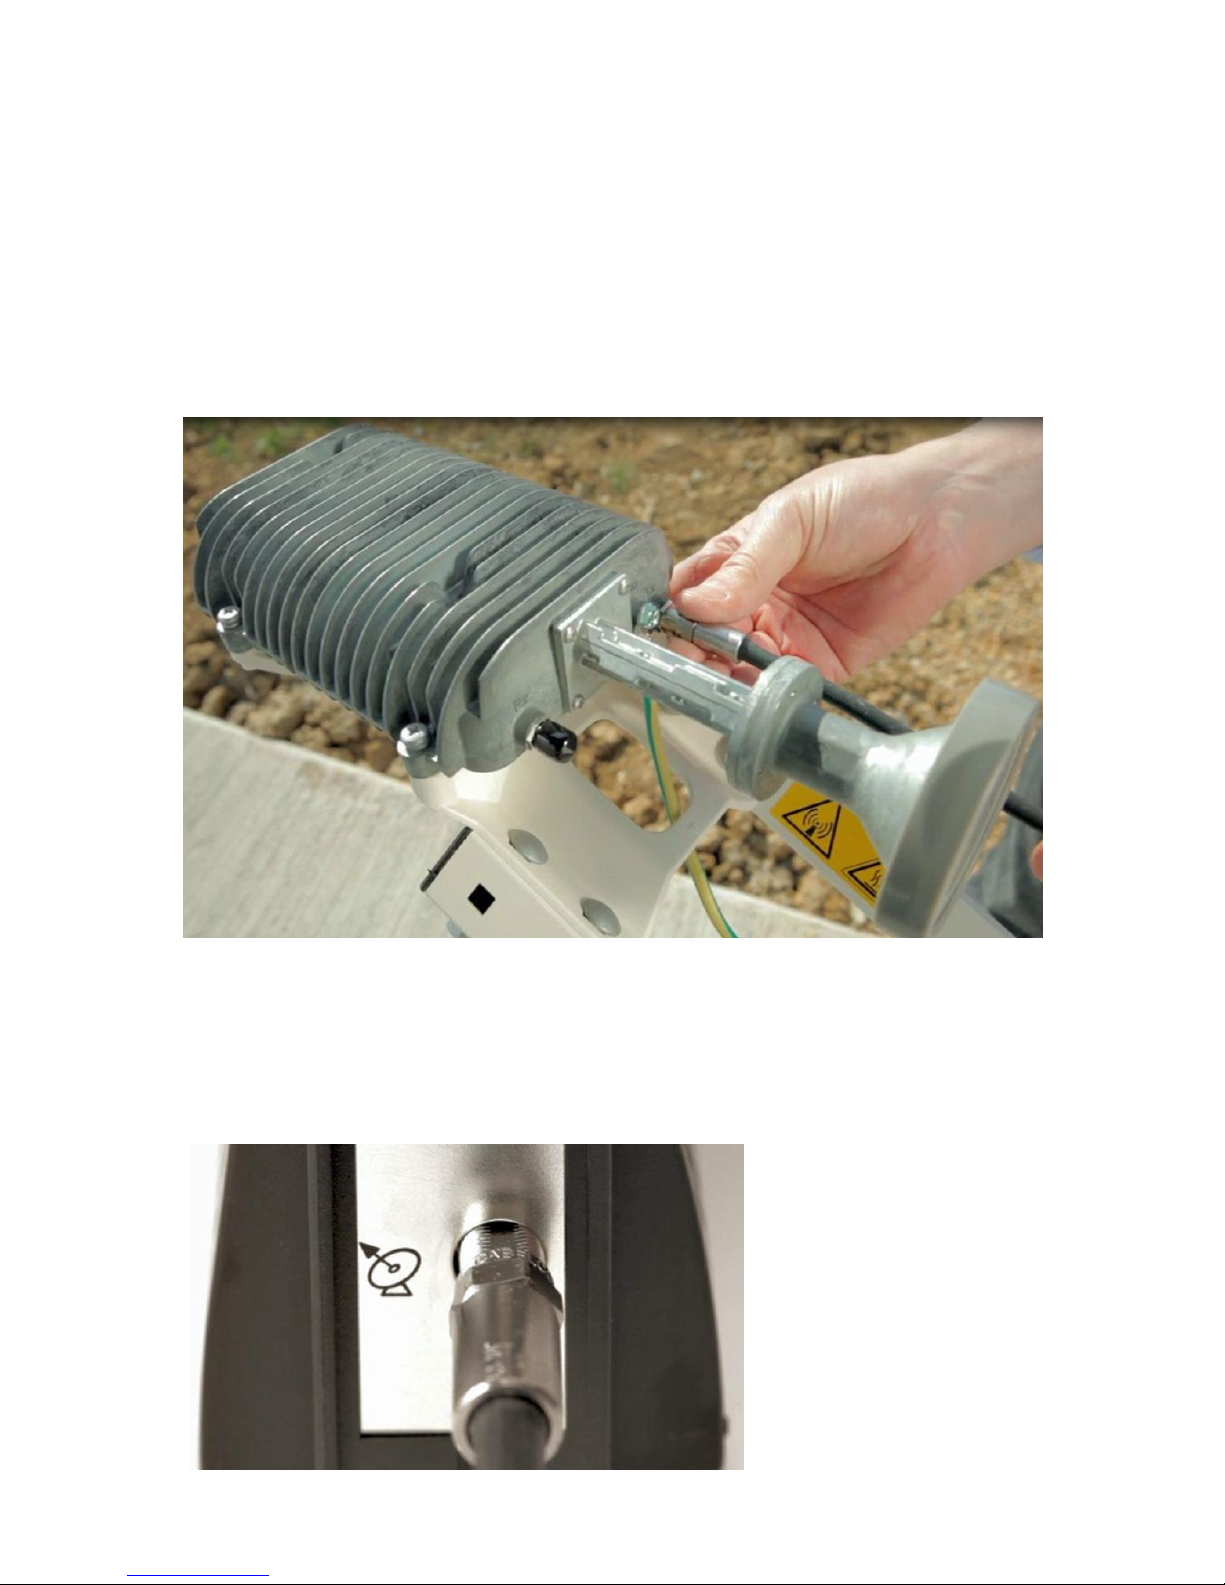
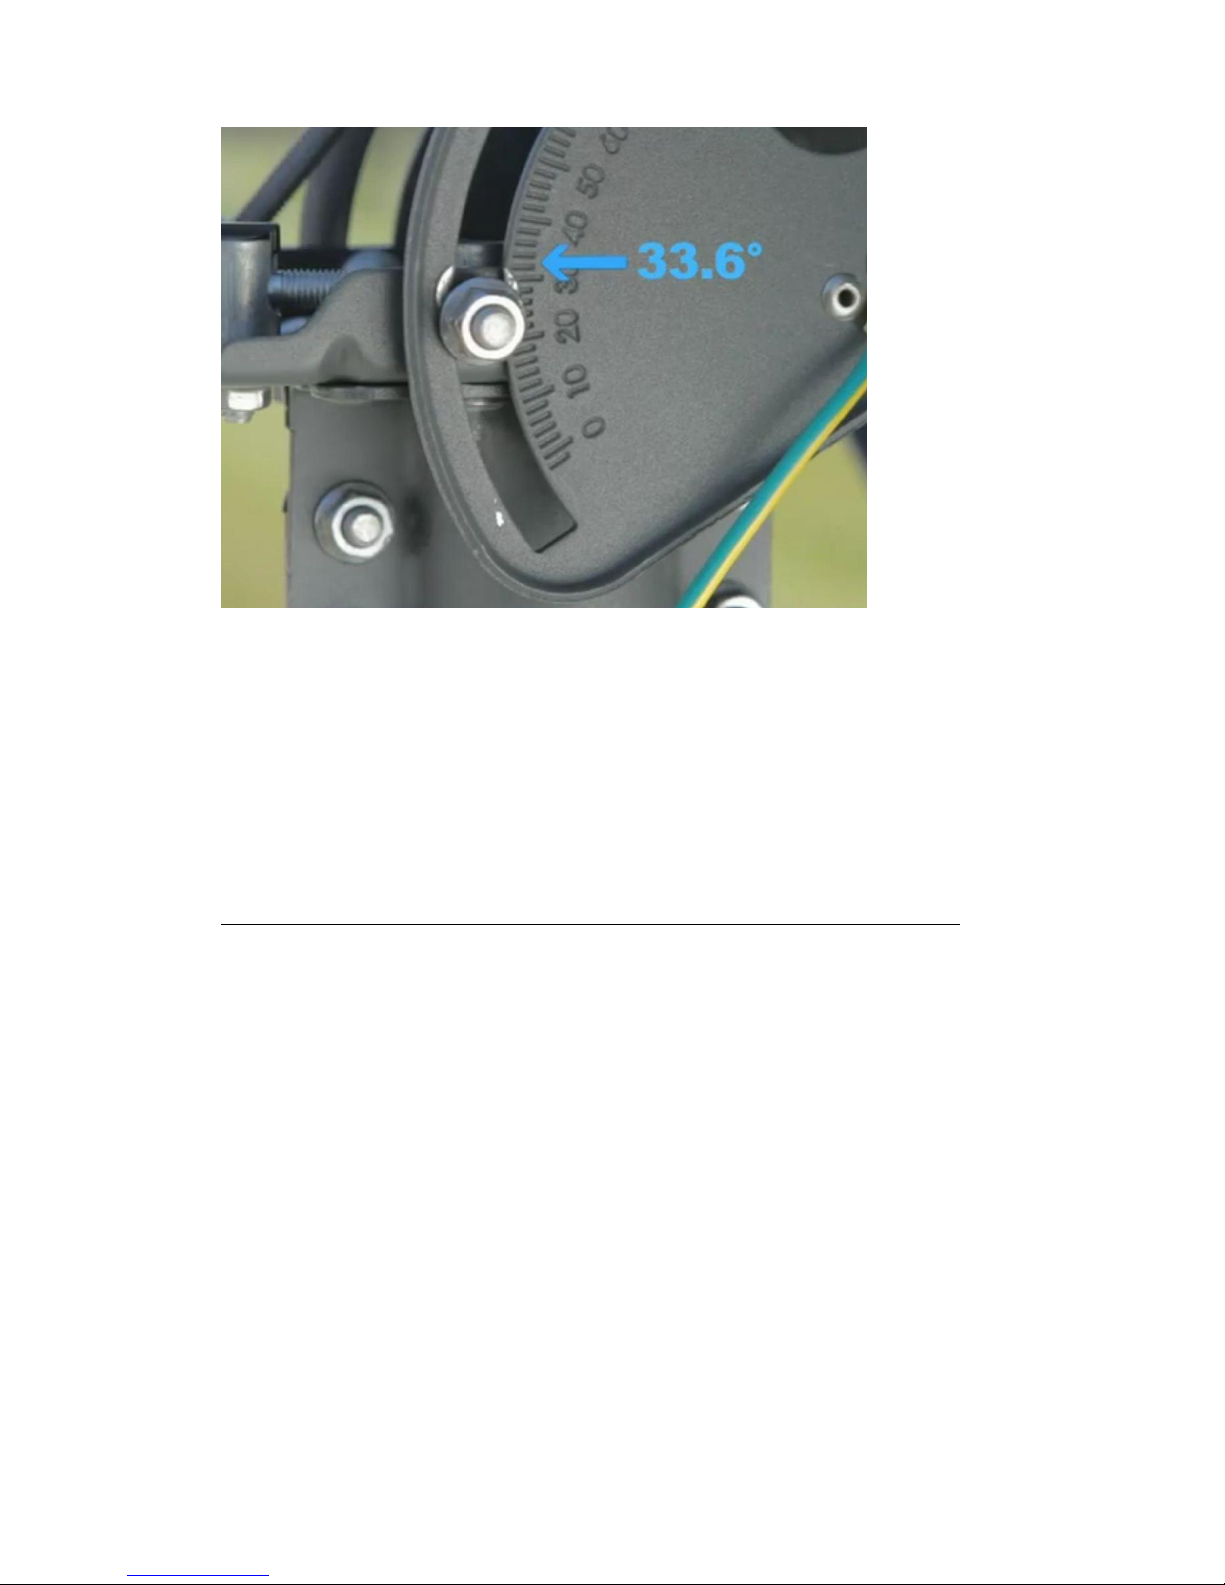
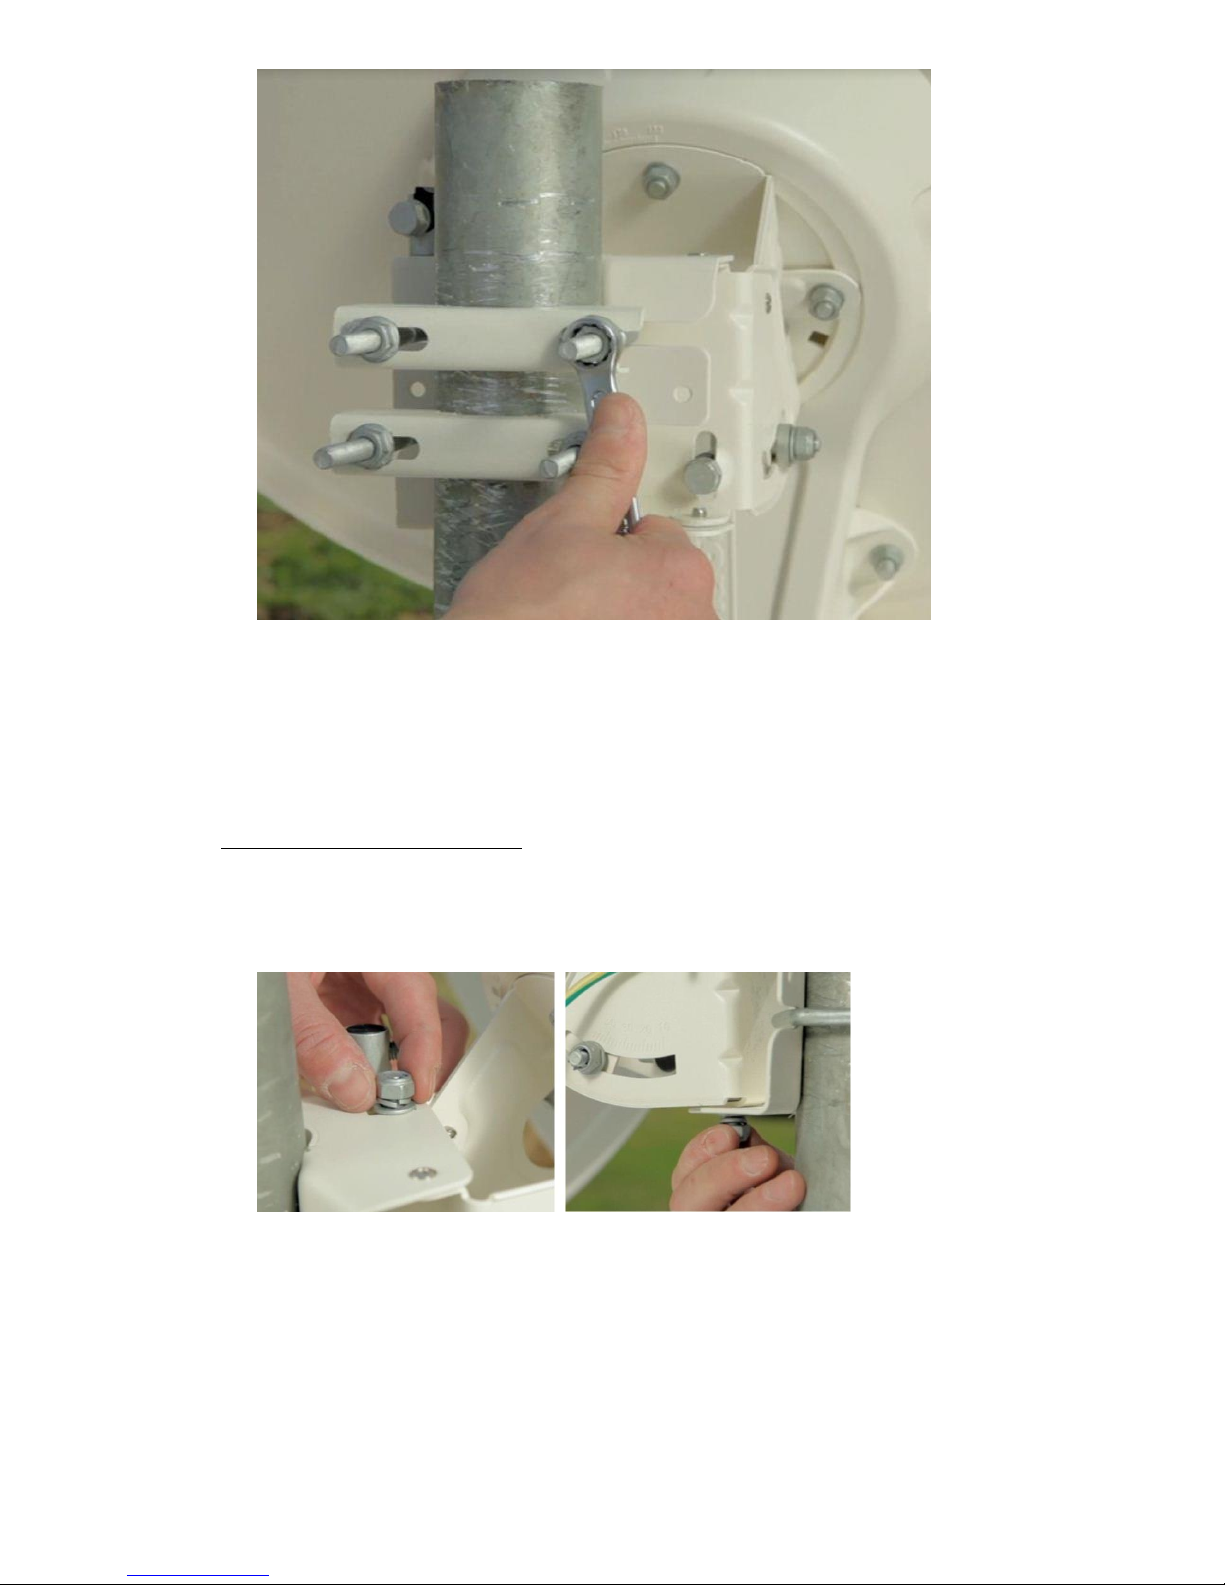
The elevation is read from the metal end as displayed in the picture and NOT the centre of the bolt
itself. For this scale to be accurate the wall bracket the dish is mounted on, must be absolutely
vertical. (Check this with a spirit level)
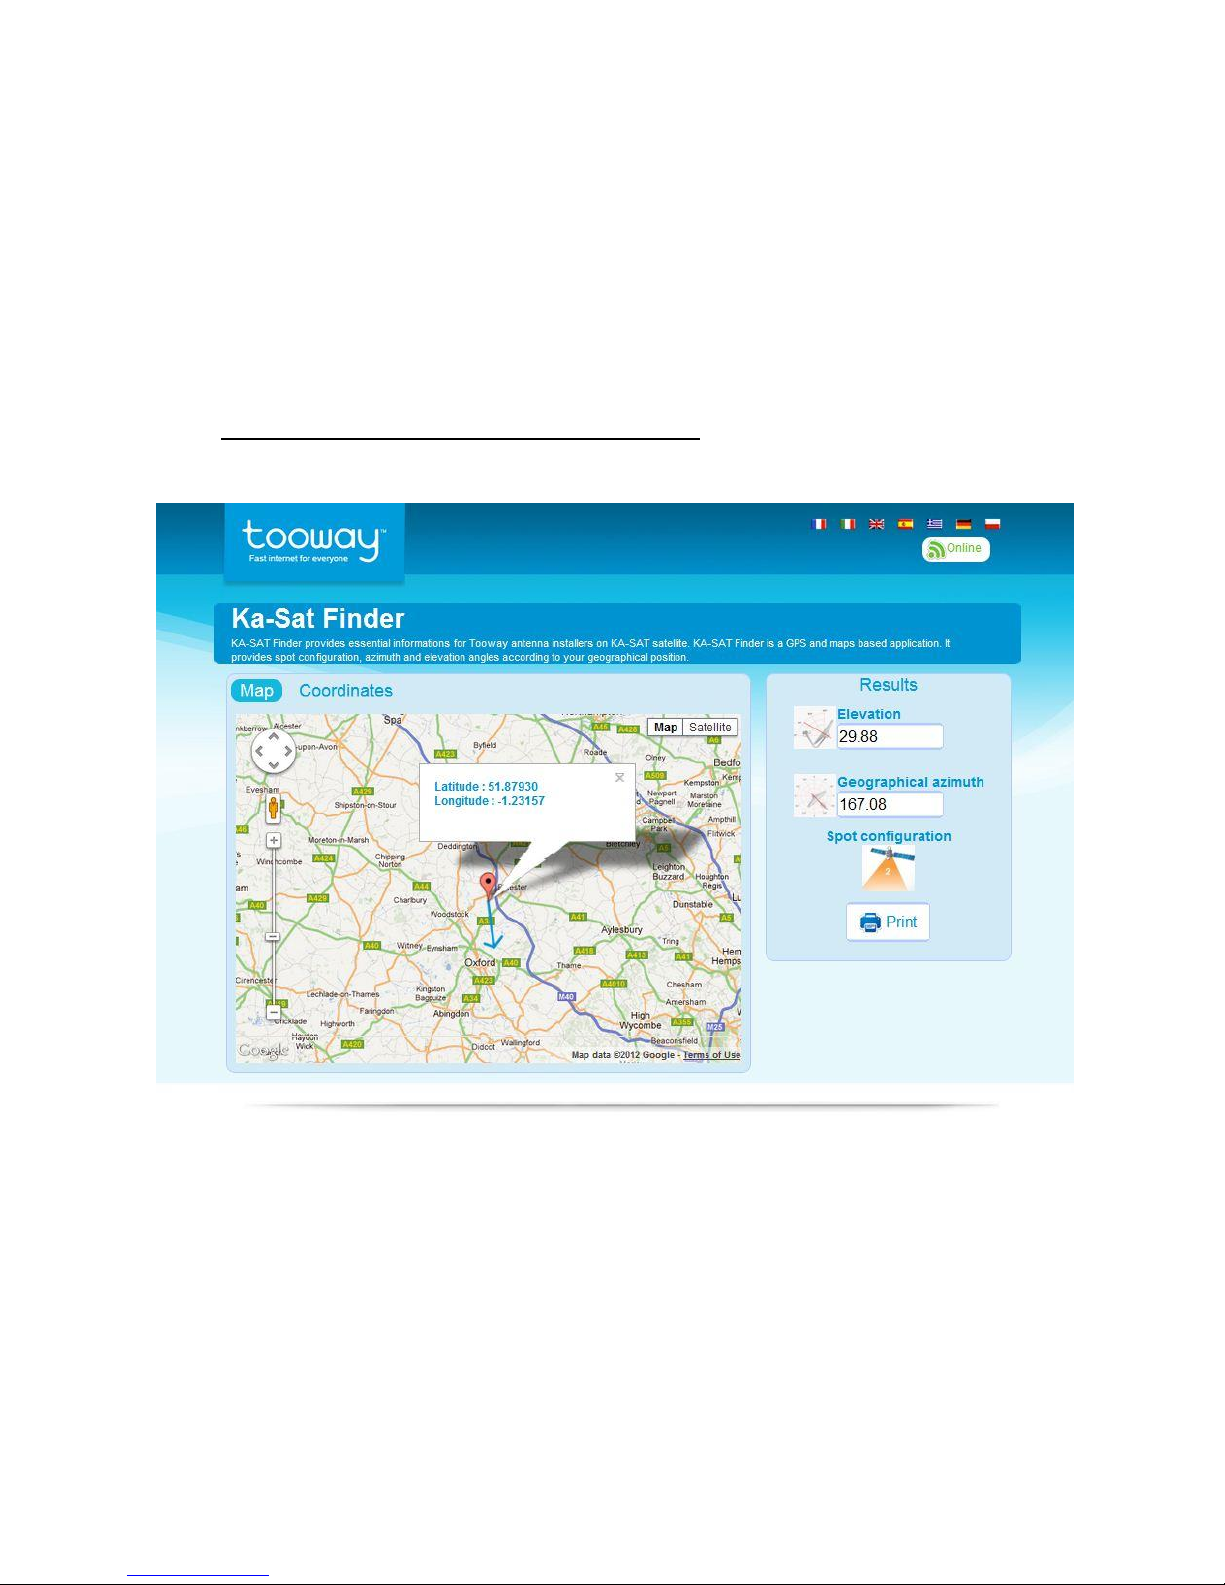
Once the elevation is correctly set as shown in step 10, move the dish in a general southern
direction. If you have a compass you can use the Azimuth in Step 1 as a reference but this is not
necessary for the installation.
Also make sure the 6 bolts holding the dish in place on the wall bracket are still loose enough for
you to be able to move the dish horizontally for the manual pointing.
11. Pointing Procedure for Mid Pole Antenna (For Top Pole Antenna continue to step 14):
Move the dish horizontally from left to right and right to left to pick up the signal from the
satellite. When the dish is not receiving any signal you will hear a “BEEP BEEP” every 3-4
seconds.
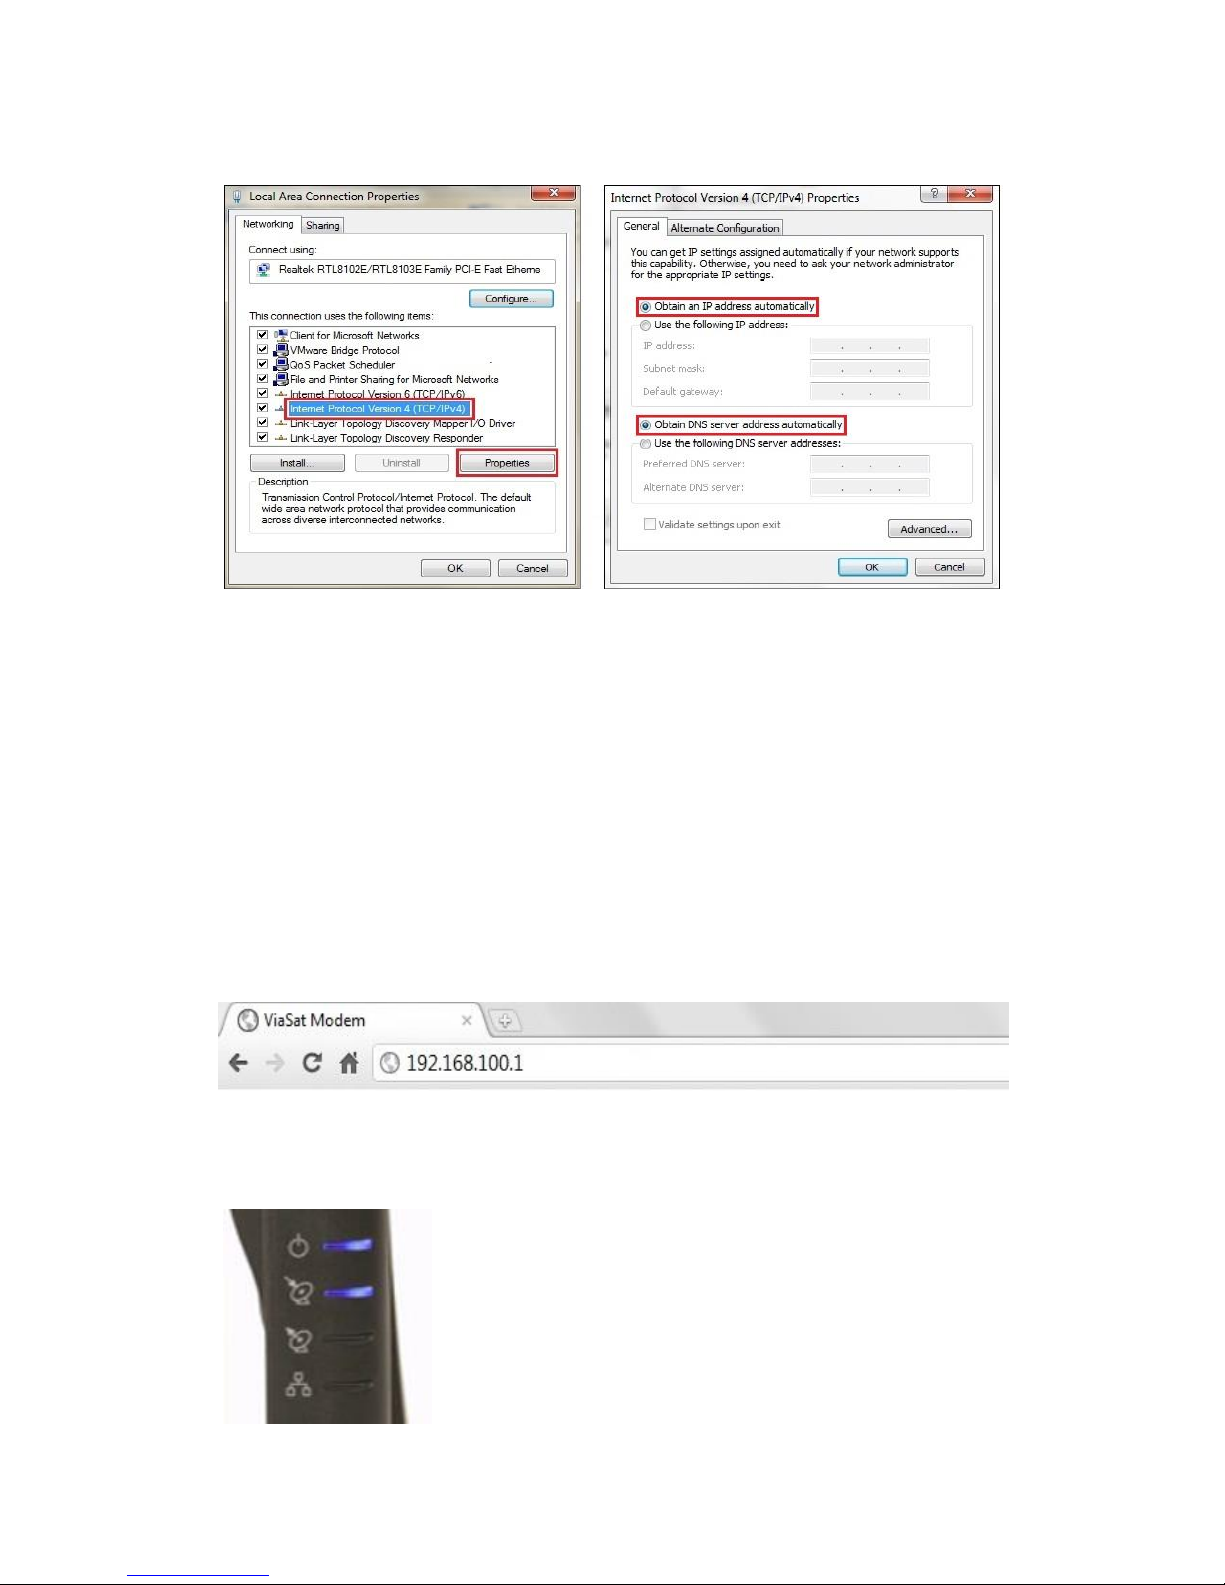
The TRIA will ring twice (like a telephone) when is has initially started to receive signal. You will
also notice a change in the beeping sound.
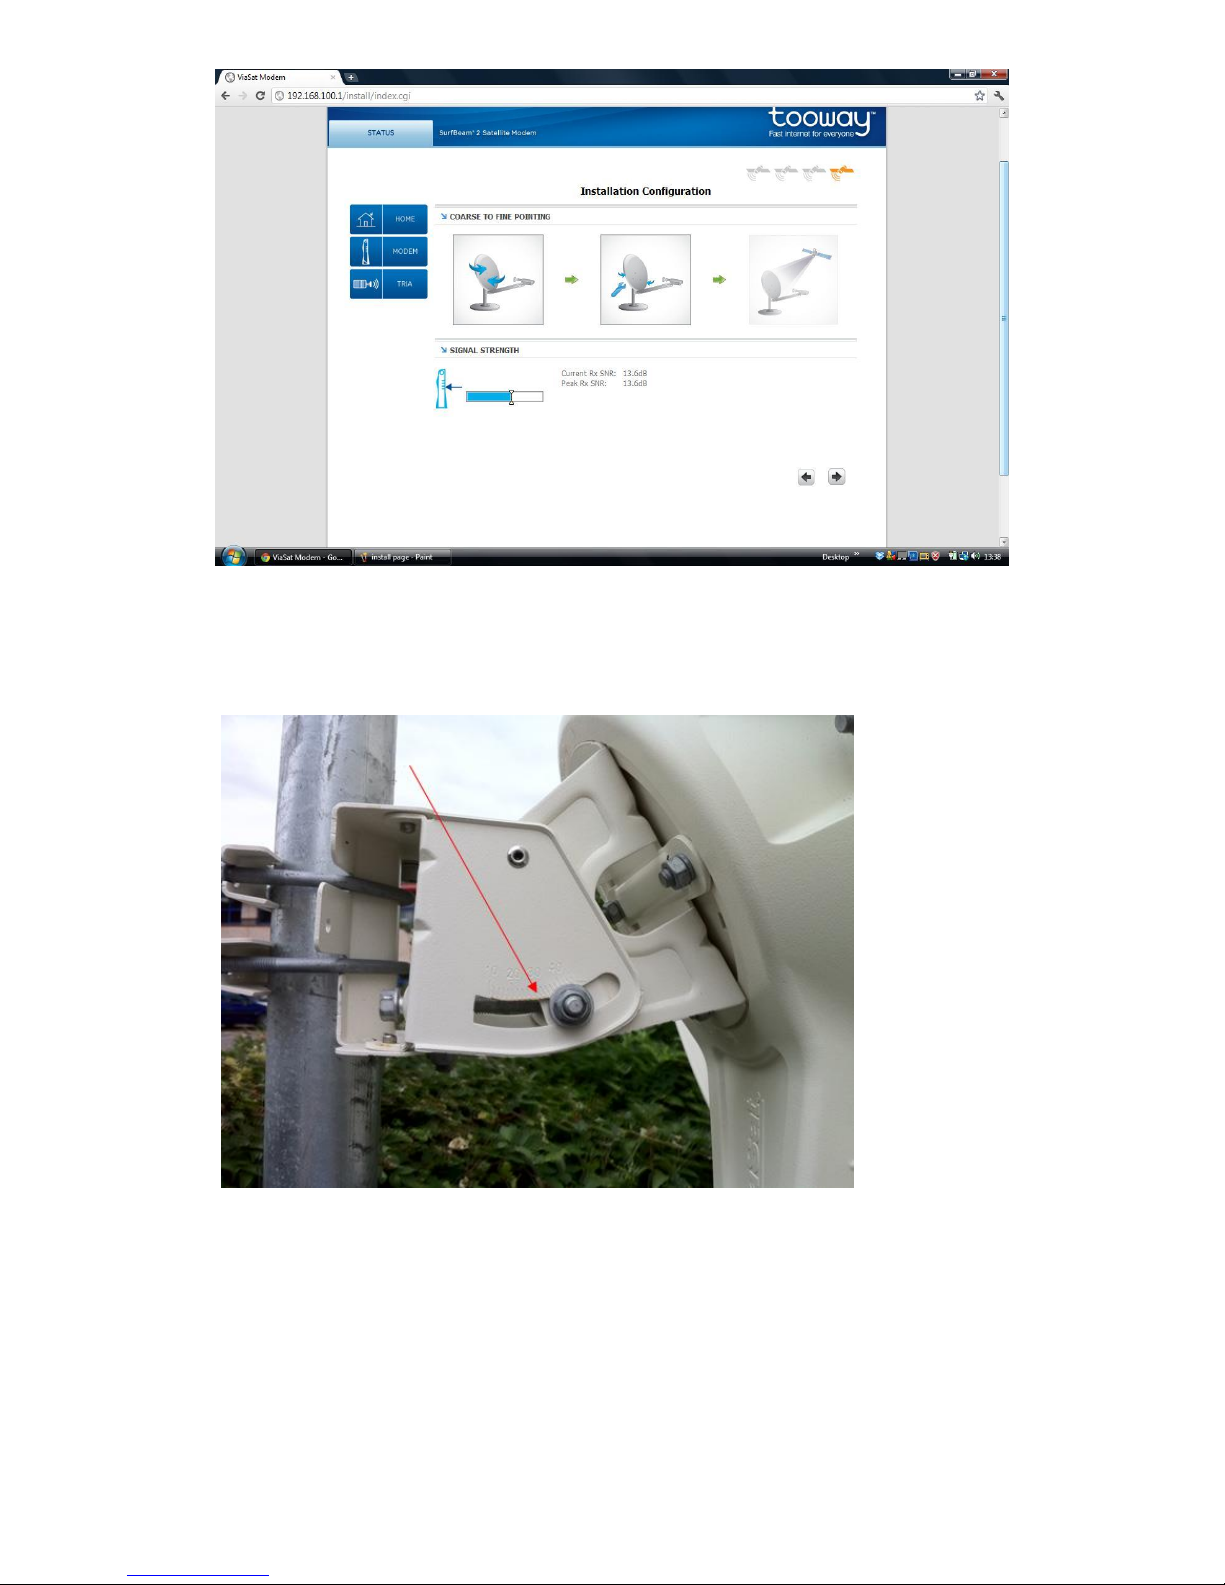
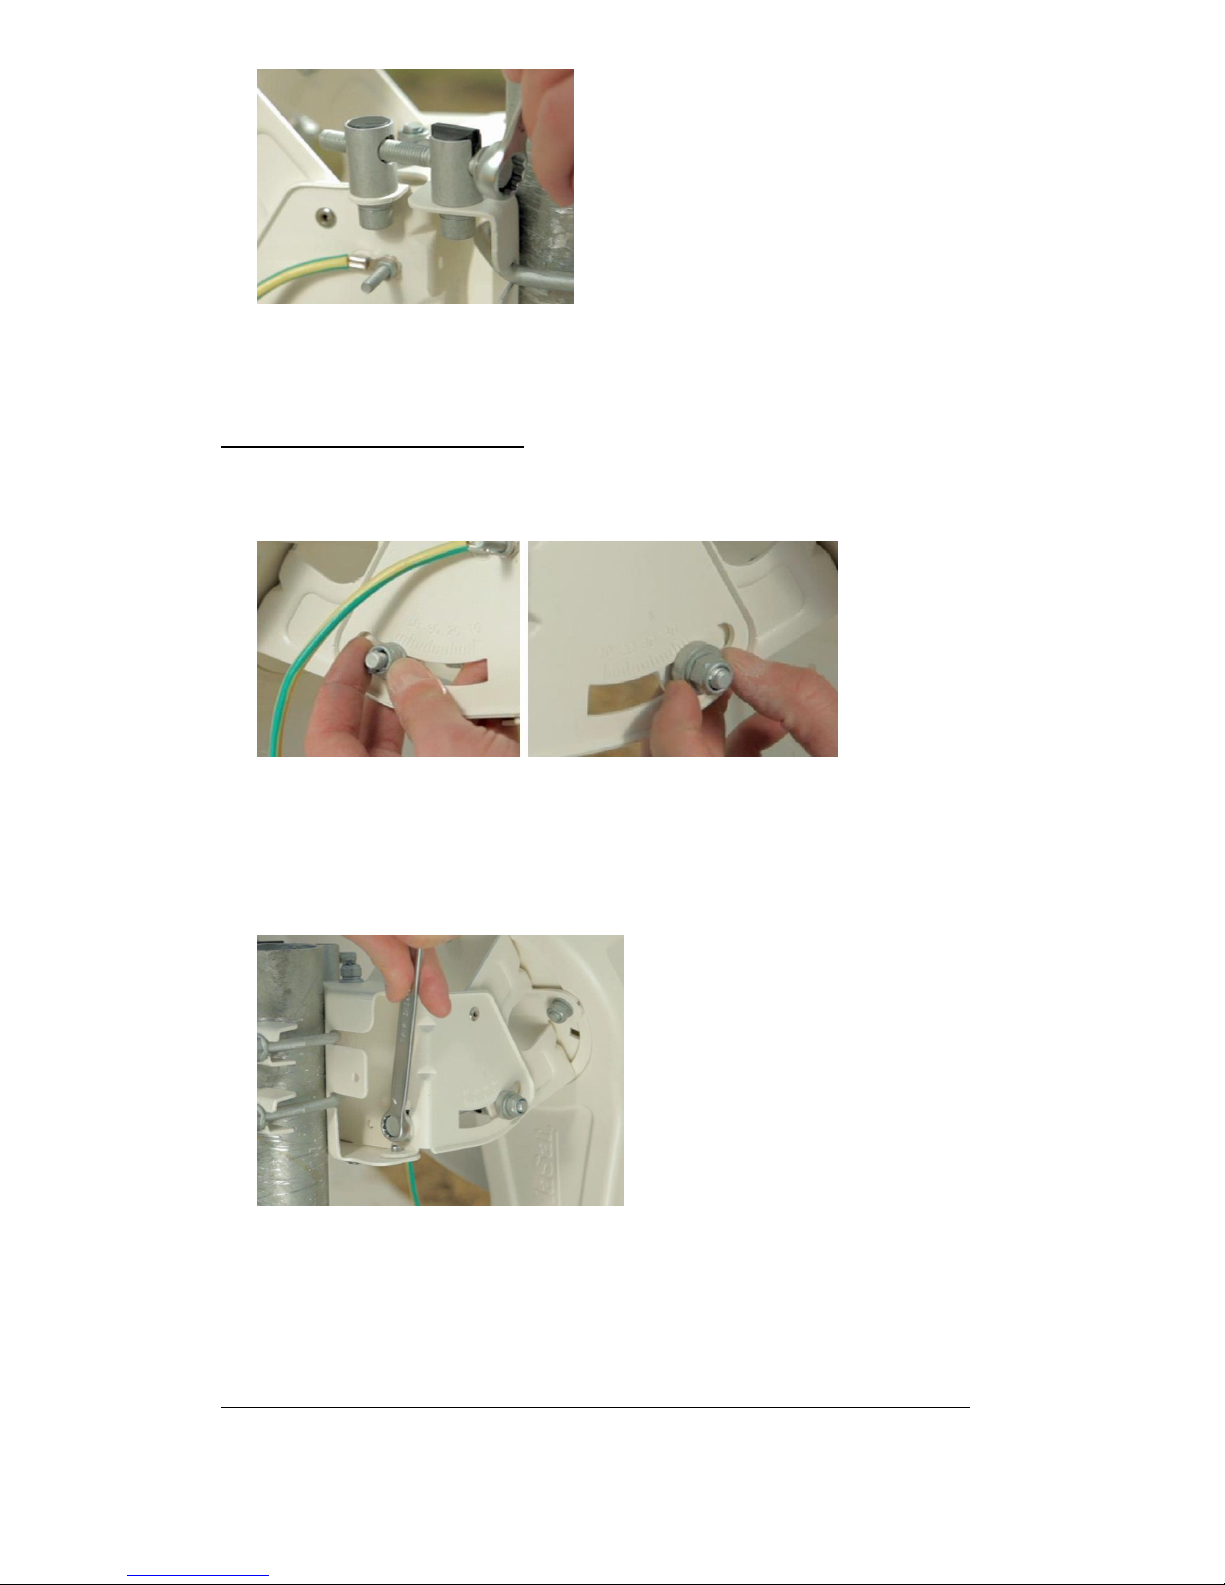
Once you have heard the change in tones, tighten the 4 bolts on the back of the dish holding it
to the wall bracket as shown below: (Make sure there is no drop in the tone)