Trilogy Touch Technology T3-HB15A1 Manuale utente

Trilogy Touch Technology
15” Chassis Touch Screen Monitor
T3-HB15A1

Table of Contents
GETTING STARTED 1
Introduction
Features
Unpacking and Checking of the Package Contents
Accessories Included
System Requirements
Mounting
Using Input
INSTALLING THE MONITOR 3
Connecting the Monitor
OPERATING THE MONITOR 4
Adjusting the Viewing Angle
Operating Procedure
Additional information about the On-Screen-Display
Menu Table
FOR YOUR SAFETY 8
SPECIAL NOTES ON LCD MONITORS 9
Cleaning
Power Management
Supported Timing
Troubleshooting Procedures
CONFORMITY AND COMPLIANCE 12
PRODUCT SERVICE AND SUPPORT 13
Contact Information
Warranty

Copyright © 2004, Trilogy Touch Technology, Inc. All rights reserved
The information contained in the document is subject to change without
notice. Nor does the contained information constitute a warranty, either
expressed or implied or as an obligation by Trilogy Touch Technology.
Trilogy Touch Technology shall not be liable for the accuracy of the
information, fitness for purpose or direct or indirect consequential damages.
Patents, patents under application, trademarks, copyrights and other
intellectual property rights may cover the information in this document.
Manufacturers or products mentioned in this document have their own
respective trademarks.

Page 1
GETTING STARTED
WARNING: Do not operate the LCD Monitor with an unknown utility power voltage source. Usage of incorrect
voltage may cause malfunctions and could cause fire or electric shock.
INTRODUCTION
Thank your for your selection of this Trilogy Touch Technology product. Bright and sharp images of text and graphics
are what you will find with your LCD Monitor. This product provides multiple resolutions with a flicker-free, sharp, and
vibrant color display, without the radiated emission and hazards of CRT monitors.
FEATURES
•Panel control functions
•Support for XGA resolution of 1024x768 pixels
•Wide viewing angle
•Wide tilting angle
•VESA DPMS power saving feature: powers off the monitor after a defined period of inactivity.
•Digital Character Smoothing
•Automatic Set-Up
•Windows 95/98/2000/XP Plug & Play Compliant
•Versatile, functional & User friendly OSD
•Plug & Play: Conforms to the VESA standards and support DDC1/2B specification
•Meets Energy Star guidelines for power management
•UNPACKING AND CHECKING OF THE PACKING CONTENTS
•Before unpacking your LCD Monitor, prepare a stable, level, and clean surface near a wall outlet. Set the LCD
Monitor box in an upright position and open from the top of the box before removing the right/left cushions.
It is highly recommended that all packaging materials be retained in the event that service is required.
ACCESSORIES INCLUDED
1
1 pc 1 pc 1 pc 1 pc 1pcs
VGA
Cable Driver
CD Power
Cord User’s
Manual
USB or
RS232
cable

Page 2
SYSTEM REQUIREMENTS
The following are basic requirements for using the Monitor. Please check the specifications and Supported Video
Timing section of this Users Guide for specifics.
•This monitor requires connection to a personal computer. Both industry standard architecture and Macintosh
hardware is supported.
•Various Operating System versions are supported for input operation. Please check the product features and
specifications to insure that the OS you intend to use is supported. The included software installation disc
contains the proper drivers for supported Operating Systems and devices.
•An analog, VESA standard video card for the PC is required. This monitor complies with DPMS and Plug &
Play (DDC) standards.
•The personal computer will require either a standard 9 pin serial COM port or USB port, depending on the
product version of the monitor. If the serial COM port is a 25 pin, D-connector, then an adaptor to 9-pin male
is required. In addition, consideration should be given to system IRQ assignments for serial operation, as the
controller cannot share an IRQ.
•There should be enough electrical outlets to support the system installation. This would include the
calculation of total current requirements. Although not a strict requirement, a surge protected power source
is recommended.
USING TOUCH INPUT
The surface of this LCD Monitor is a sensor. Some degree of caution is required to insure the effectiveness and long
life as an input device. Avoid using sharp objects such as pens, pencils, scissors or screwdrivers as a pointing stylus.
After installation of the driver software, a calibration should be performed. This action insures that the graphic
coordinates match the coordinates, sometimes called mapping.
Different software applications may require specific “mouse click” parameters. The control panel will allow selection
of multiple types of mouse button actions.

Page 3
INSTALLING THE MONITOR
•DO NOT install the monitor in areas where sudden temperature changes may occur, or in humid, dusty, or
smoky environments as it may cause fire, electric shock or damage.
•DO NOT expose this product to rain, water, moisture, or sunlight
•MAINTAIN good ventilation; covering of ventilation slots or holes may cause a fire
•PLACE the monitor at least 4” (or 10 cm) way from the walls
•SAFE storage temperature of the LCD Monitor is in a range of -20 to +65
•Install the software drivers via the supplied CD following standard operating system procedures
NOTE
Remember that the connection of USB devices is done after the software drivers are loaded. Further
instructions are provided during software installation and through the Help files on the driver CD.
CONNECTING THE MONITOR
1. Turn off the PC and the LCD Monitor before making any connections.
2. Use the supplied VGA cable to connect the VGA connector of the LCD Monitor to the VGA port of the PC
system.
3. Connect the male end of the power cord into a wall socket and the female end to the Monitor.
4. If your Monitor has a USB interface, use the supplied USB cable to connect the USB connector of LCD
Monitor to the USB port of the PC system. Remember to follow proper software driver installation.
5. If your Monitor has a RS232 serial interface, unplug the PC keyboard and reconnect it to the supplied serial
cable power adaptor. Connect the other end of the adaptor to the keyboard connector on the PC. Connect
the serial D-connector to and standard PC serial comport. Connect the other end or the serial interface cable
to the Monitor.
6. Turn on your computer, and then turn on your LCD Monitor.
NOTE
For added protection, it is recommended to use a Surge Protection device plugged between the AC Adapter
and the electrical wall outlet to prevent the effects of sudden current variations from reaching the LCD
Monitor. Sudden peaks of electricity may cause damage to the Monitor.
uuPower Plug the power cord in.
vvInput 1 Connect with detachable VGA cable.
wwInput 2
(Touch Function)
Connect to USB/RS232 cable

Page 4
OPERATING THE MONITOR
Users can adjust the picture to the desired brightness and sharpness by following these instructions. The adjustment
buttons utilize a security feature that required the use of a paper clip or pin to activate each selection. This is
accomplished through pinholes in each button except the power on/off.
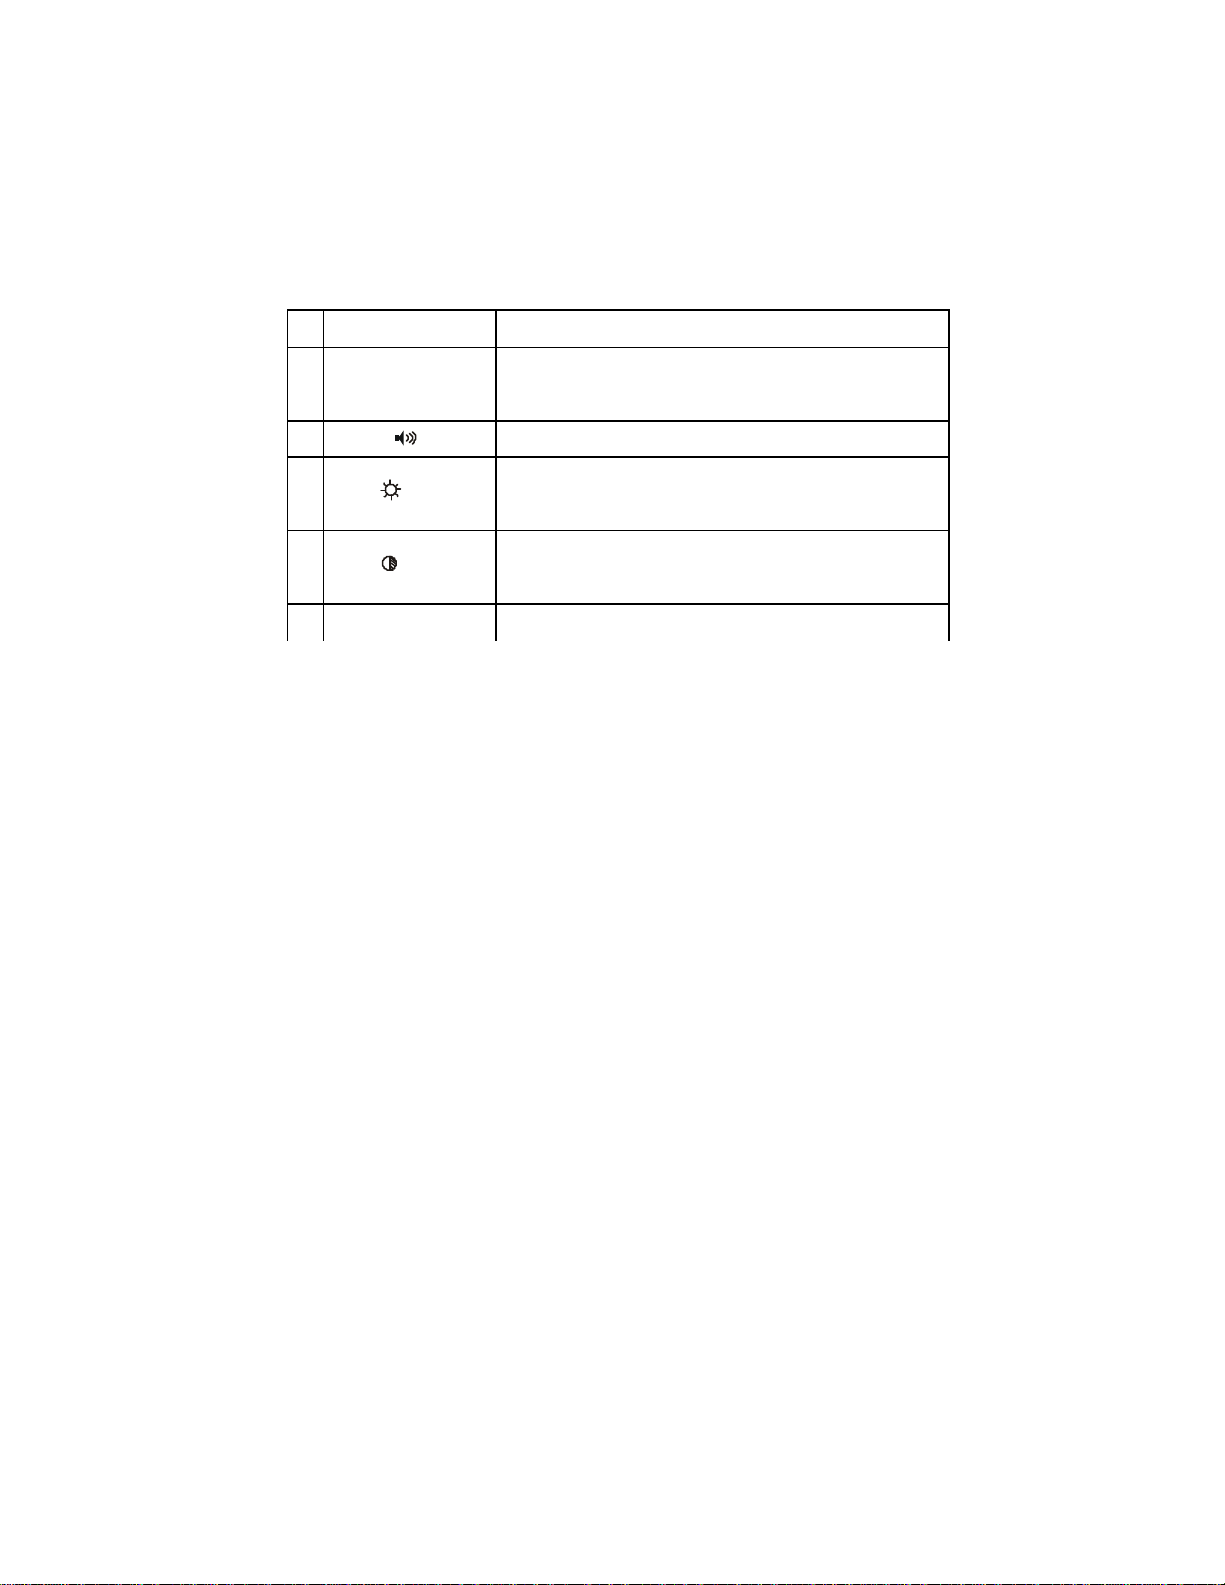
1Power Switch Power On/Off
2Auto Automatically optimize positions, phase &
clock when OSD is not shown
3Exit / Exit the OSD menu when OSD is shown
4 / Selection or adjustment when OSD is
shown/Quick brightness adjustment
5 / Adjustment when OSD is shown/Quick
contrast adjustment
6Menu Enter OSD/Access sub-menu & selection

Page 5
HOW TO USE THE OSD (ON SCREEN DISPLAY)
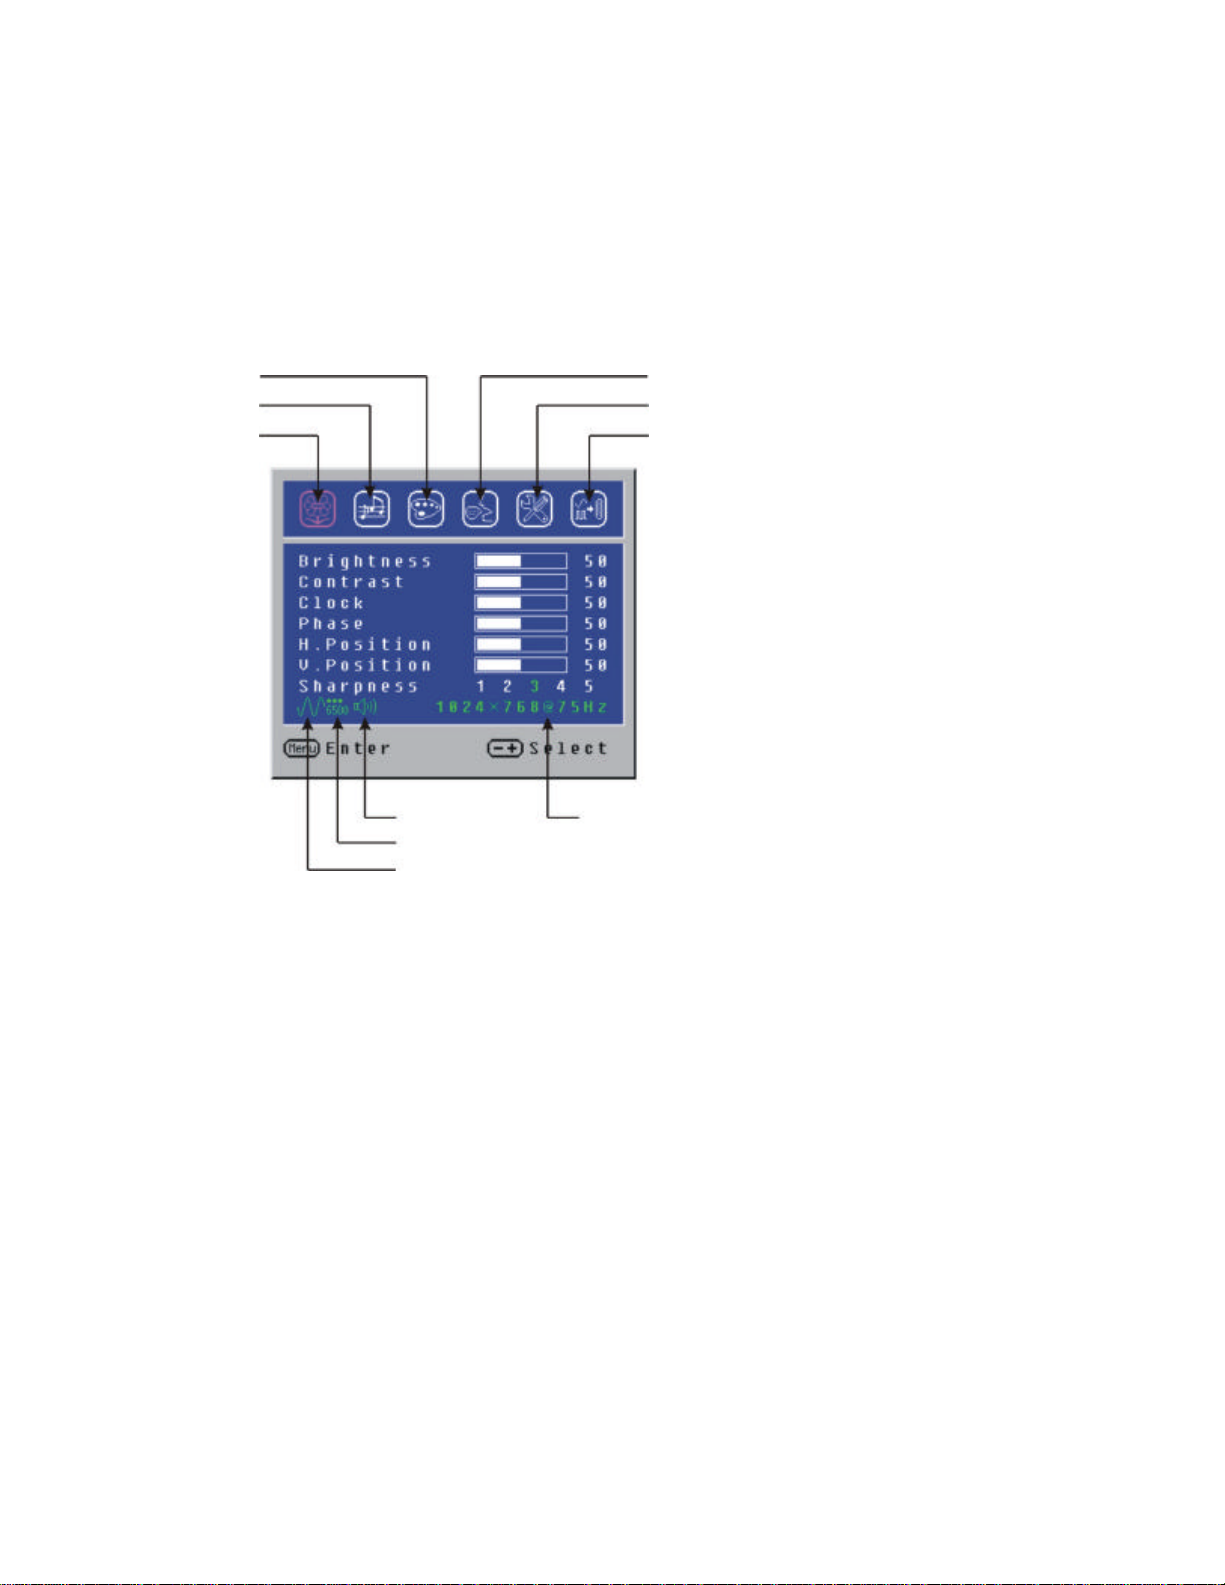
The OSD function allows the user to easily adjust the display to the desired requirements. The OSD menu includes a
main menu and sub-menus.
OPERATING PROCEDURE
Use the buttons on the right side control panel to adjust the OSD (see Operating the Monitor).
TO MAKE OSD ADJUSTMENTS:
1. Power on the LCD Monitor.
2. Press “MENU” button to pop up the OSD menu.
3. Press “+” or “-” button to select menu item.
4. Press “MENU” button to select sub-menu.
5. Press “+” or “-” button to select sub-menu item.
6. Press “EXIT” button when finished adjusting and accept the user setting.
7. Press “Auto” button to process auto tune function.
ADDITIONAL INFORMATION ABOUT THE ON SCREEN-DISPLAY
•The OSD disappears (times-out) several seconds after you stop pressing the buttons while performing an
adjustment. This function can be adjusted up to 60 seconds allowing the user more time. This adjustment is
Input Source Selection (optional)
Source Resolution & Frequency
Status
Language
Settings
Image Adjustment
Volume Adjustment
Color Temp. Selection
Color Temp. Status
Input Source Status
Current Audio Status

Page 6
Brightness Press the Brightness Button (3) when the Menu
is not displayed.
Contrast: Press the Contrast Button (2) when the Menu is
not displayed.
Auto
Setting:Press the Auto Button (5) when the Menu is not
displayed.
made in the “Settings” submenu.
•Any changes made are automatically saved in the Monitor memory when the OSD disappears. Turning off the
power should be avoided while using the OSD, as this may not allow changes to be saved.
•Adjustments for clock, phase and positions are saved for each signal timing or screen resolution. Except for
these adjustments, all other adjustments have only one setting that applies to all signal timing.
•The submenu color will change from white to pink when the function is selected.
•You can skip the OSD menu and display commonly used adjustment scales directly by using the following
button operations (refer to previous diagram for button locations):
The Auto Adjust process may take as much as 10 consecutive seconds. The display image will make noticeable
changes as the Auto Adjust function completes.
SELF-TEST CHECK:
This product provides a self-test ability, through which you can check whether the LCD monitor functions are working
properly. If your LCD monitor is properly connected, but there is no image showing and the power indicator light on the
Monitor displays orange, please follow the steps below:
1. Turn off both the computer and LCD monitor.
2. Unplug the video signal connector from the back of the computer.
3. Turn the LCD monitor on.
The monitor should display “No Signal Input” on the screen and the power LED indicator should be orange. If no
display is observed, there may be a problem with the Monitor.
Turn off the LCD monitor and reconnect the signal cable, then turn the computer and LCD monitor on. As the
computer boots, there should be a video display and the power LED should now be green. If the LED of the monitor is
an orange color after completing the steps above, please check your VGA card and computer system.

Page 7
MENU TABLE
Primary
Directory
Secondary
Directory
Description
Image Brightness Adjust the brightness of the screen.
Contrast Adjust the contrast of the image.
Clock Adjust the clock pulse of the image.
Phase Adjust the focus of the image.
H. Position Move the image left and right on the screen.
V. Position Move the image up and down on the screen.
Sharpness Adjust the picture sharpness of lower
resolutions.
Audio Volume Adjust the volume of the audio.
Mute Set the audio mute to be on or off
Color 9300K Set the color temp. to 9300K white color.
7500K Set the color temp. to 7500K white color.
6500K Set the color temp. to 6500K white color.
User/Red
User/Green
User/Blue
Adjust red/green/blue gain.
Language
English
Français
Italiano
Deutsch
Español
Settings OSD Timeout
OSD Position
Select the OSD language.
Adjust OSD display time setting.
Move OSD display position to any one of the
following 5 positions within the overall screen.
Auto Setting Set up to adjust clock, phase and positions
automatically.
Recall Restore to factory settings
Input
Source
Analog Select Analog input source:
3
1
5
2
4
Indice
Altri manuali Trilogy Touch Technology Schermo tattile
Manuali Schermo tattile popolari di altre marche

Elecro Engineering
Elecro Engineering Poolsmart Plus Istruzioni per l'installazione

Johnson Controls
Johnson Controls IQ4 HUB Manuale utente

Elo TouchSystems
Elo TouchSystems ET2270L Manuale utente

Elo TouchSystems
Elo TouchSystems ET1002L Manuale utente

Elo TouchSystems
Elo TouchSystems 3201L Manuale utente

Duratec
Duratec S15 Manuale utente