Uniden UWG 400 Manuale utente

1
For more exciting new products please visit our website:
Australia: www.uniden.com.au
New Zealand: www.uniden.co.nz
UWG 400

2
This manual contains important information about this product’s operation.
If you are installing this product for others, you must leave this manual or a
copy with the end user.
• When using your equipment, always follow basic safety precautions to
reduce the risk of fire, electric shock and injury to persons, including
the following:
• This equipment is NOT waterproof. DO NOT expose it to rain or
moisture (for the weatherproof Camera: DO NOT expose it to
excessive water or moisture).
• DO NOT immerse any part of the product in water. Do not use this
product near water, e.g., near a bathtub, wash bowl, kitchen sink or
laundry tub, in a wet basement or near a swimming pool.
• To avoid any risk of electric shock from lightning, avoid handling any
electronic devices (except battery powered ones) during an electrical
storm.
• Use only the power cord and/or batteries indicated in this manual.
Never dispose of any batteries in a fire: they may explode. Check with
local codes for possible special disposal instructions.
• Never tug or pull on any power cord: be sure to leave some slack in the
cord when placing your equipment, and always use the plug to unplug
cord from the wall outlet.
• Never leave power cords where they can become crushed, cut, or
frayed; when running power cords, avoid letting them rub against any
sharp edges or lie across any high traffic areas where people might
trip over them.
• Do not use the device if the adaptor cords or plugs have been
damaged, the unit has been exposed to liquids, or the unit has been
dropped or is damaged.
SAVE THESE INSTRUCTIONS!
IMPORTANT SAFETY INSTRUCTIONS
3
• If any item is missing or damaged, contact your place of purchase
immediately. Never use damaged products!
• Need help? Get answers at our website:
www.uniden.com.au for Australian model
www.uniden.co.nz for New Zealand model.
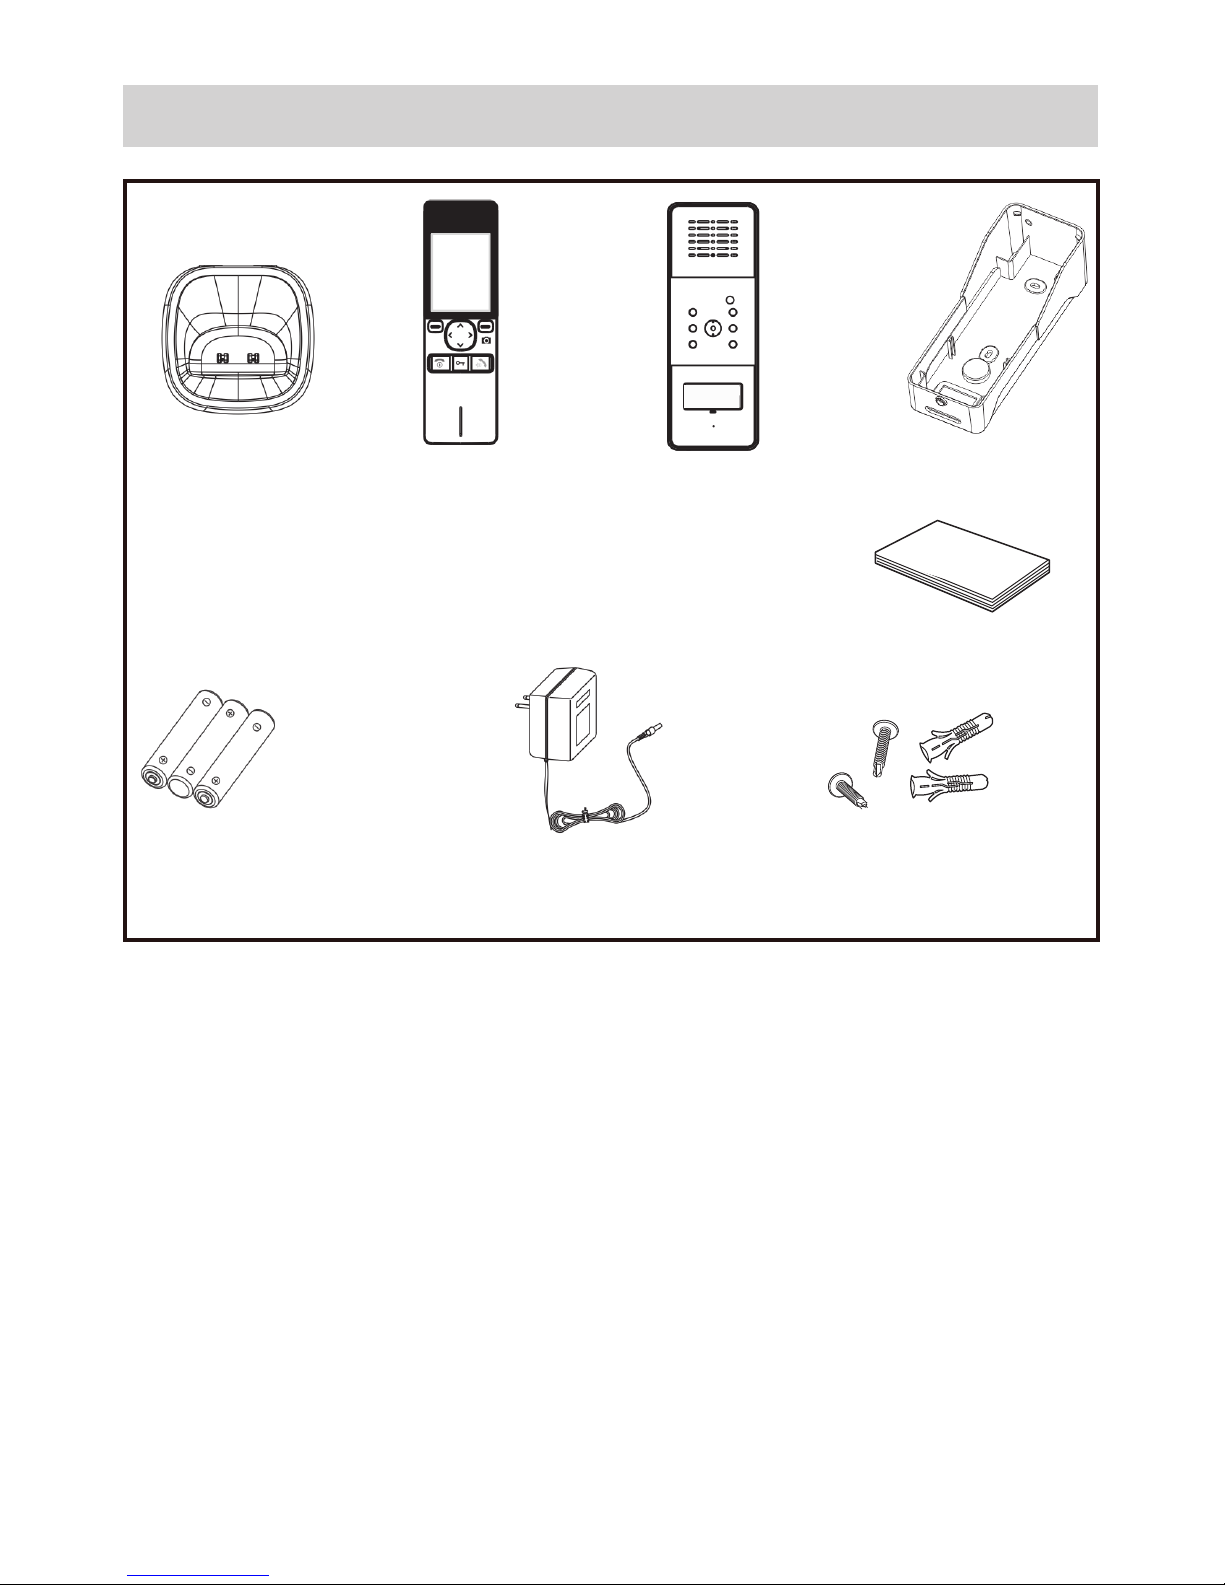
Charger
Receiver Camera Rain Cover
Batteries
(AAA Ni-MH) AC Adaptor Screws
WHAT’S IN THE BOX?
Owner’s Manual

4
CONTENTS
IMPORTANT SAFETY INSTRUCTIONS .............................................2
WHAT’S IN THE BOX? .......................................................................3
INSTALLING YOUR UNIT ..................................................................5
Receiver .................................................................................................................................5
Camera ..................................................................................................................................6
GETTING TO KNOW YOUR VIDEO INTERCOM ................................8
Receiver .................................................................................................................................8
Camera ................................................................................................................................10
OPERATIONS ..................................................................................11
Power On/Off .....................................................................................................................11
Registration ........................................................................................................................11
Make a Call ..........................................................................................................................12
Using the MENU ................................................................................................................13
Deregister the Camera ....................................................................................................15
Connecting the Camera (OPTIONAL) ..........................................................................16
Set Unlock Time ................................................................................................................17
TECHNICAL SPECIFICATION ..........................................................18
ONEYEAR LIMITED WARRANTY ...................................................19

5
Receiver
The rechargeable Ni-MH batteries (AAA size, 1.2V, 800mAh) come with
your Receiver. Install the batteries before use.
To replace the battery cover, slide the cover up
until it snaps in place.
• Reversing the orientation may damage the Receiver.
• The batteries need to be replaced if they do not recover their full
storage capacities after recharging.
• When replacing the batteries, always use good quality Ni-MH re-
chargeable batteries. Never use other batteries or conventional
alkaline batteries.
#Charge the Receiver, by placing it on the charger, completely (about
15 hours) before using.
Please note:
INSTALLING YOUR UNIT
To replace the battery cover, slide the cover up
until it snaps in place.
Remove the battery cover, slide it down and
off and then insert new batteries as indicated,
matching the correct polarity.

6
Camera
1. Install two C size batteries (not supplied) into the battery compartment.
2. Fit in the screws to secure the battery cover.
Installation
Connect the modular end of the AC power
adaptor to the power jack of the charger, then
plug the AC adaptor into a standard AC wall
outlet.
• Place the Receiver away from electrical appliances,
such as TV or PC.
• Ensure that the Receiver is placed in a location where
there is no obstruction such as walls, microwave
ovens and WiFi.
• Unlock the antenna (switch is located at the top of the
Receiver) to receive better signal.
Please note:
Antenna
Lock Switch
#The Camera can use either batteries or external DC power (optional).

7
#Choose a proper location for the Camera. Be sure to consider the
average height of visitors.
1. Align the rain cover and the screws with the drilled holes in the wall.
2. Place the Camera in the rain cover.
3. Drill the screw to fix and finish the installation.
Installation

8
Receiver
Charger
GETTING TO KNOW YOUR VIDEO INTERCOM
Charge Pins
Antenna
Lock Switch
Accept
MENU
LCD
Microphone
Power/End
Unlock (Optional)
Navigation Keys
Camera
Speaker

9
Keys/Indicators What it does
MENU • In standby: open the menu.
• In the Menu or any list: select the highlighted
item.
Accept Accepts the incoming call.
Unlock (optional) Unlocks the door (see page 16).
Power/End • Turn on/off the Receiver
• End the call
Camera • In standby: select the Camera for monitoring
(optional, see page 12)
• In the Menu: Back to the previous screen or
exit the menu
Navigations Keys Navigate through the menu
Speaker Output sound received from Camera
Antenna Receives video and audio signals from the
Camera
Lock Switch Unlock the antenna
10
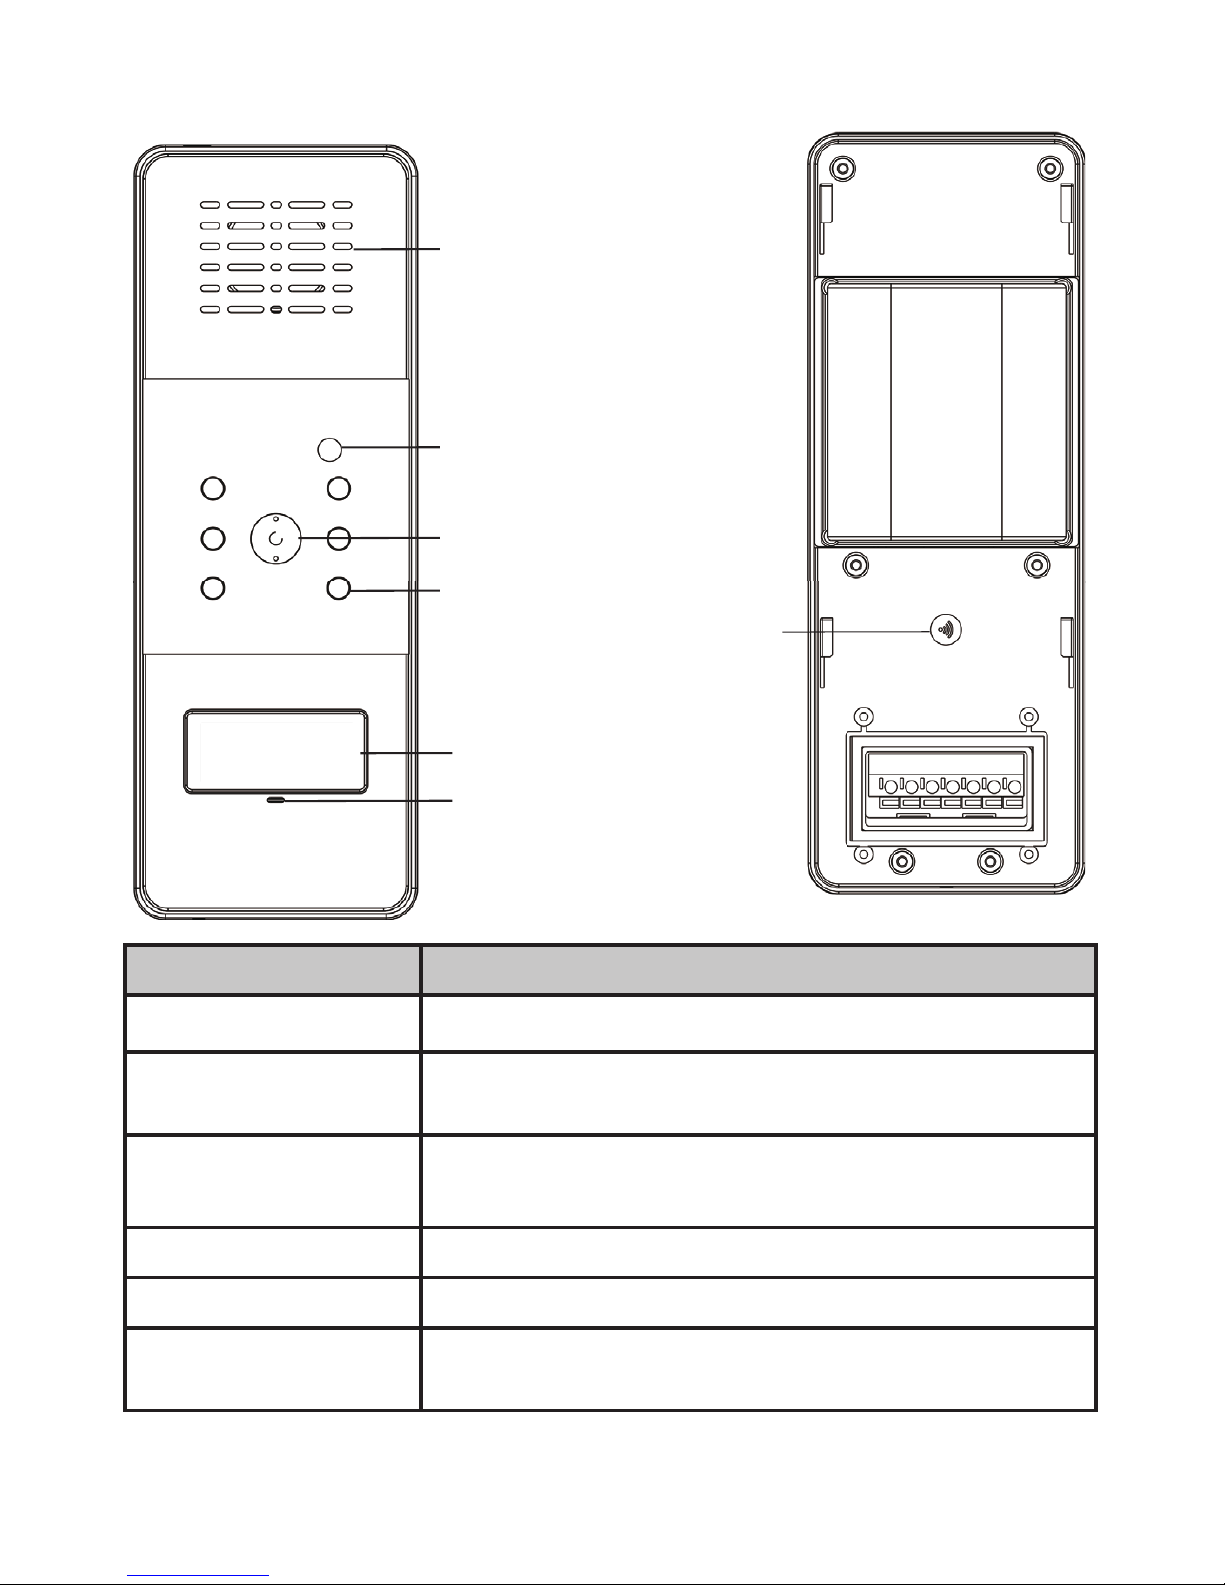
Camera
Call button
Speaker
Sensor light
Camera Lens
LED
Microphone
Register button
Indicators Function
Speaker Transmits sound from the monitor (intercom).
Sensor Light Measures light intensity to activate IR LEDs for
night vision.
LEDs Infrared LEDs provide viewing in no/low light
conditions.
Call button Press to make a call to the Receiver
Microphone Receives sounds from the area near the Camera
Register button Press and hold to register the Camera to the
Receiver.
Indice
Altri manuali Uniden Sistema di interfono


