UTILIS TMS 18 Manuale utente

ASSEMBLY INSTRUCTIONS
TMS 18 36 54 SHELTER

UTILIS S.A.S ZAC Eurotransit RUE ABBE MARIOTTE 57365 ENNERY FRANCE
T: +33 (0)3 87 71 60 74 W: www.utilis-international.com Email: contact@utilis.fr
2
2
ASSEMBLY INSTRUCTIONS
Table of contents
Equipment Description pg.3
Frame Setting-up pg.4
Canvas Setting-up pg.9
Doors Roll-up pg.13
Stacking pg.14
Shelter Disassembly pg.15

UTILIS S.A.S ZAC Eurotransit RUE ABBE MARIOTTE 57365 ENNERY FRANCE
T: +33 (0)3 87 71 60 74 W: www.utilis-international.com Email: contact@utilis.fr
3
3
EQUIPMENT DESCRIPTION
Frame is made of :
-One (1) Roof Assembly - Ridge Hinge Assemble, Roof Arches, Ridge Purlins, and Eave Purlins.
-Eight (8) Side Arches - hold up the roof assembly and each has foot to level the tent and also
for staking
-Which means a total of 9 parts for the frame.
The dimension of the deployed frame is :
-9,00 m x 6,00 m on the ground, which means a ground surface of 54 m².
-Frame is made from Aluminium.
-Profiles are made from alloy 6060 T5 (AFNOR - EN 573 standard )
-RAL 6014 lacquering (Epoxy powder) for military version.
-Mechanical parts are entirely made in machining process in AU 2017
-The surface finish for salt resistance is made by anodising (matte black)
-Axles and screws are in stainless steel.
Canvas
Canvas is made from 480 g/m² polyester PVC coated on both sides. The canvas parts are assembled by
high frequency welding.
Canvas is mildew and UV resistant. It withstands temperatures between -30 and +70°C.
The shelter includes a groundsheet and a roof net to hang some elements like lights, electrical boxes,
inner liner, etc.
Both elements are integral parts of the canvas but are removable. It is packed in a carrying bag with
handles.
Shelter applications
The shelter can be used between -30° et +50°C.
When stacked, the shelter can withstand 110 km/h wind. However, if the wind exceeds 50 km/h during
the set-up, the frame should be stacked. It is water and UV resistant.

UTILIS S.A.S ZAC Eurotransit RUE ABBE MARIOTTE 57365 ENNERY FRANCE
T: +33 (0)3 87 71 60 74 W: www.utilis-international.com Email: contact@utilis.fr
4
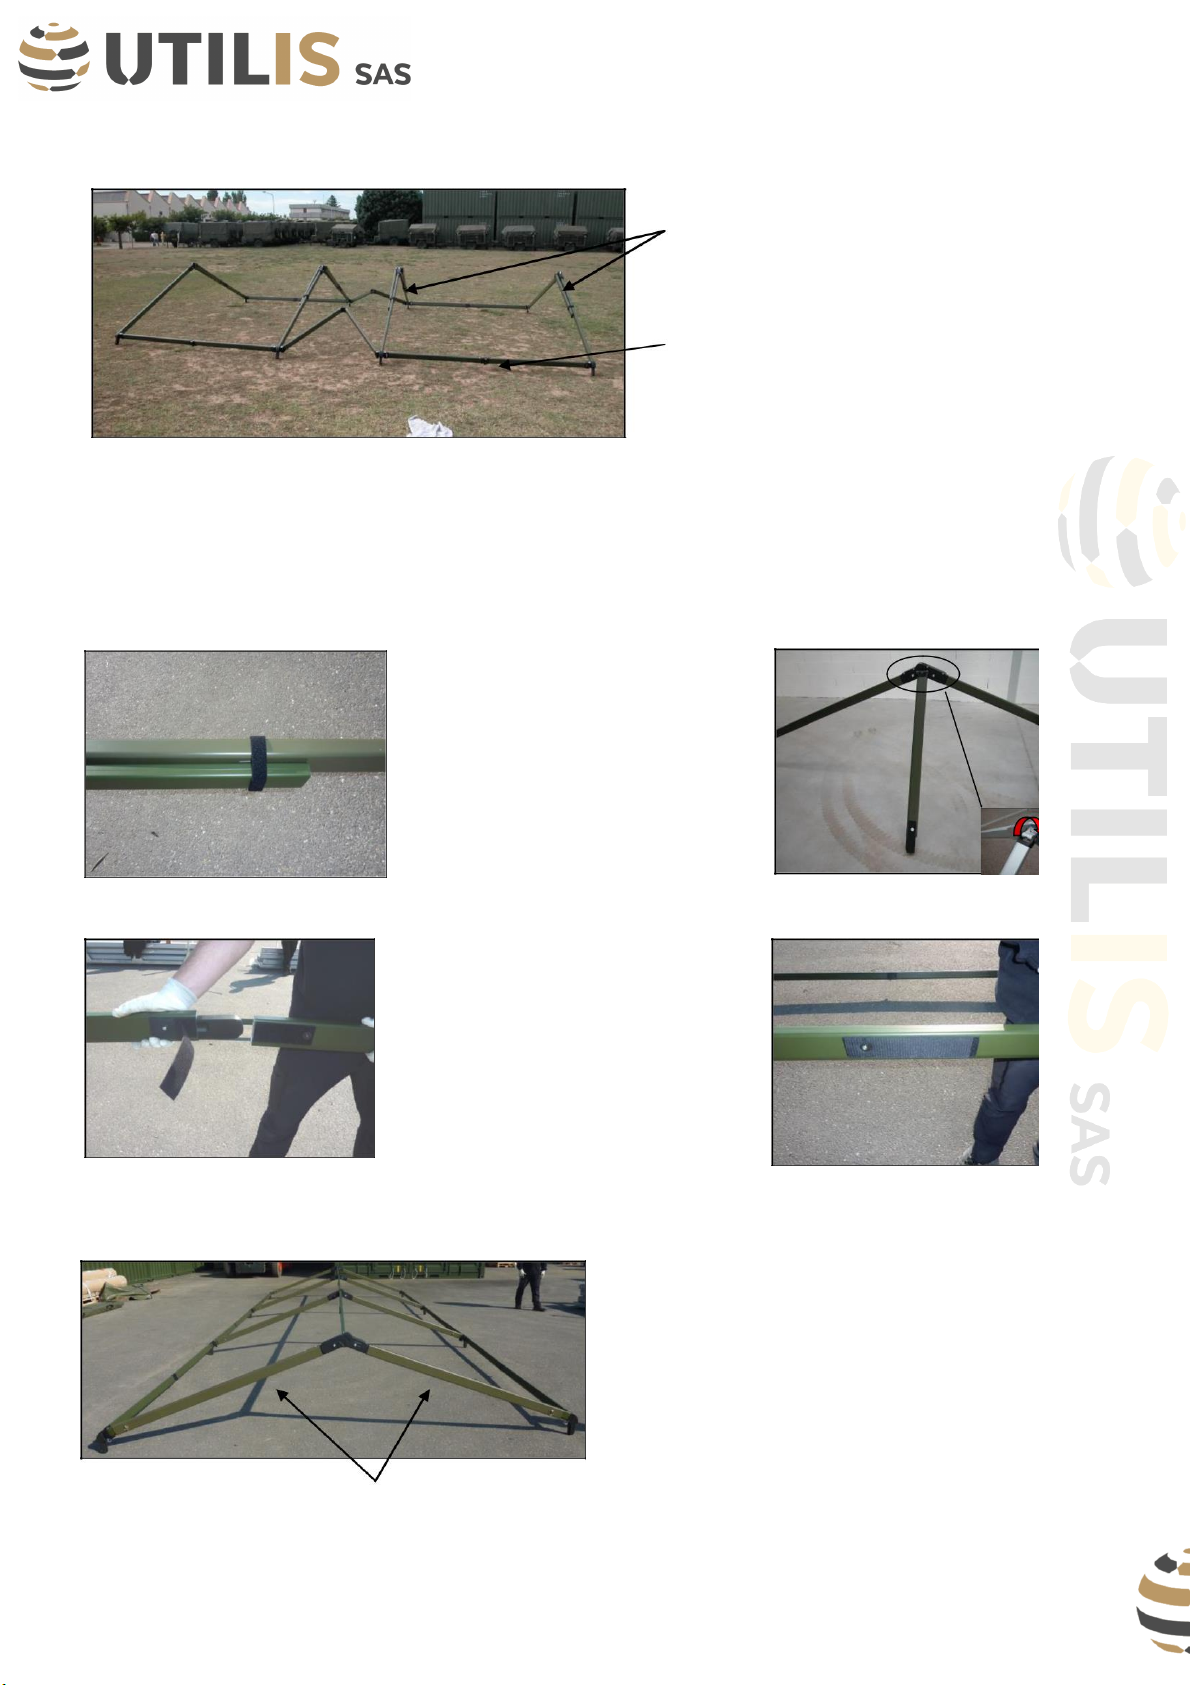
Unfold the roof frame assembly by unfolding the roof
arches while leaving the ridge hinges resting on the ground
to limit the effort required to unfold.
Raise the roof frame upright so it is resting on the eaves.
Remove the frame bag and place it outside the cleared set-
up area.
4
Frame setting-up
SHELTER SETTING-UP
(minimum 4 persons by tent)
Position the frame bag in the middle of this area. Place the
longest length of the bag in the same direction as the desired
length of the tent when erected.
You will need a 10 x 8 m setting-up area.
Open the frame bag and remove the side arches with
integrated feet. Place 4 side arches on either side of the
cleared area about a distance of 3 meters from the center.
UTILIS S.A.S ZAC Eurotransit RUE ABBE MARIOTTE 57365 ENNERY FRANCE
T: +33 (0)3 87 71 60 74 W: www.utilis-international.com Email: contact@utilis.fr
5
5
Ridge connection bars
Self-locking mechanism
Deploy the roof frame by grasping the ridge hinge at both ends, lifting slightly off the ground, and pulling
away from the center. The eave purlins will lock into place automatically. The eave purlins will be held
in place mechanically which gives rigidity to the roof assembly.
Slip the Velcro band down and
release the ridge purlins. Grasp the
two pieces of the ridge purlin.
Rotate 90º while lowering it to the
ground. Repeat this procedure on
the other 2 ridge purlins.
Grab the 2 pieces of the ridge purlin
and slide the male connector into the
corresponding piece of the ridge
purlin. When the pieces are
assembled, as added safety use the
Velcro strip across the connection.
Repeat this procedure for the other 2 ridge purlins.
The roof assembly is complete. The roof fram will
be in the configuration shown to the left. Now, you
have to slide out the telescopic part of the roof
arche.
It has to be done simultaneously by 4 people.
Roof arche

UTILIS S.A.S ZAC Eurotransit RUE ABBE MARIOTTE 57365 ENNERY FRANCE
T: +33 (0)3 87 71 60 74 W: www.utilis-international.com Email: contact@utilis.fr
6
6
Take the safety pin and the axle off.
Slide out the telescopic part until positioning the next hole in front of
the external bar hole. Replace the axle and the safety pin.
Repeat this procedure on the opposite side of the roof.
Frame with one side out
Frame with both sides out
UTILIS S.A.S ZAC Eurotransit RUE ABBE MARIOTTE 57365 ENNERY FRANCE
T: +33 (0)3 87 71 60 74 W: www.utilis-international.com Email: contact@utilis.fr
7
7
cleat
You now have to slot the leg profiles on the correct side (see below explanations) lifting the frame by 4
people.
The cleats (black plastic parts fixed on each leg profile) must face toward the outside.
Pulley
The side which has to be set-up first will
be defined by the ridge, referring to the
rope passage direction. You will position
first the four feet on the side of the rope
passage.
Rope passage direction
Rope passage
With 4 people: each one takes a foot, lift the frame and slot the leg profile into the frame.

UTILIS S.A.S ZAC Eurotransit RUE ABBE MARIOTTE 57365 ENNERY FRANCE
T: +33 (0)3 87 71 60 74 W: www.utilis-international.com Email: contact@utilis.fr
8
8
Slide the leg profiles’ telescopic part out in the same way that for
the roof arches.
Take the safety pin and the axle off on the
4 leg profiles.
Lift the frame simultaneously until
Positioning the next hole in front of the
External bar hole.
Replace the safety pin and the axle.
The frame is now in this configuration

UTILIS S.A.S ZAC Eurotransit RUE ABBE MARIOTTE 57365 ENNERY FRANCE
T: +33 (0)3 87 71 60 74 W: www.utilis-international.com Email: contact@utilis.fr
9
9
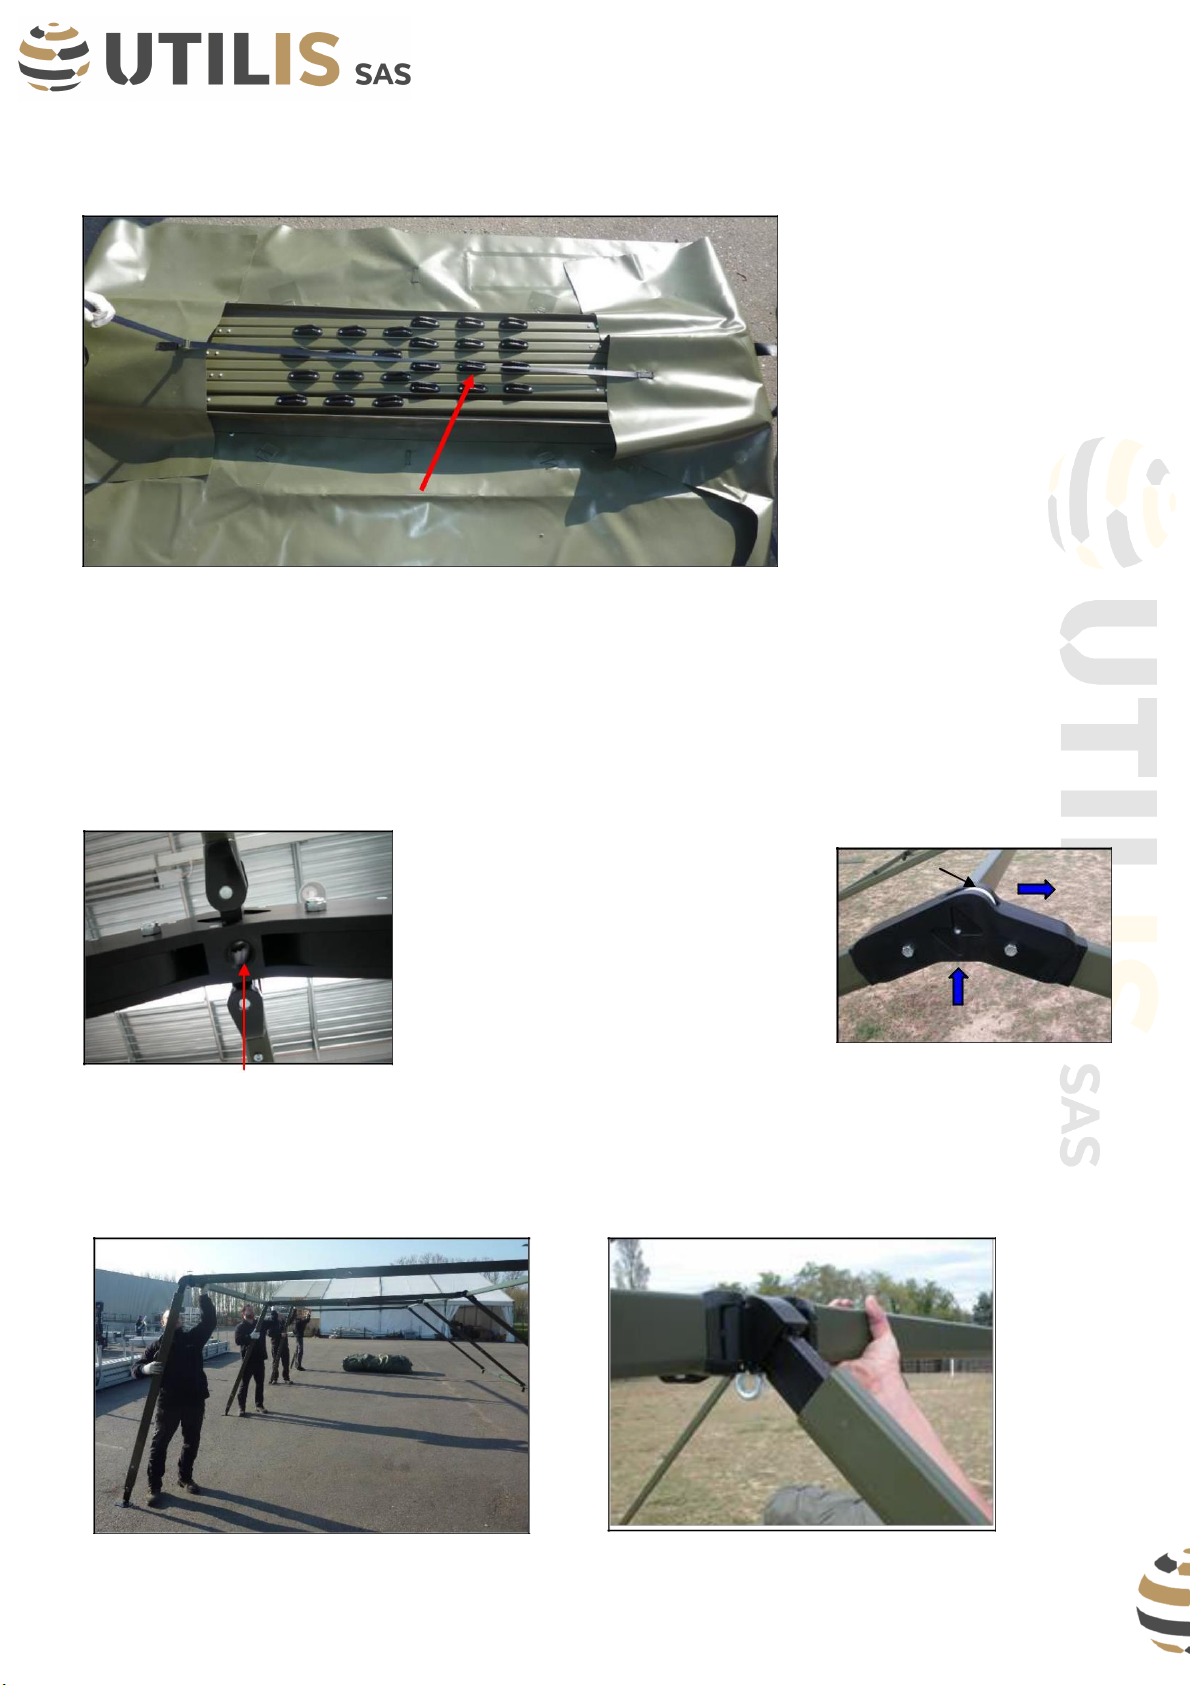
Canvas setting-up
Now, you will start to set-up the canvas. The first step is to position the bag under the frame under the
end ridge (as shown on the picture)
Then you will have to unroll the canvas from a frame end to the other.
Open the bag and unroll the
canvas along the entire length.
Remove the bag and place it
outside the set-up area.
Unfold the canvas and grab the tension ropes.

UTILIS S.A.S ZAC Eurotransit RUE ABBE MARIOTTE 57365 ENNERY FRANCE
T: +33 (0)3 87 71 60 74 W: www.utilis-international.com Email: contact@utilis.fr
10
10
Tension ropes setting-up principle
Ridge rope
Intermediary rope
Eave rope
Outer canvas
Put the ridge rope along the pulley and
the intermediary ropes through the
adapted ring and pull them till the end of
the frame passing on the top till the cleat.
Let the rope stick out by 10 cm.
With 4 people : each one takes a foot, lift the frame and slot the
leg profile into the frame.
Slide the telescopic bar as already done.
Questo manuale è adatto per i seguenti modelli
2
Indice


