
Watermark PB-8524 Manuale utente
Shower Systems
PB-8524 Wall Positioning Bar
Shower Systems –PB-8524 Wall Positioning Bar Page 1
. NOTE:
Use plywood backing in walls whenever possible, to ensure security to wall.
Be sure that distance between centers of posts is correct before drilling into wall.
Do all painting, staining or wall papering before accessory installation.
Adjustment and Installation Notes:
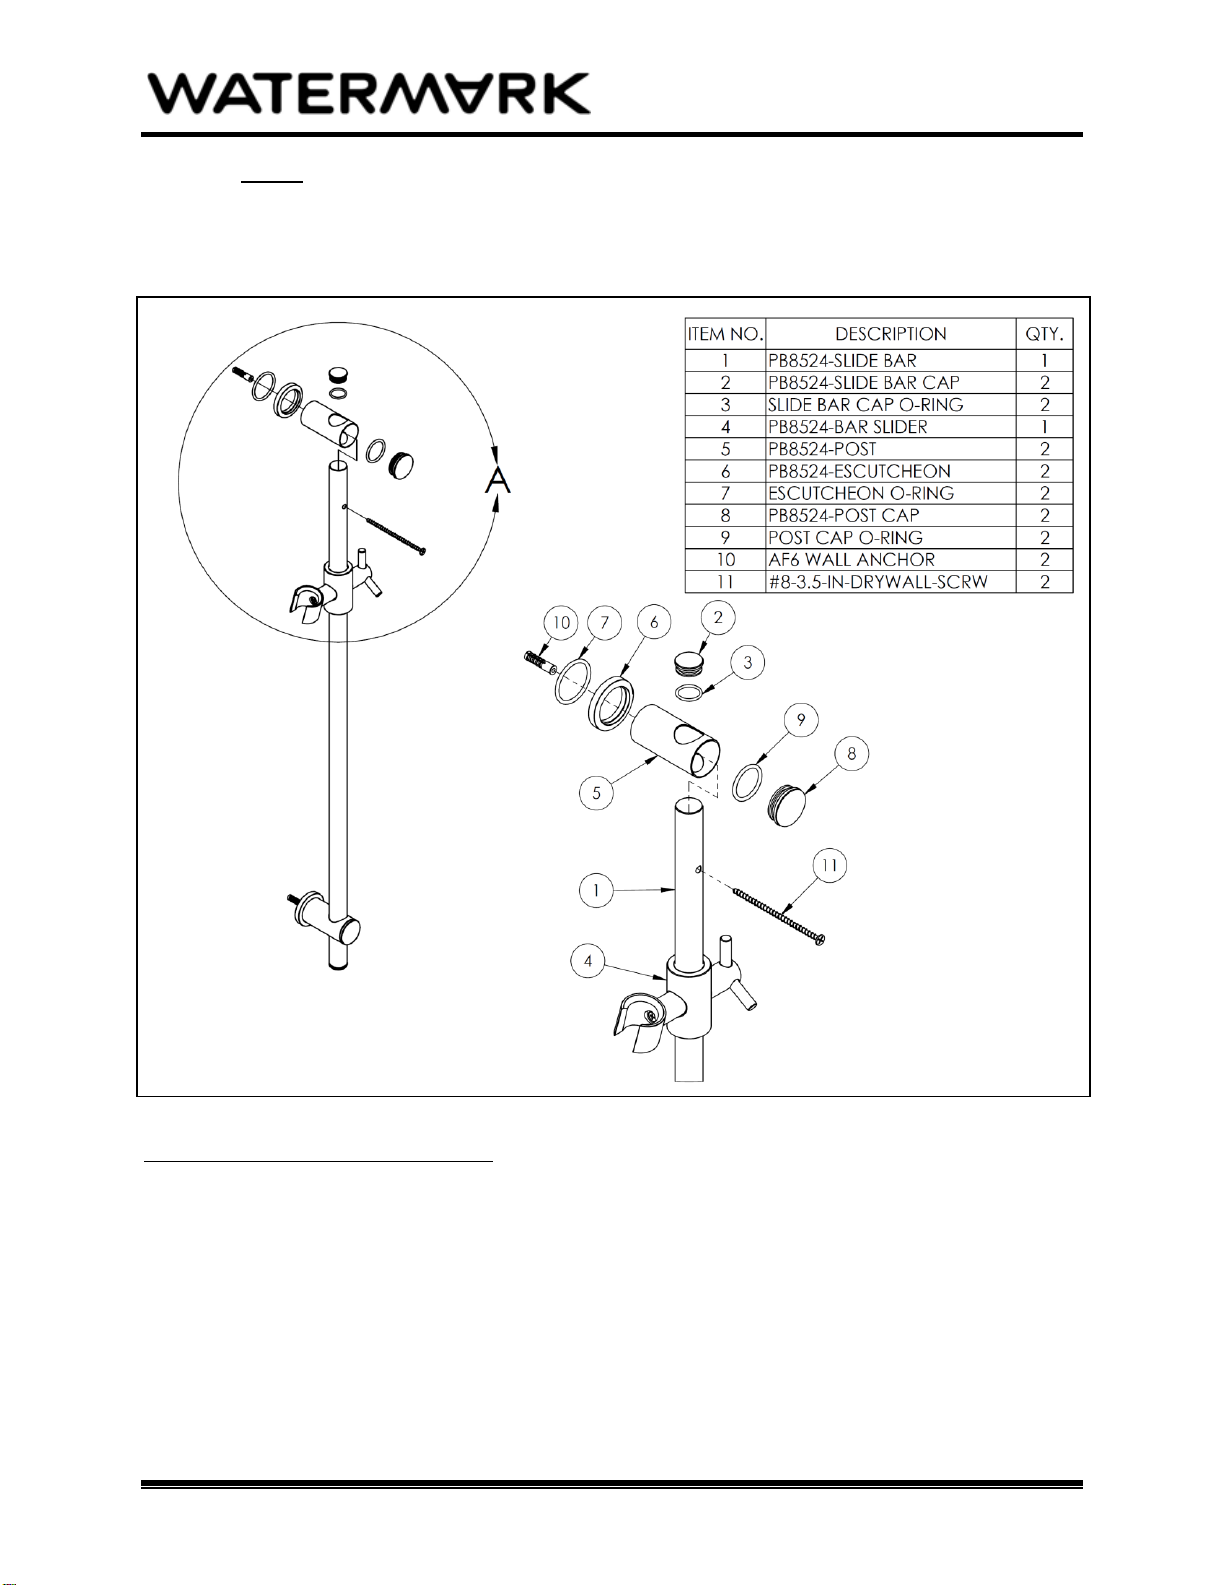
1. Determine where on the wall the positioning bar is to be installed.
2. Using the holes on the Slide Bar (1) as reference, mark the center of the holes on the wall.
3. If using supplied Wall Anchor (10), drill a ¼” hole at each marked position (1 ¾” min. hole
depth).
4. Insert the Wall Anchors (10) into holes until flush with the wall (a hammer may be needed to
lightly tap the Wall Anchors flush).
5. Remove the Post Cap (8) from the Post Assembly (5-7).
6. Insert the Slide Bar (1) into the Post (5) until the hole on the Slide Bar (1) is visible from the front
of the Post (5).
Shower Systems
PB-8524 Wall Positioning Bar
Shower Systems –PB-8524 Wall Positioning Bar Page 2
Note: The holes at each end of the Slide bar (1) consist of two different size holes. The
larger hole should face away from the wall.
7. Insert the supplied Drywall Screw (11) through the front of the Post (5) and through the Slide
Bar (1). Screw should rest inside the Slide Bar (1).
8. Secure the Post Assembly (5-7) to the wall with the Drywall Screw (11).
9. Attach the Post Cap (8) back on to the Post Assembly (5-7).
10. With the Bar Slider (4) on the Slide Bar (1), repeat for the second Post Assembly (5-7, 8-9).
Adjustment of Positioning Bar Slider:
IMPORTANT INSTALLATION INFORMATION
DO NOT USE PLUMBER’S PUTTY ON ANY OF THE BRASS COMPONENTS
-This will cause the finish to tarnish and void the warranty. A non-corrosive Alkoxy Silicone
is recommended.
To help ensure the beauty of brass accessories, never install an item until construction is almost
completed and after:
Workmen have finished treating nearby tile or marble with acid or chemicals.
The air conditioning or heat has been turned on.
The room has been painted or stained.
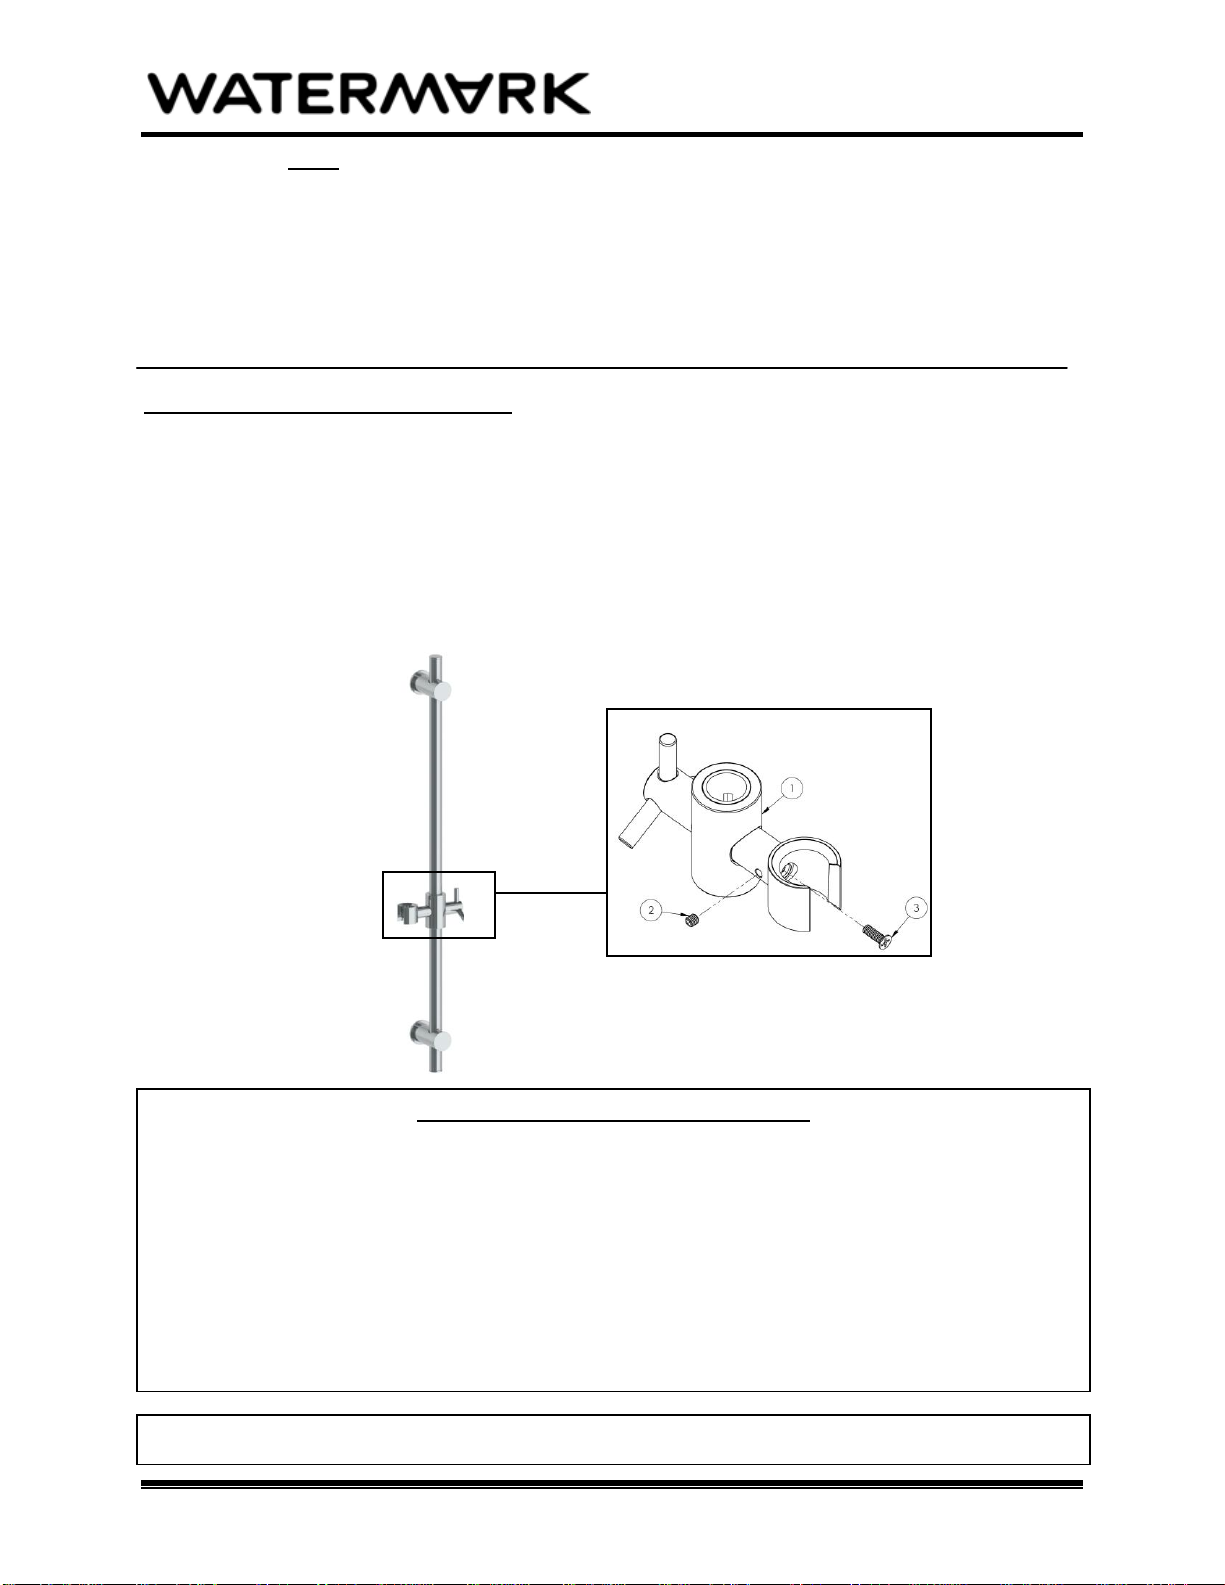
To adjust the stiffness of the Positioning Bar Slider (1), you will need a 5/64” (or 2 mm) allen wrench.
To increase the stiffness of the Positioning Bar Slider (1), turn the set screw (2) CCW and then turn the
support screw (3) CW to tighten. Once at the desired stiffness turn the set screw (2) CW until tight.
To decrease the stiffness of the Positioning Bar Slider (1), turn the set screw (2) CW and then turn the
support screw (3) CCW to loosen. Once at the desired stiffness turn the set screw (2) CW until tight.
For technical support or warranty information, please call 718-257-2800
Indice
Altri manuali Watermark Apparecchio per il bagno

Watermark
Watermark Beverly Roosevelt CRY4 Manuale utente

Watermark
Watermark SH-35WF Manuale utente

Watermark
Watermark Elements 21 Series Manuale utente

Watermark
Watermark AUT-WT1 Manuale utente

Watermark
Watermark Edge 35-2-ED1-PC Manuale utente

Watermark
Watermark aquaBUBBLER ABS14 Manuale utente

Watermark
Watermark Rainey RNS4 Manuale utente

Watermark
Watermark Lily LLD4 Manuale utente


