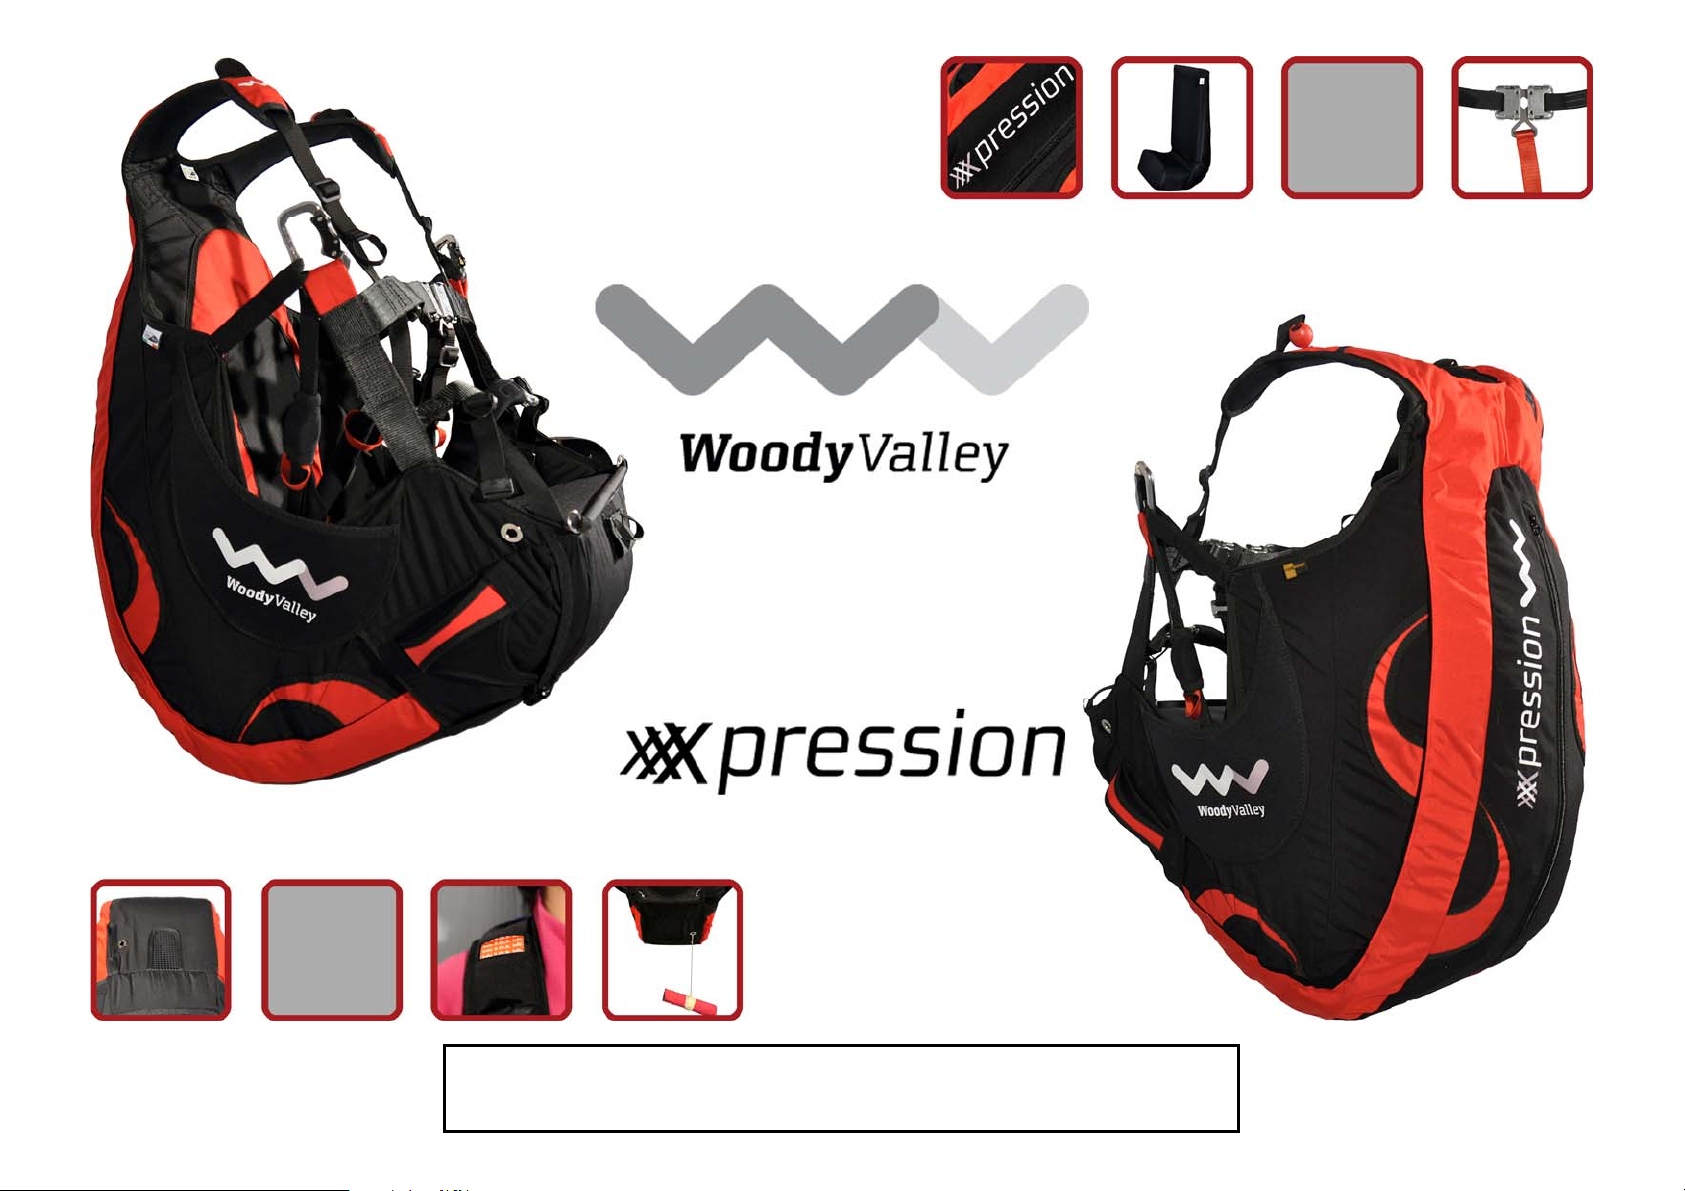
Woody Valley Xpression Manuale utente

Please read this manual before flying with the X-PRESSION
for the first time.

THANK YOU!
We would like to thank you for having chosen one of our products, and we invite you to read this important document, the User Manual for the harness. Please pay
special attention to the two most important paragraphs, regarding:
Insertion of the reserve parachute.
The reserve parachute is a piece of equipment that may save your life. It must be treated so that it works correctly when it is required, whether this happens in
two days’ time, or two years from now.
Adjusting the harness.
The harness forms the connection between the pilot and the paraglider, and it is an essential component in optimizing performance and the pleasure of flying. A
bad harness that is well adjusted may enable you to fly well, but a good harness that is badly adjusted may put you off flying altogether.
We are confident that this harness will give you greater comfort, control, performance and enjoyment in flight. We are conscious of the fact that reading an
instruction manual is not an exciting experience. However, please remember that the respective product is not a citrus juicer or a mobile phone, and that correct
use of the harness helps reduce the risk of flying accidents. This manual contains all the information necessary to assemble, adjust, fly and store your harness.
Thorough knowledge of your equipment will improve your personal safety and your level of flying.
The Woody Valley team
SAFETY NOTE
You have purchased a piece of equipment manufactured by us, and
so you are aware of your identity as a paraglider pilot holding the
respective pilot’s licence, and you accept all the risks connected to
paragliding including the possibility of injury and death. The
incorrect or inappropriate use of Woody Valley equipment greatly
increases this risk. In no case can Woody Valley and the Woody Valley
retailer be held responsible for personal injury caused to yourself or
to third parties, or for whatever type of damage. If you have any
doubts on the use of our equipment, please contact your retailer or
the importer for your country.

INDEX
1- GENERAL INFORMATION .................................................................................................................................................................................................................. 1
1.1- CONCEPT ....................................................................................................................................................................................................................................................................................2
1.2- X-PRESSION PROTECTION.......................................................................................................................................................................................................................................................2
1.3- S.O.S. LABEL..............................................................................................................................................................................................................................................................................2
2- BEFORE USING THE HARNESS ......................................................................................................................................................................................................... 3
2.1- ASSEMBLING THE DORSAL PROTECTION FOR X-PRESSION .....................................................................................................................................................................................................3
2.2- RESERVE PARACHUTES ..............................................................................................................................................................................................................................................................3
2.2.1- Connecting the deployment handle to the deployment bag .............................................................................................................................................................................4
2.2.2- Connecting the reserve parachute to the harness..............................................................................................................................................................................................4
2.2.3- Inserting the reserve parachute into the X-PRESSION harness ......................................................................................................................................................................7
2.2.4- Reserve parachute deployment................................................................................................................................................................................................................................9
2.3- HARNESS ADJUSTMENTS............................................................................................................................................................................................................................................................9
2.3.1- Adjusting the sitting position....................................................................................................................................................................................................................................9
2.3.2- Adjusting the back......................................................................................................................................................................................................................................................10
2.3.3- Shoulder-strap adjustment .....................................................................................................................................................................................................................................10
2.3.4- Chest strap adjustment ............................................................................................................................................................................................................................................11
2.3.5- Leg strap adjustment ................................................................................................................................................................................................................................................12
2.3.6- Installing smoke canisters........................................................................................................................................................................................................................................12
3- FLYING WITH THE X-PRESSION HARNESS ..................................................................................................................................................................................... 14
3.1- PRE-FLIGHT CHECKS ................................................................................................................................................................................................................................................................14
3.2- POCKETS ..................................................................................................................................................................................................................................................................................14
3.3- DUAL FLIGHT ............................................................................................................................................................................................................................................................................15
3.4- FLYING ABOVE WATER...............................................................................................................................................................................................................................................................15
3.5- TOW BRIDLE CONNECTION.........................................................................................................................................................................................................................................................16
3.6- LANDING WITH THE X-PRESSION HARNESS ..........................................................................................................................................................................................................................16
4- FEATURES AND ASSEMBLY OF OPTIONAL ACCESSORIES ............................................................................................................................................................ 16
4.1- ASSEMBLY AND ADJUSTMENT OF THE SPEED-SYSTEM.............................................................................................................................................................................................................16
4.2- COCKPIT AND FRONT BALLAST ASSEMBLY ................................................................................................................................................................................................................................17
4.3- LEG COVER ...............................................................................................................................................................................................................................................................................17
4.4- RELAX-BAR...............................................................................................................................................................................................................................................................................17
5- MAINTENANCE AND REPAIR .......................................................................................................................................................................................................... 18
6- TECHNICAL DATA ........................................................................................................................................................................................................................... 19

1
1- GENERAL INFORMATION
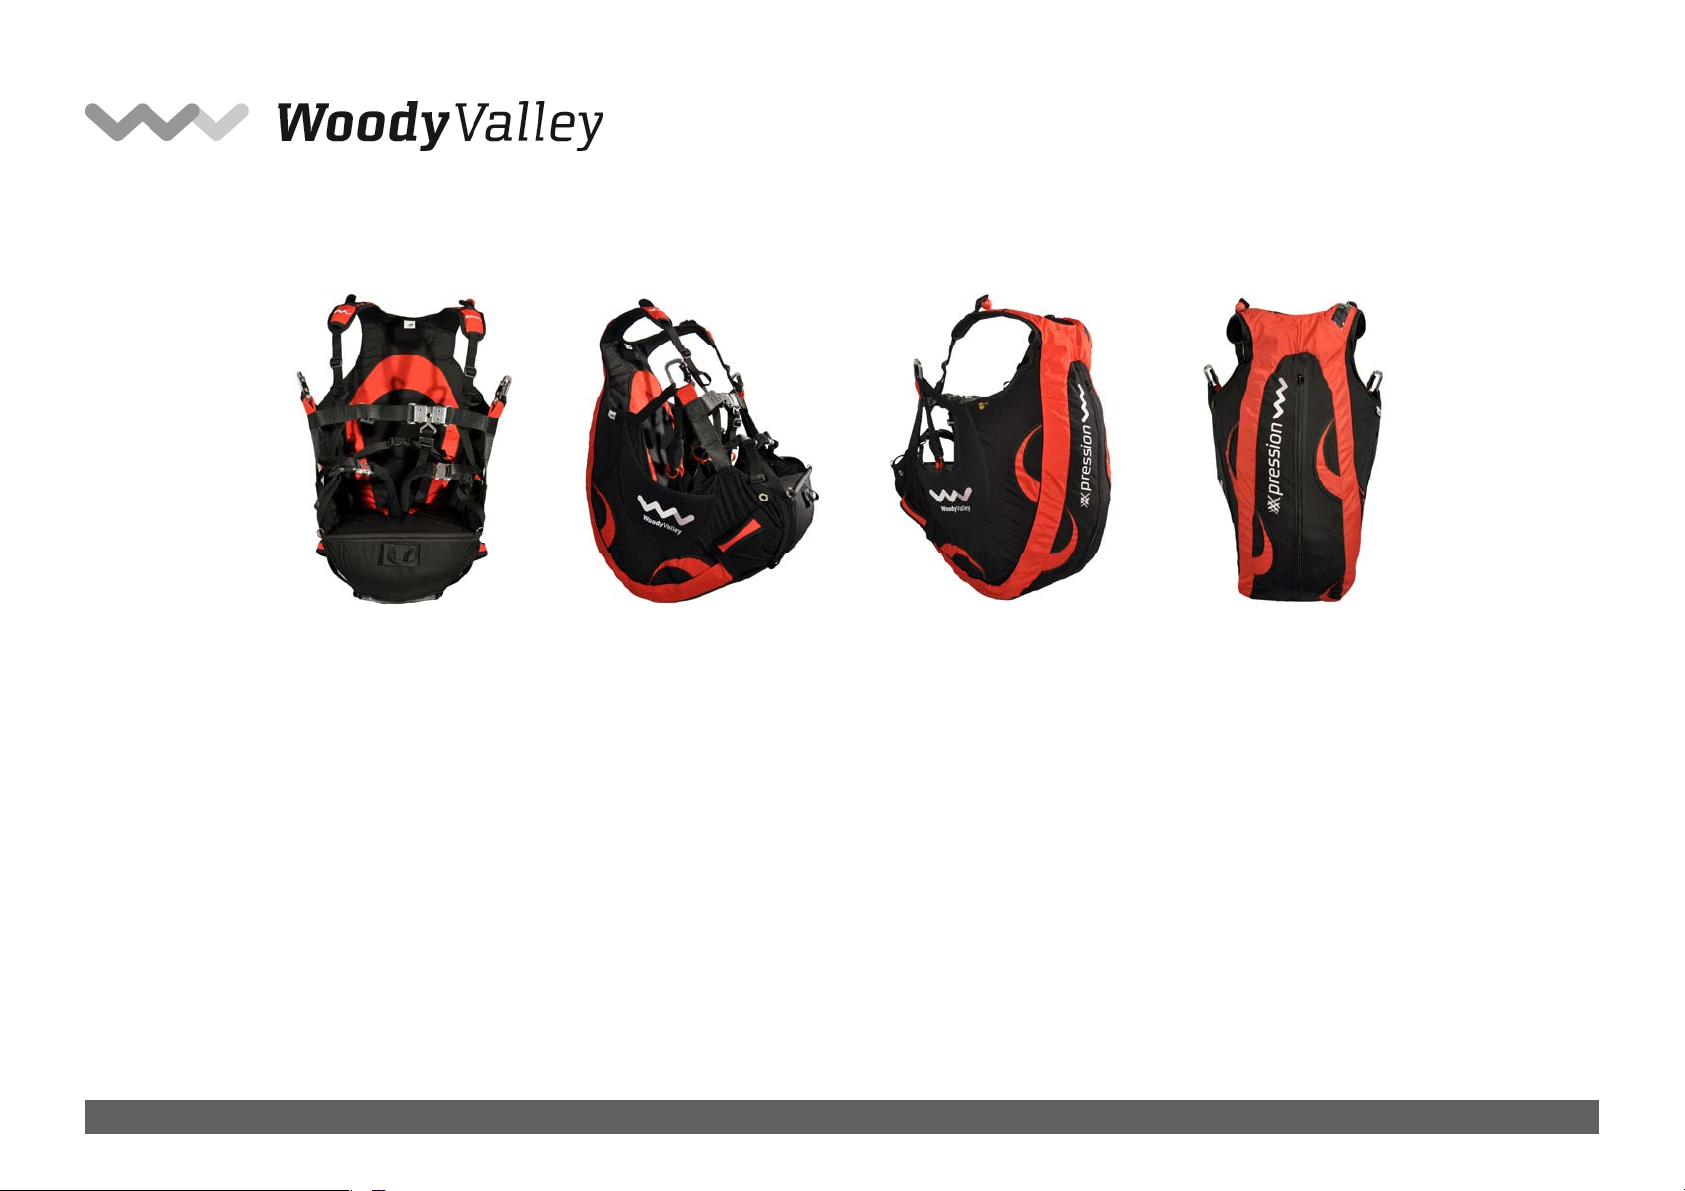
The equipment supplied should comprise:
- Harness
- Wooden seat plate
- Hook-in karabiners
- 2 floating reserve parachute deployment handles
- 3 elastic loops for fastening the reserve parachute
The optional extras comprise:
- Speed-bar
- Relax-bar
- Front ballast pocket
- Leg Cover (wind-proof protection)

2
1.1- Concept
X-PRESSION is a product that was developed entirely by Woody Valley to meet the demands specifically expressed by our pilots. This paragliding harness was
designed principally for pilots who fly aerobatics and freestyle, but also for pilots who like to fly in a seated position. In building this harness, we have dedicated
meticulous attention to even the smallest details regarding comfort and safety.
X-PRESSION was designed for maximum comfort and simplicity of use. Its compact and attractive design makes it pleasant and smart.
The overall geometry of the harness gives the pilot a better perception of the sensations transmitted by the paraglider, while maintaining a feeling of maximum
safety in flight. This increases precision in handling and facilitates active flying techniques. The harness is fitted with the “T-LOCK safety system,” which prevents
the pilot from sliding out of the harness in the case that he or she has forgotten to fasten the leg-straps.
1.2- X-PRESSION protection
X-PRESSION is fitted with dorsal protection in foam with a thickness of 14 cm. A sheet of high-density polyethylene on the outside of the foam dorsal protection
provides a barrier in the case of collision with pointed objects, and the reinforced external fabric reduces the damage that could be caused to the harness by
abrasion. This dorsal protection was designed to help the pilot in case of impact, reducing the energetic intensity of deceleration. However it cannot completely
eliminate the risk of injury.
1.3- S.O.S. label
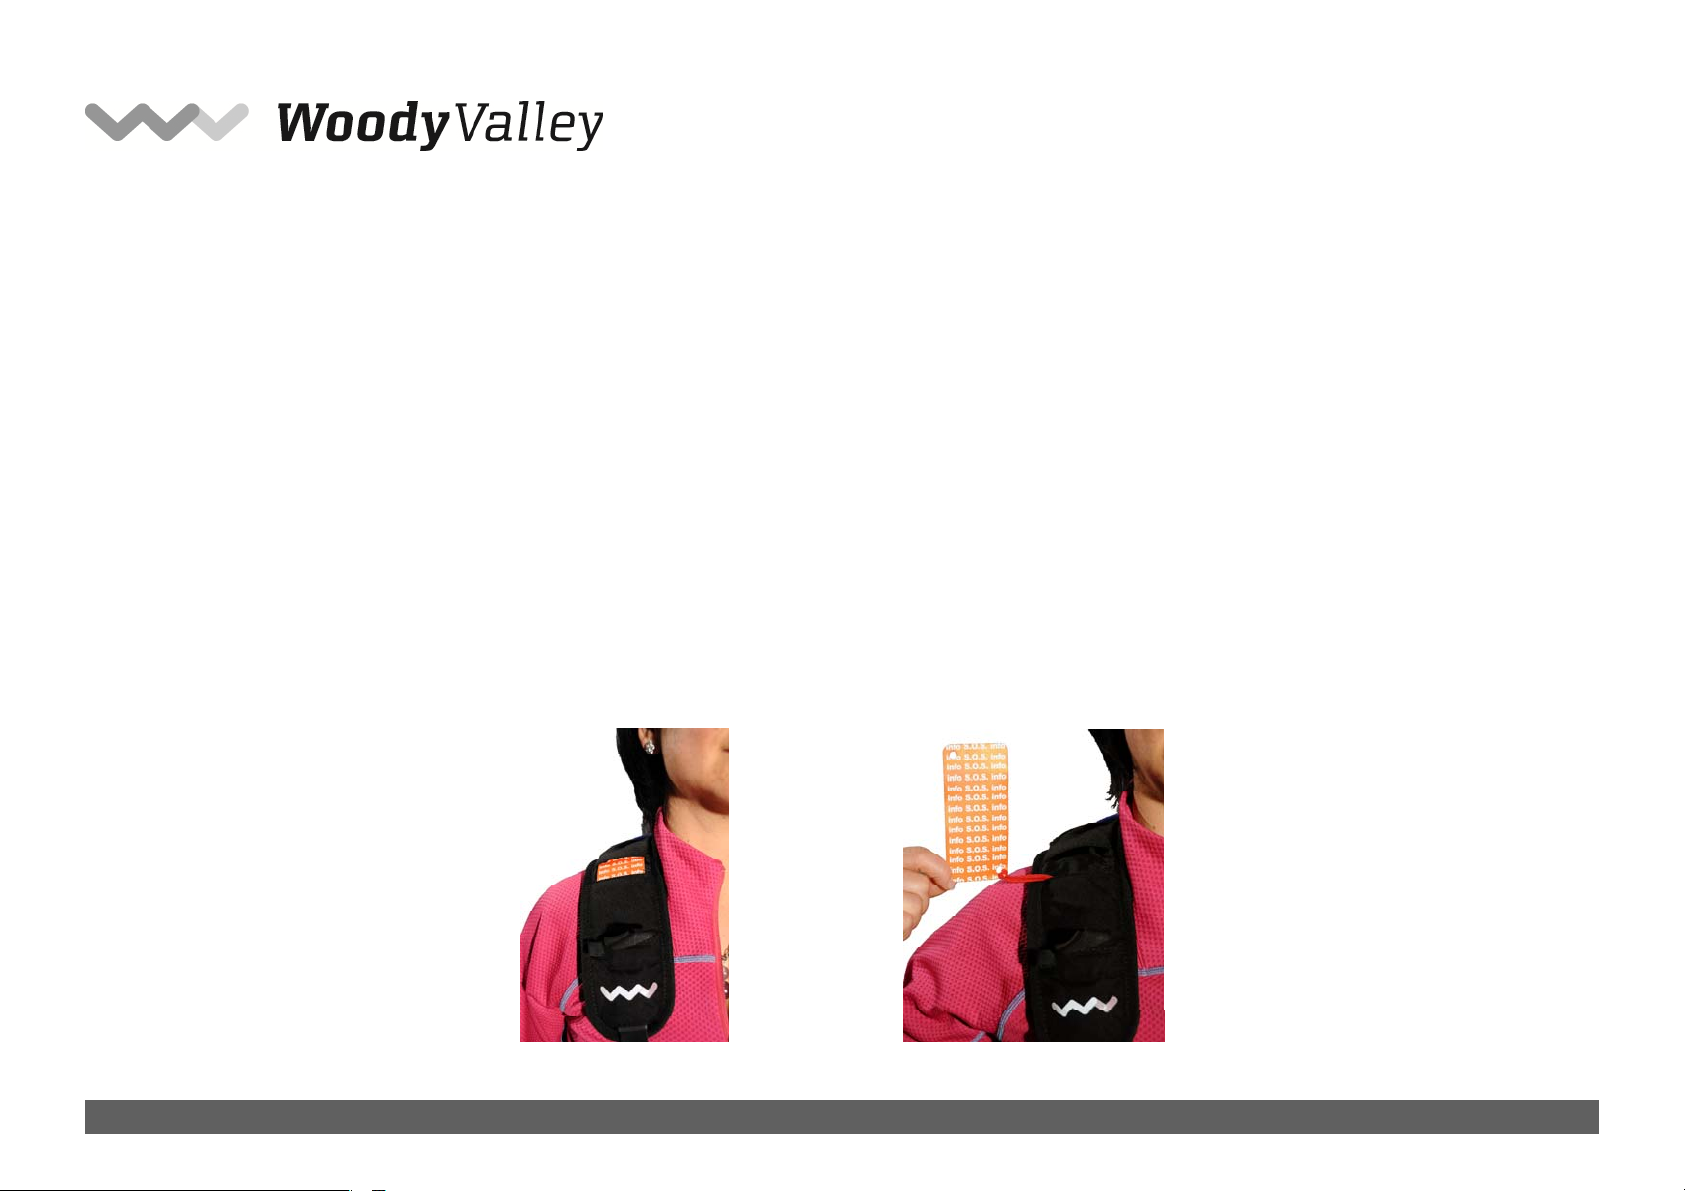
This label, coloured red with white lettering, is readily visible in a pocket on the right shoulder-strap padding. It is easy to pull out, and it is fastened to the harness
to prevent it from being lost. On the back of this label, you can write the information that you think should be given to rescue personnel in case of accident.

3
2- BEFORE USING THE HARNESS
X-PRESSION must be assembled by a qualified paragliding professional, such as your instructor. More specifically, great care has to be dedicated to inserting the
reserve parachute into the harness in the correct way. Only after this has been performed should the pilot adjust the harness for maximum comfort.
2.1- Assembling the dorsal protection for X-PRESSION
Woody Valley recommends that assembly should be performed in the sequence detailed below. In case of doubts or any other problems regarding this procedure,
please consult your instructor, your Woody Valley retailer, or the importer.
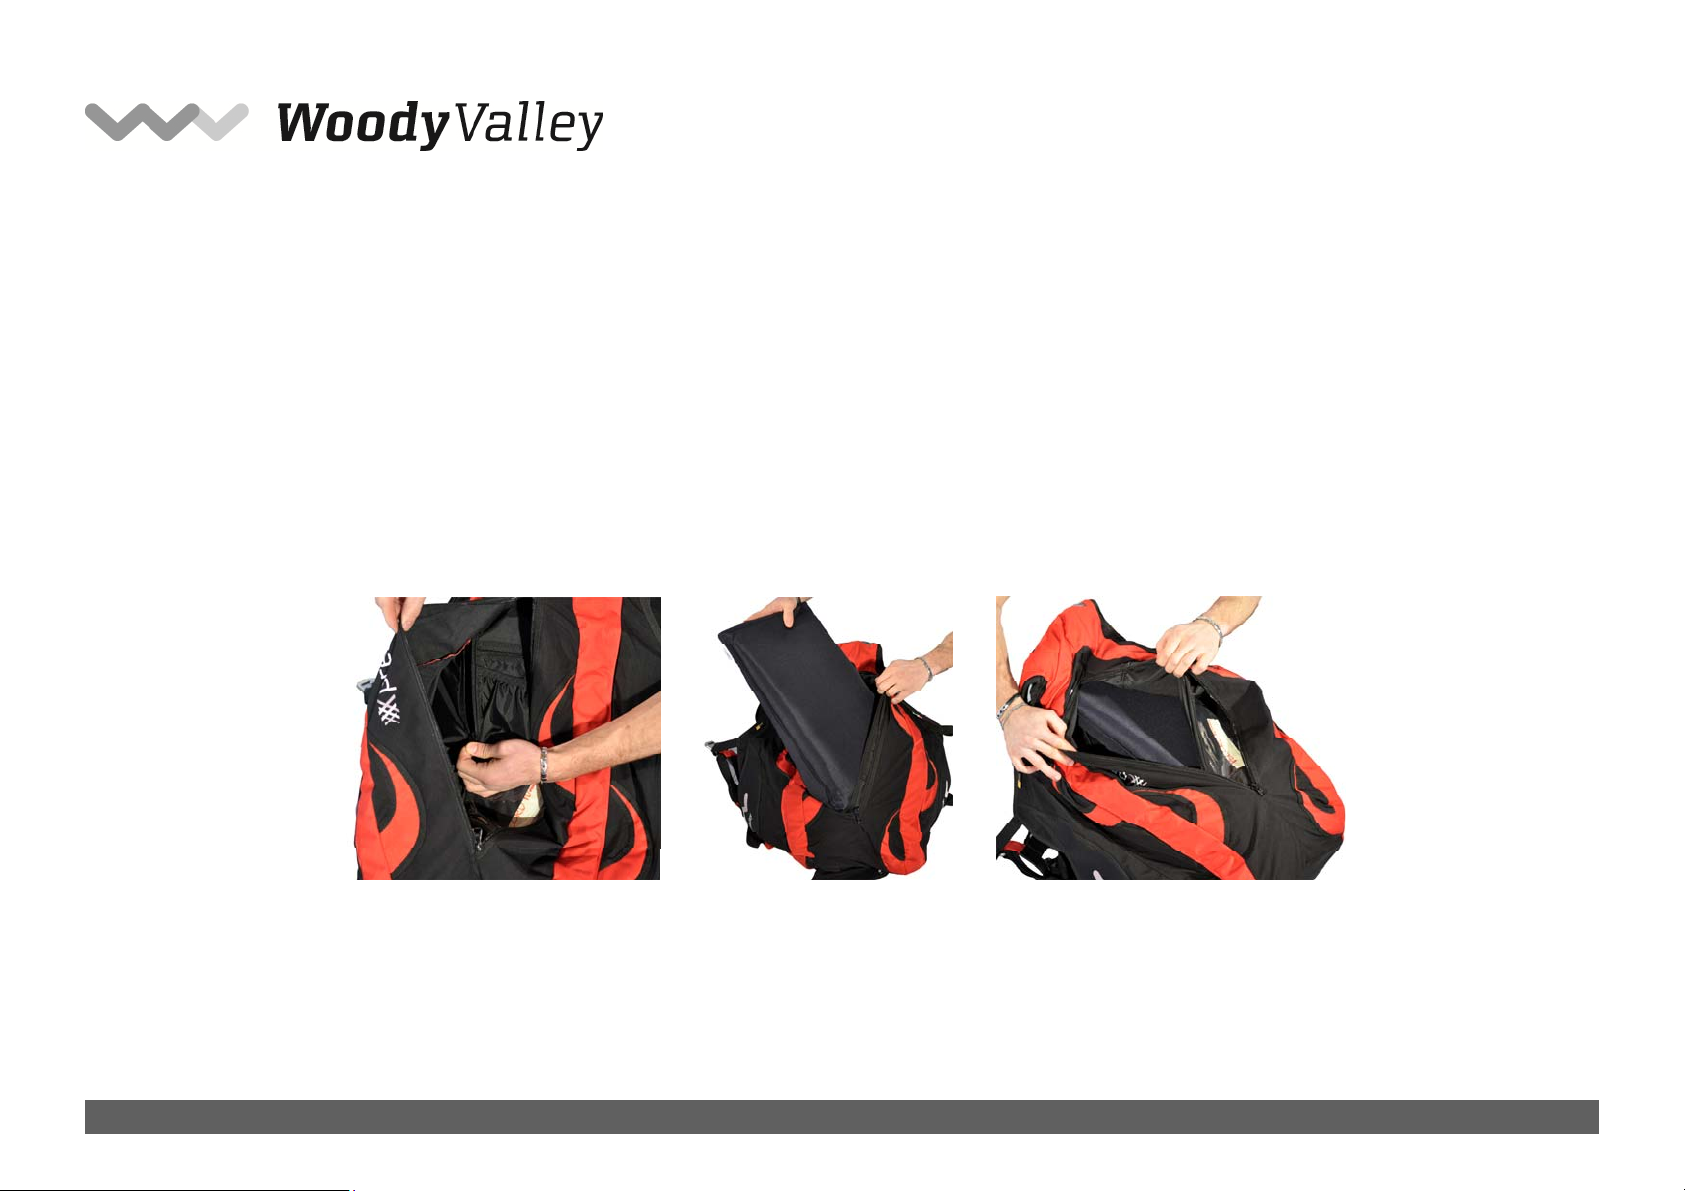
Normally the product is supplied with separate dorsal protection in foam and rigid plastic. This is rolled and packed separately. In this case, follow these steps for
its installation:
a. Remove the protection from its packaging (once it has been removed from its packaging, the foam may take about 2 hours to return to its normal shape)
b. Open the zip inside the rear storage pocket.
c. Insert the foam protection. It will automatically take up the correct position.
Do not place the foam protection below the cross-buckles on the back of the harness.
Should it be necessary to remove the protection, just extract it following the steps described in point “b”.
2.2- Reserve parachutes
The containers for reserve parachutes are placed under the front part of the harness seat. The containers are large enough for most reserve parachutes on the
market today. The reserve parachute must be attached to the harness before it is inserted into the container built into the harness. This connection takes the
form of a dual bridle fixed to the harness at shoulder height, for better load distribution and to ensure a correct landing position in the case that the reserve
parachute is deployed. This helps reduce the risk of injury to a minimum. The reserve chute bridle has a large central loop coloured red, and this is reinforced with
a cover in Cordura 500. At the extremity of the loop, there is a Velcro band which enables the link with the reserve parachute to be held firmly in position.

4
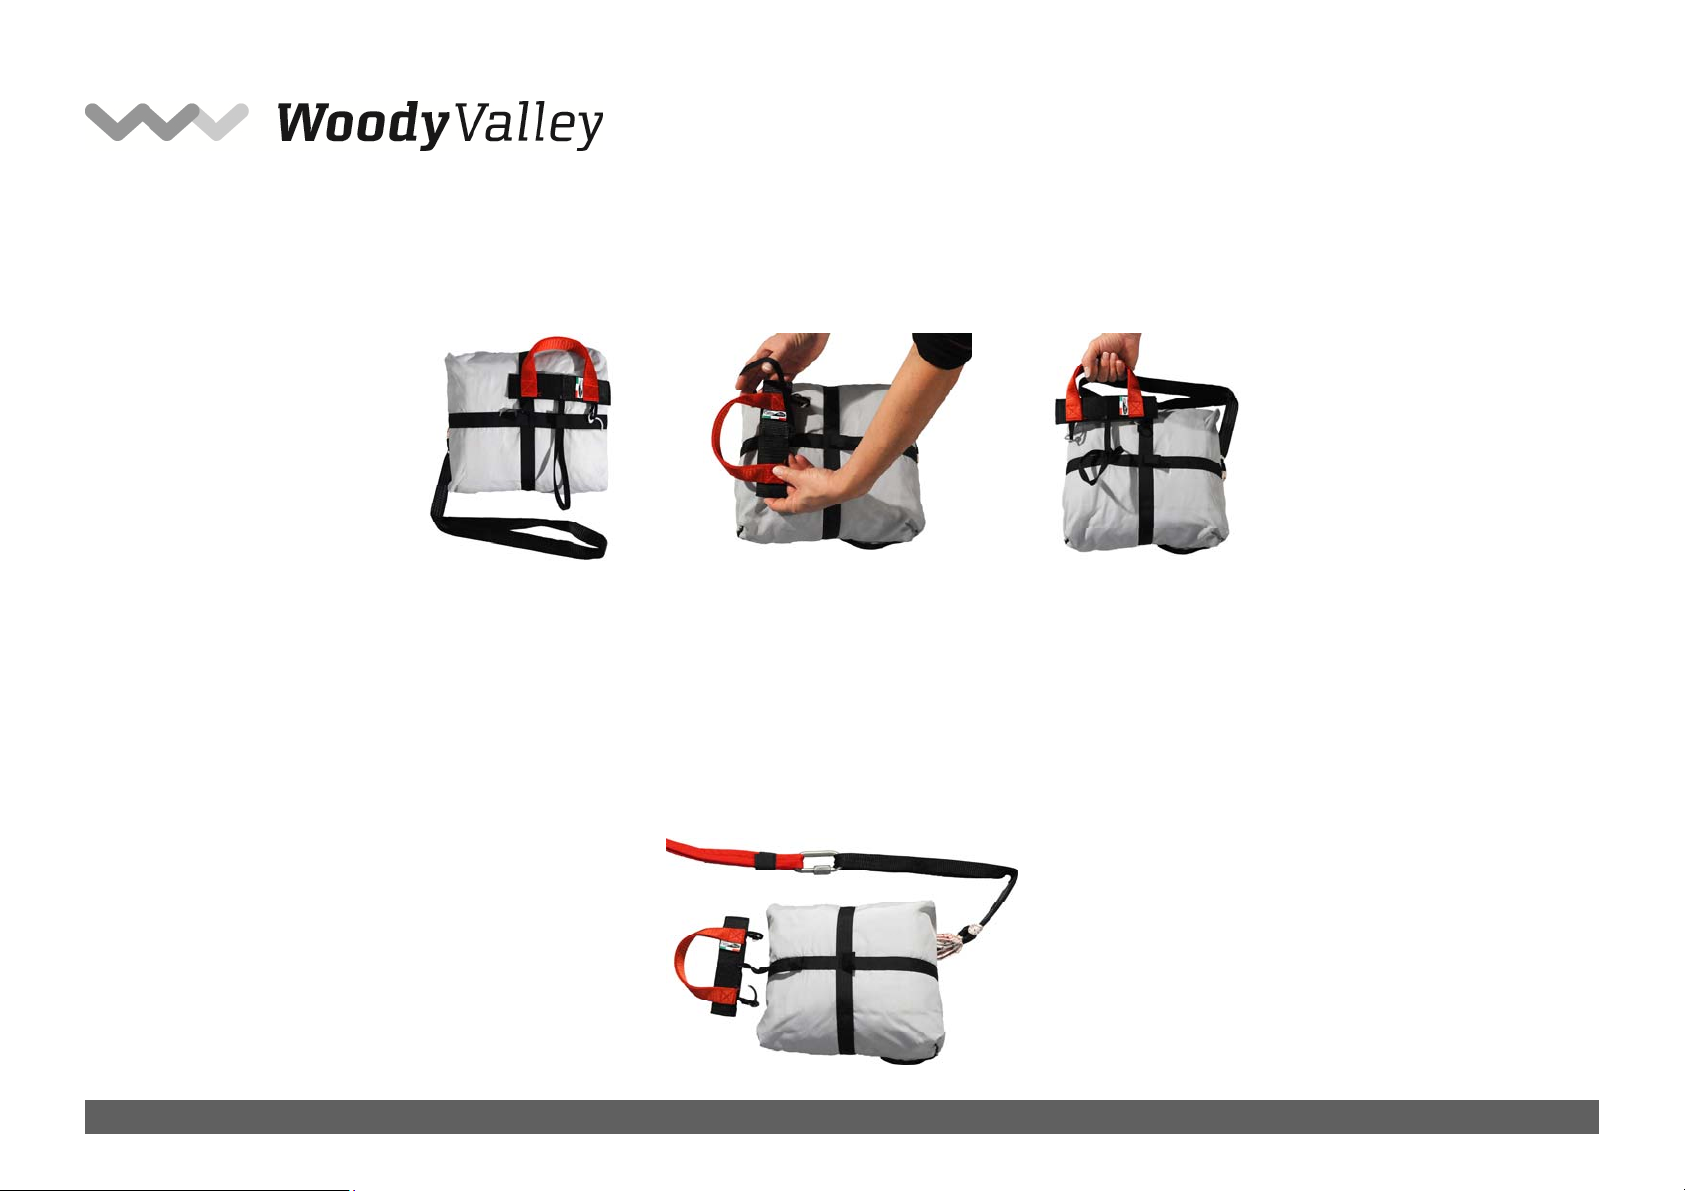
2.2.1- Connecting the deployment handle to the deployment bag
X-PRESSION is supplied with a handle for reserve parachute extraction. It is identified with the number 9; this handle alone should be used for this purpose.
The black loop attached to the handle itself should be passed into the loop on the deployment bag, and then the entire handle should be passed through its own
loop and pulled tight. For easier extraction, the loop attached to the deployment bag should be positioned laterally with respect to the centre of the reserve
parachute. If your deployment bag does not have this loop, please contact the retailer from whom you purchased the reserve parachute.
2.2.2- Connecting the reserve parachute to the harness
There are three different methods of attaching the reserve parachute bridle to the harness bridle.
First system:
Use a screw-lock karabiner with a breaking strength of at least 2,000 kg. In this case, the bridles should be held in position within the karabiner using elastic bands,
to prevent the karabiner from rotating and taking the strain laterally instead of vertically. The karabiner’s screw-lock should be tightly screwed shut to avoid any
possibility of it opening accidentally. This type of connection can absorb a higher opening shock than the second system, and for this reason this is without doubt
the recommended system.

5
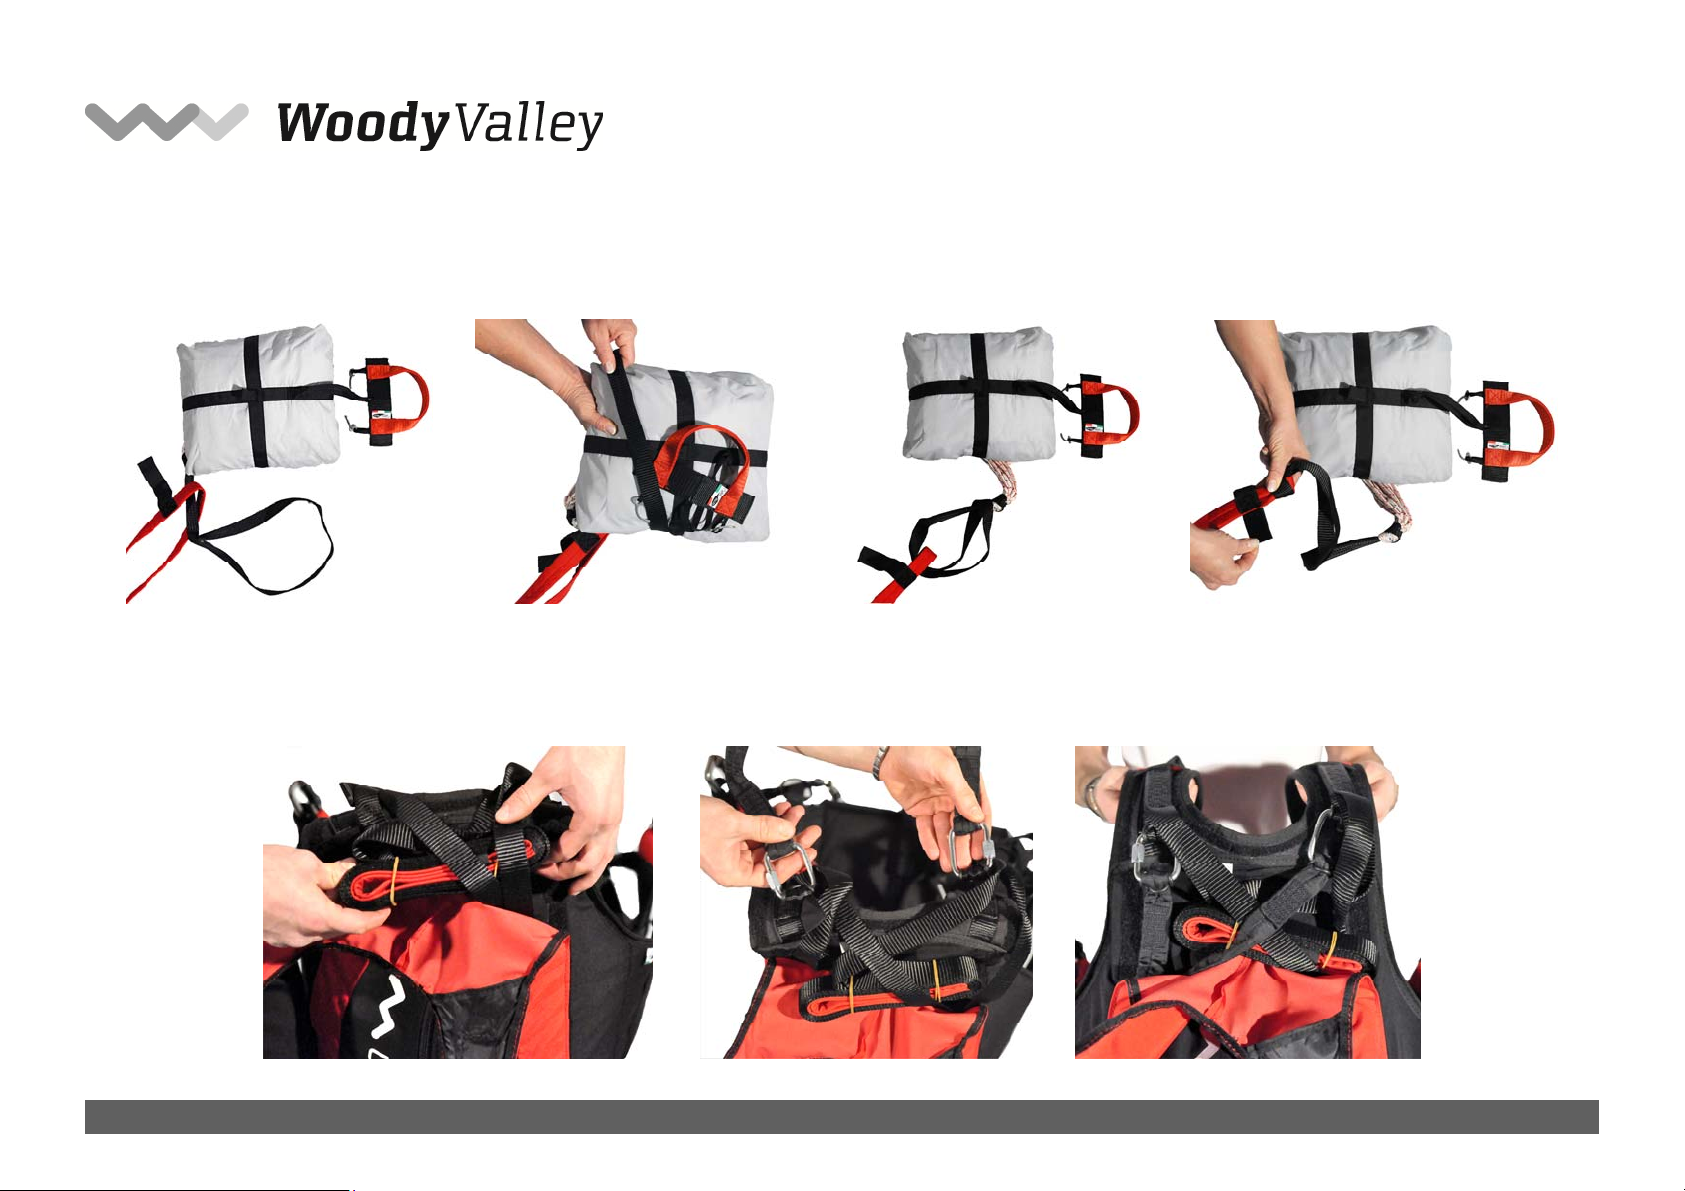
Second system:
The reserve parachute bridle is passed through the loop at the end of the harness reserve parachute bridle. The reserve parachute itself is then passed through
the large loop in the reserve parachute bridle. This connects the two bridles. The loops should be pulled as tight as possible to avoid any chance of dangerous
friction developing between the two bridles during the shock caused when the reserve parachute opens. To ensure that the link between the two bridles remains
tight, remember to fasten the knot using the Velcro strip on the harness reserve parachute bridle.
Third system:
If you are using a reserve parachute with directional control and dual bridle, or if your reserve parachute in any case has a double-riser bridle, it can be connected
to the harness using the two loops positioned at the base of the harness bridle, near the padded shoulder straps. In this case, the harness’ reserve parachute
bridle will not be used, and so it should be folded, fastened using two elastic bands, and positioned under the cover behind the pilot’s neck.

6
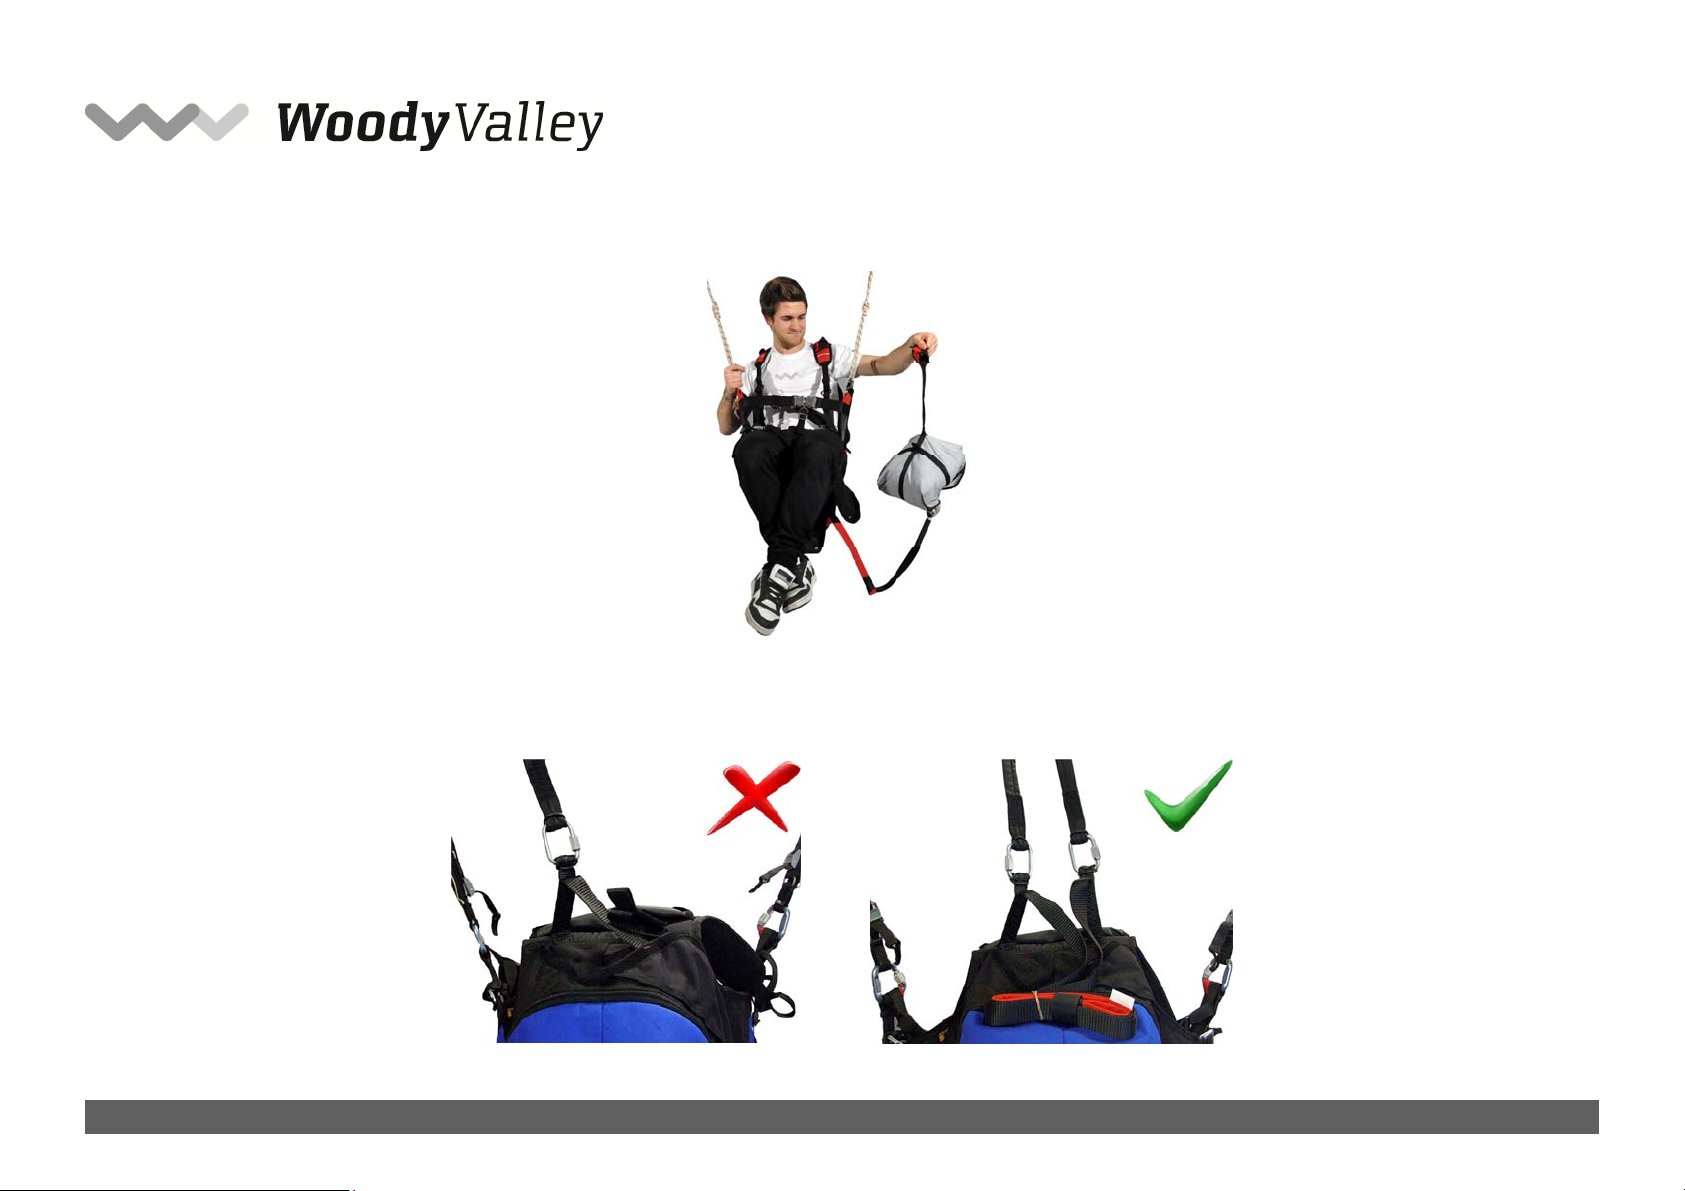
The two connections should be made using screw-lock karabiners with a breaking strength of at least 1,400 kg. In any case, it is important to verify that the length
of the bridle is sufficient to position the reserve parachute inside the harness pocket, and that there is sufficient play to enable the parachute to be taken out of
the pocket without causing the reserve parachute deployment bag itself to open during extraction.
IMPORTANT: To prevent anomalous lateral loads, the bridle should be attached to both the loops on the shoulder straps. Not to just one of them.

7
2.2.3- Inserting the reserve parachute into the X-PRESSION harness
Insert the reserve parachute into the pocket of the harness, so that the handle is visible and facing outwards, and the loop connecting the handle to the
deployment bag is facing upwards.
Thread a thin cord (such as paraglider riser cords) through each elastic loop. This will help close the pocket.
Thread the elastic loops into the smallest of the eyelets on the pocket flaps. Close the flaps following the order shown in the photographs below.
Indice
Altri manuali Woody Valley Accessori

Woody Valley
Woody Valley Voyager Plus Manuale utente

Woody Valley
Woody Valley Wani light 2 Manuale utente

Woody Valley
Woody Valley X-Rated 7 Manuale utente

Woody Valley
Woody Valley Wani Manuale utente

Woody Valley
Woody Valley Transalp Manuale utente

Woody Valley
Woody Valley WANI 2 Manuale utente

Woody Valley
Woody Valley Passenger Manuale utente

Woody Valley
Woody Valley GTO LIGHT Manuale utente

Woody Valley
Woody Valley QUADRO115 Manuale utente

Woody Valley
Woody Valley exense Manuale utente