X-Micro XPFA-128 Manuale utente

X-Micro Digital Photo Frame 100
Quick Start Guide
V2.0

1
INFORMATION TO USER
Product Name: X-Micro Digital Photo Frame 100
Model Name: XPFA-STD, XPFA-128, XPFA-256, XPFA-512
This device complies with Part 15 of the FCC
Rules. Operation is subject to the following two
conditions:(1)this device may not cause
harmful interference,and (2) this device must
accpt any interference received, including interference that
may cause undesired operation. Conforms to the following
EMC Product Testing Specifications FCC part 15.109, Class
B-Residential Emissions at 3 meters. Testing was performed
in a FCC Listed 3 meter semi-anechoic chamber. FCC Part
15.107, Class B-Residential Emissions at shield Room.
Testing was performed in a FCC Listed shield Room.
The referred test report(s) show that the
product complies with standard(s) recognized
as giving presumption of compliance with the
essential requirement in the above listed EU
Directive(s). Other relevant Directives have to be observed.

2
Copyright
Copyright 2006 by X-Micro Technology Corp., All rights
reserved. No part of this publication may be reproduced,
transmitted, transcribed, stored in a retrieval system, or
translated into any language or computer language, in any
form or by any means, electronic, mechanical, magnetic,
optical, chemical, manual or otherwise, without the prior
written permission of X-Micro Technology Corp.
Disclaimer
X-Micro Technology Corp. makes no representations or
warranties, either expressed or implied, with respect to the
contents hereof and specifically disclaims any warranties,
merchantability or fitness for any particular purpose. Any
software described in this manual is sold or licensed "as is".
Should the programs prove defective following their purchase,
the buyer (and not this company, its distributor, or its dealer)
assumes the entire cost of all necessary servicing, repair,
and any incidental or consequential damages resulting from
any defect in the software. Further, X-Micro Technology Corp.,
reserves the right to revise this publication and to make
changes from time to time in the contents hereof without
obligation to notify any person of such revision or change.
All brand and product names mentioned in this manual are
trademarks and/or registered trademarks of their respective
holders.

3
Index
English…………………...………………………..P.4
German…………………......……………………P.8
French……………………..……………………..P.13
Dutch…………………………..…………………P.18
Italian………………………………............….…P.23
Spanish…………………………….....………….P.28
Portuguese……...……………………….………..P.33
Russian………………………………….……….P.38

4
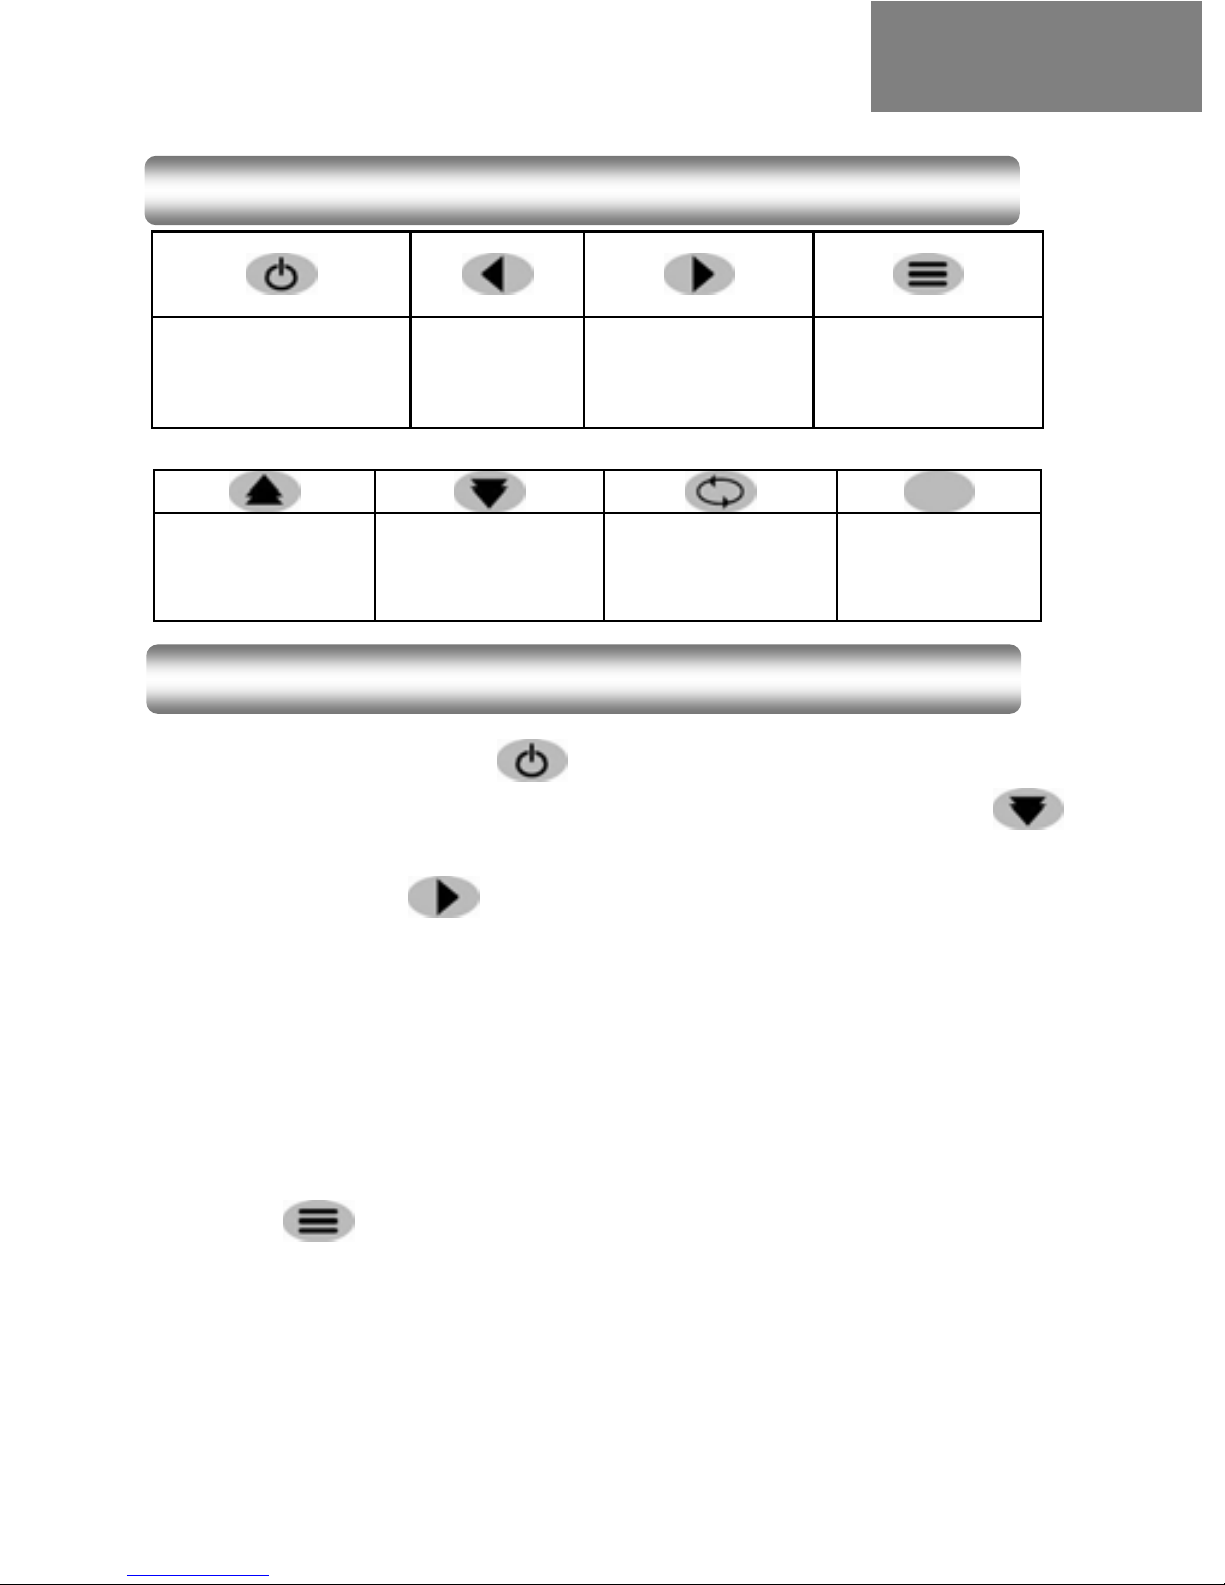
Power
on/off
Rotate
image Enter Select
image
Brightness Menu Slideshow Zoom
image
Press button to activate power, the Language menu
will show up; press button to select your language and
press to save the setting and exit. After selecting a
language the screen will pause for 3 seconds to complete
saving and automatically start to play image.
After activating the power, “Digital Photo Frame” will play in
slideshow mode directly; to stop slideshow, just press
button.
Notice: You must select a language every time the power is
re-initiated.
Button definition
Power On
English

5
To enter into Menu screen, you need to stop the Slideshow
mode first; press to stop Slideshow.
(1) Press once to enter into Menu screen.
(2) On the Menu screen, there are four function menus for
your selection; press button to scroll the cursor
up and down.
(3) Scroll the cursor onto the desired function Menu and
press button to save the setting and exit.
Menu 1. Hide image
This function allows you to hide a specific image in the
Slideshow mode, so it will not be played.
Press button to move the cursor onto “Show or hide
image in slideshow”, then press button to save and exit.
A subsequent pressing of one of the following buttons will
activate the respective function:
Manual selection of image
Hide/Display of image
Rotate image (0/90/180/270 degrees)
Adjust image brightness
Activate Slideshow (3/6/15/60 second)
Zoom image (Max. 0~35%)
Menu 2. Copy image
This function allows you to copy the image from a removable
device into the built-in memory.
Press button to move the cursor onto “Copy photo from
removable device to the digital photo frame” and then press
Menu introduction

6
button to save and exit. A subsequent pressing of one
of the following buttons will activate the respective function:
Manual selection of image
Copy photo from removable device to the
digital photo frame
Rotate image (0/90/180/270 degrees)
Adjust image brightness
Activate Slideshow (3/6/15/60 second)
Zoom image (Max. 0~35%)
Menu 3. Delete image
This function allows you to directly delete the image in the
removable device or the built-in memory.
Press button to move the cursor onto “Delete image
from media” and press button to save the selection and
exit. A subsequent pressing of one of the following buttons
will activate the respective function:
Manual selection of image
Delete photo of removable device or built-in
memory
Rotate image (0/90/180/270 degrees)
Adjust image brightness
Activate Slideshow (3/6/15/60 second)
Zoom image (Max. 0~35%)
Menu 4. Zoom mode
This function allows you to Zoom the viewing image.
Press button to move the cursor onto “Enter Zoom
Mode” and press button to save and exit; pressing
button one more time will enter into “Zoom pan” menu.

7
(1) To Zoom image out
Press button to scroll the cursor to select a desired
zoom factor (2x/3x/4x), press button to save setting,
press to pre-view the desired image for zooming, (at
this moment, pressing buttons in the
preview mode may move the image), press button to
confirm selection and return to Menu; finally press
button to move cursor to “Return to image view” and press
button to exit.
Note: When in Preview mode, press button to cancel
the setting and return to menu screen.
(2) To cancel a zoom setting of a zoomed image
Follow the above mentioned steps to enter into Zoom pan
menu, then select “Reset image display setting to 1x” and
press button to save setting, then move the cursor to
“Return to image view” and press button to exit; this
allows return to the original size of the image.
(3) Return to Browse Image mode
Press button to select “Show or hide image in
slideshow” and press button to exit; then press
button to activate slideshow.
8
Ein-/
Ausschalten
Bild
drehen Eingabe Bild wählen
Helligkeit Menü Diashow Bild
zoomen
Drücken Sie die Taste , um das Gerät einzuschalten.
Das Sprachmenü wird angezeigt. Drücken Sie die Taste
um die gewünschte Sprache auszuwählen. Drücken Sie
anschließend auf , um Ihre Einstellung zu speichern und
das Menü zu schließen. Wenn Sie nach dem Auswählen der
Sprache für 3 Sekunden warten, dann wird Ihre Auswahl
gespeichert und es wird automatisch begonnen, die Bilder
anzuzeigen.
Nach dem Einschalten des Gerätes werden die Bilder
automatisch im Diashowmodus angezeigt. Drücken Sie bitte
die Taste , um die Diashow zu beenden.
Hinweis: Sie müssen immer eine Sprache auswählen, wann
immer das Gerät erneut eingeschaltet wird.
Tastenfunktion
Einschalten
German

9
Um das Menü zu öffnen, müssen Sie zuerst die Diashow
beenden. Drücken Sie bitte auf , um die Diashow zu
beenden.
(1) Drücken Sie einmal auf , um das Menü
anzuzeigen.
(2) In dem Menü stehen vier Funktionen zur Auswahl.
Drücken Sie bitte immer wieder auf , um den
Cursor nach oben oder unten zu bewegen.
(3) Bringen Sie den Cursor zu der gewünschten Funktion
und drücken anschließend die Taste , um Ihre
Auswahl zu bestätigen.
Menü 1. Bild ausblenden
Diese Funktion erlaubt Ihnen ein bestimmtes Bild im
Diashowmodus auszublenden; d.h. das Bild wird nicht
angezeigt.
Drücken Sie die Taste , um den Cursor zu der Option
"Show or hide image in slideshow"(Bild in Diashow
ein-/ausblenden) zu bringen. Drücken Sie anschließend auf
, um Ihre Auswahl zu bestätigen. Wenn Sie anschließend
eine der folgenden Tasten drücken, dann wird die
entsprechende Funktion aktiviert:
Manuell Bild auswählen
Bild ein-/ausblenden
Bild drehen (um 0/90/180/270 Grad)
Bildhelligkeit einstellen
Diashow (mit einem Zeitintervall von 3/6/15/60
Sekunden) aktivieren
Bild zoomen (Max. 0~35%)
Einführun
g
ins Menü
Altri manuali per XPFA-128
1
Questo manuale è adatto per i seguenti modelli
3
Indice
Lingue:
Altri manuali X-Micro Cornice digitale


