XM XMP3 Manuale utente

XM XMP3 Car Kit Installation Guide
http://www.manuallib.com/file/2669124
From ManualLib.com
ManualLib.com collects and classifies the global product
instrunction manuals to help users access anytime and
anywhere, helping users make better use of products.
Home: http://www.manuallib.com/ Chinese: http://www.shuomingshuku.com/
This Manual: http://www.manuallib.com/file/2669124

Car Kit Installation Guide
This Manual: http://www.manuallib.com/file/2669124
2
Table of Contents
Introduction ..................3
Welcome to XM .........................3
What’s in the box?.......................3
Remote control functions ...............4
Vehicle Installation ........... 5
Step 1: Plan the installation............. 6
Step 2: Mount the XM car antenna ...... 7
Step 3: Install the swivel or vent mount . 10
Step 4: Connect your XMp3 radio. ......12
Step 5: Turning on your XMp3 radio. ....14
Find an FM frequency...................15
Set the line out level. ...................17
Place XM car antenna for best reception. 18
Automatic power. ......................19
Power off. ..............................20
Troubleshooting ..............21
Product Specs, FCC and IC info,
Warranty ....................25
Product Specifications..................26
FCC and IC Statement ..................27
Warranty...............................28
Patent information .....................31
Environmental information.............31
This Manual: http://www.manuallib.com/file/2669124

3
Welcome to XM
Thank you for purchasing the XMp3™ Radio Car Kit. This guide walks you through the
installation of your new car kit and helps get you set up and listening fast.
What’s in the box?
car cradle
power adapter swivel mountvent mount swivel mount
preparation kit
remote control
audio cable XM car antenna
Introduction
This Manual: http://www.manuallib.com/file/2669124

4
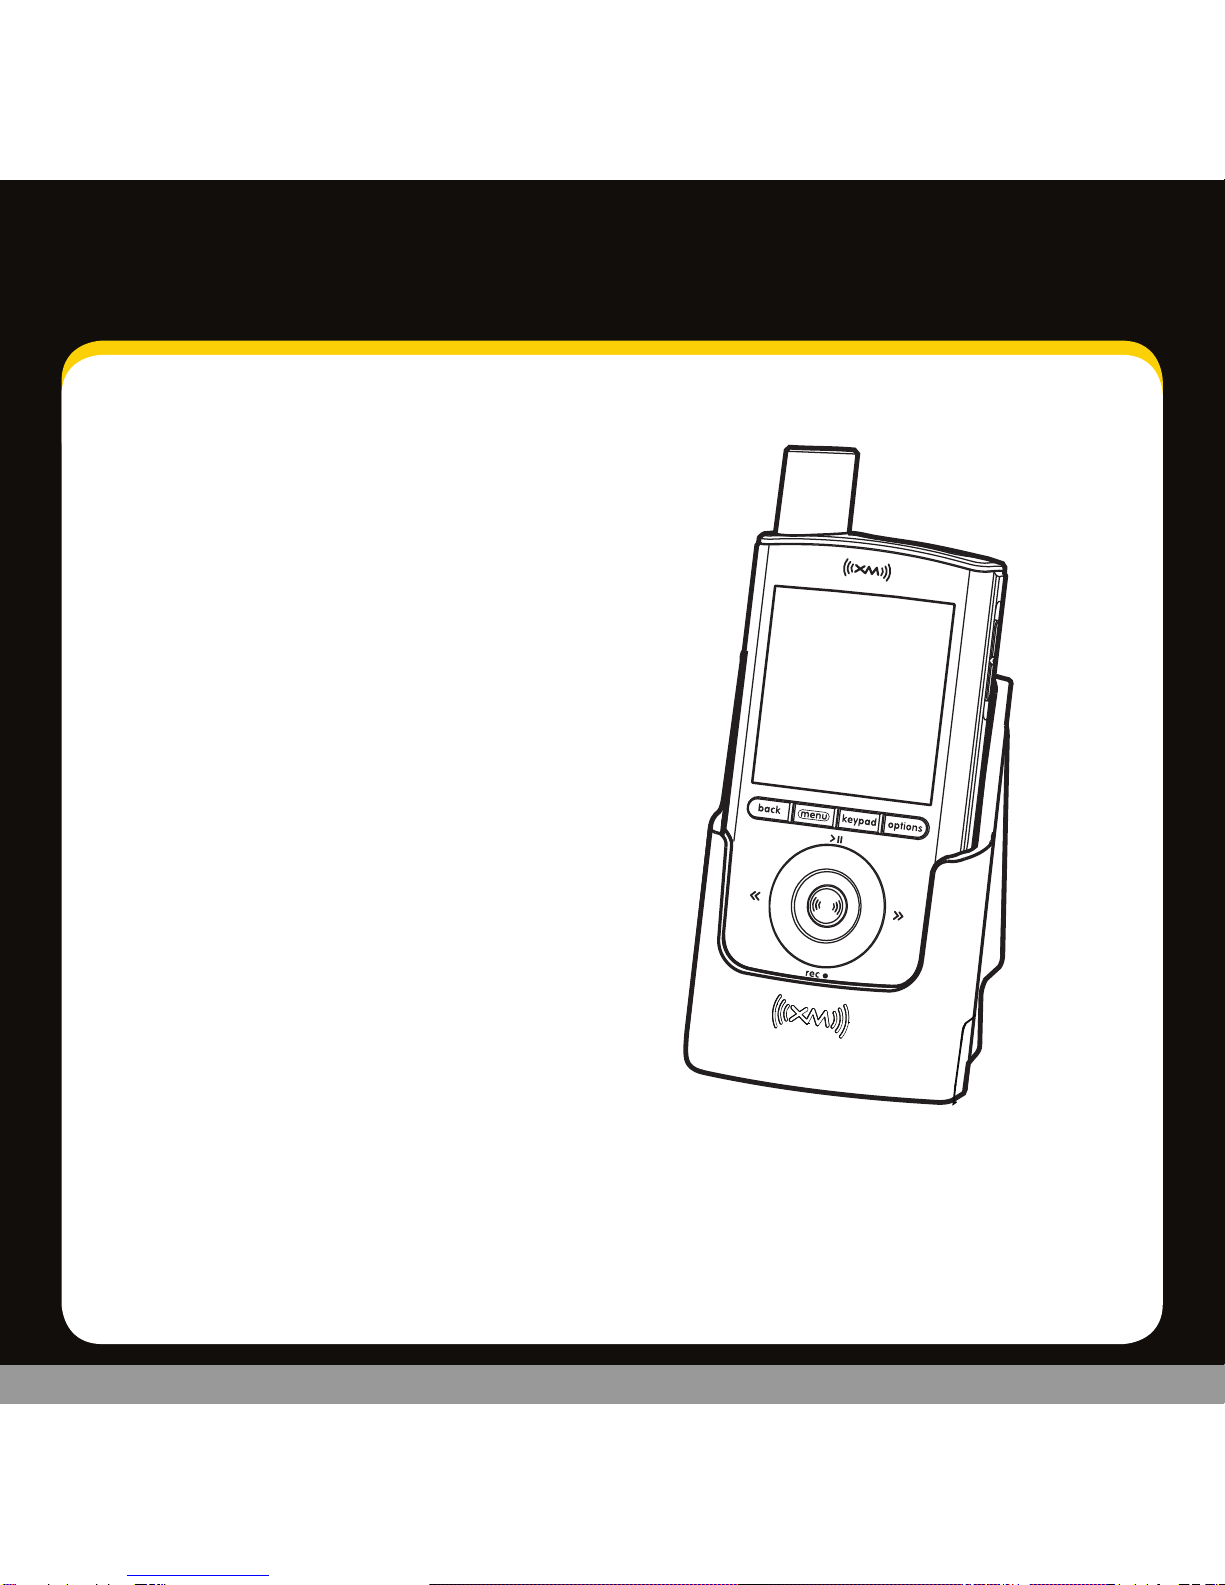
Introduction
Remote Control functions
30-Minute Replay Buttons
Pause and replay up to 30
minutes of live XM content.
Power Button
Record
Record a song or channel.
Arrow Buttons
Select menu entries,
change channels.
Options
TuneSelect, bookmarks, add
channel to favorites, set
channel to auto record, and
view programs for channel.
XM Button/Select
Press to confirm selections.
Back
Return to previous screen.
Press and hold to return
to the previous channel.
Jump
Switches between current
channel and previous channel.
Menu
Go to My Music Library,
access advanced features
and configuration options
or info extras information.
Number Keys
Enter a channel directly.
+ and -
Change channels or control
volume for audio system
(sold separately).
Mute
Silences live, saved songs,
and replayed XM content.
This Manual: http://www.manuallib.com/file/2669124

5
Vehicle Installation
This Manual: http://www.manuallib.com/file/2669124

66
Vehicle Installation
Step 1: Plan the Installation
Select an area on the dashboard you want to place the car cradle. This is where1
you will install the swivel or vent mount.
TIP! An adhesive pad is used to mount the swivel mount to the dashboard. The adhesive
requires 24 hours to cure. Make sure you provide yourself the proper amount of time to
install your car kit. See Step 3: Install the Swivel or Vent Mount for more information.
Determine which connection method you plan to use in order to receive the2
XM signal:
Audio Cable (Included)•
XM SureConnect (sold separately)•
Cassette Adapter (sold separately)•
FM Direct Adapter (sold separately)•
WARNINGS:
When using this product, it is always important to keep your eyes on the road and hands•
on the wheel. Not doing so could result in personal injury, death, and/or damage to your
XMp3 radio, accessories, and/or to your vehicle or other property.
Your XMp3 radio should be placed in your vehicle where it will not interfere with•
the function of safety features, e.g., deployment of airbags. Failure to correctly place
your XMp3 radio may result in injury to you or others, if the unit becomes detached
during an accident and/or obstructs the deployment of an airbag.
This Manual: http://www.manuallib.com/file/2669124

7
Step 2: Mount the XM Car Antenna
1 Place the car cradle on the dashboard. You will connect it to the swivel or vent
mount later on.
Select a suitable location on the outside of your car for the XM car antenna.2
For example, on the roof near the windshield or rear window.
TIP! When selecting a location, consider any accessories that your car has, such as a
luggage rack, and how often you use the accessories. Select a location where the XM car
antenna won’t be covered or blocked as this could interfere with signal reception.
Gently place the XM car antenna in the location3
you selected. The antenna has a strong magnet
that sticks to any metallic surface.
TIP! Make sure the door does not pinch the cable when closed.
TIP! Always cross the weather seals at the lowest point possible to reduce water leaks.
TIP! Always hand wash or use brushless or touch-free car washes.
Magnet
This Manual: http://www.manuallib.com/file/2669124

8
4. Route the cable:
• IfyouplacedtheXMcarantennaonthe front of the vehicle, route the cable
across the top of the windshield. Gently pry up the rubber weather seal
and tuck the cable underneath. Follow the weather seal down the side
of the windshield to the door jam. Tuck the cable into the door jam and
then under the floormat to the car cradle.
•IfyouplacedtheXMcarantennaontherearofthevehicle,routethecable
under the weather seal of the rear window. Tuck the antenna cable around
and down the window to the lowest point, just above the trunk.
Vehicle Installation
This Manual: http://www.manuallib.com/file/2669124

9
Next, route the cable from the rear window molding into the weather stripping•
around the trunk opening. Run the cable into the trunk and then into the rear
passenger compartment. Route the cable through the main compartment by tucking
it under the door jam trim or under the carpet and up to the radio.
5 Make sure any excess cable does not interfere with vehicle operations.
TIP! Always be careful to include enough slack in your cable to accommodate open doors
or trunk lids. Use things typically found around the home, like electrical tape, to secure
cables in areas so that hinges do not pinch the cable with the door. Hide any excess cable in
the trim.
This Manual: http://www.manuallib.com/file/2669124
Altri manuali per XMP3
5
Indice
Altri manuali XM Ricevitore per auto


