Applied Logic Engineering NavDive Manuale utente

1
Diver Navigation System
User’s Guide

2
Copyright 2014 Applied Logic Engineering, Inc. All rights reserved.
Statement of Liability
Our products and services are provided "as is" without warranty of any kind, either expressed
or implied unless otherwise stated. In no event shall Applied Logic Engineering, Inc. be liable for
any damages including, but not limited to, direct, indirect, special, incidental or consequential
damages or other losses arising out of the use of or inability to use our products and services.

3
Table of Contents
Introduction to NavDive……………………………………………………………………………………………………….. 3
Description of the System
GPS Receiver…………………………………………………………………………………………………………….. 5
Diver Console
Basic Overview……………………………………………………………………………………………… 5
Liquid Crystal Display (LCD)…………………………………………………………………………… 6
Operational controls……………………………………………………………………………………… 6
Starting Out –Using NavDive for the first time
Using NavDive while conducting a dive…………………………………………………………………….. 9
Saving a position to memory…………………………………………………………………………………….. 10
Using the Tracking feature………………………………………………………………………………………… 11
Ending the Dive…………………………………………………………………………………………………………. 12
Advanced Use
Saving your Entry Position………………………………………………………………………………………… 14
Navigating to a Target………………………………………………………………………………………………. 15
System flowchart………………………………………………………………………………………………………………….. 19
Working with NavDive data
Accessing NavDive’s memory card……………………………………………………………………………. 20
Using the NavDive Log PC Application……………………………………………………………………….. 20
Pre Dive…………………………………………………………………………………………………………. 21
Post Dive……………………………………………………………………………………………………….. 22
Appendix A : File Formats…………………………………………………………………………………………………………………… 27

4
Introduction to NavDive
Congratulations on your purchase of NavDive! You will find that NavDive is a useful tool that is
fun to use, extending your ability to capture important data regarding your diving experience
and use that data to map important dive locations.
NavDive was designed and developed by divers for divers. We developed the product based on
work we were doing with marine archeologists who needed to translate GPS coordinates they
had acquired during side-scan sonar surveys into useable data that could be used to guide
divers to specific positions while underwater. NavDive easily read the coordinates obtained
and gave the diver the ability to select any specific target and swim directly to it, even in very
poor visibility situations.
Our hope is that you find NavDive to be a powerful and useful product whether you are using it
for commercial or for recreational purposes.
5
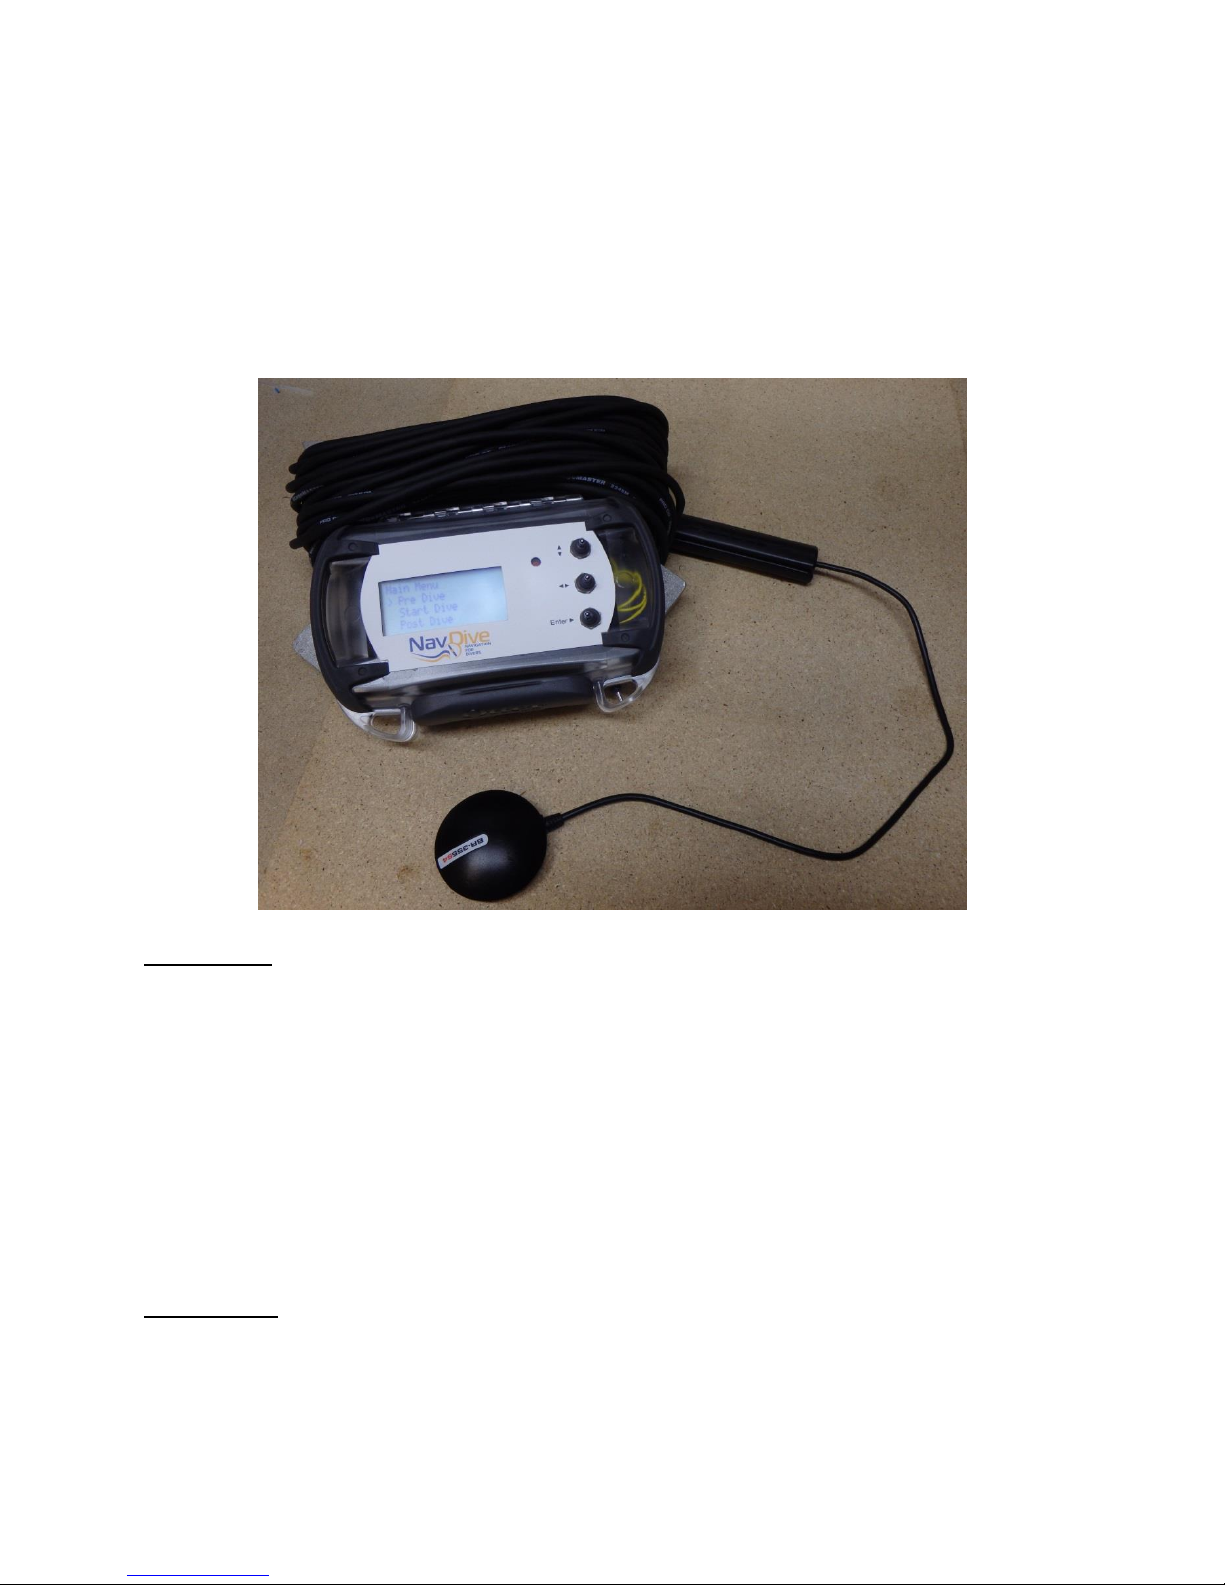
Description of the System
NavDive consists of two main components -- a surface deployed GPS receiver / transmitter that
receives a GPS fix and transmits it to the diver. The second component is a receiver / display
unit that is used by the diver to determine position and to determine a course to desired
destinations.
GPS Receiver
The topside unit consists of a self-contained, waterproof GPS receiver and data
transmitter. The GPS receiver obtains the lat/long postion information from satellites
overhead. This information is then converted to a usable format and sent on to the diver's
display/console every second.
This unit mounts to the diver's flag float. The base of the receiver is magnetic, so there are
many choices in terms of mounting. The receiver is also waterproof, but only on the surface.
DO NOT take the receiver below depths of about a foot –it is not designed to be waterproof at
depth.
Diver Console
The display/console unit is carried by the diver. It is a waterproof, self-contained unit that
receives the GPS information from the topside GPS receiver/transmitter. This unit contains an
integral LCD display and momentary contact switches that are operated by the diver. The

6
console shows current position, navigation information, or other unit status in real time as the
dive is conducted.
With this unit, the diver can control the functionality of NavDive, including saving the lat/long
of the entry point, navigating to any pre-loaded target site while underwater, saving the
lat/long of any notable site while underwater, or automatically storing (tracing) the entire dive's
lat/long coordinates.
Basic Overview of the Diver Console
Liquid Crystal Display (LCD)
The LCD contains 4 lines of 20 characters, organized to show operational status as well as menu
options that can allow the diver to select the proper modes of operation.
In this user’s guide, we will represent the information on the LCD via this type of graphic:
Main Menu
> 1 Pre Dive
2 Start Dive
3 Post Dive
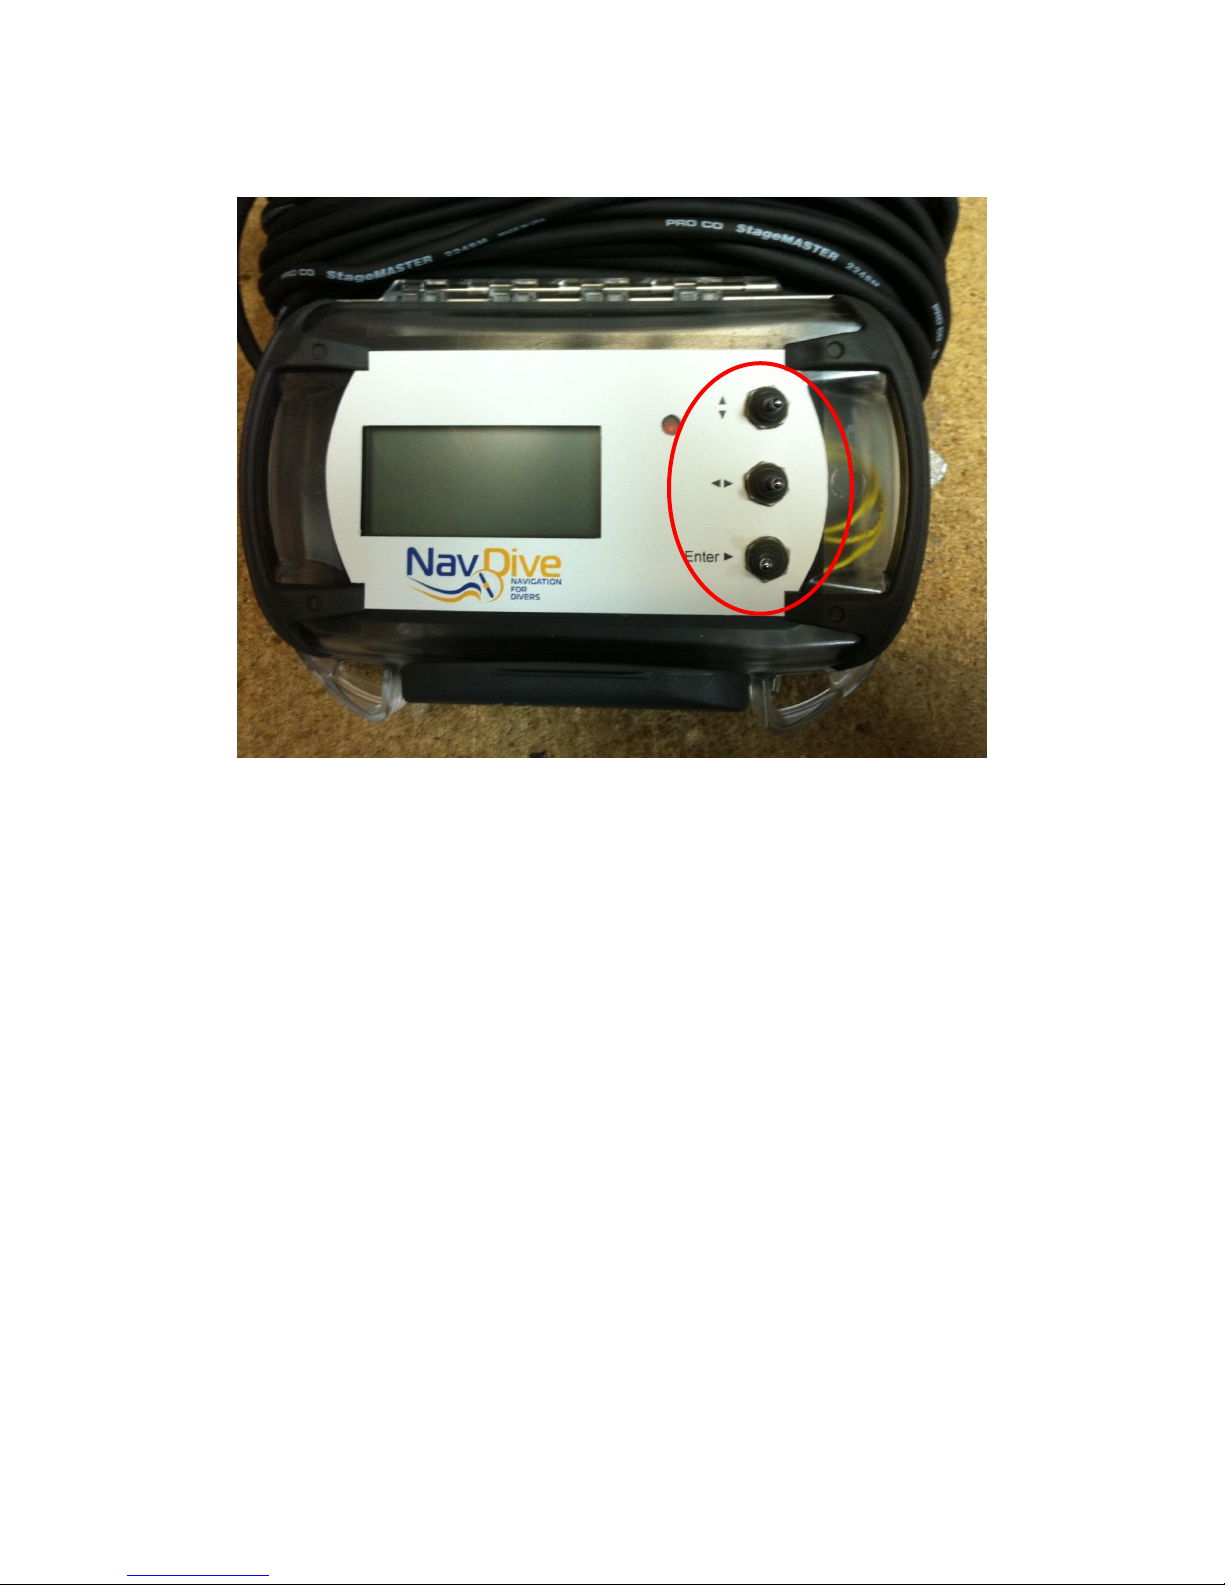
Momentary contact switch controls
NavDive contains 4 switch controls that are accessible by the diver. They are:
System Power –this switch turns the power on to the diver console as well as the GPS receiver.
It is located on the front edge of the unit (as shown below):

7
Location of Power switch
Cursor (Up/Down) -- this switch is used to move through the menuing system of NavDive
Option (left/right) –this switch is used to display options available within the menu system
Enter –this switch is used to select the current option being displayed on the LCD
8
User interface controls (Up/Down, Left/Right, and ENTER)

9
Starting Out –Using NavDive for the first time
This section will cover the basic operation of NavDive using a few of the key features. It will
detail the features most divers will use the first few dives before detailing the more advanced
capabilities of the system. In this scenario, the diver will learn how to successfully get NavDive
powered up, operational, and use the realtime display on the diver console to view current GPS
position, to save GPS position to memory on demand, and to enable the tracing feature to track
the dive as it progresses
Using NavDive to conduct a dive
To get setup for your first use of NavDive, follow the steps below:
1) Remove the NavDive unit from its carrying case.
2) Determine how you want to mount the GPS receiver to your flag float. There are many
options / choices here, so we will not attempt to detail installation. The only important
thing to keep in mind is that the receiver needs a clear line-of-sight to the sky to work
properly. Once the receiver is mounted, route the cable to the diver console so that it
will provide a secure tether that will withstand underwater handling by the diver. It’s
recommended that some cable strain relief be implemented by attaching the cable itself
to the float so that the receiver mount does not bear all of the pressure from cable
handling.
3) On the diver console –be sure that a SD memory card is installed and properly
configured for use with NavDive.
4) Also on the diver console, be sure that the unit is properly closed and latched.
5) Turn the power on to the NavDive diver console. Note that the console also supplies
power to the GPS receiver. The red LED on the side of the GPS receiver will begin
flashing as the unit attempts to sync to the satellites to determine your initial position.
6) When the red LED on the GPS receiver goes from flashing to steady ON, the receiver has
locked onto satellite reception and you are ready to proceed with your dive.
7) On the diver console, you will see the following:
Main Menu
> 1 Pre Dive
2 Start Dive
3 Post Dive
8) As we will not use any advanced features on this first dive, we’ll skip the PRE DIVE
option. Press the DOWN switch on the console to move the cursor to 2 START DIVE and
then press the ENTER switch on the console. You should now see the following:
Select Dive Num:
1

10
9) Since this is the first dive of the day, you can simply press the ENTER switch. If this
happened to be your second or third dive of the day, you can use the RIGHT switch to
increment the dive number to reflect the correct number for your next dive, followed by
pressing the ENTER switch. You should then see the following:
Save Entry?
N
10) Since saving your entry position is considered an advanced function, we will skip it here
and cover it later. For now, just press the ENTER switch. You should then something
similar to the following:
N 44 56.344
W092 16.987 5
Heading:125.3876
This is called the HOME SCREEN and is the primary view that you will have when using
NavDIve underwater. It displays the current latitude and longitude coordinates as well
as your current heading as you begin your dive. The single digit on the far right of the
second line on the display represents the battery condition (5-full to 1 –discharged).
This allows you to determine if your batteries have enough power to conduct a dive. It
is advisable to always have at least a “3” indicated before starting a dive to insure
enough power to conduct a dive.
11) You are all set to start. Pay out some cable as needed and observe the console unit. You
will see the lat/long position and heading change as you swim, reflecting your current
position as you move underwater.
12) As you conduct your dive, pay attention to the NavDive cable. You will want to make
sure that you pay out cable as you move deeper and take up the cable on the reel as you
move from deeper depths to shallower depths. This will keep the cable for getting
tangled or hung up on the bottom. It will also improve your GPS position accuracy by
keeping the GPS receiver on your flag float as close to directly overhead as possible.
Indice


