Asus PA238QR Manuale utente
PA238QR Series
LCD Monitor
User Guide

ii
Copyright © 2012 ASUSTeK COMPUTER INC. All Rights Reserved.
No part of this manual, including the products and software described in it, may be reproduced,
transmitted, transcribed, stored in a retrieval system, or translated into any language in any form or by any
means, except documentation kept by the purchaser for backup purposes, without the express written
permission of ASUSTeK COMPUTER INC. (“ASUS”).
Product warranty or service will not be extended if: (1) the product is repaired, modied or altered, unless
such repair, modication of alteration is authorized in writing by ASUS; or (2) the serial number of the
product is defaced or missing.
ASUS PROVIDES THIS MANUAL “AS IS” WITHOUT WARRANTY OF ANY KIND, EITHER EXPRESS
OR IMPLIED, INCLUDING BUT NOT LIMITED TO THE IMPLIED WARRANTIES OR CONDITIONS OF
MERCHANTABILITY OR FITNESS FOR A PARTICULAR PURPOSE. IN NO EVENT SHALL ASUS, ITS
DIRECTORS, OFFICERS, EMPLOYEES OR AGENTS BE LIABLE FOR ANY INDIRECT, SPECIAL,
INCIDENTAL, OR CONSEQUENTIAL DAMAGES (INCLUDING DAMAGES FOR LOSS OF PROFITS,
LOSS OF BUSINESS, LOSS OF USE OR DATA, INTERRUPTION OF BUSINESS AND THE LIKE),
EVEN IF ASUS HAS BEEN ADVISED OF THE POSSIBILITY OF SUCH DAMAGES ARISING FROM ANY
DEFECT OR ERROR IN THIS MANUAL OR PRODUCT.
SPECIFICATIONS AND INFORMATION CONTAINED IN THIS MANUAL ARE FURNISHED FOR
INFORMATIONAL USE ONLY, AND ARE SUBJECT TO CHANGE AT ANY TIME WITHOUT NOTICE,
AND SHOULD NOT BE CONSTRUED AS A COMMITMENT BY ASUS. ASUS ASSUMES NO
RESPONSIBILITY OR LIABILITY FOR ANY ERRORS OR INACCURACIES THAT MAY APPEAR IN THIS
MANUAL, INCLUDING THE PRODUCTS AND SOFTWARE DESCRIBED IN IT.
Products and corporate names appearing in this manual may or may not be registered trademarks or
copyrights of their respective companies, and are used only for identication or explanation and to the
owners’ benet, without intent to infringe.
Table of contents
Notices......................................................................................................... iii
Safety information ...................................................................................... iv
Care & Cleaning........................................................................................... v
1.1 Welcome! ...................................................................................... 1-1
1.2 Package contents......................................................................... 1-1
1.3 Monitor introduction .................................................................... 1-2
1.3.1 Front of the LCD monitor ................................................ 1-2
1.3.2 Rear of the LCD monitor ................................................. 1-4
2.1 Detaching the arm/stand
(for VESA wall mount) ..............................................................2-1
2.2 Adjusting the monitor.................................................................. 2-2
2.3 Connecting the cables................................................................. 2-3
3.1 OSD (On-Screen Display) menu ................................................. 3-1
3.1.1 Howtorecongure.......................................................... 3-1
3.1.2 OSDFunctionIntroduction.............................................. 3-2
3.2 Specications............................................................................... 3-7
3.3 Troubleshooting (FAQ)................................................................ 3-8
3.4
Supported Timing List........................................................................3-9

iii
Notices
Federal Communications Commission Statement
ThisdevicecomplieswithPart15oftheFCCRules.Operationissubject
tothefollowingtwoconditions:
• Thisdevicemaynotcauseharmfulinterference,and
• Thisdevicemustacceptanyinterferencereceivedincluding
interferencethatmaycauseundesiredoperation.
Thisequipmenthasbeentestedandfoundtocomplywiththelimitsfora
ClassBdigitaldevice,pursuanttoPart15oftheFCCRules.Theselimits
aredesignedtoprovidereasonableprotectionagainstharmfulinterference
inaresidentialinstallation.Thisequipmentgenerates,usesandcan
radiateradiofrequencyenergyand,ifnotinstalledandusedinaccordance
withmanufacturer’sinstructions,maycauseharmfulinterferencetoradio
communications.However,thereisnoguaranteethatinterferencewill
notoccurinaparticularinstallation.Ifthisequipmentdoescauseharmful
interferencetoradioortelevisionreception,whichcanbedeterminedby
turningtheequipmentoffandon,theuserisencouragedtotrytocorrect
theinterferencebyoneormoreofthefollowingmeasures:
• Reorientorrelocatethereceivingantenna.
• Increasetheseparationbetweentheequipmentandreceiver.
• Connecttheequipmenttoanoutletonacircuitdifferentfromthatto
whichthereceiverisconnected.
• Consultthedealeroranexperiencedradio/TVtechnicianforhelp.
AsanEnergyStar® Partner,ourcompanyhasdetermined
thatthisproductmeetstheEnergyStar® guidelinesfor
energyefciency.
Canadian Department of Communications Statement
ThisdigitalapparatusdoesnotexceedtheClassBlimitsforradio
noiseemissionsfromdigitalapparatussetoutintheRadioInterference
RegulationsoftheCanadianDepartmentofCommunications.
ThisclassBdigitalapparatuscomplieswithCanadianICES-003.

iv
Safety information
• Beforesettingupthemonitor,carefullyreadallthedocumentationthat
camewiththepackage.
• Topreventfireorshockhazard,neverexposethemonitortorainor
moisture.
• Nevertrytoopenthemonitorcabinet.Thedangeroushighvoltages
insidethemonitormayresultinseriousphysicalinjury.
• Ifthepowersupplyisbroken,donottrytofixitbyyourself.Contacta
qualifiedservicetechnicianoryourretailer.
• Beforeusingtheproduct,makesureallcablesarecorrectlyconnected
andthepowercablesarenotdamaged.Ifyoudetectanydamage,
contactyourdealerimmediately.
• Slotsandopeningsonthebackortopofthecabinetareprovidedfor
ventilation.Donotblocktheseslots.Neverplacethisproductnearor
overaradiatororheatsourceunlessproperventilationisprovided.
• Themonitorshouldbeoperatedonlyfromthetypeofpowersource
indicatedonthelabel.Ifyouarenotsureofthetypeofpowersupplyto
yourhome,consultyourdealerorlocalpowercompany.
• Usetheappropriatepowerplugwhichcomplieswithyourlocalpower
standard.
• Donotoverloadpowerstripsandextentioncords.Overloadingcan
resultinfireorelectricshock.
• Avoiddust,humidity,andtemperatureextremes.Donotplacethe
monitorinanyareawhereitmaybecomewet.Placethemonitorona
stablesurface.
• Unplugtheunitduringalightningstormorifitwillnotbeusedfora
longperiodoftime.Thiswillprotectthemonitorfromdamagedueto
powersurges.
• Neverpushobjectsorspillliquidofanykindintotheslotsonthe
monitorcabinet.
• Toensuresatisfactoryoperation,incaseuseataPCthenitshould
usethemonitoronlywithcomputerswhichhaveappropriate
configuredreceptaclesmarkedbetween100-240VAC.
• Ifyouencountertechnicalproblemswiththemonitor,contacta
qualifiedservicetechnicianoryourretailer.
• Thewallsocketshallbeinstalledneartheequipmentandshallbe
easilyaccessible.

v
Care & Cleaning
• Beforeyouliftorrepositionyourmonitor,itisbettertodisconnectthe
cablesandpowercord.Followthecorrectliftingtechniqueswhen
positioningthemonitor.Whenliftingorcarryingthemonitor,graspthe
edgesofthemonitor.Donotliftthedisplaybythestandorthecord.
• Cleaning.Turnyourmonitoroffandunplugthepowercord.Cleanthe
monitorsurfacewithalint-free,non-abrasivecloth.Stubbornstains
mayberemovedwithaclothdampenedwithmildcleaner.
• Avoidusingacleanercontainingalcoholoracetone.Useacleaner
intendedforusewiththeLED.Neverspraycleanerdirectlyonthe
screen,asitmaydripinsidethemonitorandcauseanelectricshock.
The following symptoms are normal with the monitor:
• Thescreenmayflickerduringtheinitialuseduetothenatureofthe
fluorescentlight.TurnoffthePowerSwitchandturnitonagainto
makesurethattheflickerdisappears.
• Youmayfindslightlyunevenbrightnessonthescreendependingon
thedesktoppatternyouuse.
• Whenthesameimageisdisplayedforhours,anafterimageofthe
previousscreenmayremainafterswitchingtheimage.Thescreenwill
recoverslowlyoryoucanturnoffthePowerSwitchforhours.
• Whenthescreenbecomesblackorflashes,orcannotworkanymore,
contactyourdealerorservicecentertofixit.Donotrepairthescreen
byyourself!
Conventions used in this guide
WARNING:Informationtopreventinjurytoyourselfwhentryingto
completeatask.
CAUTION:Informationtopreventdamagetothecomponentswhen
tryingtocompleteatask.
IMPORTANT:InformationthatyouMUSTfollowtocompleteatask.
NOTE:Tipsandadditionalinformationtoaidincompletingatask.

vi
Wheretondmoreinformation
Refertothefollowingsourcesforadditionalinformationandforproductand
softwareupdates.
1. ASUS websites
TheASUSwebsitesworldwideprovideupdatedinformationonASUS
hardwareandsoftwareproducts.Refertohttp://www.asus.com
2. Optional documentation
Yourproductpackagemayincludeoptionaldocumentationthatmayhave
beenaddedbyyourdealer.Thesedocumentsarenotpartofthestandard
package.

1-1ASUSLCDMonitorPA238QRSeries
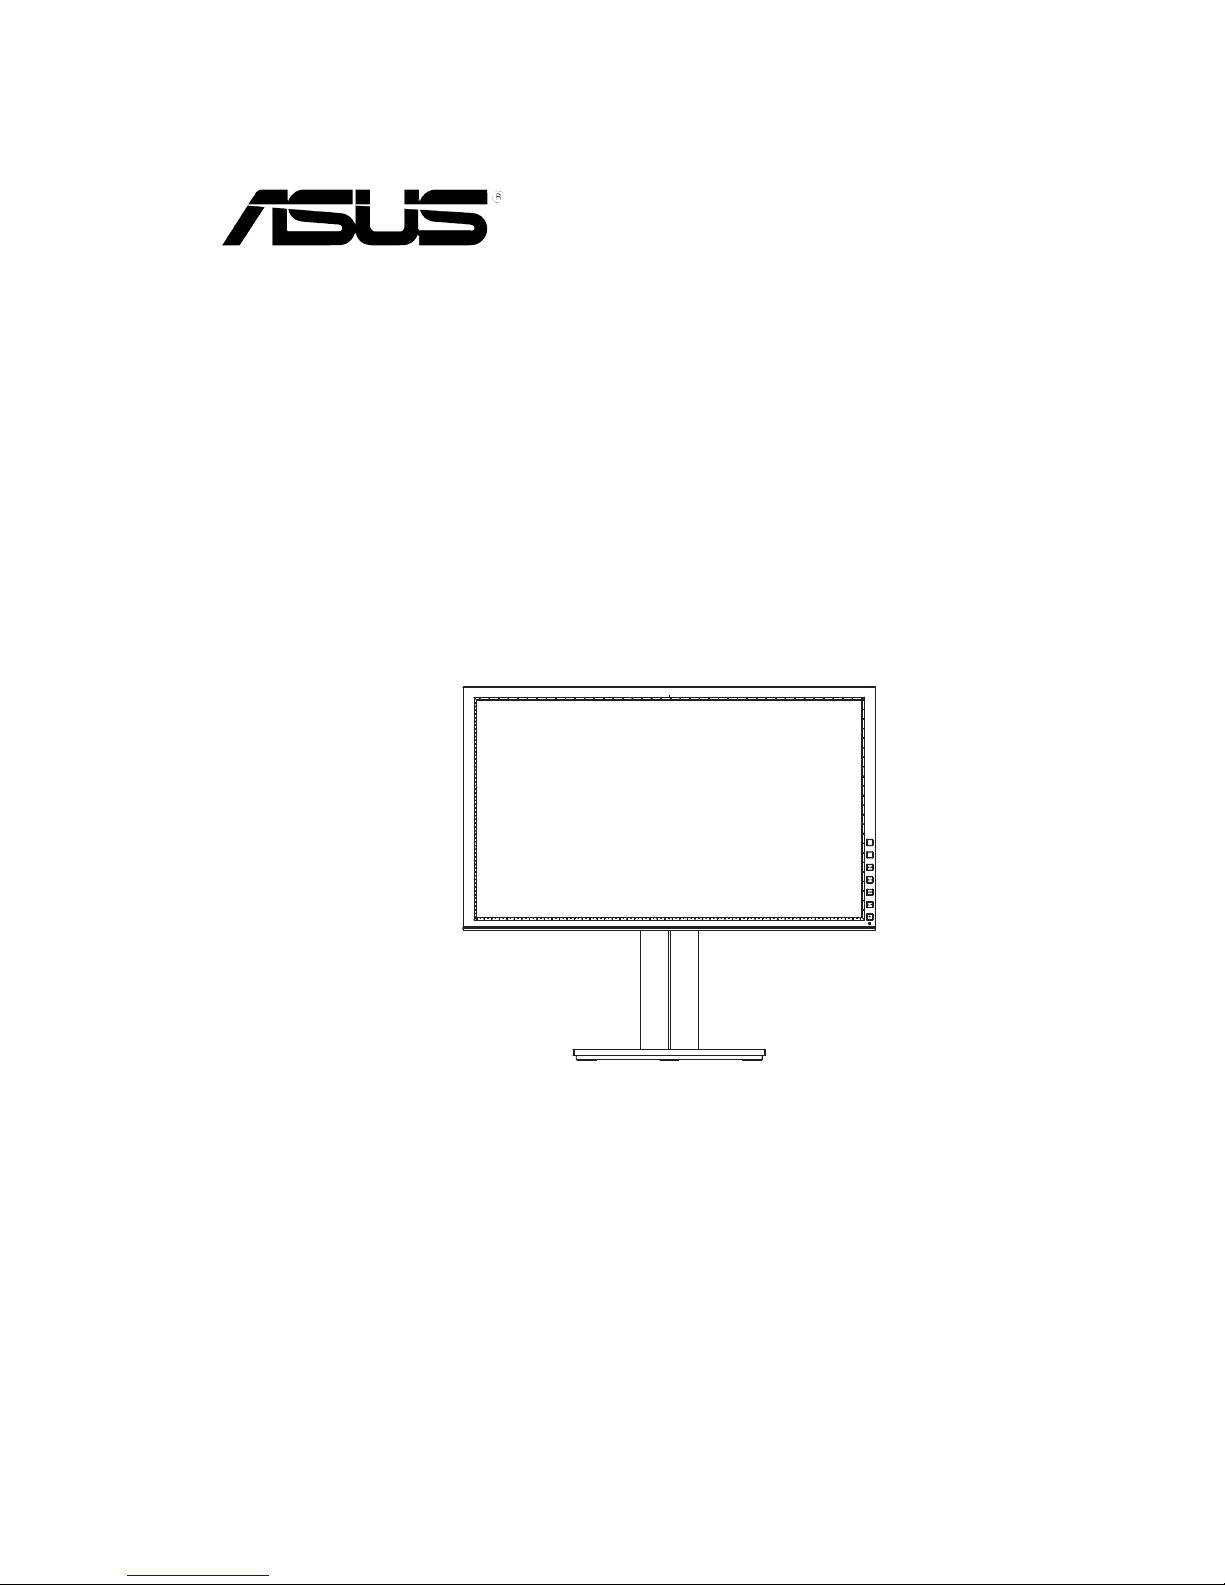
1.1 Welcome!
ThankyouforpurchasingtheASUS®PA238QRSeriesLCDmonitor!
ThelatestwidescreenLCDmonitorfromASUSprovidesacrisper,broader,and
brighterdisplay,plusahostoffeaturesthatenhanceyourviewingexperience.
Withthesefeatures,youcanenjoytheconvenienceanddelightfulvisual
experiencethatthePA238QRSeriesbringsyou!
1.2 Package contents
CheckyourPA238QRSeriesLCDmonitorpackageforthefollowingitems:
LCD monitor
PowerCord
VGACable
DVICable
USBCable
CableTie
SupportCD
QuickStartGuide
WarrantyCard
Ifanyoftheaboveitemsisdamagedormissing,contactyourretailer
immediately.

1-2 Chapter1:ProductIntroduction
1.3 Monitor introduction
1.3.1 Front of the LCD monitor
4
5
6
3
2
1
1. Humansensor
• Humansensorwilldetectuser’spresenceinfrontofthemonitorscreen.
Itwillautomaticallyswitchthemonitorintopowersavingmodewhenit
doesnotdetectanyoneinfrontofthemonitorwithinthe50cmto70cm
effectiverangeforlongerthan60seconds.Whentheusercomesback,
thepowerresumesautomaticallywhenitdetectstheuser’spresence.
ThedefaultsettingofHumansensoris“Medium”.Usercanadjustthe
sensitivitybasedonhis/herphysiqueortheenvironment.Usercould
alsoswitchoffHumansensorfunction.
• Pleasedonotputanyobjectontherightsideofthemonitortoavoidany
interference.
• PleasemakesurethattheHumanSensorisnotplacedanywherehigher
thantheuser’sshoulder
2. Button:
• Automaticallyadjusttheimagetoitsoptimizedposition,clock,and
phasebylongpressingthisbuttonfor2-4seconds(forVGAmodeonly).
• Usethishotkeytoswitchfromsixvideopresetmodes(SceneryMode,
StandardMode,TheaterMode,GameMode,NightViewMode,and
sRGBMode)withSPLENDID™VideoIntelligenceTechnology.
1-3ASUSLCDMonitorPA238QRSeries
• ExittheOSDmenuorgobacktothepreviousmenuastheOSDmenu
isactive.
3. Button:
• Pressthisbuttontoincreasethevalueofthefunctionselectedormove
right/uptothenextfunction.
• ThisisalsoahotkeyforBrightnessadjustment.
4. MENUButton:
• PressthisbuttontoentertheOSDmenu.
• Pressthisbuttontoenter/selecttheicon(function)highlightedwhilethe
OSDisactivated.
5. Button:
• Pressthisbuttontodecreasethevalueofthefunctionselectedormove
tothenextfunction.
• UsethishotkeytoswitchfromVGA,DVI,HDMIandDisplayPortinput
signal.
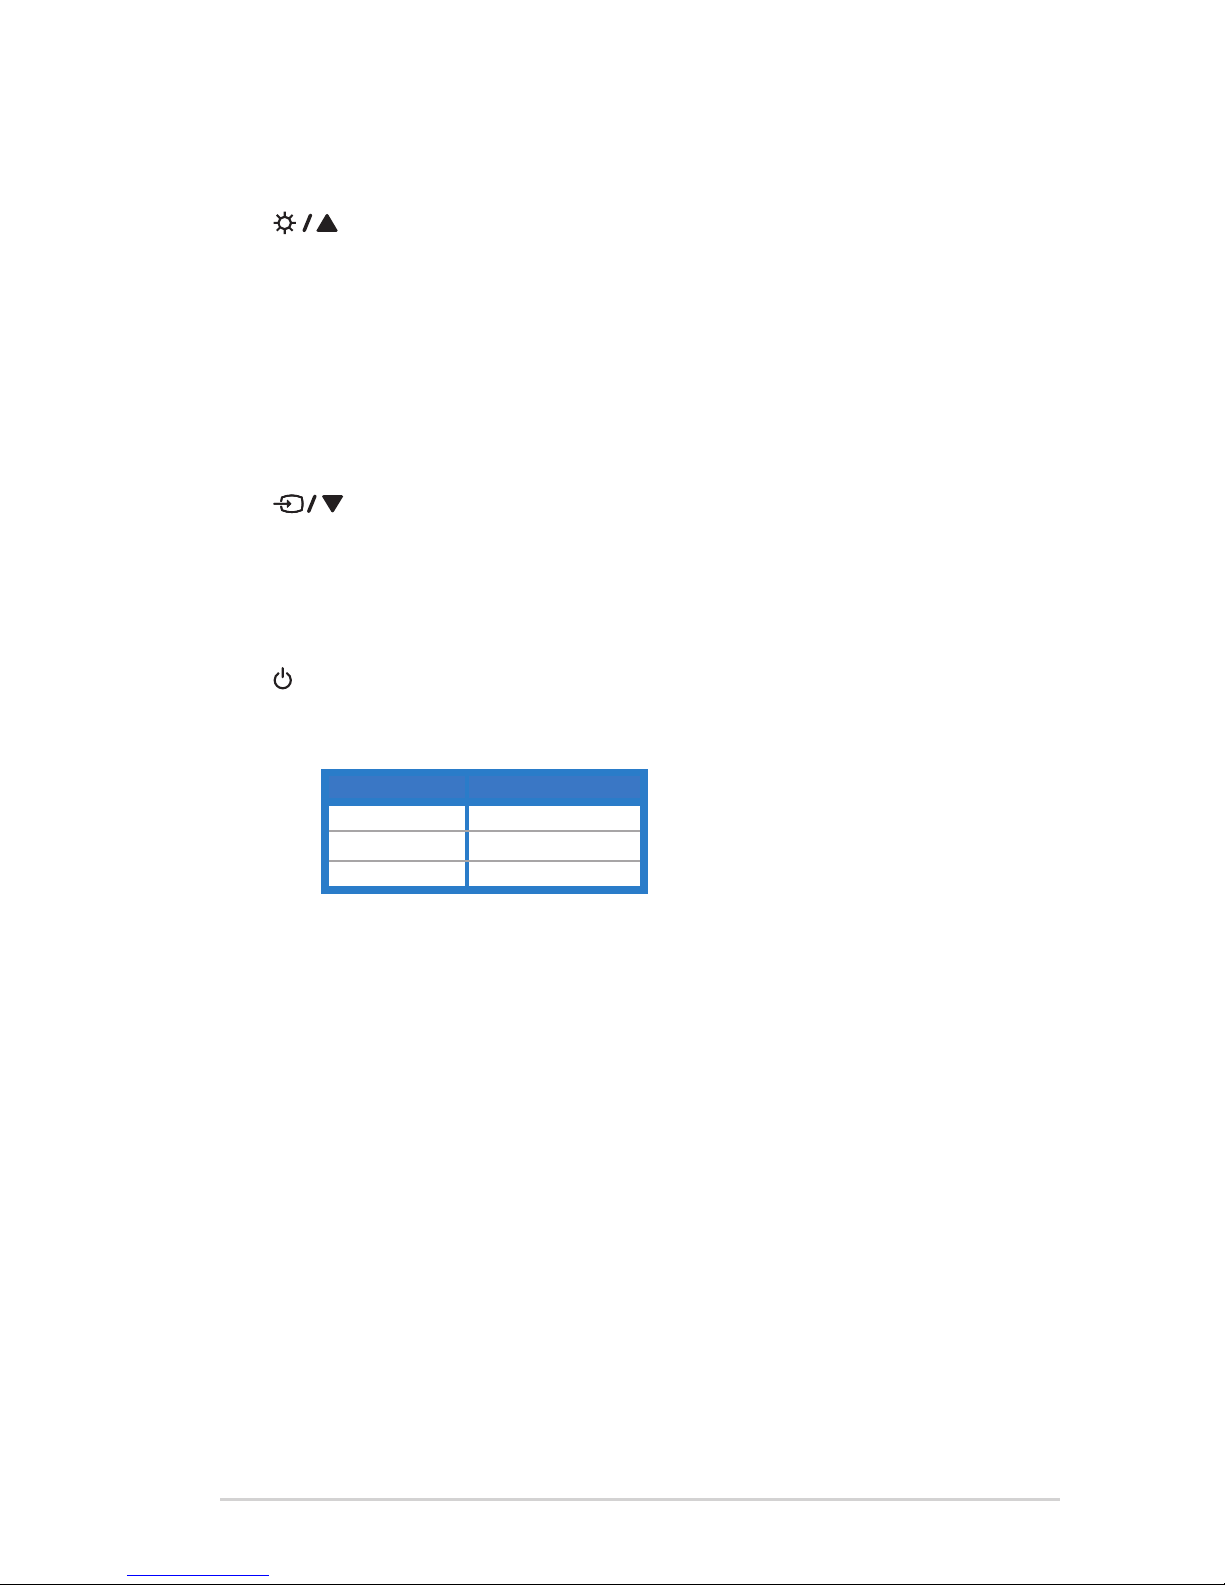
6. PowerButton/PowerIndicator:
• Pressthisbuttontoturnthemonitoron/off.
• Thecolordefinitionofthepowerindicatorisasthebelowtable.
Status Description
White ON
Amber Standbymode
OFF OFF
1-4 Chapter1:ProductIntroduction
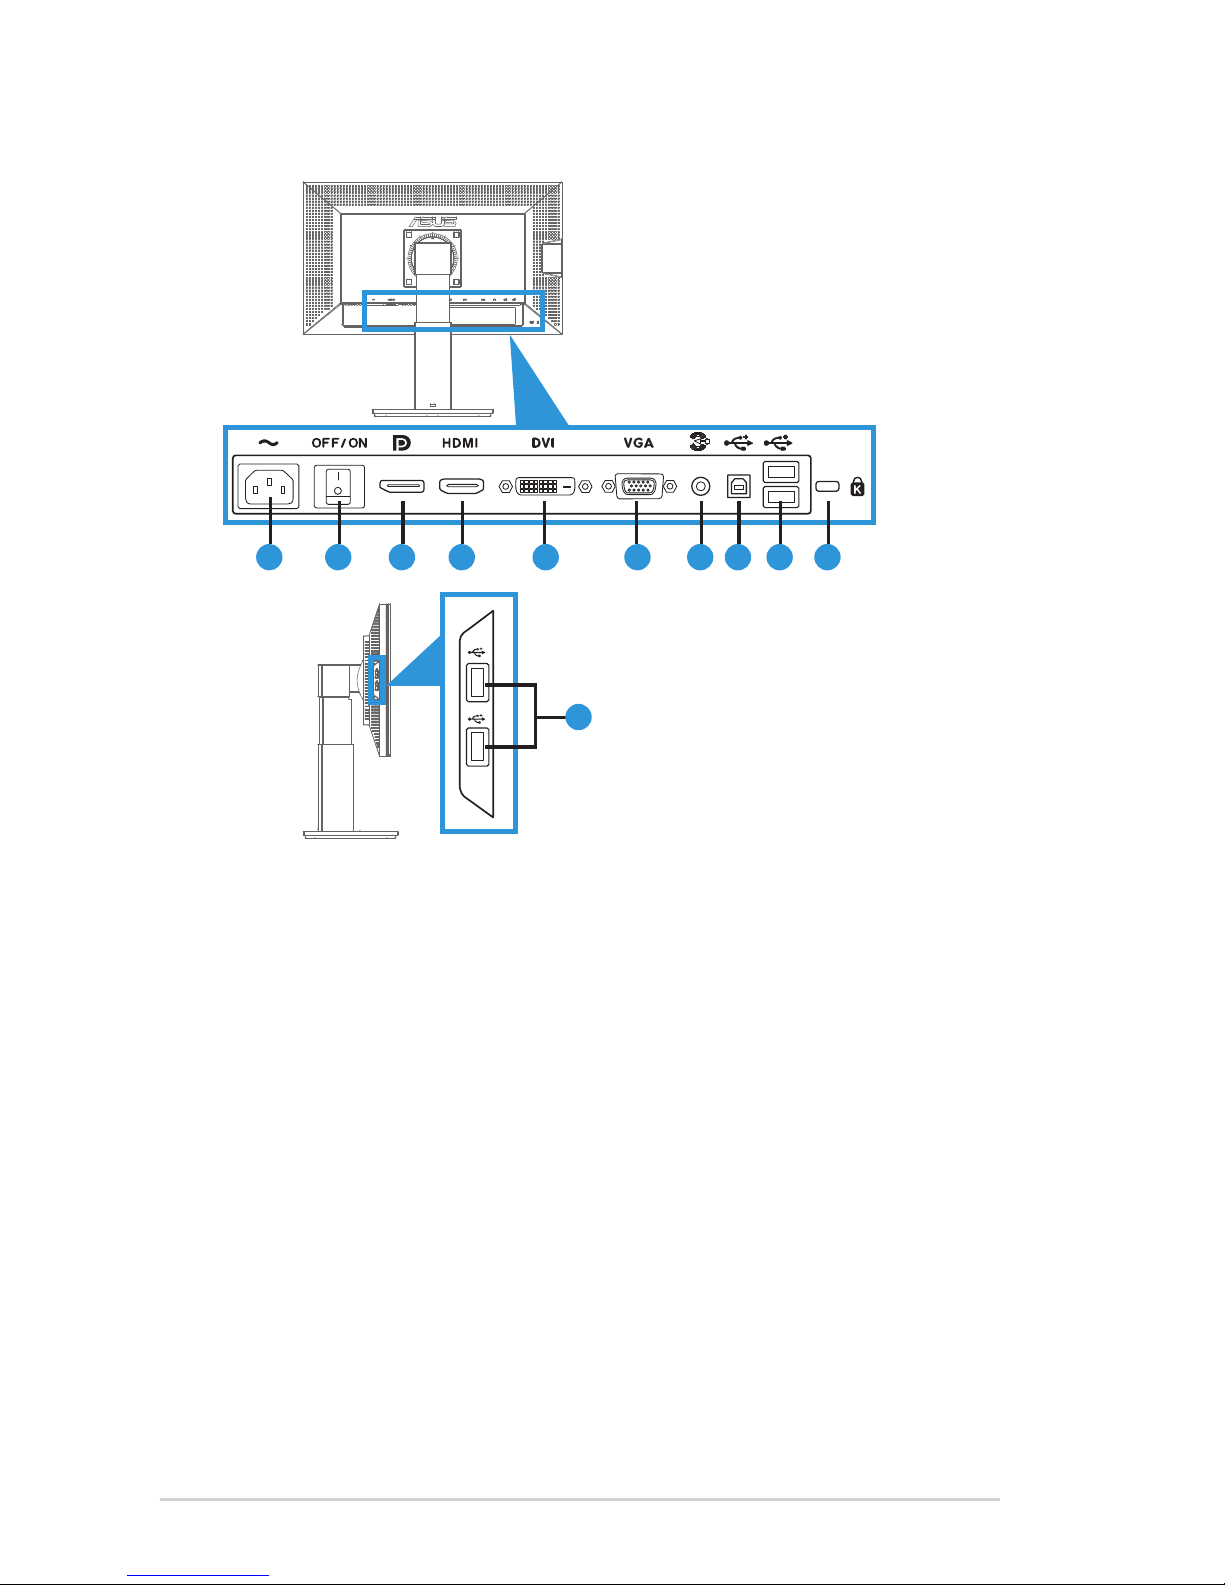
1.3.2 Rear of the LCD monitor
4321 5 6 8 9 107
11
Rear connectors
1. AC-INport:Thisportconnectsthepowercord.
2. Powerswitch:Pressthisswitchtoturnon/offpower.
3. DisplayPort.ThisportisforconnectionwithaDisplayPortcompatible
device.
4. HDMIport:ThisportisforconnectionwithanHDMIcompatible
device.
5. DVIport:This24-pinportisforPC(PersonalComputer)DVI-Ddigital
signalconnection.
6. VGAport:This15-pinportisforPCVGAconnection.
7. AudioLine-inPort:
8. USBupstreamport:ThisportisforconnectionwithaUSBupstream
cable.
9. USBdownstreamports:TheseportsareforconnectionwithUSB
devices,suchasUSBkeyboard/mouse,USBashdrive,etc.
Indice
Altri manuali Asus Monitor

Asus
Asus Republic of Games ROG SWIFT PG329Q Manuale utente

Asus
Asus MT276 Series Manuale utente

Asus
Asus PA27DCE Manuale utente

Asus
Asus LS201 Manuale utente

Asus
Asus VS208 Series Manuale utente

Asus
Asus PA238Q Manuale utente

Asus
Asus REPUBLIC OF GAMERS SWIFT PG248Q Manuale utente

Asus
Asus C1241 Series Manuale utente

Asus
Asus ROG Swift 360Hz PG259QN Manuale utente

Asus
Asus ROG Strix XG43UQ Manuale utente

Asus
Asus MX27UQ Manuale utente

Asus
Asus Vg278Q Manuale utente

Asus
Asus MG248Q Manuale utente

Asus
Asus MX239H Manuale utente

Asus
Asus VA24DCP Manuale utente

Asus
Asus VW171S Manuale utente

Asus
Asus VE276Q Series Manuale utente

Asus
Asus VK193 Series Manuale utente

Asus
Asus VH198T Manuale utente

Asus
Asus VK248H Manuale utente


