BenQ Professional VP150X Manuale utente

ULTRA PORTABLE PROJECTOR
VP150X
USER’S GUIDE
Thank you for purchasing Benq Ultra Portable Projector.
Please read this user’s guide to ensure correct use of the device. Save this user’s guide for future reference.
OUTLINE
This Ultra Portable Projector can display various computer
signals and NTSC/PAL/SECAM video signals.
FEATURES
1. High Brightness
2. High Resolution
3. Easy to Set Up
4. Compact Size, Light Weight for Portability
5. RGB Output Terminal
6. Mouse Emulation
7. Auto-Adjustment Function (i - key)
8. USB Communication

ii English
Copyright
Copyright © 2002 by Benq Corporation, formerly Acer Communications & Multimedia Inc.. All rights reserved. No part
of this publication may be reproduced, transmitted, transcribed, stored in a retrieval system or translated into any
language or computer language, in any form or by any means, electronic, mechanical, magnetic, optical, chemical, manual
or otherwise, without the prior written permission of Benq Corporation.
Disclaimer
Benq Corporation makes no representations or warranties, either expressed or implied, with respect to the contents
hereof and specifically disclaims any warranties, merchantability or fitness for any particular purpose. Furthermore,
Benq Corporation reserves the right to revise this publication and to make changes from time to time in the contents
hereof without obligation of Benq Corporation to notify any person of such revision or changes.
Warning
This equipment has been tested and found to comply with the limits for a Class A digital device, pursuant to part 15 of
the FCC Rules. These limits are designed to provide reasonable protection against harmful interferences when the
equipment is operated in a commercial environment. This equipment will generates and radiate radio frequency energy,
if not installed and used in accordance with the instruction manual, may cause harmful interference to radio
communications. Operation of this equipment in a residential area is likely to cause harmful interference in which case
the user will be required to correct the interference at his own expense.
Fill this in!!
For future service convenience, record the following information in the space below. The serial number is on the
back of the product.
Projector Information
Product Name: VP150X
Serial Number:
Date of Purchase:
Dealer Information
Dealer:
Telephone
Number:
Address:

Safety Instructions iii
Safety Instructions
1. Read this user’s guide before you operate your projector and save it for future reference.
2. When the lamp becomes extremely hot during operation, allow the projector to cool for approximately 45 minutes
prior to removing the lamp assembly for replacement. Do not operate lamps beyond the rated lamp life. Excessive
operation of lamps beyond rated life could cause them to explode in rare occasions.
3. Power is still available when the projector is in the standby mode. Never replace lamp assembly or any electronic
components unless the projector is unplugged.
4. Do not attempt to service this product yourself, as opening or removing covers may damage the components inside
and will void your warranty.
5. Do not place this product on an unstable cart, stand, or table. The product may fall, causing serious damage to the
product.
6. The standard remote control contains a low-power laser that acts as a pointing device during presentations. The
light beam may cause injury if pointed directly into a person’s eyes.
7. This product is capable of displaying inverted images for ceiling mount configurations. Please use suitable
equipment for mounting the unit and make sure it is securely installed.
8. Openings in front or at two sides are for ventilation. They must not be blocked or covered.
9. For ventilation reasons, fans continue to operate for about 1 minute after the projector is powered off. Please do
not unplug the power cord until the fans stop.
10. Do not look straight at the projector lens during operation. The intense light beam may injure your eyes.

iv English
TABLE OF CONTENTS
INTRODUCTION ................................................................................................................................... 1
Projector Features.................................................................................................................................................................. 1
Description............................................................................................................................................................................... 2
A FRONT ....................................................................................................................................................................... 2
B RIGHT ......................................................................................................................................................................... 2
C BOTTOM ............................................................................................................................................................. 2
Installation................................................................................................................................................................................. 3
AI
MAGE SIZE ADJUSTMENT............................................................................................................................................ 3
BA
DJUSTABLE FEET ......................................................................................................................................................... 3
Moving the Projector............................................................................................................................................................. 4
Accessories .............................................................................................................................................................................. 5
CONNECTION ....................................................................................................................................... 6
Connect the Projector to Computer .............................................................................................................................. 6
Connect the Projector to Notebook ................................................................................................................................ 6
Connect the Projector to Macintosh................................................................................................................................. 7
Connect the Projector to Power Book ........................................................................................................................... 7
Connect to Video/ S-Video .................................................................................................................................................. 7
OPERATION ........................................................................................................................................... 8
Turn On/Off Procedure ........................................................................................................................................................ 8
AP
OWER ON ................................................................................................................................................................... 8
BS
TANDBY....................................................................................................................................................................... 8
External Control ..................................................................................................................................................................... 8
A CONTROL PAD ............................................................................................................................................................ 8
B REMOTE CONTROL .................................................................................................................................................... 9
Usage and Replacement of Lamp ..................................................................................................................................... 11
AL
AMP/TEMPERATURE STATUS LED INDICATOR .................................................................................................... 11
B LAMP REPLACEMENT 12
OSD ........................................................................................................................................................................................ 14
Main OSD Menu................................................................................................................................................................... 14
AD
ISPLAY PAGE............................................................................................................................................................ 14
B IMAGE PAGE ............................................................................................................................................................... 15
CC
ONTROL PAGE........................................................................................................................................................ 16
DS
OURCE PAGE............................................................................................................................................................ 16
Other Correspondent and Remote Functions Messages........................................................................................... 17
MAINTENANCE AND TROUBLESHOOTING............................................................................... 18
AL
AMP REPLACEMENT ................................................................................................................................................. 18
BC
LEANING THE LENS ................................................................................................................................................ 18
CT
ROUBLESHOOTING ................................................................................................................................................ 18
SPECIFICATIONS ................................................................................................................................ 19
AO
PTICAL ..................................................................................................................................................................... 19
BE
LECTRICAL ................................................................................................................................................................ 19
CM
ECHANICAL ............................................................................................................................................................. 19
DP
RESET DISPLAY RESOLUTION TABLE..................................................................................................................... 19

Introduction 1
INTRODUCTION
Projector Features
A. Image Resolution
By using advanced intelligent compression technology, it is fully compatible with true XGA, and supports SXGA . The
advanced intelligent compression technology enables the projector to present clear compression XGA images without
line omission.
B. Brightness
Provides superior brightness for the 0.9" Liquid Crystal Panel and our own optical design, with a geometric effect that
increases light usage efficiency. By increasing the light usage efficiency we can better reproduce the three basic colors
(RGB) required for color reproduction on LCD Panel.
C. Portability
This projector has a sophisticated shape, like that of an attaché case, with a retractable carrying handle that is extremely
compact and lightweight. It helps you make powerful presentations wherever you go with its
8-pound weight and A4 size.
D. Keystone
The projection position is already set to the height of the line of vision; there is no keystone effect. Even when projecting
above or under the height of the line of vision, image distortion (if any) can be adjusted using the keystone correction
function.
E. Multilanguage
The OSD (On Screen Display: information screens and menus) in 7 languages (English, Deutsch, Français, Italiano,
Español, Dutch and Simplified Chinese) provides you with additional information to assist you making corrections with
OSD operation in your native languages.
F. Auto Detect System
This projector can detect display signals from PCs with frequently used timing and do the optimization simultaneously.
It does not require complicated adjustments in order to project picture images from PCs.
G. Ceiling Mount and Rear Screen Projection
The projector is equipped with a full mirror scan conversion function (vertical/horizontal mirror), which allows the
image to be reversed for ceiling mounting as well as for rear projection applications.
H. Auto adjustment (I-key)
The projector will automatically adjust five items (V. Position, H. Position, H. Phase, V. Phase, White Level), when I-key
is selected.
1

2 English
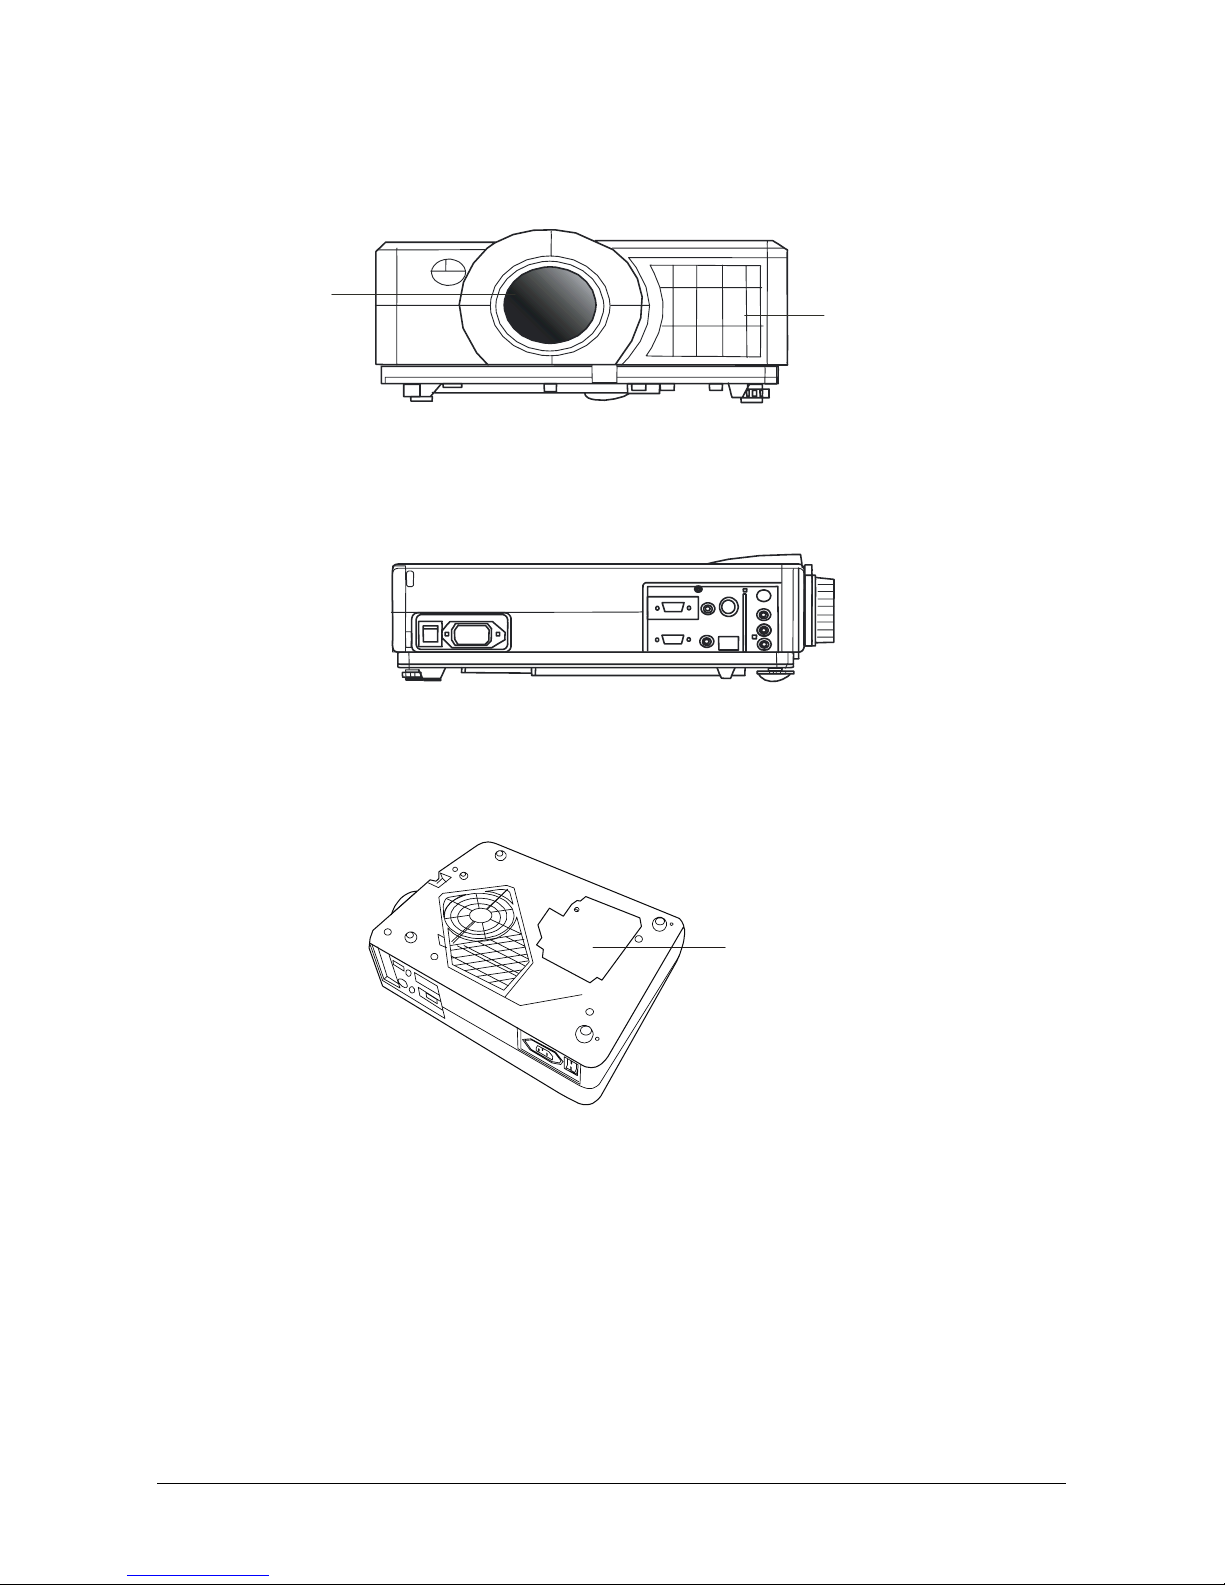
Description
AFRONT
Figure 1. Front view
BRIGHT
Figure 2. Right view
C BOTTOM
Figure 3. Bottom view
Projecton
Lens Ventilation Hole
Lamp cover

Introduction 3
Installation
AImageSizeAdjustment
zThis projector is basically designed to project on a flat projection surface.
zThis projector can be focused from 1m–12.3m.
zRefer to Figure. 4 to adjust the screen size.
Figure 4. Positioning
B Adjustable Feet
Picture tilt and projection angle can be adjusted by twisting the adjustable feet. Projection angle can be adjusted from 0
to 9 degrees by rotating the feet. .
Figure 5. Adjustable feet
Projection distance Screen size
Wide Telephoto
m Inch Inch
1.64 40 30.76
2.06 50 38.46
2.46 60 46.15
2.9 70 53.84
4.6 100 76.92
6.26 150 115.38
8.35 200 153.84
12.55 300 230.76
Lens center
Projection distance

4 English
Moving the Projector
Use the carrying handle when moving the projector.
Replace the lens cover and rotate the feet fully clockwise (to shorten the feet) when moving the projector to prevent
damage it.
Figure 6. Moving the projector
Caution
The carrying bag is supplied to protect the projector from dust and scratches on the surface of the cabinet. It is not
designed to protect the projector from external shock.
Do not transport the projector in an unsuitable transport case by using a courier or transport service. This may cause
damage to the projector.

Introduction 5
Accessories
Please check and ensure your box contains everything listed below. Contact your dealer, if any pieces are missing,.
Please save the original box and packing materials in case you ever need to ship the unit.
Figure 7. Accessories
User’s Guide
Remote Controle
AAA
Batteries
Mac Adapter
VGA Cable
ADB Mouse Adapter
PS/2 Mouse Adapter
Serial Mouse Adapter
USB Cable
Power Cable
General Cable
RCA Jack
(Audio/ Video)
Audio Cable
S-Video Cable

6 English
CONNECTION
Connect the Projector to Computer
Figure 8. Connect to PC
Connect the Projector to Notebook
Figure 9. Connect to notebook
Computer Input
Control Port Output
Computer in
Control Port
VGA Cable (supplied)
ADB Port Input
Mouse Cable
for PS/2 Port
(Supplied)
Computer
output
Computer Input
Control Port Output
Computer in
Control Port
VGA Cable (supplied)
ADB Port Input
Mouse Cable
for PS/2 Port
(Supplied)
Computer
output
2
Indice
Altri manuali BenQ Proiettore

BenQ
BenQ MX760 Manuale utente

BenQ
BenQ GP30 Manuale utente

BenQ
BenQ LX20 Manuale utente

BenQ
BenQ MW821ST Manuale utente

BenQ
BenQ W1200 Manuale utente

BenQ
BenQ W1110s Manuale utente

BenQ
BenQ PB8220 - XGA DLP Projector Manuale utente

BenQ
BenQ Home Entertainment PE5120 Manuale utente

BenQ
BenQ MP615P Manuale utente

BenQ
BenQ MX620ST Manuale utente

BenQ
BenQ S11 Manuale utente

BenQ
BenQ SX930 Manuale utente

BenQ
BenQ MW814ST Manuale utente

BenQ
BenQ MS535 Manuale utente

BenQ
BenQ MP780 ST+ Manuale utente

BenQ
BenQ MW663 Manuale utente

BenQ
BenQ X1300i Manuale utente

BenQ
BenQ LK953ST Manuale utente

BenQ
BenQ MU706 Manuale utente

BenQ
BenQ Home Entertainment PE5120 Manuale utente