detekt RDS2500 Manuale utente

2101 E Saint Elmo Rd
Building 3, Suite 330
Austin, TX 78744
512-912-0837
PRODUCT MANUAL

1
CONTENTS
Features........................................
Materials Provided........................
Getting Started..............................
Navigation....................................
Main Menu..................................
Side Menu...................................
Settings........................................
Unit Status...................................
User Preferences........................
Diagnostic Check......................
Testing..........................................
Printing.........................................
Updating Software.......................
Data Manager.............................
Safety..........................................
Miscellaneous.............................
2
3
4
6
6
7
8
9
10
10
11
14
15
16
23
24
2
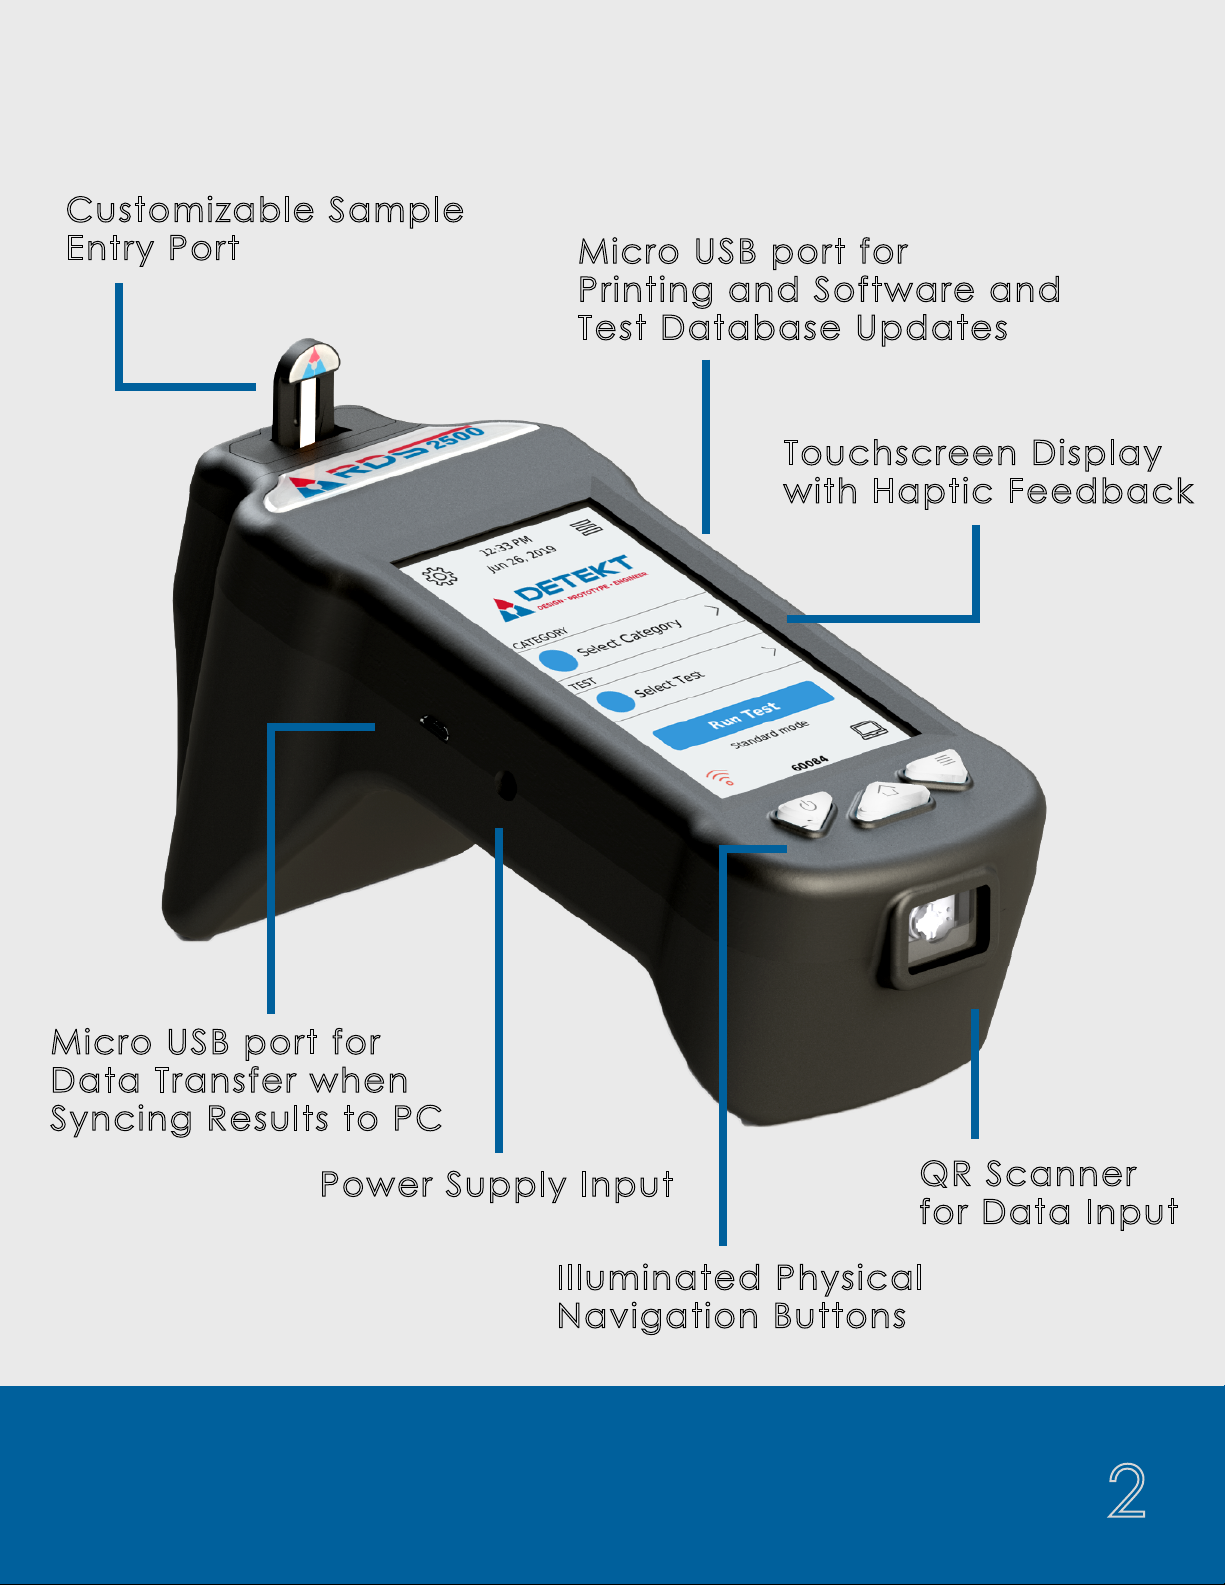
FEATURES
Customizable Sample
Entry Port
Micro USB port for
Data Transfer when
Syncing Results to PC
Power Supply Input
Touchscreen Display
with Haptic Feedback
Micro USB port for
Printing and Software and
Test Database Updates
Illuminated Physical
Navigation Buttons
QR Scanner
for Data Input

3
MATERIALS
RDS 2500
Reader
Diagnostic
Cartridge
Standard to Micro
USB Converter
Sync Cable for
Data Transfer
Power Supplies
& International
Converters

4
GETTING STARTED
Charging Your RDS-2500
To charge your reader, connect the power adapter to the charging
port on the left side of the reader. When powered off and
connected to a power supply, the reader will charge fully in 3 hours.
Physical Button Functionality
The battery icon on the side menu will
indicate when the reader is charging.
When the reader is on or in use while
connected to power, it will maintain its
current power state.
Messages throughout the interface pages
will alert the user when the battery is
getting low.
They keypad at the base of the front of the reader allows for quick
access to several key features.
Menu
Power Home
This button will
open any menu
available on the
current page.
Press and hold
to power on
the reader. This
button can also
be used as a
hard shutdown.
This button can be
used on all pages
to return to the
main screen.

5
To turn the RDS-2500 on, press and hold
the power button for a few seconds
until the keypad illuminates.
Safe Shutdown
Left Side Micro USB
GETTING STARTED
Proper Storage Conditions
Store the RDS-2500 in a dry, dust-free environment
at normal room temperature.
Turning the Reader On and Off
Micro USB Port Functionality
Power On
Hard Reset
To power off a reader safely, navigate to
the side menu and select Power. From
here, the user can choose to Power off
or Restart.
If the reader becomes unresponsive, a
hard reset may be required. This can be
done by pressing and holding the power
button until the reader turns off.
Import result data and images
to view and generate export
files on the computer.
Updating
Update software or test
database from USB flash drive.
Print results directly from
testing routine or saved results
page.
View reader diagnostic
information on the unit status
page.
Right Side Micro USB
Printing
Data Manager

6
NAVIGATION
Main Menu
Connect to
Network,
Replace Track,
Diagnostic Check,
Advanced Settings
Enter Testing
Routine
Network
Connection
Status
Settings Side Menu
Data Transfer
Battery Status,
View Results,
User Preferences,
Unit Status,
Power
Sync Results to a
PC via USB or
Network Transfer
The Main Menu can be
accessed from any page
by clicking the center
physical home button or
any home icon on
the screen. From the
Main Menu, you have
access to several
key features.
From this screen, the user may
access settings, run a test,
and enter Data Transfer mode
to sync the results to the PC.
Once Run Test is selected,
the reader will walk you
through the steps to arrive at
your test result.

7
The Side Menu is located on the Main Menu page and allows
quick-access to key features.
The Side Menu can be opened by clicking the right-most
physical button or the menu icon in the upper-right corner.
This menu allows you to check battery status, view test results,
access user preferences, update the software and test
database, safely restart or power off the unit, and check
network connection status.
The battery status icon will display up to 4 bars indicating the
level of charge, and will show a lightning bolt if the reader is
currently charging.
NAVIGATION
Side Menu
Access Saved Results
Battery Status
Users, Data, Time, Brightness,
Volume, Printers
Restart or Power Off
Current User
Network Connection Status
Update Software or Test Database

8
NAVIGATION
Settings
From the Settings page you can scan new Lot ID information,
connect to a wireless network, change track type, run the
annual diagnostic check, and access additional advanced
settings.
* For select partners who wish to use Wi-Fi to update the test
database or software versions on their units, software
customization is required. Contact Detekt to discuss the
implementation of this feature.
Main Menu
Scan Codes for
Customization
Change Reader
Track Settings
Scan New Lot ID
Information
Connect to Wifi *
Run Diagnostics
Check
Access Additional
Settings
9
NAVIGATION
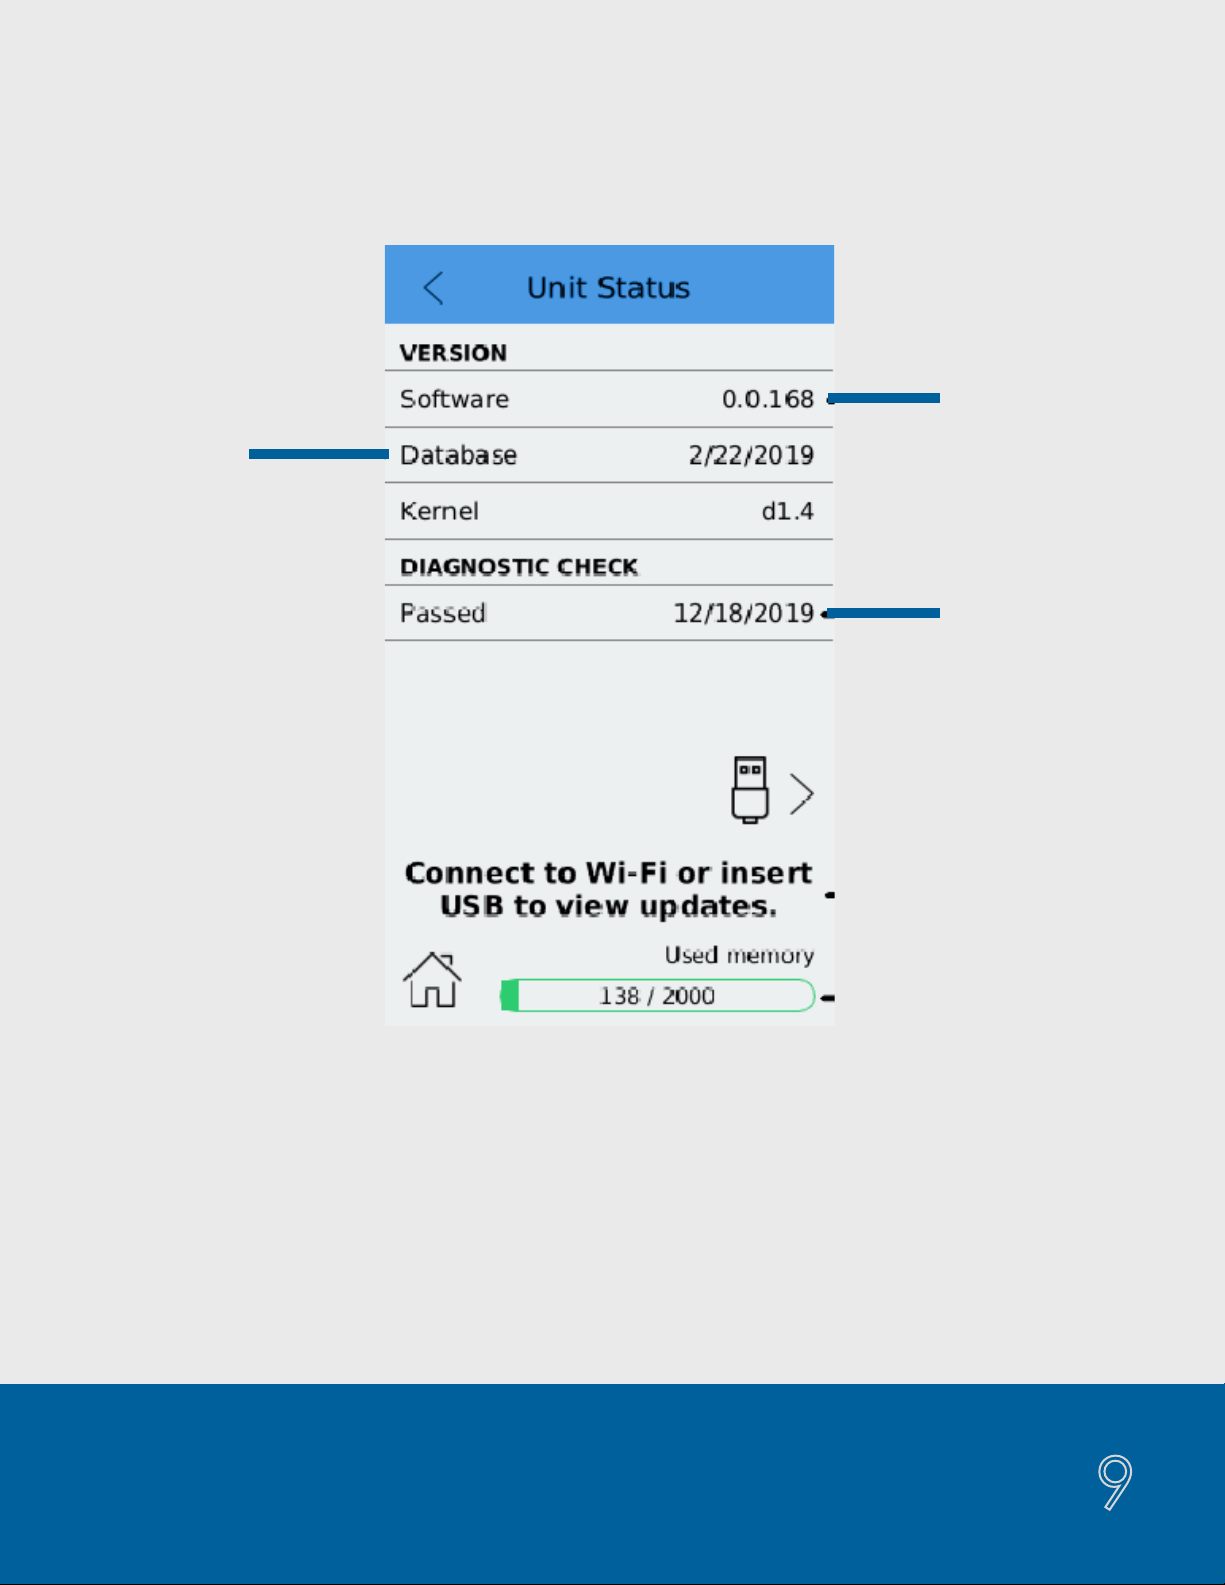
Unit Status/Reader Update
From the Unit Status page, which is accessed from the Side Menu,
you may update the Test Database and the software version by
inserting a flash drive containing the updates into the right-hand
side USB port of the unit.
The used memory graphic indicates the number of test results stored
on the reader. Storing more than 2000 tests can result in slower
operating performance.
Diagnostic
Pass Date
Current
Software
Version
Current Test
Database
Memory Usage
Indicator
Download Updates
via Wifi or USB
Indice


