RFLS–53 © Dinel, s.r.o.
6
4 . installation and pUtting into operation
This procedure has the following three steps:
• installation - chapter 5
• electrical connection -chapter 6
• settings -chapter 7
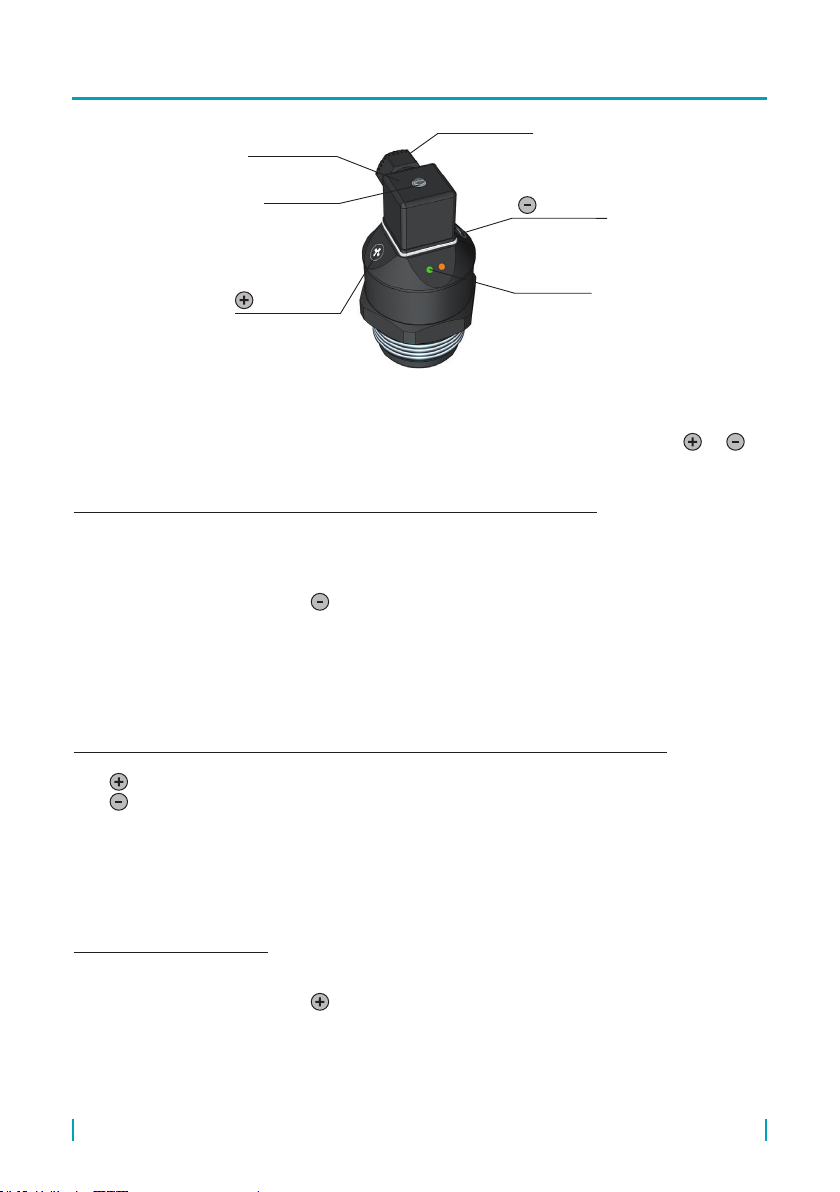
• The sensor should be mounted to a slant
or vertical wall of the hopper using a weld-
on tting with G1 ½'' thread or appropriate
xing nut (PUM-G1,5). The front (active
surface) of the sensor should remain 2-5
mm in front of the inner wall (inwards) or
in front of the xing nut – Fig. 1a, 1b.
• Although the inuence of the build-ups
is strongly eliminated, thick sediments
might cause false activation (blocking) of
the sensor (see Fig. 2). The function of the
sensor is safe with a maximum sediment
thickness of ca. 5 - 10 mm depending on
the dielectric properties of the material.
• The sensor must not be installed in places
with direct solar radiation and must be
protected against weather conditions. In
case the installation at places with direct
solar radiation is inevitable, it is necessary
to mount a shielding cover above the
sensor (Fig. 3).
• If possible, mount the cable from the
sensor down and let there a draining loop
to avoid intrusion of humidity (Fig. 4). The
cable gland as well as the connector's
safety screw have to be tightened
suciently.
• The placement of the sensor must be
carried out in such a way that the material
ow from the lling point does not
interfere with the sensor's scanning eld.
Othrewise false activation (blocking) of the
sensor could occur (Fig. 5).
5 . installation instrUctions
Fig. 1a: Installation of the sensor using
a fastening nut
Fig. 1b: Installation of the sensor using
a weld-on tting
FIG. 2: The height of the sediment
can be a maximum of 5-10 mm
5
14
5~ *
1,7~
1,7~
18
5
6
*
max.
5
14
5~ * 1,7~
1,7~
18
5
6~ *
max.
5-10 mm
!