ESP GuardCam WF-SAR Manuale utente
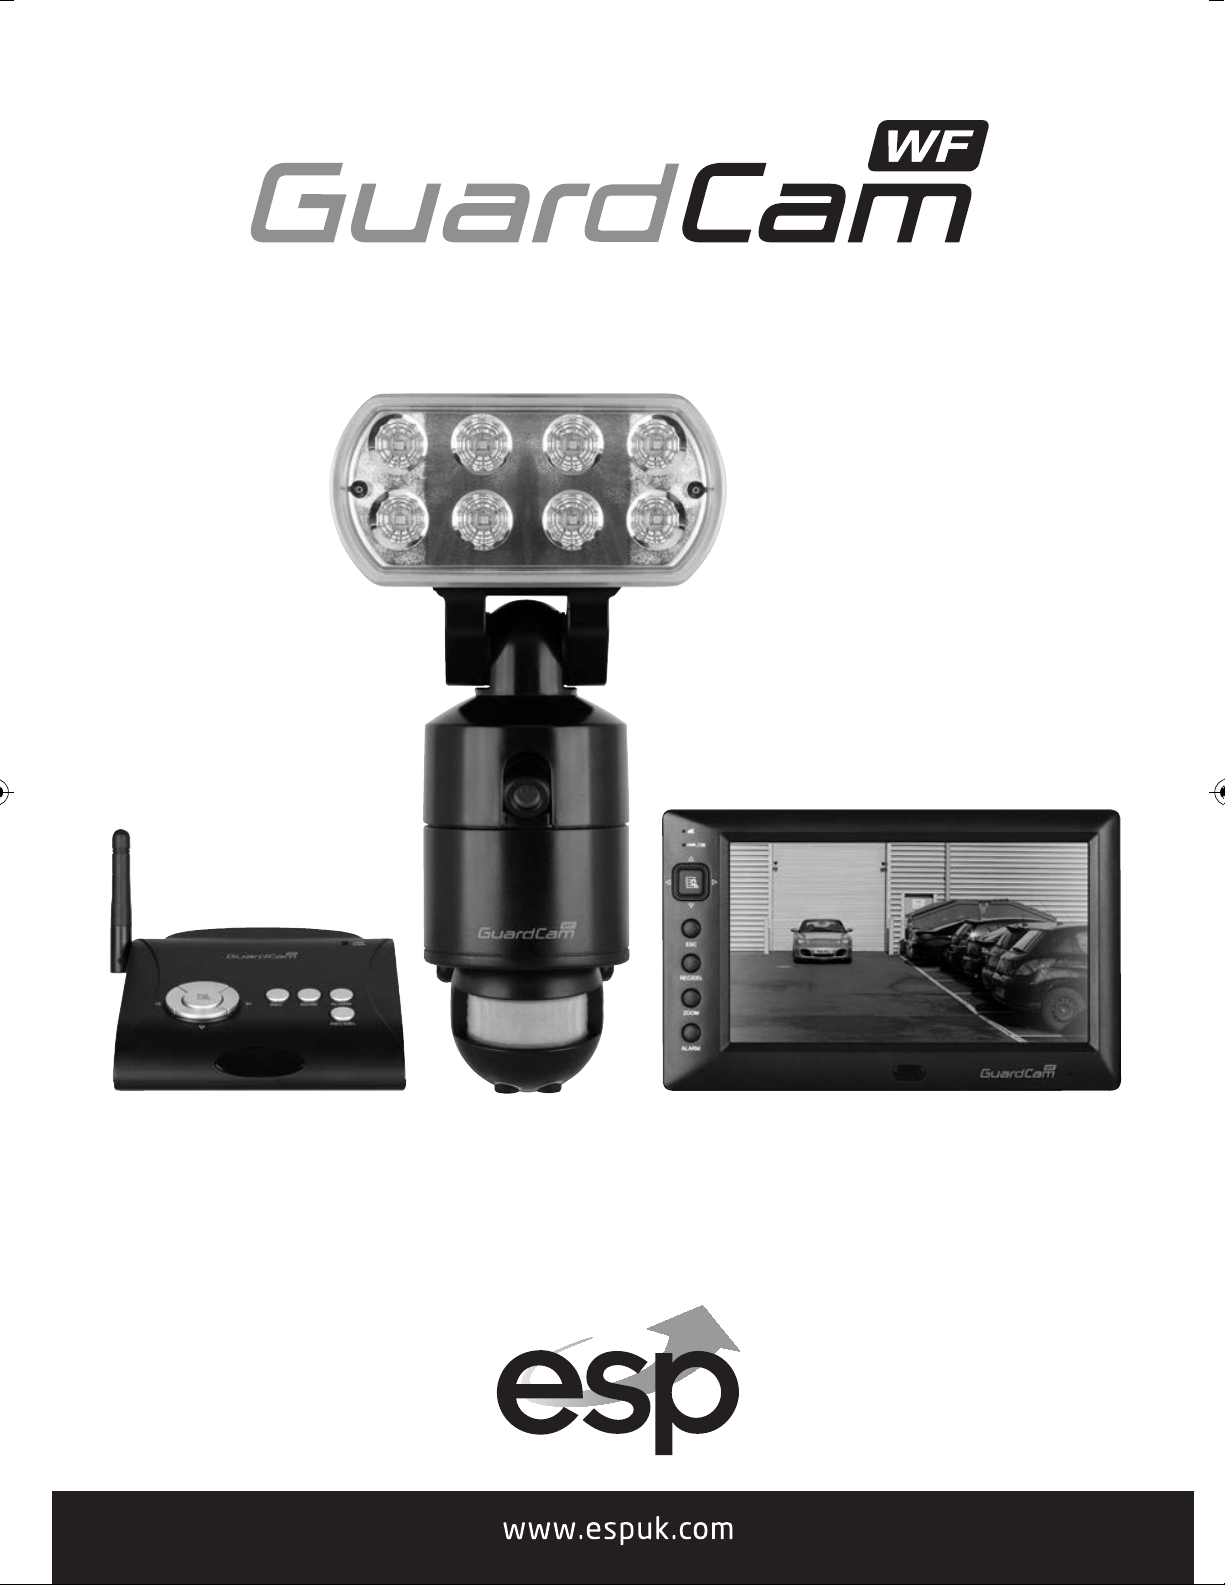
Wire free external area protection system
Installation and operation manual
GuardCam WF-SAR • GuardCam WF-T • GuardCam WF-MR
GuardCam WF Manual_Layout 2 28/11/2013 10:29 Page 1

2
GuardCam WF Manual_Layout 2 28/11/2013 10:29 Page 2

3
Table of contents
System components . . . . . . . . . . . . . . . . . . . . . . . . . . . . . . . . . . . . . . . . . . . . . . . . . . . . 4
Introduction . . . . . . . . . . . . . . . . . . . . . . . . . . . . . . . . . . . . . . . . . . . . . . . . . . . . . . . . . . . . 5
GuardCam WF-T . . . . . . . . . . . . . . . . . . . . . . . . . . . . . . . . . . . . . . . . . . . . . . . . . . . . . . . . 6
GuardCam WF-SAR . . . . . . . . . . . . . . . . . . . . . . . . . . . . . . . . . . . . . . . . . . . . . . . . . . . . . 6
GuardCam WF-MR . . . . . . . . . . . . . . . . . . . . . . . . . . . . . . . . . . . . . . . . . . . . . . . . . . . . . . 7
GuardCam WF-T Installation . . . . . . . . . . . . . . . . . . . . . . . . . . . . . . . . . . . . . . . . . . . . . 8
PIR Set Up . . . . . . . . . . . . . . . . . . . . . . . . . . . . . . . . . . . . . . . . . . . . . . . . . . . . . . . . . . . . . 9
System Set Up . . . . . . . . . . . . . . . . . . . . . . . . . . . . . . . . . . . . . . . . . . . . . . . . . . . . . . . . 10
System Setup . . . . . . . . . . . . . . . . . . . . . . . . . . . . . . . . . . . . . . . . . . . . . . . . . . . . . . . . . 14
Captured Image Playback Software . . . . . . . . . . . . . . . . . . . . . . . . . . . . . . . . . . . . 17
Connecting to a Television . . . . . . . . . . . . . . . . . . . . . . . . . . . . . . . . . . . . . . . . . . . . . 21
Trouble Shooting Guide . . . . . . . . . . . . . . . . . . . . . . . . . . . . . . . . . . . . . . . . . . . . . . . . 22
Best Practice . . . . . . . . . . . . . . . . . . . . . . . . . . . . . . . . . . . . . . . . . . . . . . . . . . . . . . . . . 23
Technical Specifications . . . . . . . . . . . . . . . . . . . . . . . . . . . . . . . . . . . . . . . . . . . . . . . 24
GuardCam WF Manual_Layout 2 28/11/2013 10:29 Page 3
4
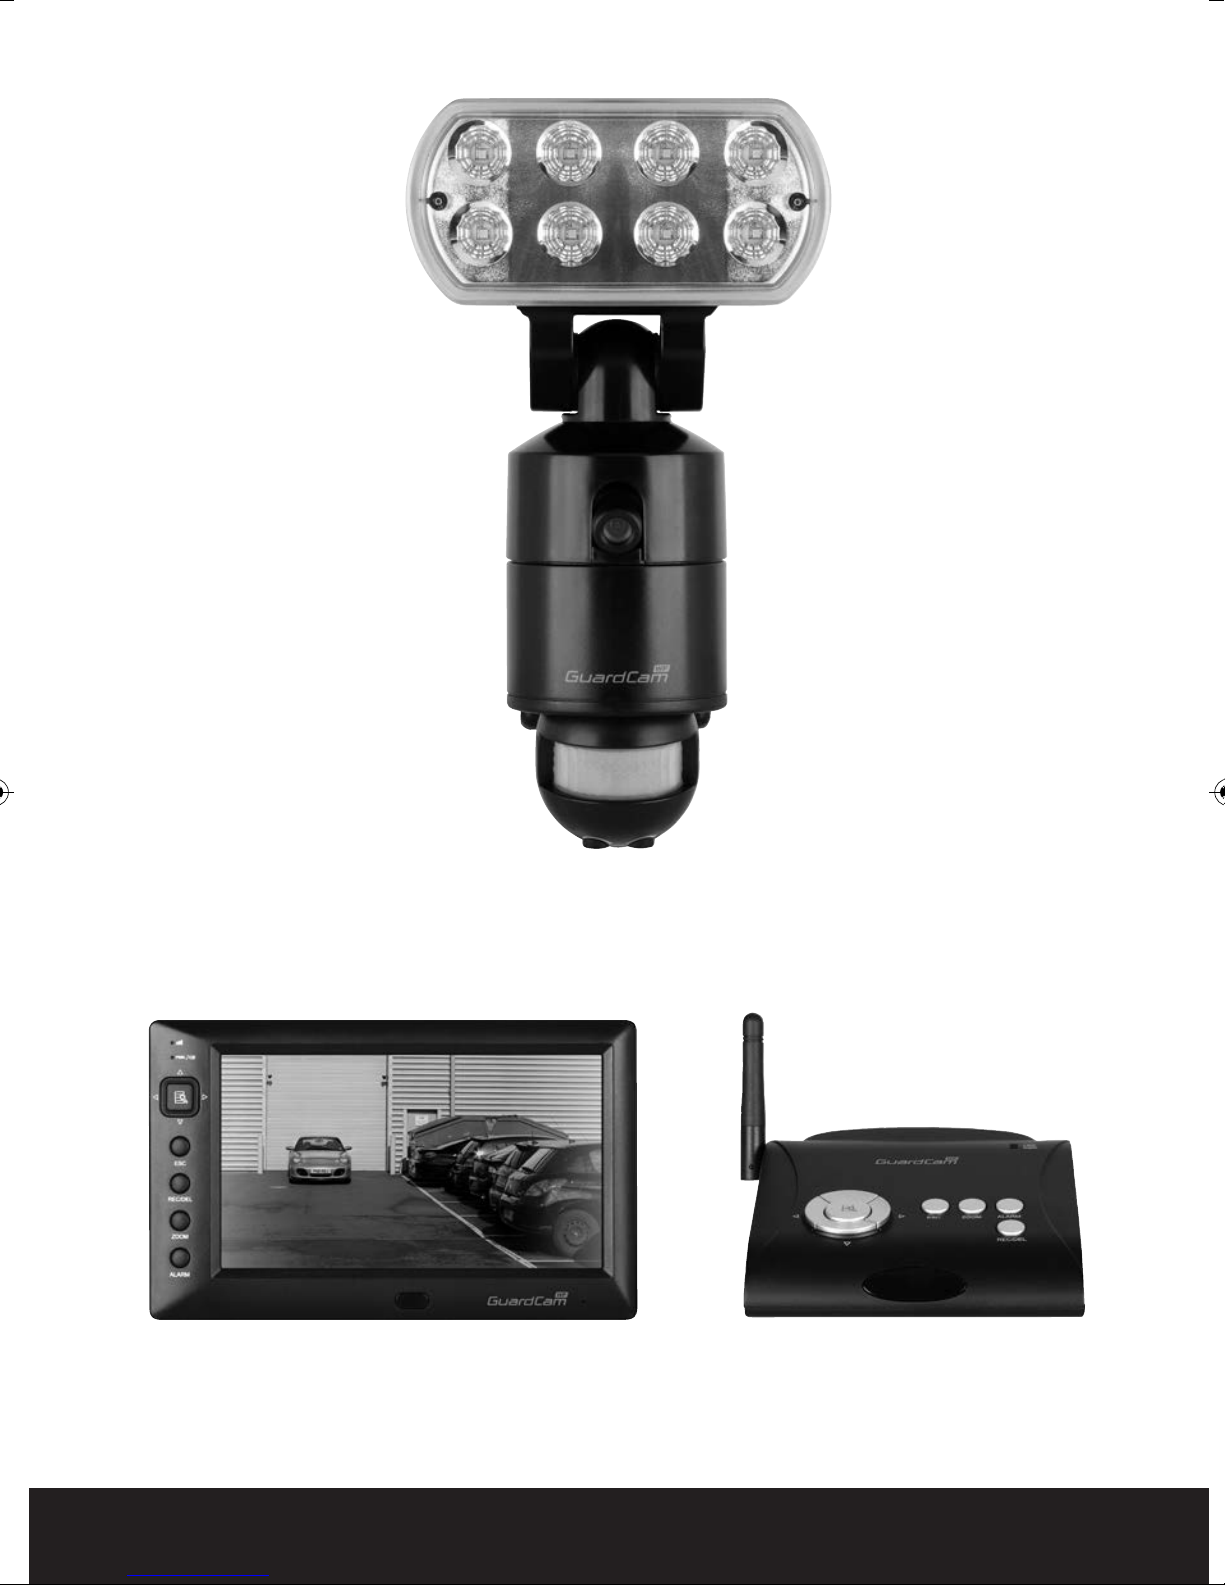
GuardCam WF-T
Combined PIR Floodlight camera and transmitter
GuardCam WF-MR
Combined Monitor receiver
GuardCam WF-SAR
Stand alone receiver module
System
components
GuardCam WF Manual_Layout 2 28/11/2013 10:29 Page 4

5
Introduction
The GuardCam-WF range of products are an ideal solution for the protection of external areas
around domestic or light commercial properties. Images are captured by wire free cctv cameras built
into pir controlled security lighting units and digitally transmitted to a choice of receivers with
integral SD card recording. GuardCam operates on a secure stable 2.4ghz frequency to provide
excellent range and image quality. The feature packed yet user friendly control interface provides a
number of useful options. To obtain the most from your GuardCam-WF installation please read
through this manual carefully.
Getting the best from Wire free technology
Whilst employing the benefits of latest digital signal technology a number of key factors should be
remembered when siting both transmitter and receiver units. Think of the wire free signal travelling
as a straight line between transmitter and receiver –“ The line of transmission”.
The stated Open field range of 150M is exactly that , across an open field. Any line of transmission
obstruction will reduce the useful range.
When siting units consider minimising the number of walls, trees, doors, hills within landscaping or
other solid objects that exist along the line of transmission.
Avoid a line of transmission that follows the whole length of a wall rather than directly through it.
A small adjustment to the position of either transmitter or receiver can make a huge difference to
performance .
Avoid siting transmitter or receiver units in close proximity to other wire free equipment such as
routers, baby monitors or sources of electrical energy such as microwave ovens, very high voltage
cable etc.
Following these guidelines will achieve the best results from a given site. The construction method
of obstructions will create variance in results however a satisfactory system should be achieveable
on most buildings up to 4000 sq meters.
System architecture
Up to four transmitters (GuardCam WF-T) can be paired with a single receiver (either GuardCam WF-
MR or GuardCam WF-SAR).
Note. A transmitter can only be paired with one receiver at a time. It is not possible to pair a
single transmitter with two separate receivers.
OR
GuardCam WF Manual_Layout 2 28/11/2013 10:29 Page 5
6
GuardCam WF-T
DISPLAY MENU PLAYBACK REC M DE THER
1 Link indicator
2 Power indicator
3 Switch Channel Cursor UP Fast Forward
4 Menu OK / ENTER PLAY / PAUSE
5 Switch Channel Cursor Down Fast Backward
6 ESC EXIT Previous
7 REC/STOP DEL STOP
8 ZOOM Next
9 ALARM
10 Power Button
3
4
6 8 9
1
210
7
5
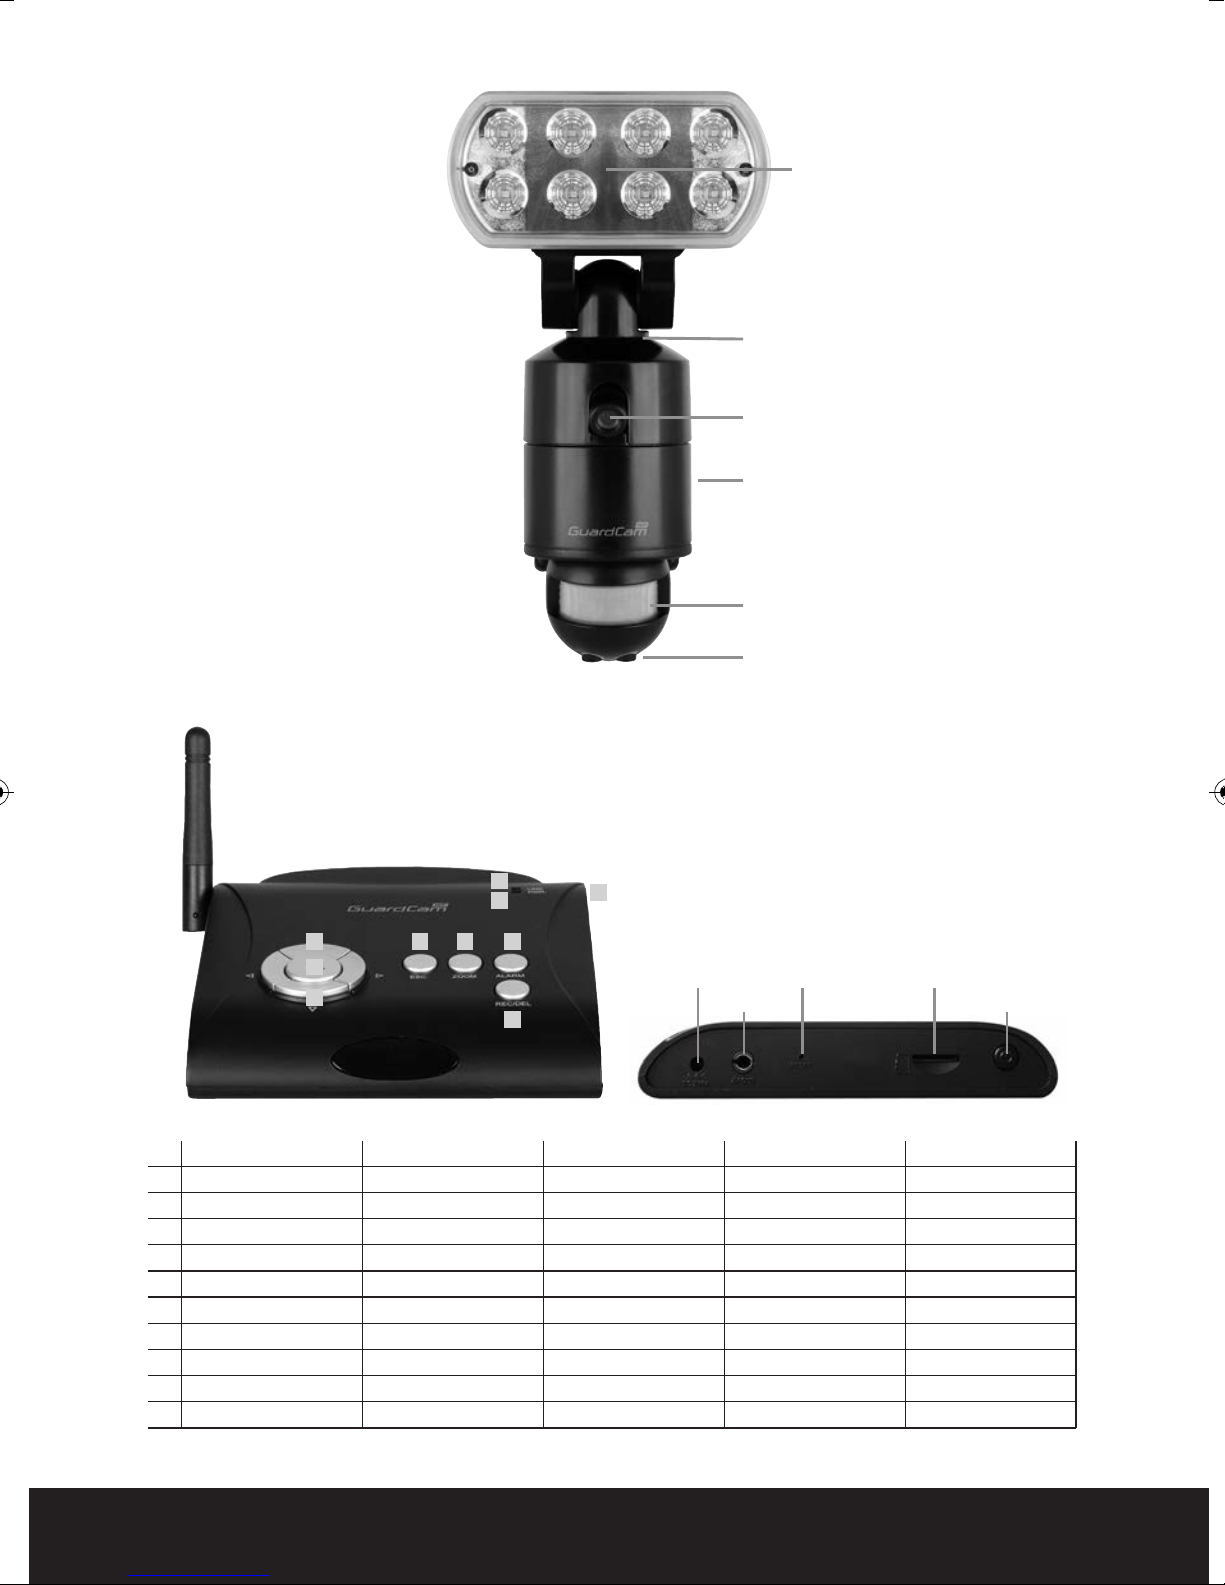
Pairing button
Camera
Termination box and
mounting plate
PIR detector
Time adjustment /
Lux adjustment
LED light
GuardCam WF-SAR
5vDC p wer input
AV ut Jack
Reset Micr SD sl t
P wer Butt n
GuardCam WF Manual_Layout 2 28/11/2013 10:29 Page 6

7
GuardCam WF-MR
DISPLAY MENU PLAYBACK REC M DE THER
1 Link indicator
2 Power indicator
3 Channel up Cursor UP Fast Forward
4 menu Left Switch Display C
5 Menu OK / ENTER PLAY / PAUSE
6 menu Right Switch Display C
7 Channel down menu Down Fast Backward
8 EXIT Previous
9 Next Start/STOP
10 ZOOM
11 Alarm on/off
12 Power Button
General
Channel Indicator
Signal Indicator
Recording Indicator
(Red Flashing)
Display mode
Quad Display
Scan Display
Single Display
Battery Power Indicator
100% Strength
70% Strength
50% Strength
20% Strength
n screen Icons
1
12 P wer Butt n
Speaker Speaker
Flip- ut Stand
Antenna
Micr SD sl t
Reset
AV ut Jack
Adapt r Plug
8
9
10
11
23
6
7
4 5
GuardCam WF Manual_Layout 2 28/11/2013 10:29 Page 7
8
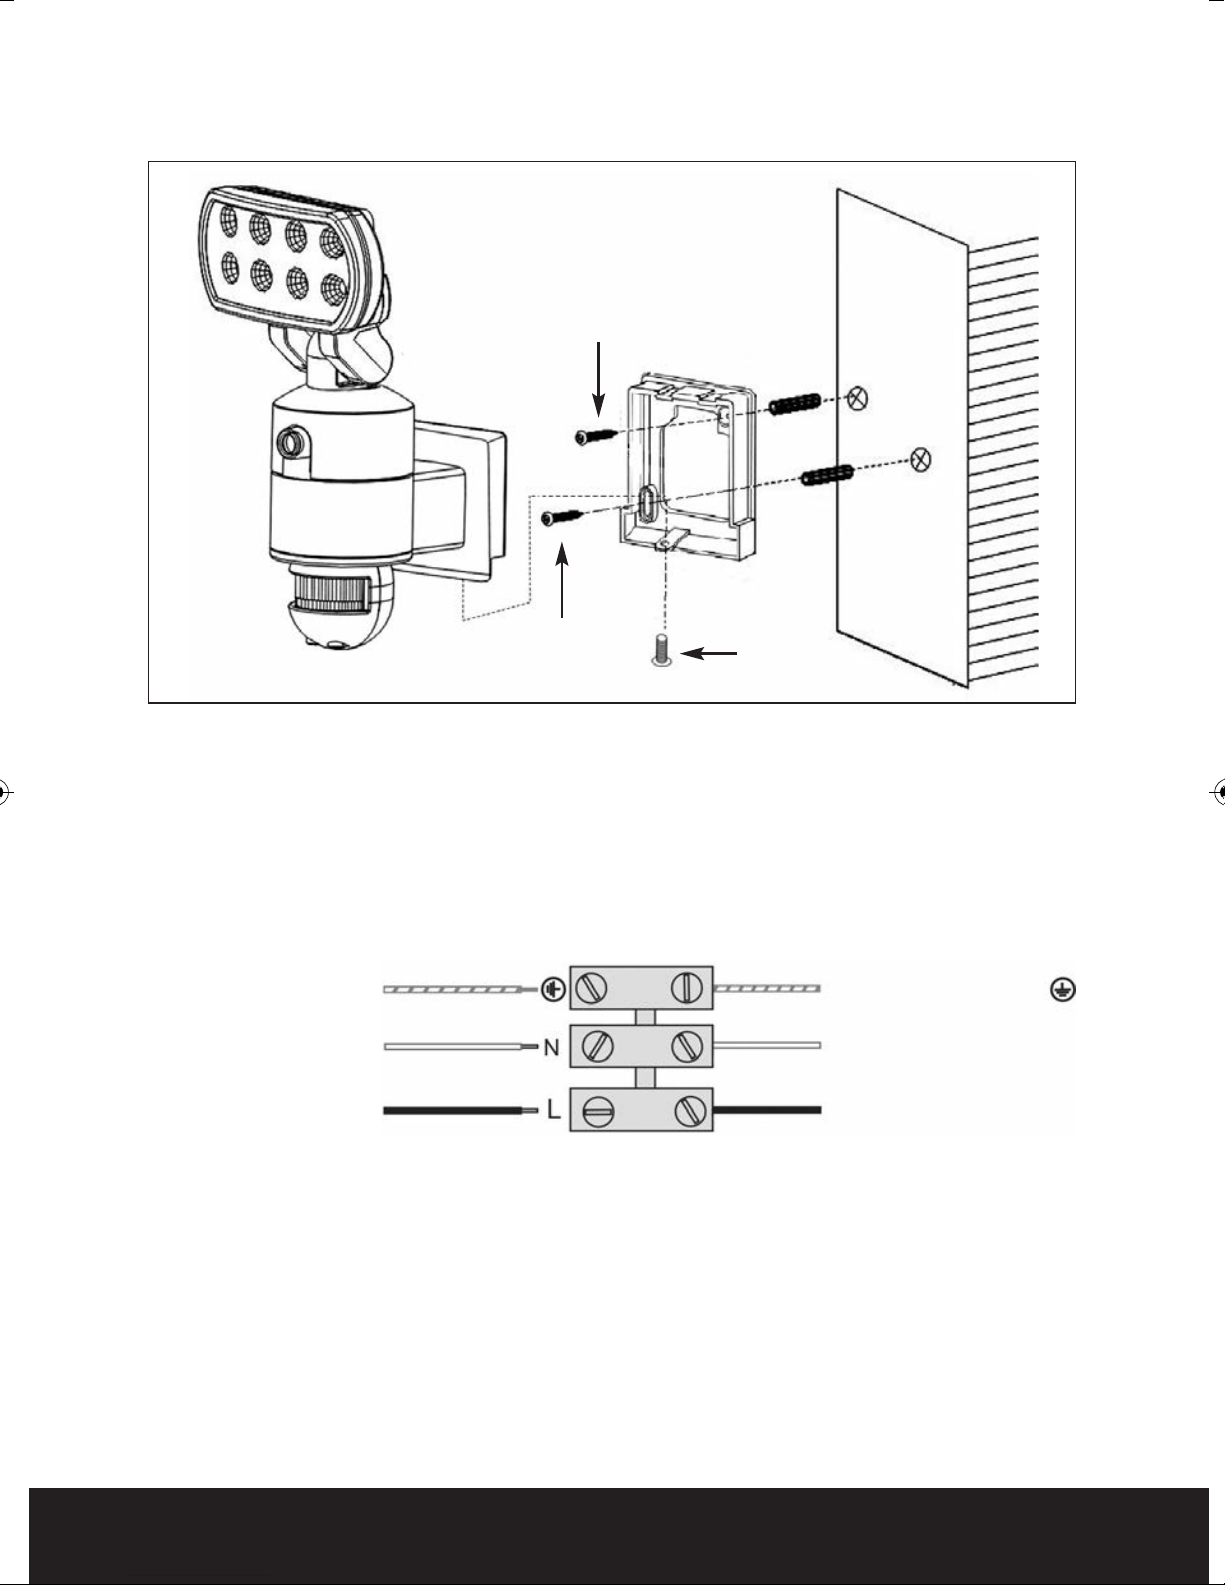
GuardCam WF-T Installation
1. Place plastic masonry plugs into desired surface aligning holes as shown above. Using an
electric screwdriver, fasten mounting plate directly to surface using screws E.
2. Feed the cable through the back mounting box and bush the cable entry to avoid abrasion to the
cable.
3. Wire the unit as follows: (Ensure all wires are connected securely and that no loose strands are
exposed)
4. Make sure the polarity is correct. Double check the connections after wiring. Errors may damage
the motion sensor or cause a fire hazard.
5. Attach the unit to the mounting plate. You will first need to angle the unit back so that the
catch at the top of the mounting plate fits into slot on the back of the unit. Next lower the unit
until holes at the bottom of the mounting plate and unit are flush. Then screw (screw A) into
this hole, tightening carefully.
INCOMING SUPPLY
EAR H (Green & Yellow) EAR H (Green & Yellow)
NEU RAL (Blue or Black)
LIVE (Brown or Red)
NEU RAL (Blue or Black)
LIVE (Brown or Red)
O FI ING
Screw E
Screw A
Screw E
GuardCam WF Manual_Layout 2 28/11/2013 10:29 Page 8

9
PIR Set Up
For optimum performance it is recommended to mount the GuardCam WF-T 1.8 to 2.5 m above the
ground. The PIR has a range of 12m over a 140 degree angle.
PIR technology provides much better target capture if movement is across the face of the PIR. Aim
the PIR to achieve the highest chance of this happening.
Setting the Time and Lux control
Time control: The time the floodlight is illuminated after triggering
can be set between 30 seconds to 7 minutes. Turning the dial
clockwise will increase the time, turning counter-clockwise will
reduce the time.
Lux control: PIR activation of the floodlight is also controlled by a
photocell to ensure illumination only occurs when required.
Adjustment can be set between darkness , fully clockwise and
daylight (walktest), fully anti clockwise.
To perform a walk test turn the dial fully anti clockwise. When the walk test is completed adjust
the dial clockwise to the "+" side to your desired light on time (we recommend this be at least
2 minutes to ensure lighting of the area is sufficient for the minimum recording time.
12m
140º
2.5m
GuardCam WF Manual_Layout 2 28/11/2013 10:29 Page 9
10
System Set Up
Before commencing system configuration ensure all GuardCam WF –T units to be included in the system
are powered and a clean formatted mini SD card is present in the chosen GuardCam WF receiver.
Please also ensure the chosen GuardCam RF receiver is powered using the supplied 5VDC plug in power
supply.
Important. Only use the plug in power supply provided with the unit. Use of other power supplies may
damage the unit and invalidate the warranty.
Note. It is not possible to enter the set up menu if a recording session is occurring. It is possible to
stop recording by pressing Rec/Del.
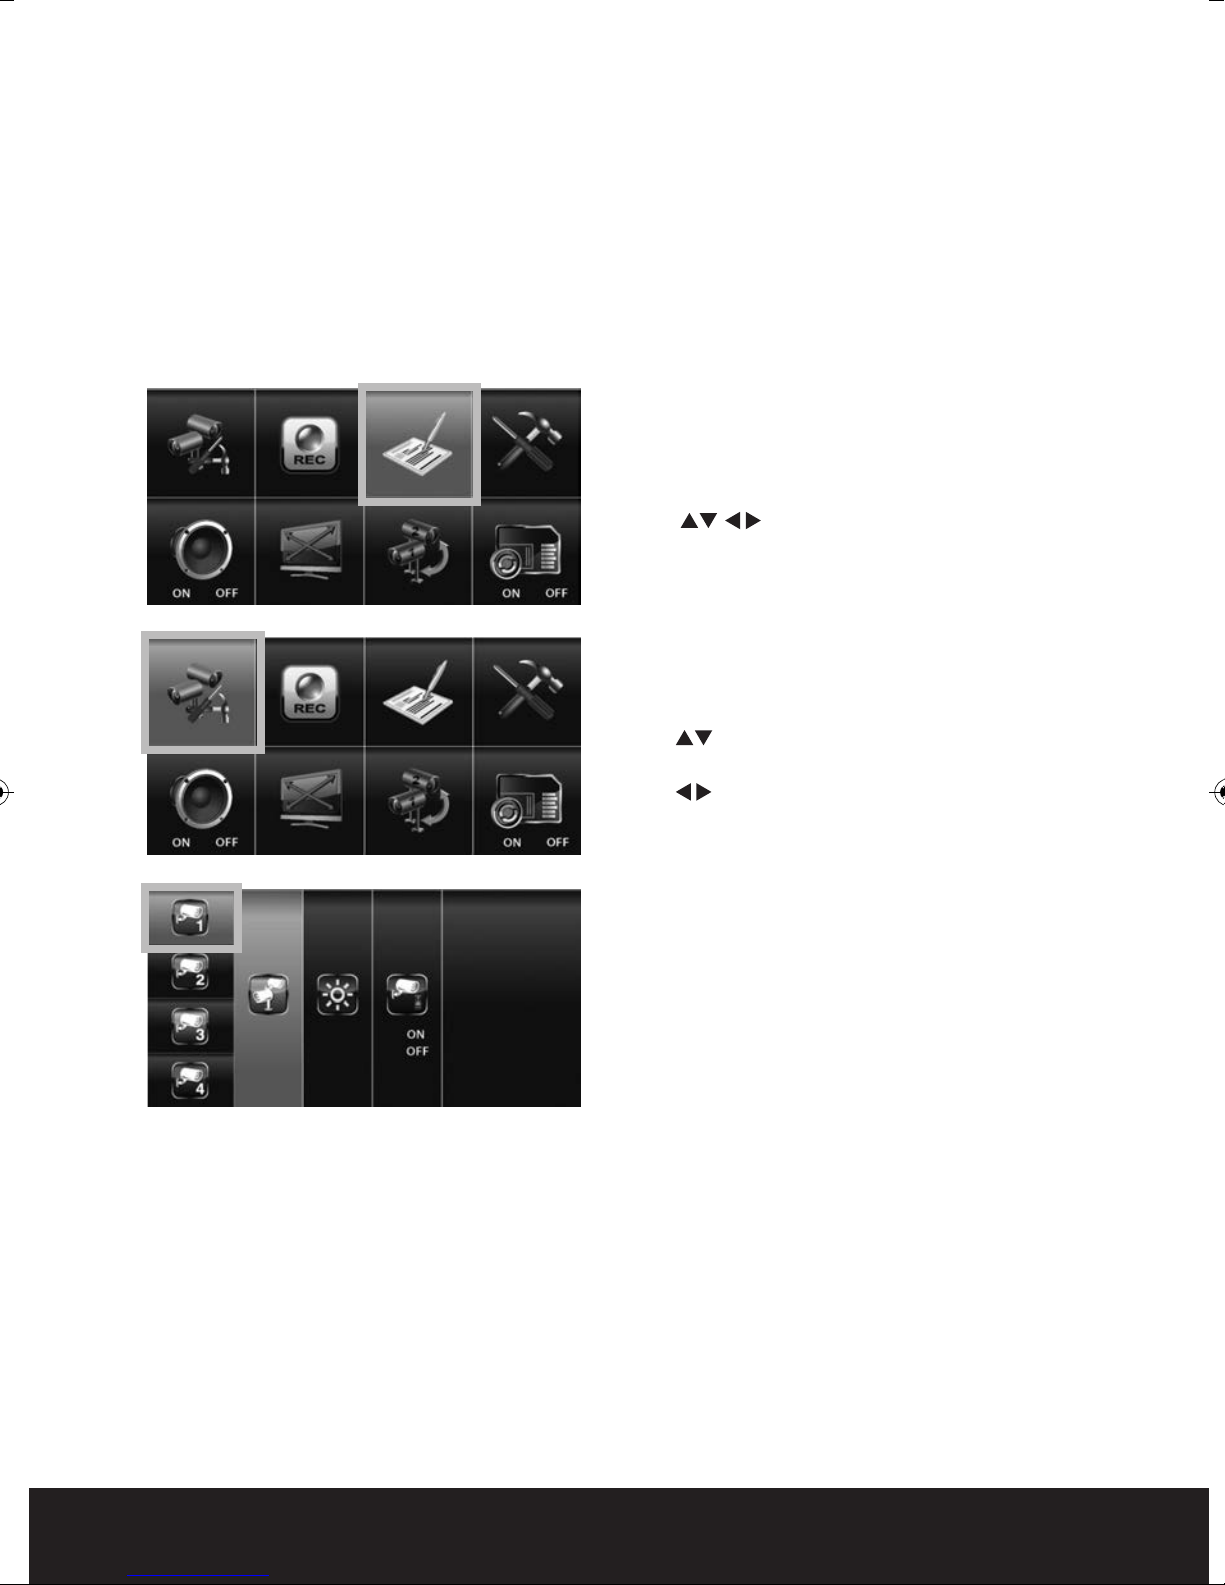
Main Menu
Press the MENU button to enter the MAIN
MENU. The system highlights EVENT LIST by
default.
Use to navigate through the menus;
press the MENU button to confirm selection
and enter sub-menu.
Camera Setup
Select CAMERA SETUP, press the MENU button
to enter sub-menu.
Use to select the camera to set up (camera
1-4).
Use to select the sub-menu
Pair a new device (GuardCam WF-T)
Pairing GuardCam WF-T to a Receiver
Pairing allows the GuardCam WF-T to communicate
with a chosen receiver (GuardCam WF-MR or
GuardCam WF-SAR).
Up to four GuardCam WF-T transmitters can be
paired with each receiver.
A GuardCam WF-T can only be paired to a single
receiver at any one time.
Pairing to a second receiver will delete the pairing
with the initial receiver.
The GuardCam WF-T pairing button is located to
the rear of the floodlight.
Pair each GuardCam WF-T individually to a separate
channel.
With the PAIRING option highlighted, press the
menu / select button once to begin camera pairing.
Press and release the pairing button on the
GuardCam WF-T twice. The System will confirm
pairing process to be successful by displaying
"PAIRED" on screen.
GuardCam WF Manual_Layout 2 28/11/2013 10:29 Page 10
Questo manuale è adatto per i seguenti modelli
2
Indice
Altri manuali ESP Sistema di sicurezza

ESP
ESP DVR4i Pro Manuale utente

ESP
ESP HDview Manuale utente

ESP
ESP HDview SHDV8KD4G Manuale utente

ESP
ESP CanCam Manuale utente

ESP
ESP FHDV4RWF Manuale utente

ESP
ESP HDV4R Manuale utente

ESP
ESP UDTAKIT Manuale utente

ESP
ESP FHDV4KBWF Manuale utente

ESP
ESP ESPAN-04 Series Manuale utente

ESP
ESP MAGPRO16 Istruzioni per il montaggio


Manuali Sistema di sicurezza popolari di altre marche


EDM
EDM Solution 6+6 Wireless-AE Manuale utente

Highway Safety Group
Highway Safety Group EA401 Manuale utente

Siren
Siren LED GSM Manuale utente

Detection Systems
Detection Systems 7090i Istruzioni per il montaggio

Se-Kure Controls
Se-Kure Controls MicroMini SK-4841 Manuale utente

Siemens
Siemens FDM273 Manuale utente