Gentner APV200-IP Manuale utente

APV200-IP
Audio Perfect Video 200- IP
V.35 Manual
Perfect Communication through Technology, Service and Education.

V.35 2
Table of Contents
Before you begin................................................................................................3
Where do I start..................................................................................................3
Connectivity ....................................................................................................4
Remote control...................................................................................................5
The Setup Genie.................................................................................................6
Optional IR Remote Pick-up............................................................................12
Local and remote camera control.....................................................................13
Camera presets .................................................................................................13
V.35 ..................................................................................................14
Additional Configurations................................................................................16
External FIFO ..................................................................................................17
Auto Dial Features ...........................................................................................17
Loopback Test..................................................................................................18
Typical Applications........................................................................................19
Leased Line Manual Dial / Manual Answer..............................................20
Leased Line Auto Dial / Auto Answer ......................................................21
DTR Automatic Dialing Method...............................................................22
Leased Line Application............................................................................23
Dial Up Applications..................................................................................24
Satellite Applications.................................................................................27

V.35 3
Before You Begin
Visually inspect the equipment that you have received for any damages. If any damage is
noticed, call Gentner's Technical Support Department at (800)283-5936 to request a Return Material
Authorization (RMA) number. All returns must be packed in their original shipping containers
and must be properly marked and identified with an RMA number.
You will need to obtain a power cord from your local electrical parts supplier if you do not live
in the United States, United Kingdom, Switzerland or Europe (CE).
Where Do I Start?
(The do it yourself basics)
Carefully review this Users Guide before you begin your installation. Exercise every safety
precaution in your installation to protect yourself and your investment.
Make sure you have a live network connection and the appropriate network configuration
information. Refer to the connection guide to assemble your hardware.
Familiarize yourself with the hand held Remote Control before you power on your
APV200IP and start your configuration setup.

V.35 4
Connectivity
Turn on the camera.
Turn on the monitor.
Turn on the APV200IP.
V.35 Cables
EtherNet Net Meeting
SCSI
Platter Mic
Standard
Mic
Standard
Speakers
Camera Control
S-Video
Optional Remote
IR Pick-up
Camera Control
Power Supply
Sony Camera
Canon Camera
Panasonic Camera
Camera S-Video
TV Monitor
Clip Camera
To Camera Power
Cube (adapter)
To codec Microphone In
To S-video adapter cable
(codec video in)

V.35 5
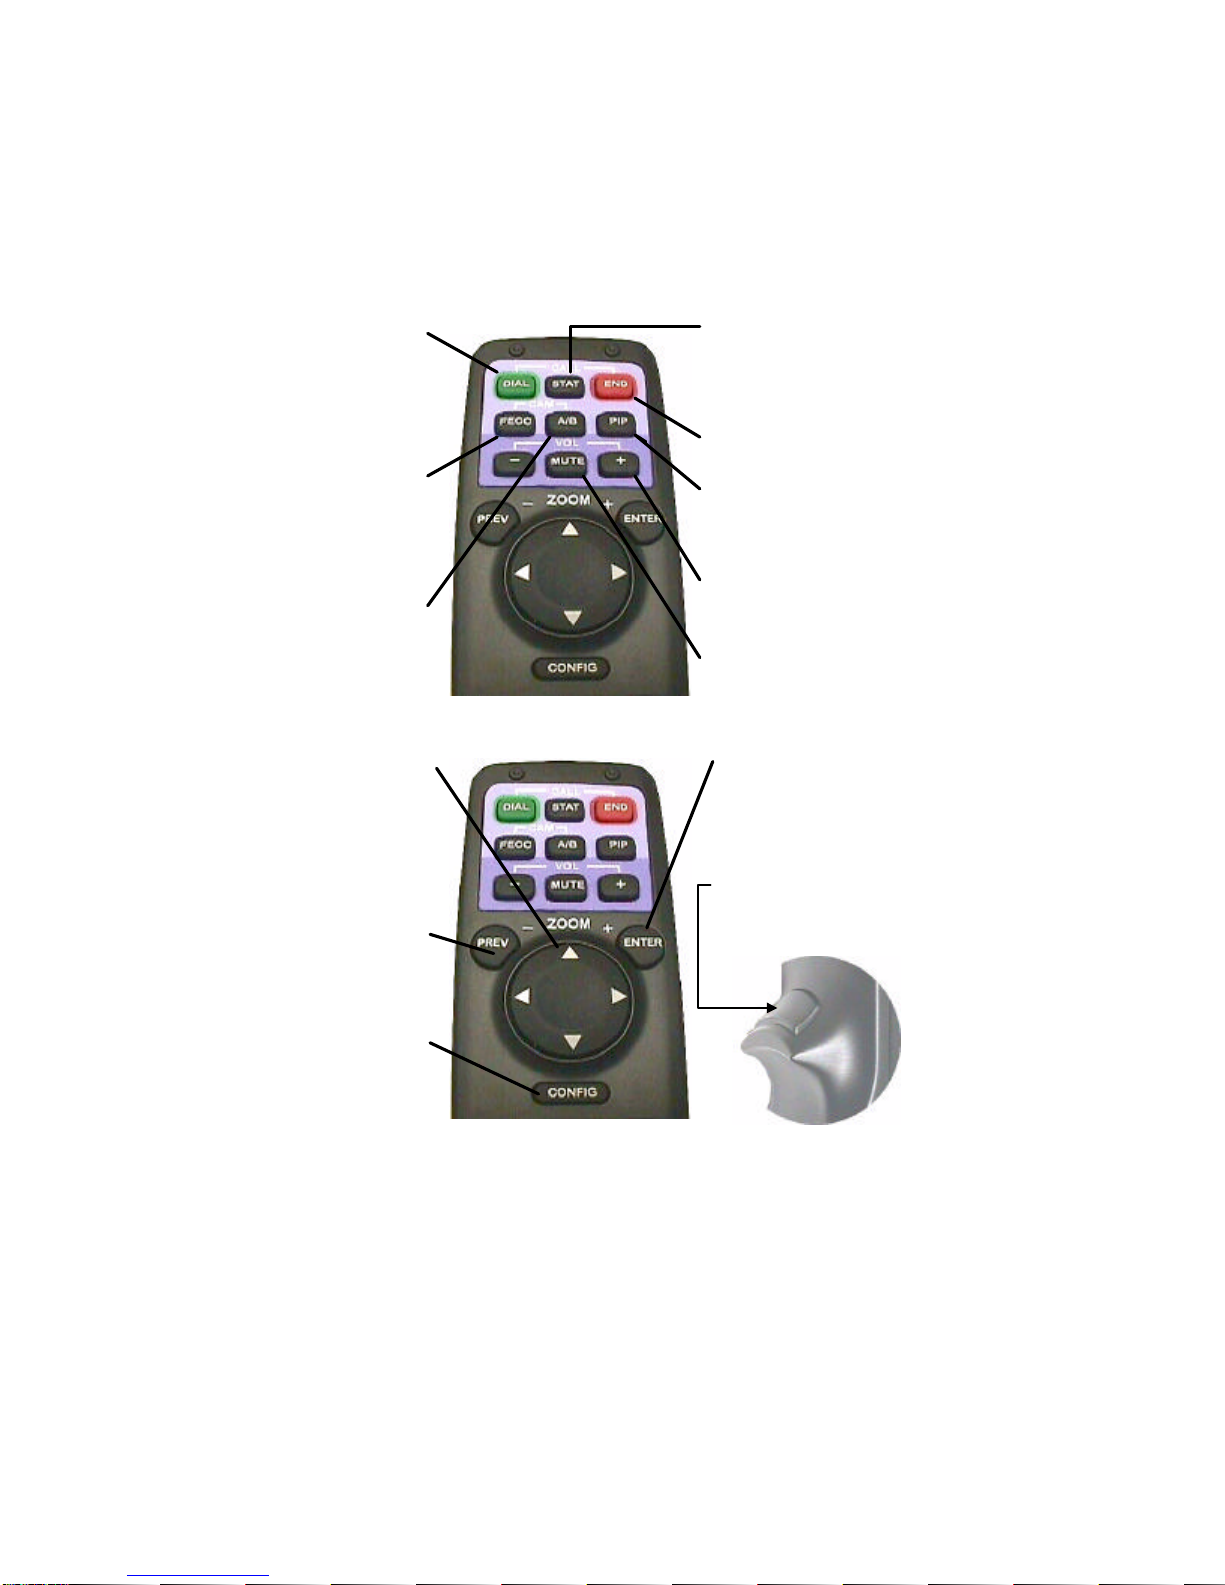
Remote Control
V.35 6
VIDEO TRIGGER
This will show video at any
time when a menu is
showing.
UP, DOWN,
LEFT, RIGHT
Manipulates the menu items.
Pan and tilt functions for
camera when no menu is
showing.
PREV (ZOOM-)
Goes to the previous menu.
Zooms camera out when no
menu is showing.
CONFIG
Allows you to configure
your system setup options.
ENTER
Used in menu functions that
say "press ENTER."
Zooms camera in when no
menu is showing.
DIAL
Manual dial, redial, speed dial,
or use a video phonebook to
make calls. Allows you to get
information about the remote
control, Gentner, or the
APV200IP.
FECC
Far End Camera Control
Pressing this allows you to
control the remote camera,
pan, tilt, zoom and presets.
A/B
Allows you to switch
between the two camera
inputs, or up to 16 remote
inputs.
STAT
Shows all important call
information such as transfer,
audio and video rates.
END
Hangs up the current call.
PIP
Allows you to position
the picture-in-picture
around the screen.
VOLUME
Adjusts the speaker or line
out level.
MUTE
Mutes the microphone
or line input.

V.35 7
Configuration
There are 3 different network configuration options available on the V.35 APV200IP. The 3
options are Leased line (T1, E1, PRI), RS-366 dialing (for dialing video numbers), and DTR
dialing (for numbers stored in the IMUX). To assist in the proper setup and configuration, a
brief description of each menu option specific toV.35 configuration is shown in this document.
Please refer to your Gentner APV200IP manual for all other menus and their respective
descriptions.
The Setup Genie
After initial power on and boot up, you will enter the Setup Genie. Follow all instructions
carefully.
You can make your desired selection by using the < > buttons on the remote control.
Step 1. Select your language of choice. Press
Enter to continue. English is the only option
at this time.
Step 2. To begin follow the Setup Genie’s
instructions carefully. Press Enter to continue.
V.35 8
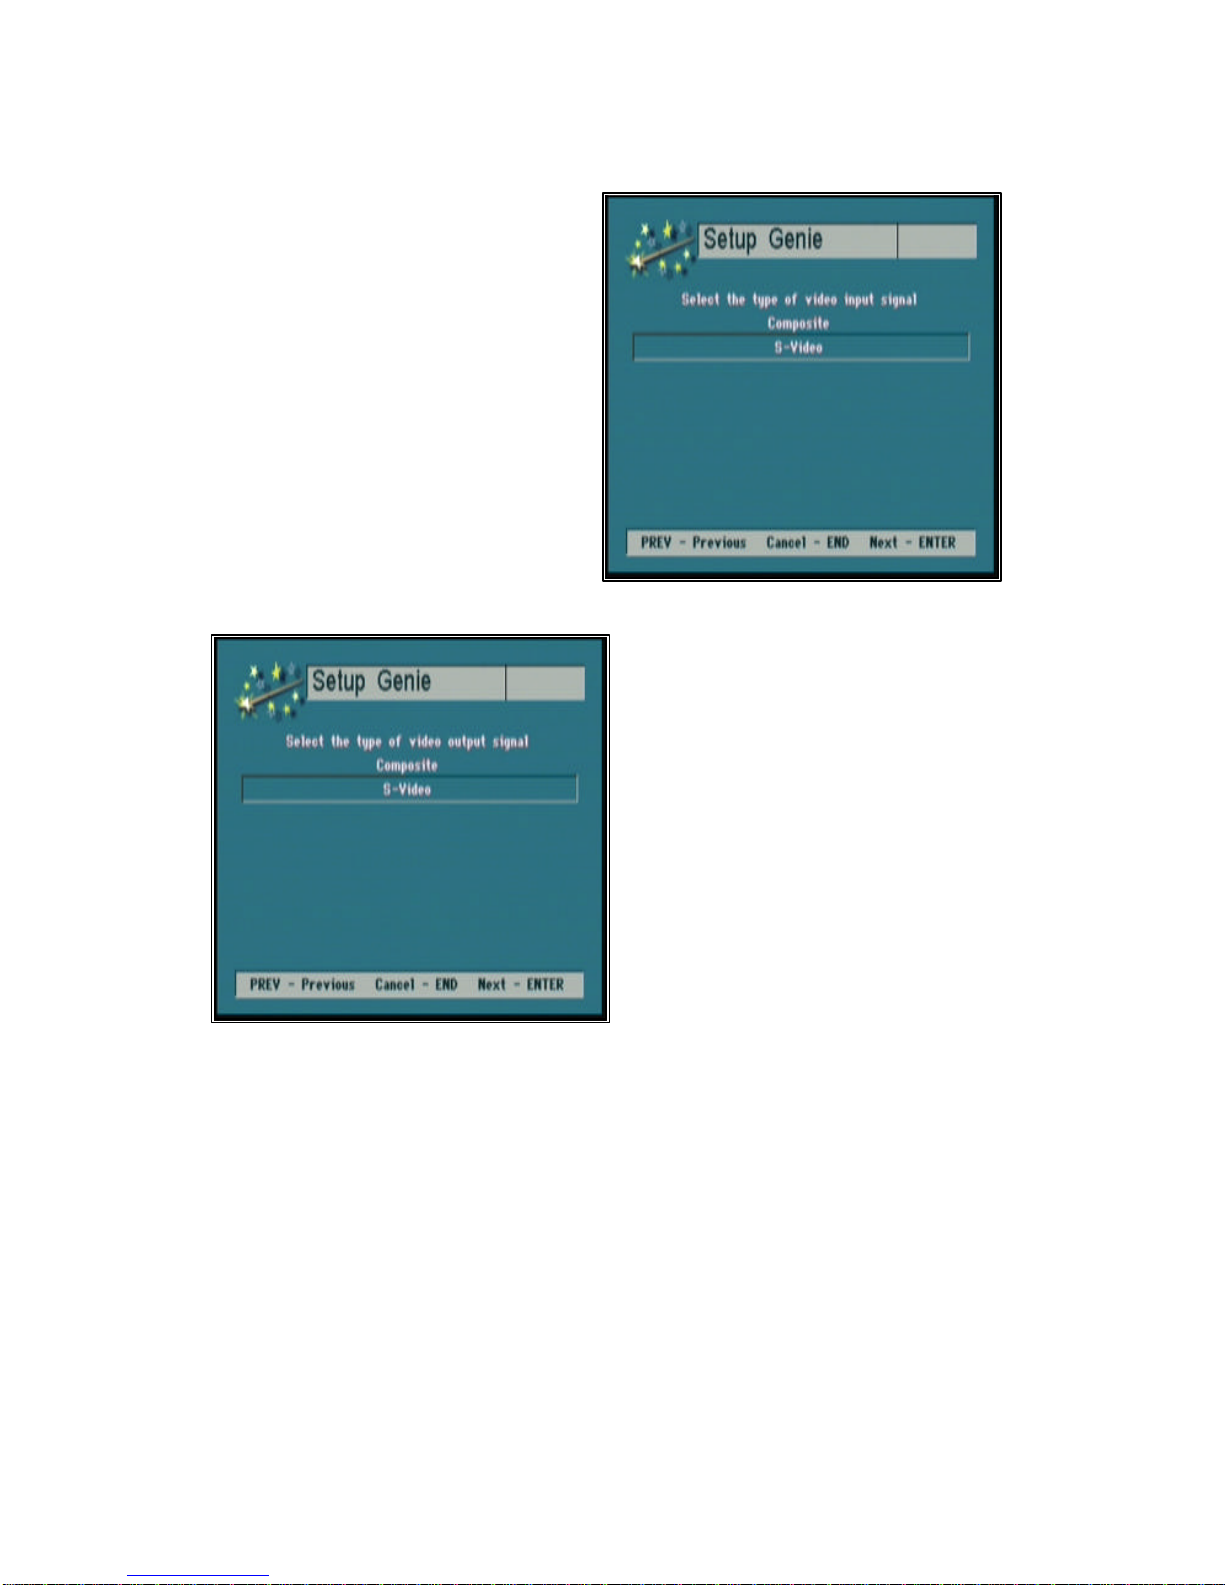
Step 3. Using the up/down (tu) arrow
buttons select the type of video signal your
primary input device (camera, VCR) will
provide. Press Enter to continue.
Step 4. Using the up/down (tu) arrow
buttons select the type of video signal your
display device (TV, monitor) requires. Press
Enter to continue.

V.35 9
Step 5. Using the up/down (tu) arrow
buttons select your V.35 dial type. Press
Enter to continue.
Selecting the Leased line option
This is a direct connection from one location to another location, there are no dialing capabilities.
The V.35 APV200IP can only connect to the location at the other end of the leased telephone
line or private network. Select this option when the V.35 APV200IP is attached to a
CSU/DSU or DCE device. Only Port A on the V.35 APV200IP is connected. The RS366
interface is not used for this application.
Selecting the RS-366 option
This allows you to dial to any location using an external DCE network device or IMUX. The
external DCE device must have an RS-366 connection. The dial digits are sent to the DCE via
the RS366 interface. When dialing an H.221 call Port A and B are both used, where bonded
calls use only Port A. Select this option when attaching to an IMUX. The IMUX must be
configured for RS366 dialing.
Note: The set up and configuration of the IMUX is the responsibility of the systems integrator or
the end user.
Selecting the DTR option
Select this option to instruct the APV200IP to raise the Data Terminal Ready (DTR)
interface signal to place a call to a telephone number stored in the IMUX. The IMUX must be
configured for DTR dialing and have the telephone number stored in its call directory. In this
application, the APV200IP does not send dial digits to the IMUX.

V.35 10
Step 6. Using the up/down (tu) arrow
buttons select your profile type. Press Enter to
continue.
Selecting the correct Profile type
Consult your DCE equipment manufacturer’s
documentation to determine if a prefix or suffix
is required in the call profile to activate the RS-
366 dialing procedure.
Step 7. Enter your call profile information for
the type of calls that you make. Use the left
(w) arrow button to backspace and the
up/down (tu) arrow buttons to advance to
the next line. Press Enter to continue.
Selecting the correct Call Profiles
Consult your DCE equipment
manufacturer’s documentation to
determine if a prefix or suffix is
required in the call profile to
activate the RS-366 dialing
procedure.
Example:
In the Call profiles menu, select
64K 2 channel BOND, and enter
#012. In the
Dial menu, when you select the
call type of 2Ch 64K (128), the
#012 will automatically be added
to the dialing string.
Altri manuali per APV200-IP
2
Indice
Altri manuali Gentner Telecomando


