Hart InterCivic Verity Scan Manuale utente

1
Polling Place Field Guide
Humboldt County Office of Elections
Revised February 2020

2
Document Number 6651-017 A
Hart InterCivic Quality and Information Security Policy
Hart InterCivic is committed to consistently providing high quality products and services for its customers through adherence to its
established hardware and software Quality Management Systems, complying with customer, statutory and regulatory requirements, and
a commitment to continual improvement. Hart InterCivic is also committed to the integrity and the security of the information used in
the product development process, in the products themselves, and in our management of customer data during the implementation
process.
This DOCUMENT and the SOFTWARE, HARDWARE, and FIRMWARE to which it pertains contain confidential and proprietary information
belonging exclusively to Hart InterCivic, Inc. No part of this publication may be modified, reproduced, stored in a retrieval system, or
transmitted in any form, distributed by any electronic or mechanical means, photocopied, recorded, or otherwise reproduced or
distributed without prior written permission from authorized personnel at Hart InterCivic, Inc. Any person receiving this document has a
duty to take reasonable precautions preventing unauthorized use or disclosure of the contents.
Trademarks
Hart InterCivic and Verity are registered trademarks of Hart InterCivic, Inc.
Hart InterCivic disclaims any proprietary interest in the marks and names of others.
Hart InterCivic, Inc.
15500 Wells Port Drive
Austin, TX 78728
Document Number 6651-017 A
© 2019 Hart InterCivic, Inc.
All Rights Reserved
about this guide
This Verity Polling Place Field Guide is a portable guide to polling place tasks using the Verity Scan and Verity Touch Writer devices.

3
contents
Verity Scan 4
setting up Verity Scan 5
setting up the ballot box 5
setting up the Verity Scan 8
Verity Scan orientation 11
screen orientation 11
report printer operation 12
opening polls 13
voting with Verity Scan 15
overview: Verity Scan 15
instructions for hand-marking ballots 15
scanning ballots with Verity Scan 15
Verity Scan help and features 16
troubleshooting 17
spoiling printed paper ballots 17
undervotes, overvotes, and blank ballots on Verity Scan 17
provisional ballots 18
the unread ballot slot 18
multi-sheet ballots and Verity Scan 18
closing polls 19
4
Verity Scan
Verity Scan is a polling place-based digital scanner for scanning and casting ballots. Verity Scan
can be used with hand-marked ballots or with ballots marked and printed using Verity Touch
Writer. Verity Scan deposits scanned ballots into its ballot box for secure storage.
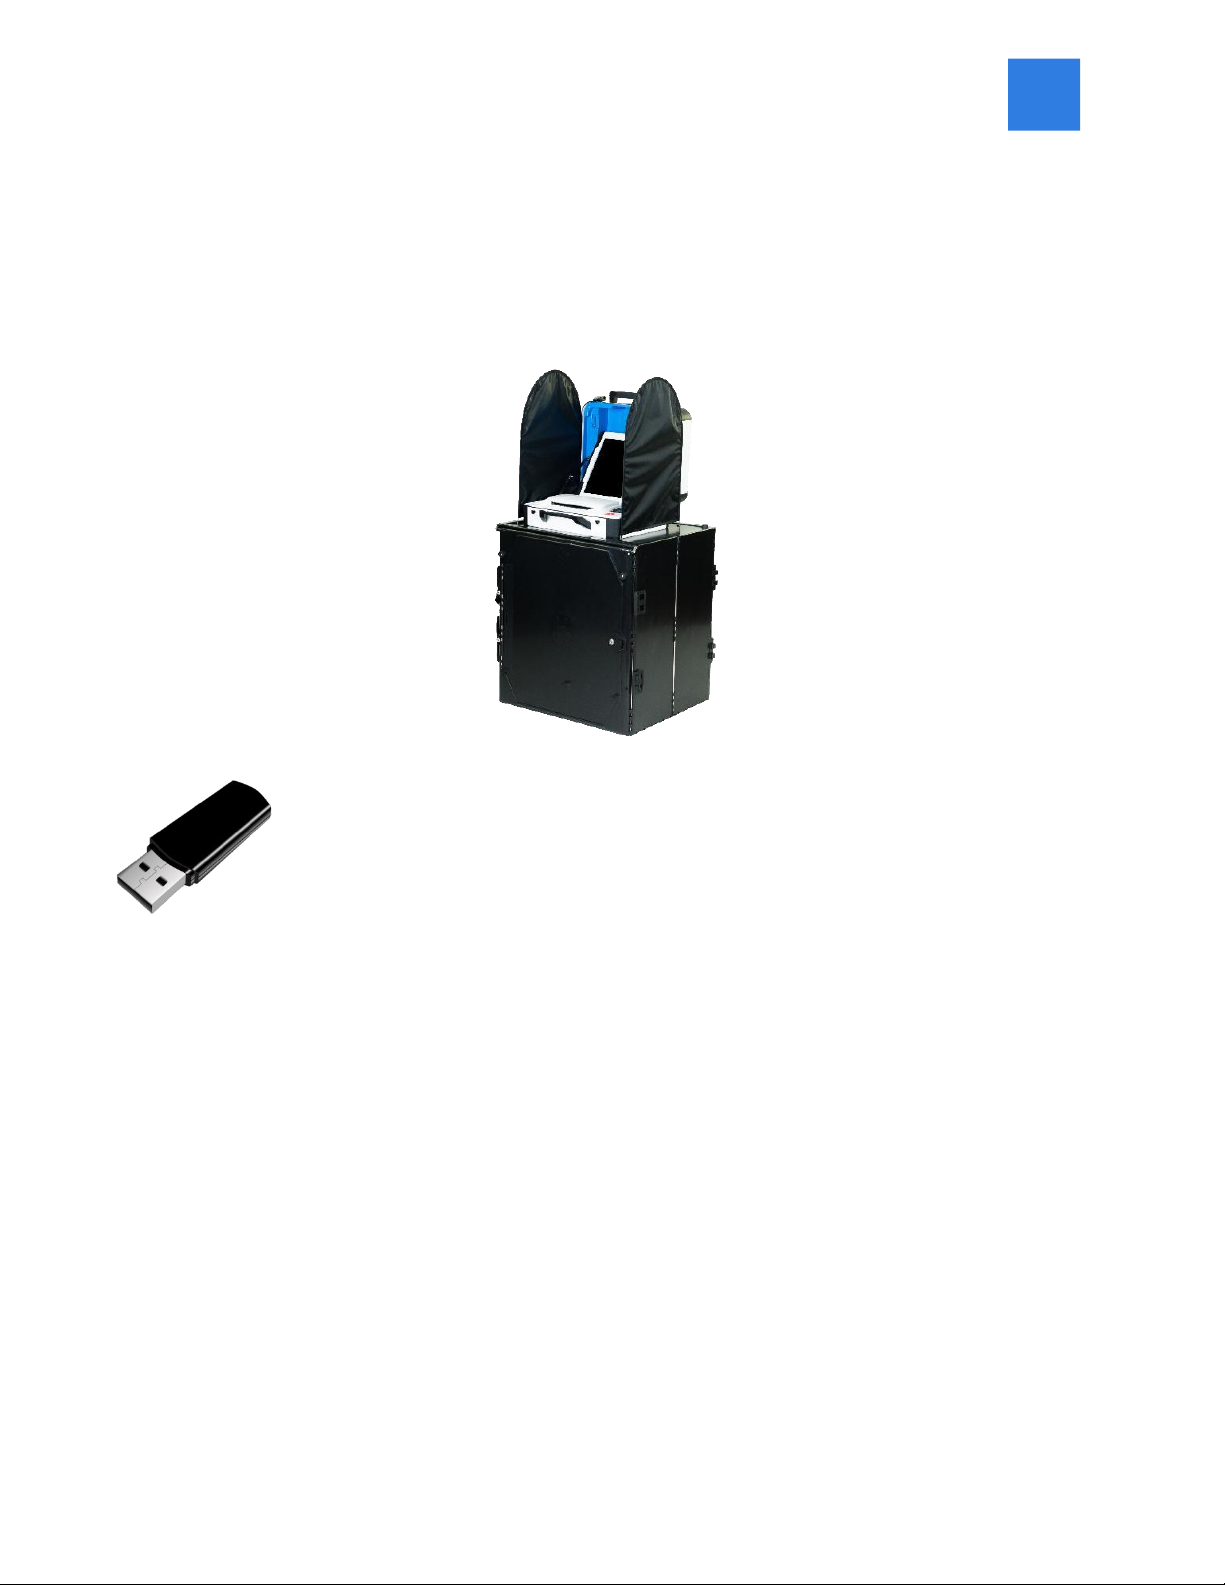
vDrives are used to transfer digital ballot styles from the Verity election
definition software to Verity Scan, and to transfer voted ballots from Verity Scan
to Verity software for tabulation. vDrives are inserted into a standard USB port
located in a locked and sealed compartment; each Verity Scan has its own
vDrive.
NOTE: Software startup for each unit may take several minutes, due to security and data integrity checks
that the Verity software performs. This process is included in the design of the Verity Voting System to verify
the authenticity of the software before allowing it to operate.

5
setting up Verity Scan
setting up the ballot box
1. Position the folded ballot box as shown.
2. Unlatch the four clips (two on each side).
3. Pull open the ballot box.
4. Press the side panels outward until they are flat, being careful not to
pinch your hands or fingers.

6
5. Lower the bottom panel put do not press down.
6. Release the lid by unhooking the 3 straps.
7. Pull the string on the underside of the lid upward
to unlock the lid latch.
8. Lift the lid while gently pulling upward and outward, ensuring that the double hinge is fully
extended. Lay the lid across the top of ballot box, and then press it down. Do not force it.

7
9. Remove the white key from the voting equipment manuals and
supplies bag. Using the white key, unlock the front door of the ballot box.
10. Press firmly on bottom panel to lock it in place.

8
setting up the Verity Scan
1. Assemble the ballot box, if this has not been done already.
2. Place the Verity Scan on the ballot box, aligning footpads with the
indentations. The handle on the Verity Scan must face the front of the
ballot box.
3. Reach inside the ballot box and pull the cord down and away from
you to lock the lid and the Verity Scan in place.
4. Close and lock the front ballot box door.
5. Remove power brick and power cord from the voting equipment manuals and supplies bag.

9
6. Plug the power cord into the power brick, and then plug the power brick into the back of the
Verity Scan (flat side up).
IMPORTANT: Do not plug the power cord into the wall yet.
7. Log the yellow beaded seal number on your Security Log -
AM. Open the Verity Scan case and lock the lid brace in
place.
IMPORTANT: Never tilt a device up by the handle while
cords are connected –this can damage the cord where
it connects to the device, or cause damage to the
device itself.
8. Unlock (A), unlatch (B), and remove (C) the tablet.
A: Remove blue key from the voting equipment manuals and supplies bag. Use the blue key to
unlock the tablet from its cradle.
A
B
C

10
9. Log the red CFAST seal number on the Security Log - AM. Seat the tablet in the cradle (A), tilt
it back (B), and lock it in place (C).
10. Log the red wire seal number found on the white
panel box (located to the right side of the cradle) on
the Security Log - AM.
11. Plug the power cord into AC power. A green light should illuminate
on the power brick when AC power is present.
12. Press the RED button on the back of the Verity Scan to power it on.
Note: During the power on process, a Power-On Self Test report will print
on Verity Scan’s built-in printer. This report will indicate any hardware or
connection issues; if any issues are noted, check connections and restart the
device using the RED power button.
A.
B.
C.
Altri manuali per Verity Scan
1
Indice
Altri manuali Hart InterCivic Scanner


