Honeywell GKP-S8M Manuale utente

Wireless Keypad
GKP-S8M
User manual

1
Contents
Congratulations on your purchase of this Honeywell
wireless keypad.
To make the best out of your equipment we advise
you to read this manual carefully.
This keypad is designed to operate on an authorised
radio frequency and will in no way endanger the user.
Contents .................................................................................1
Introduction............................................................................3
Arming using your code or tag.............................................4
Arming with a fault (*)............................................................5
Disarming using your code or tag........................................5
Resetting the system after an alarm (*)................................6
Incorrect code protection......................................................6
Personal attack ......................................................................6
Duress code ...........................................................................7
Switch on/off receivers..........................................................7
Remote Maintenance (optional)............................................7
User Programming functions................................................8
Indicator lights (*) ................................................................12
Keypad tones .......................................................................13
Maintenance and recommendations..................................14

3
Introduction
This manual describes how to use your wireless keypad.
The keypad is used to arm and disarm your security
system using a valid access code or a key TAG.
The keypad is equipped with a proximity tag reader,
located next to the symbol; the keypad also features an
integrated siren as a deterrent and 4 LEDs to inform you on
system status.
KEYPAD
(*) If keypad installed with CMI, HMI, Sucre Box panels. Refer to Annex A if keypad
installed with PMI panels.
TAG
Siren output
System armed
LED (LED 1)
Intruder alarm (*)
(LED 2)
Total set
arming key
Tag reader area
S.O.S keys
Partial set
arming key
Tamper alarm (*)
(LED 4)
System fault (*)
(LED 3)

4
Arming using your code or tag
Press an arming key on the keypad and enter the code or present
a programmed TAG.
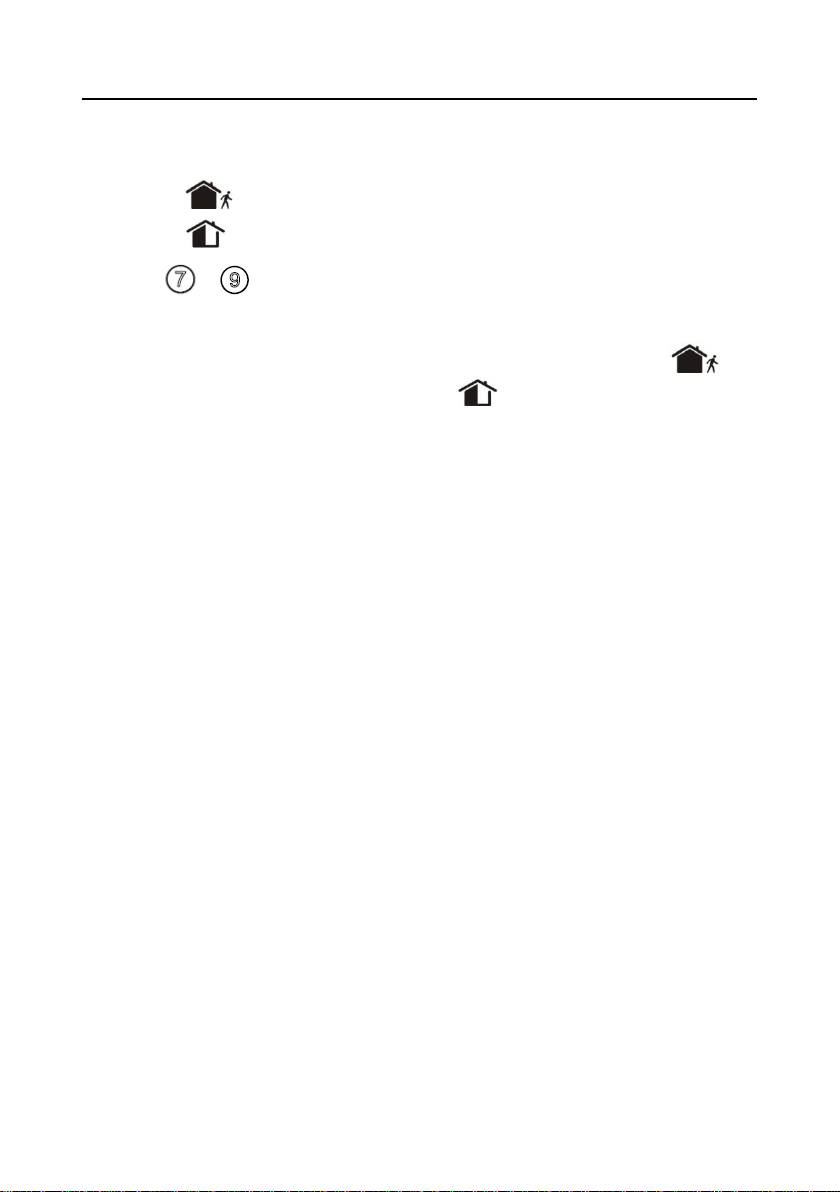
Arms the total set
Arms the partial set
Arms the annex set
(the keypad must be associated with Total
+Annex)
When the keypad is dedicated to the annex set only, the
key will arm the annex set and the key will be disabled.
Arming can be performed with or without user identification
depending on the panel setup.
The arming tone is emitted by the keypad followed by the exit
delay beeps. If a perimeter fault is signalled on arming, disarm
the system before checking all the doors and windows equipped
with contacts.
The zone set arming is completed automatically at the end of the
delay (depending on your system configuration).
Notes:
Always make sure that your Total arming request is followed
by the arming tone.
Holding the TAG less than 1 minute in front of the keypad will
not reverse the status.
If a detector is parameter in final door, Total set arming is
completed after you close the final exit door. After the door is
closed, the exit delay beeps stop and the ‘arming complete’ tone
is emitted by the panel and keypad siren. For Partial, the zone set
arming is completed automatically at the end of the delay.
+

5
Arming with a fault (*)
If the system diagnoses a fault on arming, you cannot set the
alarm. Faults include system faults, tampering and triggering of
detectors.
A tone indicating a fault is emitted by the keypad after the arming
request instead of the arming tone.
Check that all doors and windows fitted with contacts are closed.
You can override prevention of arming by requesting arming a
second time within two minutes from the first request. This will
bypass all faults.
The arming process restarts, the arming tone is emitted by the
keypad followed by the exit delay beeps. Arming is completed at
the end of the delay.
(*) If keypad installed with CMI, HMI, Sucre Box panels. Refer to Annex A if keypad installed
with PMI panels.
Disarming using your code or tag
To enable you to get to the keypad without triggering an alarm,
your installer may have programmed an entry delay.
To disarm your system:
Enter a valid code or present a programmed TAG.
The disarming tone is emitted by the panel and keypad siren.
Disarming the system will also stop the sirens if an alarm is
triggered.
Important: Stopping the siren does not interrupt the
transmission of the alarm to the alarm company.
Notes:
Always make sure that your disarming request is followed by
the disarming tone.
Always disarm the system when re-entering the premises.
Holding the TAG in front of the keypad will not reverse the
status.

6
Depending on your keypad’s configuration, this will disarm the
total set or the entire system. In the latter case, the annex set
might need to be re-armed.
Resetting the system after an alarm (*)
If any of the LEDs 2, 3 or 4 are flashing slowly, an alarm has
occurred (see page 12 for detailed LED functionalities). When
there is an alarm in memory, the system must be reset before it
can be armed.
To reset the system:
1. Disarm it using a valid code or present a tag.
2. If there is more than one alarm in the memory, repeat this
operation for each alarm until LEDs 2, 3 or 4 stops flashing
slowly.
If LED 4 is flashing quickly on your keypad, a confirmed alarm
has occurred and a reset must be performed by your alarm
company, you cannot operate the system. Call the operator.
(*) If keypad installed with CMI, HMI, Sucre Box panels.
Incorrect code protection
Important: If you enter five successive incorrect codes or
present 5 invalid tags consecutively, the keypad will be
blocked for 5 minutes. The intrusion siren will be triggered
if the system is armed.
Personal attack
Note: This function is optional, and can be set at installation.
You can send an alarm at any time, even when your system is
not armed:
Press the and keys simultaneously.
The siren is triggered (depending on the configuration).
The central monitoring station is alerted (if the service is
available).


7
Duress code
Use a duress code if you are forced to disarm your security
system under duress. Your duress code is obtained by adding 1
to the last digit of your code (e.g. 1234 => 1235, 6789 => 6780).
The system will disarm as normal but a silent alert signal is
transmitted to your alarm company (depending on the
configuration).
Switch on/off receivers
Note: This function is optional, and can be set at installation.
It is possible to switch on/off receivers (such as smart plugs) from
the keypad.
To switch a receiver on/off:
1. Press the keyto switch the selected receiver on or the
key to switch the selected receiver off.
2. Select the desired receiver by pressing a key corresponding to
the receiver number 0 to 9 (0 corresponds to receiver number
10).
A high beep is played if the receiver is driven successfully;
otherwise a low beep is played.
Remote Maintenance (optional)
Note: This function is optional and depends on the panel
configuration.
Press the + keys simultaneously to activate the remote
maintenance function as configured by your installer. Ask your
installer for more information on this function.

8
User Programming functions
Important: The system will automatically exit the
programming mode after 20 seconds if no keys are
pressed during this time. When this happens you must
repeat all of the steps necessary for the function you are
using.
The keypad features 2 programming modes:
- User Programming mode to adjust beep level,
enable/disable the chime.
- Master User Programming mode to manage user profiles
(the keypad can have up to 10 user profiles configured). This
mode can only be accessed with the master code (master user
#1).
USER FUNCTIONS
To adjust the volume of the beep:
1. Press and hold the and keys simultaneously more
than 2 seconds to enter user programming mode.
A double beep is played and all LED light on.
2. Keep pressing the key to select the device that you wish
to adjust (each device will emit a beep when it is selected).
Example: If you want to adjust the beep level for device 2:
press the key twice. Device 2 will emit a beep to confirm
its selection.
All LEDs start flashing.
3. Press a key from to to select the required beep volume
(1 = min, 7 = max).
The device selected will emit a beep at the new level to
confirm the beep volume.
4. Press the key to exit user programming mode and save
you changes.

9
5. After a few seconds, a double beep is played and all LED stop
flashing.
To enable/disable chime:
1. Press and hold the and keys simultaneously more than
2 seconds to enter user programming mode.
A double beep is played and all status LEDs light on.
2. Press the key.
A double beep is played and all status LEDs start flashing.
3. Press the key to enable the chime or the key to
disable the chime.
A long beep is played.
4. Press the key to exit user programming code and save
you changes.
5. After a few seconds, a double beep is played and all status
LED stop flashing.
MASTER USER FUNCTIONS
To associate a TAG to a user:
1. Press and hold the user number “0 to 9” key for 3 seconds (1
is the master).
A double beep is played and all LEDs light on.
2. Enter the master code or present the master tag.
A beep is played and all status LEDs start flashing.
3. Present a new TAG.
The programming mode ends automatically.
4. After a few seconds, a double beep is played and all status
LED stop flashing.
The operation fails if the TAG is already registered.
If the user already has a TAG, the new one will take its place.
To change a user’s code:
1. Press and hold the user number “0 to 9” key for 3 seconds (1
is the master).
Altri manuali per GKP-S8M
2
Indice
Altri manuali Honeywell Tastiera