IKEA FRYSA Manuale utente

FRYSA
GB


ENGLISH 4

Contents
Safety information 4
Safety instructions 5
Installation 7
Product description 9
Operation 10
First use 12
Daily use 12
Hints and tips 13
Care and cleaning 14
Troubleshooting 15
Technical information 17
IKEA GUARANTEE 18
Subject to change without notice.
Safety information
Before the installation and use of the appliance, carefully read
the supplied instructions. The manufacturer is not responsible if
an incorrect installation and use causes injuries and damages.
Always keep the instructions with the appliance for future
reference.
Children and vulnerable people safety
•This appliance can be used by children aged from 8 years
and above and persons with reduced physical, sensory or
mental capabilities or lack of experience and knowledge if
they have been given supervision or instruction concerning
use of the appliance in a safe way and understand the
hazards involved.
•Do not let children play with the appliance.
•Cleaning and user maintenance shall not be made by
children without supervision.
•Keep all packaging away from children.
General Safety
•This appliance is intended to be used in household and
similar applications such as:
–Farm houses; staff kitchen areas in shops, offices and other
working environments
ENGLISH 4

–By clients in hotels, motels, bed and breakfast and other
residential type environments
•Keep ventilation openings, in the appliance enclosure or in
the built-in structure, clear of obstruction.
•Do not use mechanical devices or other means to accelerate
the defrosting process, other than those recommended by the
manufacturer.
•Do not damage the refrigerant circuit.
•Do not use electrical appliances inside the food storage
compartments of the appliance, unless they are of the type
recommended by the manufacturer.
•Do not use water spray and steam to clean the appliance.
•Clean the appliance with a moist soft cloth. Only use neutral
detergents. Do not use abrasive products, abrasive cleaning
pads, solvents or metal objects.
•Do not store explosive substances such as aerosol cans with a
flammable propellant in this appliance.
•If the supply cord is damaged, it must be replaced by the
manufacturer, its service agent or similarly qualified persons
in order to avoid a hazard.
Safety instructions
Installation
Warning! Only a qualified
person must install this
appliance.
• Remove all the packaging.
• Do not install or use a damaged
appliance.
• Obey the installation instruction supplied
with the appliance.
• Always be careful when you move the
appliance because it is heavy. Always
wear safety gloves.
• Make sure the air can circulate around
the appliance.
• Wait at least 4 hours before connecting
the appliance to the power supply. This
is to allow the oil to flow back in the
compressor.
• Do not install the appliance close to
radiators or cookers, oven or hobs.
• The rear of the appliance must stand
against the wall.
• Do not install the appliance where there
is direct sunlight.
• Do not install this appliance in areas that
are too humid or too colds, such as the
construction appendices, garages or
wine cellars.
• When you move the appliance, lift it by
the front edge to avoid scratching the
floor.
ENGLISH 5

Electrical connection
Warning! Risk of fire and
electrical shock.
• The appliance must be earthed.
• All electrical connections should be made
by a qualified electrician.
• Make sure that the electrical information
on the rating plate agrees with the
power supply. If not contact an
electrician.
• Always use a correctly installed
shockproof socket.
• Do not use multi-plug adapters and
extension cables.
• Make sure not to cause damage to the
electrical components (e.g. mains plug,
mains cable, compressor). Contact the
Service or an electrician to change the
electrical components.
• The mains cable must stay below the
level of the mains plug.
• Connect the mains plug to the mains
socket only at the end of the installation.
Make sure that there is access to the
mains plug after the installation.
• Do not pull the mains cable to disconnect
the appliance. Always pull the mains
plug.
Use
Warning! Risk of injury, burns,
electrical shock or fire.
• Do not change the specification of this
appliance.
• Do not put electrical appliances (e.g. ice
cream makers) in the appliance unless
they are stated applicable by the
manufacturer.
• Be careful not to cause damage to the
refrigerant circuit. It contains isobutane
(R600a), a natural gas with a high level
of environmental compatibility. This gas
is flammable.
• If damage occurs to the refrigerant
circuit, make sure that there are no
flames and sources of ignition in the
room. Ventilate the room.
• Do not let hot items to touch the plastic
parts of the appliance.
• Do not put soft drinks in the freezer
compartment. This will create pressure
on the drink container.
• Do not store flammable gas and liquid in
the appliance.
• Do not put flammable products or items
that are wet with flammable products in,
near or on the appliance.
• Do not touch the compressor or the
condenser. They are hot.
• Do not remove or touch items from the
freezer compartment if your hands are
wet or damp.
• Do not freeze again food that has been
thawed.
• Obey the storage instructions on the
packaging of frozen food.
Care and cleaning
Warning! Risk of injury or
damage to the appliance.
• Before maintenance, deactivate the
appliance and disconnect the mains plug
from the mains socket.
• This appliance contains hydrocarbons in
the cooling unit. Only a qualified person
must do the maintenance and the
recharging of the unit.
• Regularly examine the drain of the
appliance and if necessary, clean it. If
the drain is blocked, defrosted water
collects in the bottom of the appliance.
Disposal
Warning! Risk of injury or
suffocation.
• Disconnect the appliance from the mains
supply.
• Cut off the mains cable and discard it.
• Remove the door to prevent children and
pets to be closed inside of the appliance.
ENGLISH 6
• The refrigerant circuit and the insulation
materials of this appliance are ozone-
friendly.
• The insulation foam contains flammable
gas. Contact your municipal authority for
information on how to discard the
appliance correctly.
• Do not cause damage to the part of the
cooling unit that is near the heat
exchanger.
Installation
Warning! Refer to Safety
chapters.
Location
To ensure best performance, install the
appliance well away from sources of heat
such as radiators, boilers, direct sunlight etc.
Make sure that air can circulate freely
around the back of the cabinet.
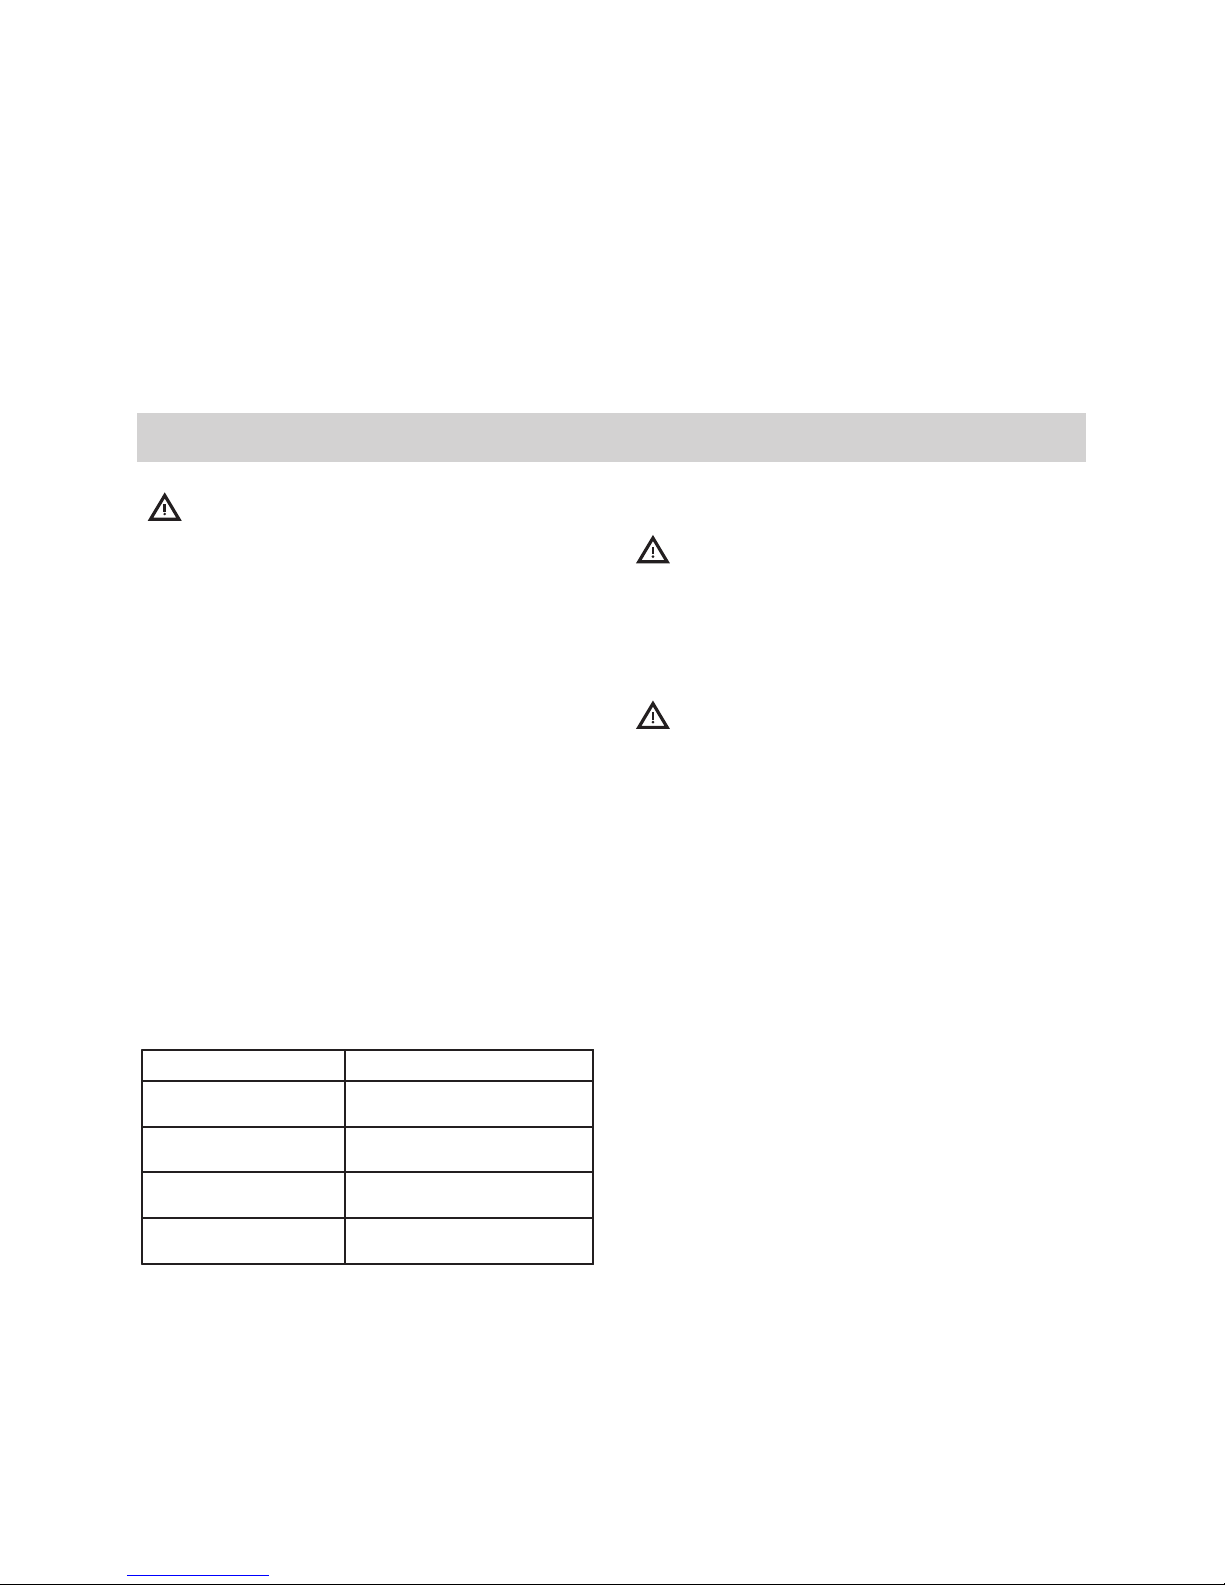
Positioning
This appliance should be installed in a dry,
well ventilated indoor (garage or cellar)
also, but for optimum performance install
this appliance at a location where the
ambient temperature corresponds to the
climate class indicated on the rating plate
of the appliance:
Climate class Ambient temperature
SN +10°C to + 32°C
N +16°C to + 32°C
ST +16°C to + 38°C
T +16°C to + 43°C
Electrical Connection
Caution! Any electrical work
required to install this appliance
should be carried out by a
qualified electrician or
competent person.
Warning! This appliance must be
earthed. The manufacturer
declines any liability should these
safety measures not be
observed.
The wires in the mains lead are coloured in
accordance with the following code:
ENGLISH 7

A B
C
D
E
•A - green and yellow: Earth
•C - brown: Live
•D - blue: Neutral
As the colours of the wires in the mains lead
of this appliance may not correspond with
the coloured markings identifying the
terminals in your plug, proceed as follows:
1. Connect the wire coloured green and
yellow to the terminal marked either
with the letter “E“ or by the earth symbol
or coloured green and yellow.
2. Connect the wire coloured blue to the
terminal either marked with the letter
“N“ or coloured black.
3. Connect the wire coloured brown to the
terminal either marked with the “L“ or
coloured red.
4. Check that no cut, or stray strands of
wire is present and the cord clamp (E) is
secure over the outer sheath.
Make sure the electricity supply voltage
is the same as that indicated on the
appliance rating plate.
5. Switch on the appliance.
The appliance is supplied with a 13 amp
fuse (B). In the event of having to change
the fuse in the plug supplied, a 13 amp
ASTA approved (BS 1362) fuse must be
used.
Warning! A cut off plug inserted
into a 13 amp socket is a serious
safety (shock) hazard. Ensure
that it is disposed of safely.
ENGLISH 8

Product description
Product overview
21
4
3
5
1Control panel
2Cold module (evaporator)
3Freezing flaps
4Freezer drawers
5Rating plate
Coldest zone
Least cold zone
ENGLISH 9

Operation
Control panel
A++
1
632
4
5
1Display
2Temperature warmer button
3Temperature colder button
4OK button
5Function button
6ON/OFF switch
Display
A FC D EB
A) Timer function
B) Drinks Chill function
C) Fast Freezing function
D) Child Lock function
E) Alarm indicator
F) Temperature indicator
Switching on
Connect the mains plug to the power
socket.
Press the ON/OFF button if the display is
off.
If DEMO appears on the display, the
appliance is in demonstration mode. Refer
to "Troubleshooting" section.
The temperature indicators show the set
default temperature.
To set a different temperature refer to
"Temperature regulation".
Switching off
Press the ON/OFF button for 5 seconds.
The display turns off.
To disconnect the appliance from the
power, disconnect the mains plug from the
power socket.
Temperature regulation
The set temperature of the freezer may be
adjusted by pressing the temperature
button.
Default temperature:
• -18°C for the freezer
The temperature indicator shows the set
temperature.
The temperature of the freezer
compartment may vary between more or
less -15°C and -24°C.
The set temperature will be
reached within 24 hours. After a
power failure the set
temperature remains stored.
Functions menu
Each time Function is pressed, the following
functions can be activated:
ENGLISH 10
Altri manuali per FRYSA
11
Indice
Altri manuali IKEA Congelatore

IKEA
IKEA FÖRKYLD Manuale utente

IKEA
IKEA FROSTIG BC155 Manuale utente

IKEA
IKEA FROSTFRI Manuale utente

IKEA
IKEA FULLGORA Manuale utente

IKEA
IKEA genomfrysa Manuale utente

IKEA
IKEA FRYSA Manuale utente

IKEA
IKEA FROSTIG Manuale utente

IKEA
IKEA Frostig BF91 Manuale utente

IKEA
IKEA SF98 Manuale utente

IKEA
IKEA LAGAN Manuale utente

IKEA
IKEA DJUPFRYSA Manuale utente

IKEA
IKEA LAGAN Manuale utente

IKEA
IKEA FRYSA Manuale utente

IKEA
IKEA YTTERNAS Manuale utente

IKEA
IKEA DJUPFRYSA Manuale utente

IKEA
IKEA FORSNAS Manuale utente

IKEA
IKEA DJUPFRYSA Manuale utente

IKEA
IKEA MEDGÅNG Manuale utente

IKEA
IKEA FULLGORA Manuale utente

IKEA
IKEA FRAMTID FC323/78 Manuale utente


