Kometec DOSTMANN ScanTemp RH 860 Manuale utente
Please read this manual before switching the unit on.
Important safety information inside.
IR Video Thermometer
User Manual
IR Video Thermometer
User Manual
KOMETEC Karl Oelkers e.K.
Mess- und Prüfgeräte · Shop
Mozartstr. 10 · D-88097 Eriskirch
T: 07541 / 955-1313 · F: 07541 / 955-1131

Contents
1. Introduction.........................................................................
2. Features...............................................................................
3. Specifications.......................................................................
4. Front Panel And Button Description.....................................
5. Menu Overview....................................................................
6. Function...............................................................................
7. Notes...................................................................................
8. Emissivity Values..................................................................
9. Maintenance........................................................................
Page
3
3
4
6
7
15
19
20
20

1. Introduction
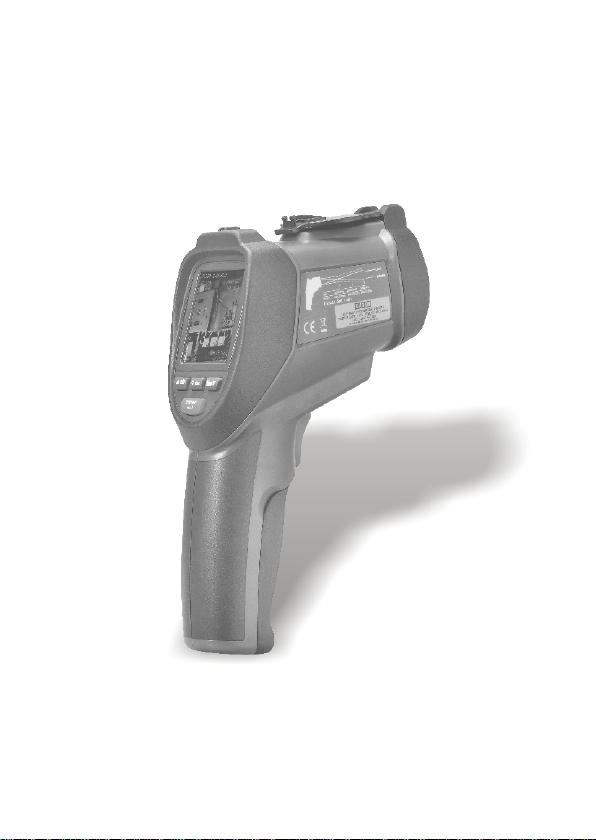
Thank you for purchasing the IR VIDEO Thermometer which is capable
of non-contact (infrared) temperature measurements with visual
camera at the touch of a button. The built-in laser pointer increases
target accuracy while the backlight LCD and handy push-buttons
combine for convenient, ergonomic operation.
The IR VIDEO Thermometer can be used to measure the surface
temperature of the objects that is improper to be measured by
traditional (contact) thermometer (such as moving object, the surface
with electricity current or the objects which are uneasy to be touched.)
Proper use and care of this meter will provide years of reliable service.
2. Features
•2.2" TFT LCD display
•640*480 pixels(30 million pixels)
•Micro SD memory card
•Image (JPEG) and video (AVI)
•Humidity and Air Temperature
•Dual laser targeting
•Type-K thermocouple probe
•Adjustable emissivity
•High accuracy
•Fast response time
•Dewpoint temperature and Wet bulb temperature
EN 3
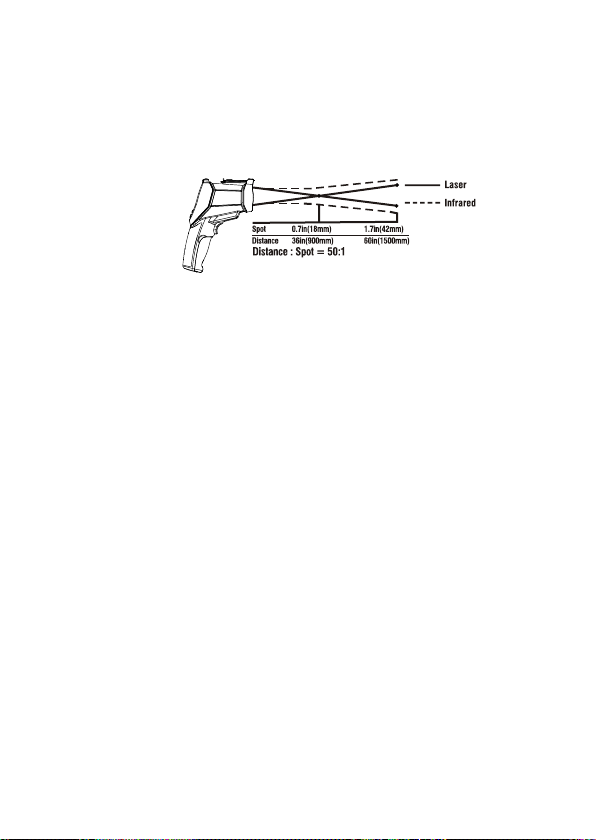
Distance & Spot Size
As the distance (D) from the object increases, the spot size (S) of the
area measured by the unit becomes larger. The relationship between
distance and spot size for each unit is listed below. The focal point
for each unit is 914mm (36"). The spot sizes indicate 90% encircled
energy.
3. Specifications
IR temperature measurement
Temperature Range
D:S
Accuracy
Display resolution
Repeatability
Response Time
Spectral Response
Emissivity
-50 to 1000°C(-58 to 1832°F)
50:1
±1%±1.0°C(1.8°F) 20 to 500°C(68 to 932°F)
±1.5% 500 to 1000°C(932 to 1832°F)
±3.5°C(6.3°F) -50 to 20°C(-58 to 68°F)
0.1°C(0.1°F) <1000
1°C(1°F) >1000
±1.5°C(2.7°F) -50 to 20°C(-58 to 68°F)
±0.5% or ±0.5°C(0.9°F) 20 to 1000°C(68 to 1832°F)
150mS
8~14um
Digitally adjustable form 0.10 to 1.00
EN 4

Type-k temperature measurement
Temperature Range
Accuracy
Display resolution
Air Temperature And Relative Humidity Measurement
Air Temperature Range
Dewpoint Temperature Range
Relative Humidity Range
Air temperature Accuracy
Dewpoint temperature Accuracy
Relative Humidity Accuracy
Operating Temperature
Storage Temperature
Relative Humidity
Display
Power
Battery
Battery Life
Battery Charge Time
Size(H*W*L)
Weight
0 to 50°C(32to 122°F)
0 to 50°C(32to 122°F)
0 to 100% RH
±0.5°C(0.9°F) 10 to 40°C
±1.0°C(1.8°F) others
±0.5°C(0.9°F) 10 to 40°C
±1.0°C(1.8°F) others
±3%RH 40% to 60%
±3.5%RH 0% to 40% and 60% to 80%
±5%RH 0% to 20% and 80% to 100%
0 to 50°C(32 to 122°F)
-10 to 60°C(14 to 140°F)
10 to 90%RH non-condensing
2.2" 320*240 color LCD with backlight
Rechargeable battery
About 4 hours continuous use
About 2 hours with AC adapter or
USB connection
205mm*62mm*155mm
410g
-50 to 1370°C(-58 to 2498°F)
±0.5%±1.5°C(2.7°F) 0 to 1370°C(32 to 2498°F)
±2.5°C(4.5°F) -50 to 0°C(-58 to 32°F)
0.1°C(0.1°F) <1000
1°C(1°F) >1000
EN 5
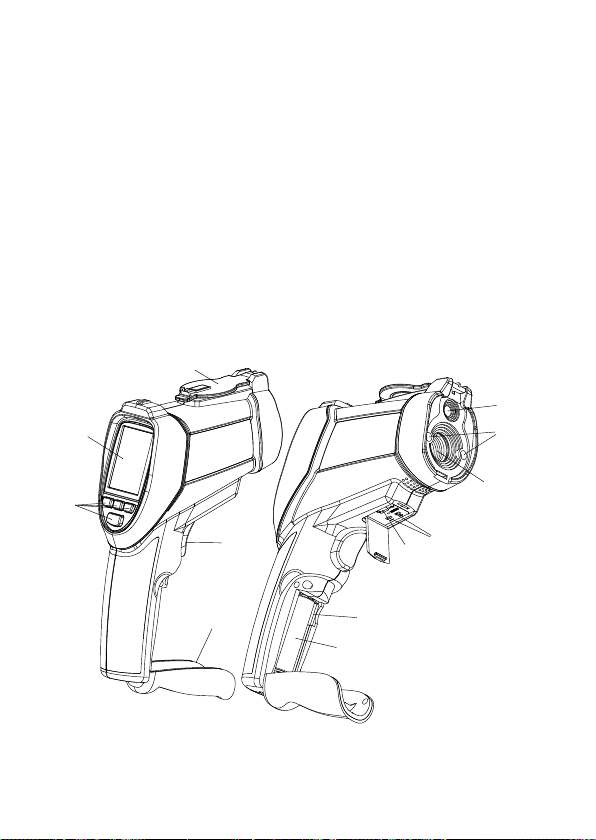
4. Front Panel And Button Description
Item-Description
1-LCD Display
2-BUTTONS
3-Battery Cover
4-Measurement Trigger
5-Retractable Lens Cover
6-Visual camera
7-Laser
8-IR sensor
9-Type-k thermocouple socket
10-USB computer interface socket
11-Micro SD memory card
12-Battery
5
1
2
4
3
6
7
8
9
10
11
12
EN 6
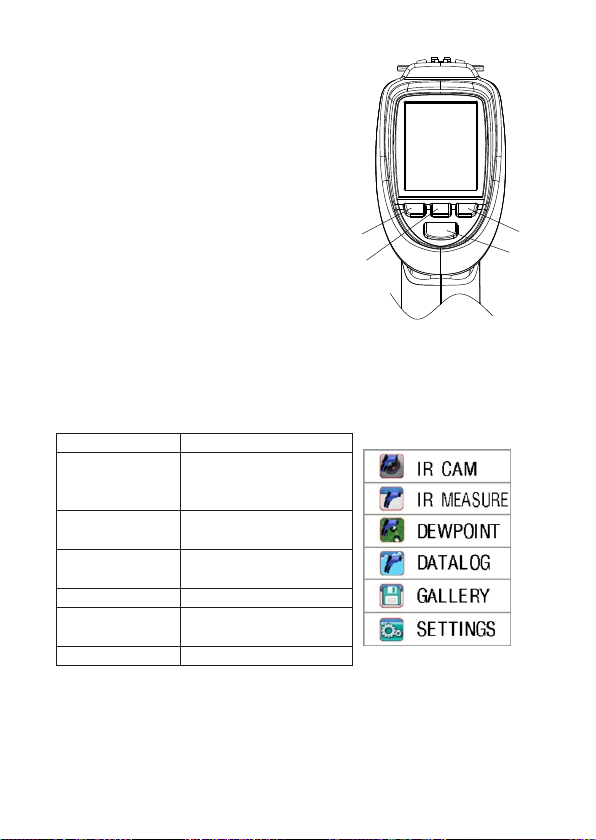
Item-Description
1-UP or Picture button
2-ESC button
3-Down or VIDEO button
4-Mode button
5. Menu Overview
Power on or power off
•On the power off mode, press and hold
ESC button, until the LCD is on, then
the unit will power on.
•On the power on mode, Press and hold
the ESC button, until the LCD is off, then
the unit will power off.
5.1 Measurement Mode
The IR VIDEO thermometer has six modes. On the power on mode,
press the ESC button, the unit will display the six modes. You can
use UP or DOWN button to select any mode you need.
1
2
3
4
Items
CAM mode
IR mode
DEWPOINT
DATALOG
GALLERY
SETTINGS
Description
measure the IR temp,
air temp. & air humi.
With camera
measure the IR temp.
Very fast
measure the IR temp.
And dewpoint temp
Datalog mode
display the picture/
datalog and video
setting parameter
EN 7
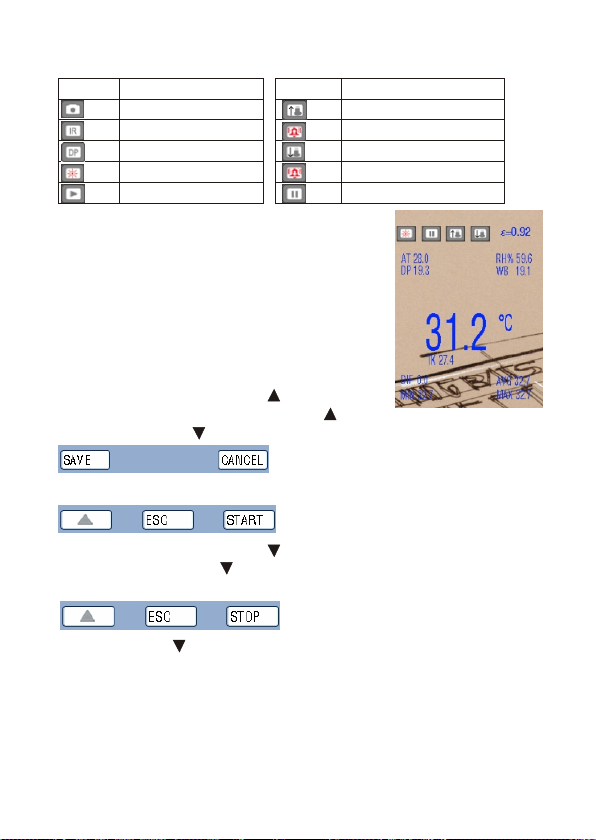
Symbols
5.2 CAM Mode
•Use to measure IR temp, air temp, air humi,
dewpoint temperature and wet bulb temperature
with camera. It is can display the IR MAX
temp., MIN temp, DIF temp, AVG temp.
•Press and hold trigger to measure the temperature.
This mode can take picture and take video.
5.2.1 take picture function
On the CAM mode, press the button to enter
picture taking, then press SAVE with button to save pictures, or
press CENCEL with button to cancel.
5.2.2 take video function.
On the CAM mode, press the button to enter video taking mode,
then press START with button to take videos, or press ESC button
to esc.
press STOP with button to stop the video.
•
•
•
•
Symbols Description
CAM mode
IR mode
DEWPOINT mode
Laser
Scan
Symbols Description
High alarm
High alarm working
Low alarm
Low alarm working
Hold
EN 8
5.3 IR Mode
Use to measure IR temp, air temp, air humi,
dewpoint temperature and wet bulb
temperature without camera. It is can display
the IR MAX temp, MIN temp, DIF temp, AVG
temp.
Press and hold trigger to measure the temperature.
5.4 DEWPOINT Mode
measure the IR temp. and dewpoint temp.
Press and hold trigger to measure the temperature.
This is that the IR temperature and dewpoint temperature close to
the percentage of.
5.5 Data log
In the DATALOG mode, first set the parameter,
like high alarm value, low alarm value, interval
time, and the line color, then press the trigger
to start logging. The unit will automatically
record data, press the ESC buttom to esc the
DATALOG mode, then the data will automatically
save.
EN 9
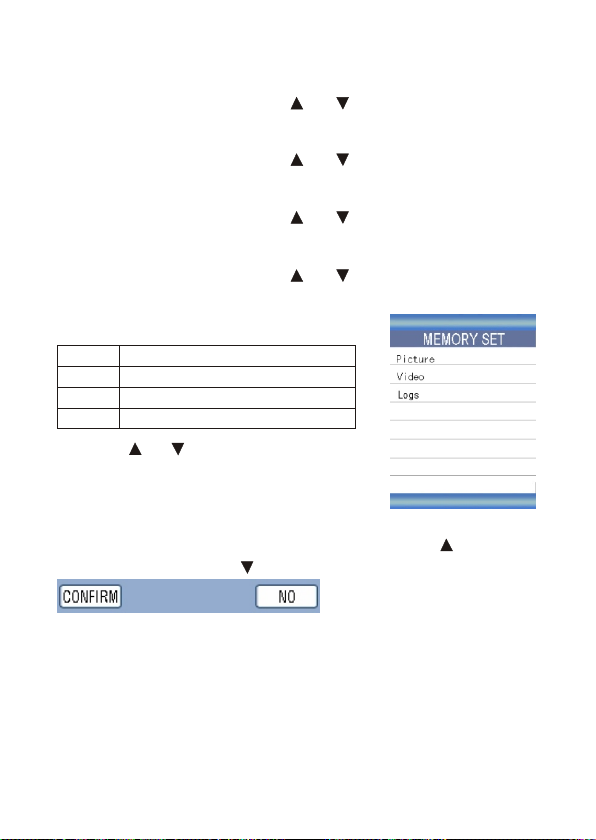
Items
Picture
Video
Logs
Descriptions
Display the saved pictures
Play the saved videos
Display the data log and view
Set the datalog parameter
Set high alarm value
Press the ENTER button, use the and button to adjust the value,
then press the ENTER button to confirm.
Set low alarm value
Press the ENTER button, use the and button to adjust the value,
then press the ENTER button to confirm.
Set interval time
Press the ENTER button, use the and button to adjust the value,
then press the ENTER button to confirm.
Select the color
Press the ENTER button, use the and button to select the color,
then press the ENTER button to confirm.
5.6 Gallery
•Press the and button to select the picture,
video or Logs. Then press the ENTER button
to enter.
•In the picture. Video or logs, press the ENTER
button to view picture, play video or view log. Then press the ENTER
button to delete the picture, video or log. Press the button to
confirm to delete, press button to cancel.
•
•
•
•
•
EN 10
Indice
Lingue:


