Limbs & Things 60000 Manuale utente

limbsandthings.com
FOR MORE SKILLS TRAINING PRODUCTS VISIT
ABDOMINAL
EXAMINATION
TRAINER
USER GUIDE
60000 60054
This product is available
in light and dark skin tones

2
TAKE A LOOK
AT OUR VIDEO
VISIT THE WEBSITE
limbsandthings.com
OR YOUTUBE CHANNEL
youtube.com/limbsandthings
INDEX
PACKAGE SUPPLIED 3
SAFETY & CLEANING INSTRUCTIONS 4
TEST CERTIFICATIONS 6
SET UP 8
•ADDING/REMOVING ABDOMINAL SKIN 8
•PLACING ORGANS & PATHOLOGIES 8
•INSTALLING/CHANGING BATTERIES 12
•USING MAINS POWER 13
•SPEAKER & MP3 PLAYER 13
•INSERTING THE ABDOMINAL WALL 15
•ATTACHING THE RECTUS BAG 15
•ASCITES SET UP 16
•GASEOUS DISTENSION 17
•USING THE BREATHING MECHANISM 19
EXAMPLES OF SET UP FOR SCENARIOS 20
3
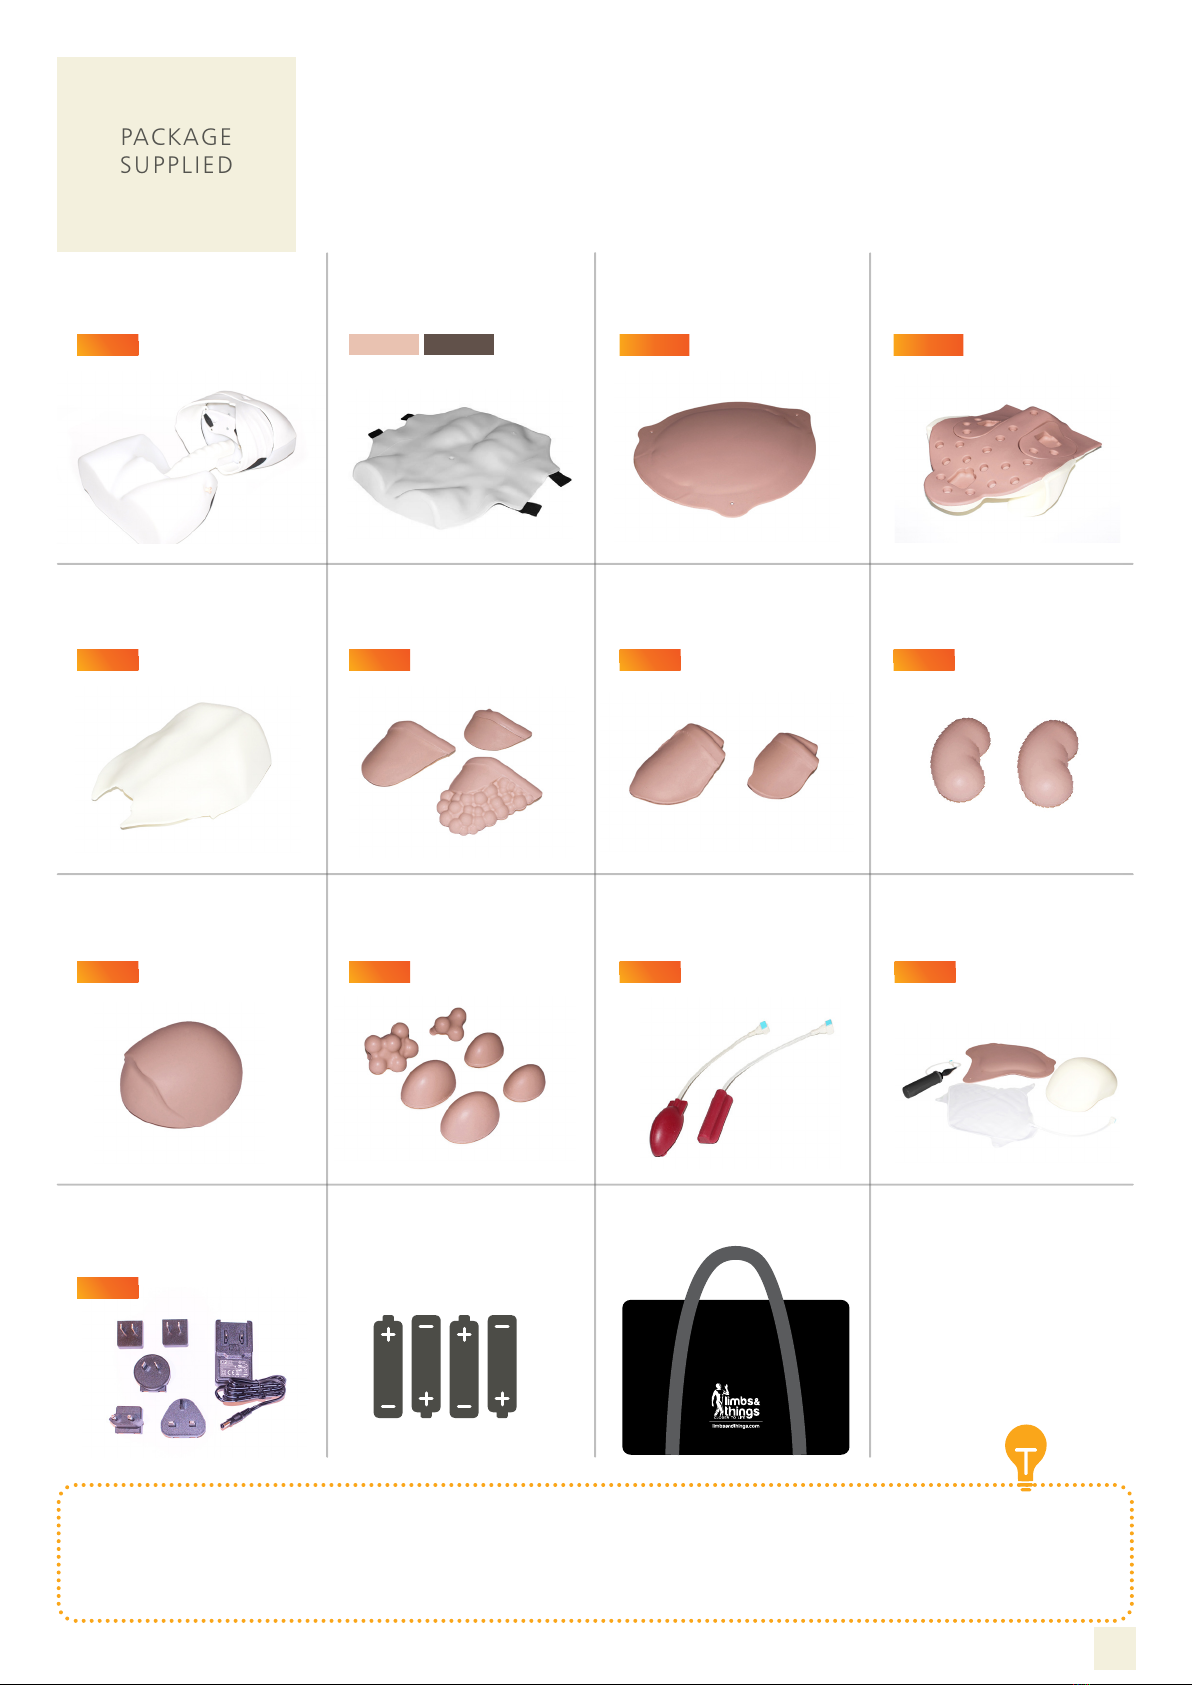
PACKAGE
SUPPLIED
International 5V
DC Power Supply
Carry Cases
(x2)
Base
Unit
Abdominal Examination
Organ Locator
Abdominal
Rectus Bag
60014 60016
Abdominal Examination
Skin
Abdominal
Wall
60009
60005
Abdominal Examination
Bladder
• Rectus Bag + Abdominal Wall: simulates underlying layers with in the abdomen (P. 15)
• Ascites Bag + Distension Foam: allows for identification of distended, fluid filled abdomen by using the following
techniques, percussion, shifting dullness or fluid thrill technique (P. 16)
• Distension Bag + Distension Foam: allows for identification of distended, air filled abdomen when percussed/palpated.
A potential scenario for this would be a bowel obstruction (P. 17)
Abdominal Examination
Aortas (Set of 2)
Abdominal Examination
Pathologies (Set of 6)
Abdominal Examination
Distension Set
60013
60053
60015
Abdominal Examination
Livers (Set of 3)
60010 60011 60012
Abdominal Examination
Spleens (Set of 2)
Abdominal Examination
Kidneys (x2)
60006 60007 60008
60057
AA Batteries (x4)
4
Only used at altitudes
not exceeding 5000m.
Clean the product with a damp
soft cloth or sponge, using only
warm water with mild detergent.
The product must be stored dry.
Do not allow young children
to use this product.
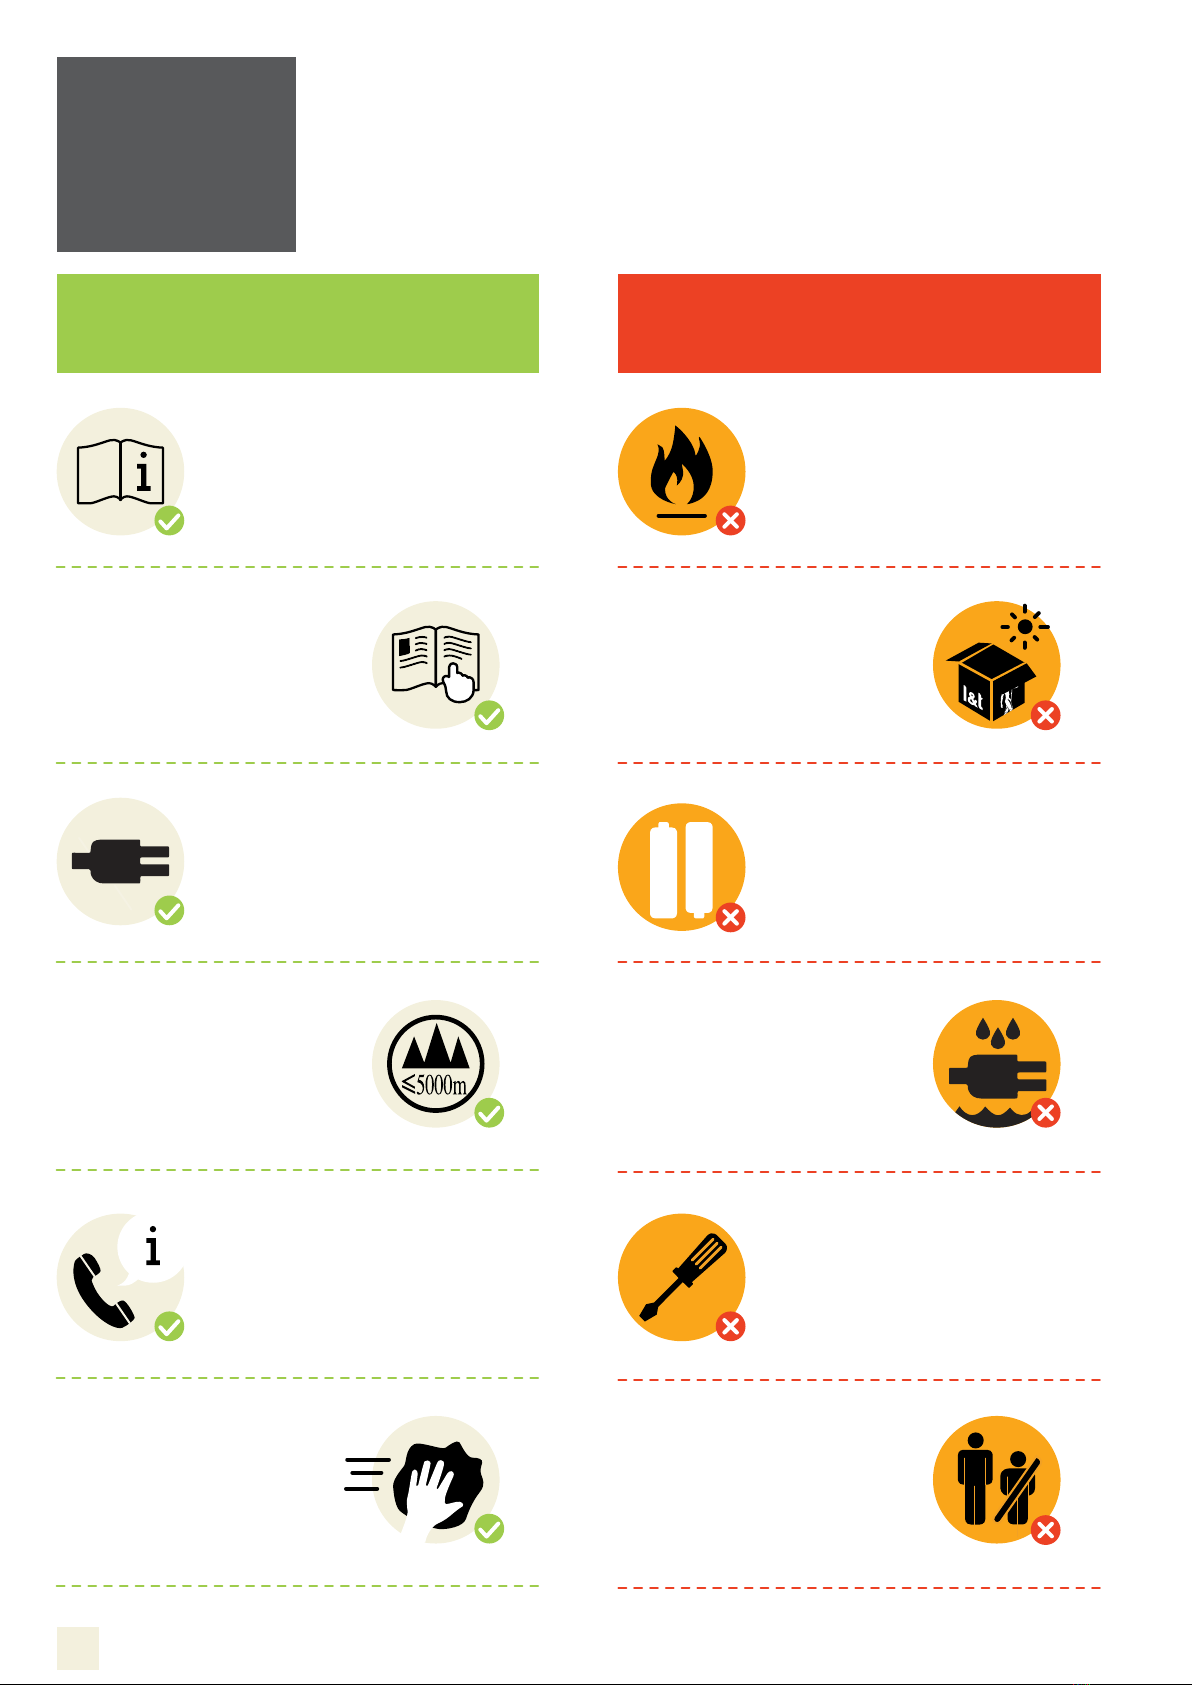
SAFETY &
CLEANING
INSTRUCTIONS
DO’s DON’Ts
Follow all instructions.
Keep these instructions.
Heed all warnings.
Do not install near any heat sources,
do not expose the product to flames
or use near naked flame sources.
Do not use flammable solvents near or
on this product.
Only use attachments/accessories
specified by Limbs & Things.
Never use the product outdoors
as this may damage the product.
Use only the XP Power ACM06 mains
adaptor provided with the product, the
use of a different adaptor can cause
electrical or fire hazards.
If a product is damaged or worn, it should
be repaired by Limbs & Things. To arrange
this, please contact your point of purchase
who will be able to provide a repair quote.
Do not disassemble the product or
attempt to repair a faulty unit, please
return the product to Limbs & Things
for assessment and repair.
READ THE SAFETY INSTRUCTIONS CAREFULLY BEFORE
USING YOUR ABDOMINAL EXAMINATION TRAINER
Caution - Risk of explosion if battery is
replaced with incorrect type. This product
is intended for use with standard type
AA Alkaline or similar non-rechargeable
batteries. Check local guidelines for the
correct disposal of batteries.
Do not use this apparatus near water,
this product contains electronics.
Rechargeable
Rechargeable
5
SAFETY &
CLEANING
INSTRUCTIONS
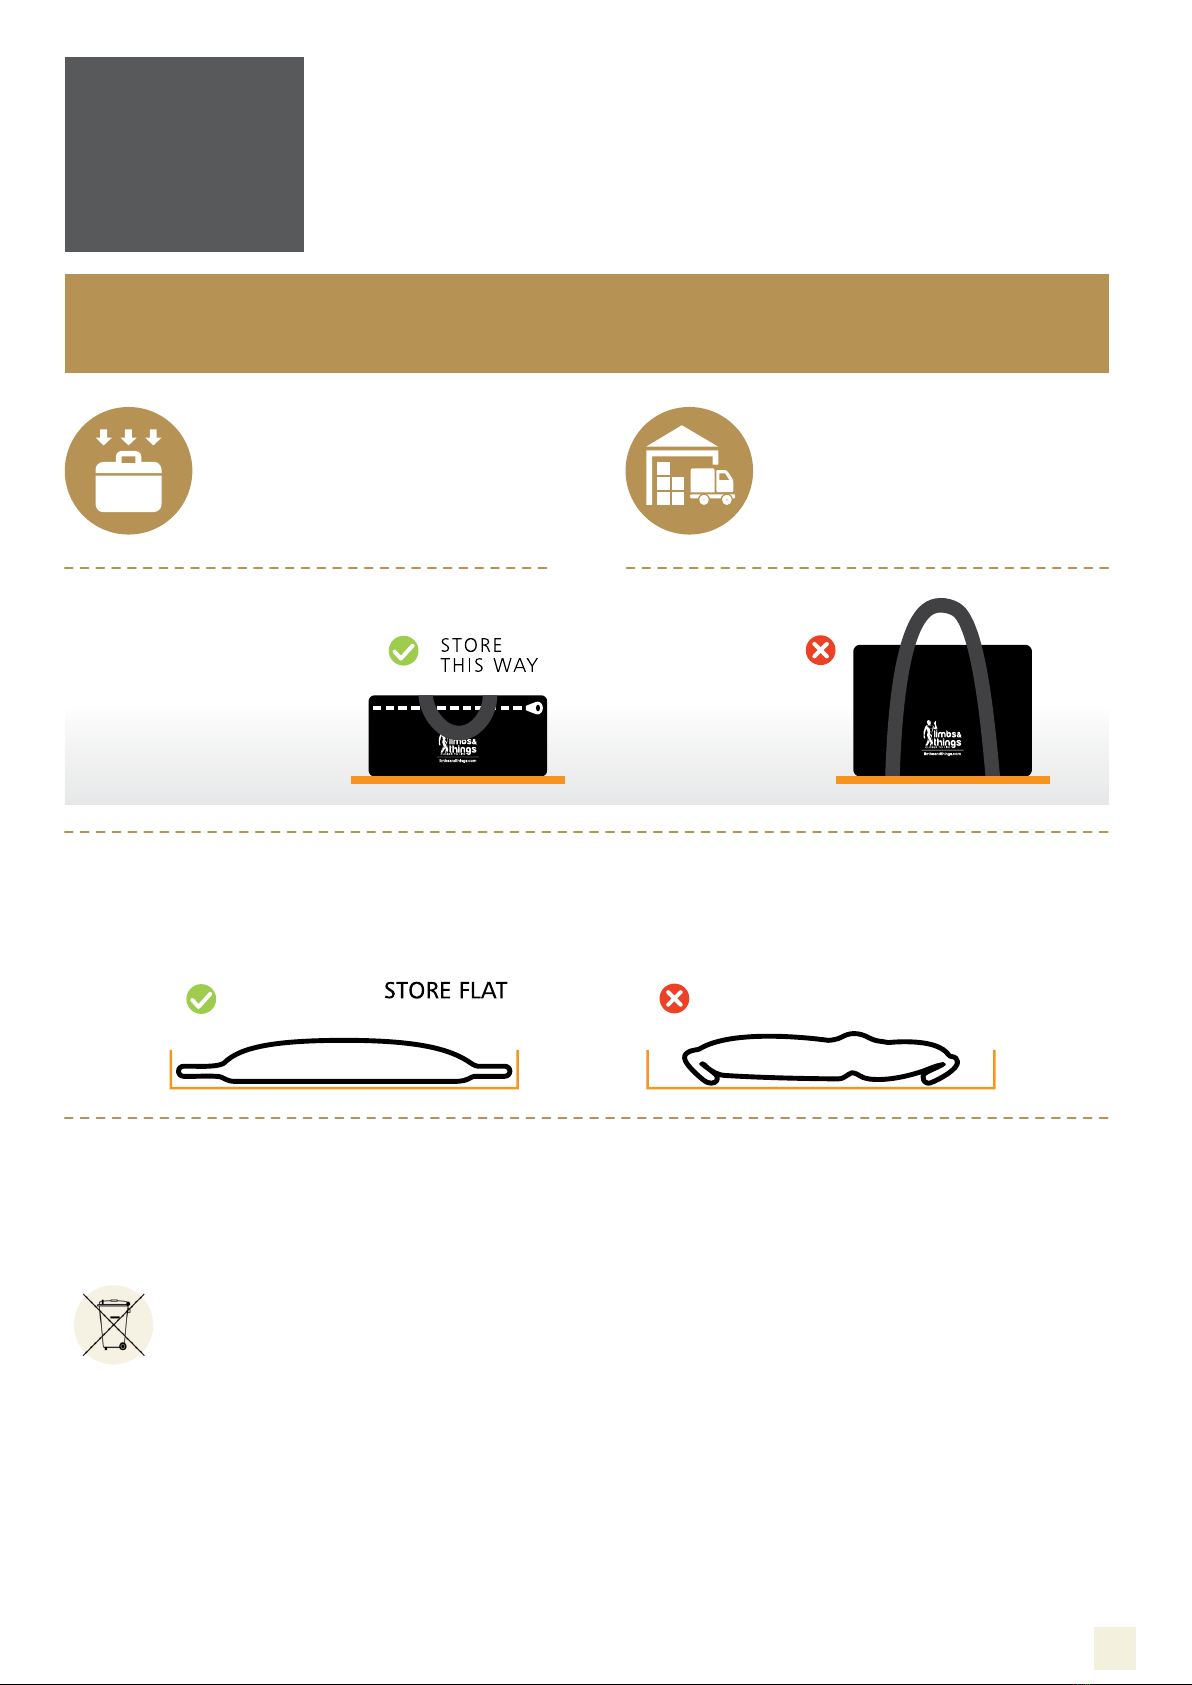
STORAGE & TRANSPORTATION
The trainer and its accessories are
heavy when packed in the carrying
case.
Always ensure that the products are
properly packed and secured during
transportation and storage in order to
prevent personal injury or damage to
the product.
READ THE SAFETY INSTRUCTIONS CAREFULLY BEFORE
USING YOUR ABDOMINAL EXAMINATION TRAINER
The black carry cases that the They should
ABDOMINAL TRAINER is not be stored
packed in should be stored flat. on their side.
DISPOSAL INSTRUCTIONS
Do not disassemble, crush, short-circuit or incinerate the batteries as it may cause fire, injury, burns or other hazards.
Do not dispose of this product with unsorted waste. Improper disposal may be harmful to the environment and human health. Please refer
to your local waste authority for information on return and collection systems in your area.
This symbol on the product(s) and / or accompanying documents means that used electrical and electronic equipment
(WEEE) should not be mixed with general household waste. For proper treatment, recovery and recycling, please take this
product(s) to designated collection points where it will be accepted free of charge.
Alternatively, in some countries, you may be able to return your products to your local retailer upon purchase of an equivalent new product.
Disposing of this product correctly will help save valuable resources and prevent any potential negative effects on human health and the
environment, which could otherwise arise from inappropriate waste handling.
Please contact your local authority for further details of your nearest designated collection point.
Penalties may be applicable for incorrect disposal of this waste, in accordance with your national legislation.
For professional users in the European Union
If you wish to discard electrical and electronic equipment (EEE), please contact your dealer or supplier for further information.
For disposal in countries outside of the European Union
This symbol is only valid in the European Union (EU). If you wish to discard this product, please contact your local authorities or dealer and
ask for the correct method of disposal.
The cardboard box that the ASCITES BAG is supplied in should be kept and used to store the Ascites bag.
Always ensure both the Abdominal Rectus Bag and Abdominal Examination Ascites Bag are detached from the trainer when not in
use and stored flat, without any risk of creasing/folded edges.

6
7

8
SET UP
ADDING/REMOVING ABDOMINAL SKIN
PLACING ORGANS & PATHOLOGIES
Tilt the model on to its
side to reveal the
velcro straps
Please ensure to pull
the velcro straps
and NOT the skin
Remove Skin, Rectus Bag and Abdominal Wall to get to the Organ Locator

9
SET UP
PLACING ORGANS & PATHOLOGIES
Liver & Spleen
Select a LIVER from the Set of 3
Select a SPLEEN from the Set of 2
Same fitting mechanism
as Liver
Knob located on
the top RIGHT
of the model
Knob located on
the top LEFT
of the model
10
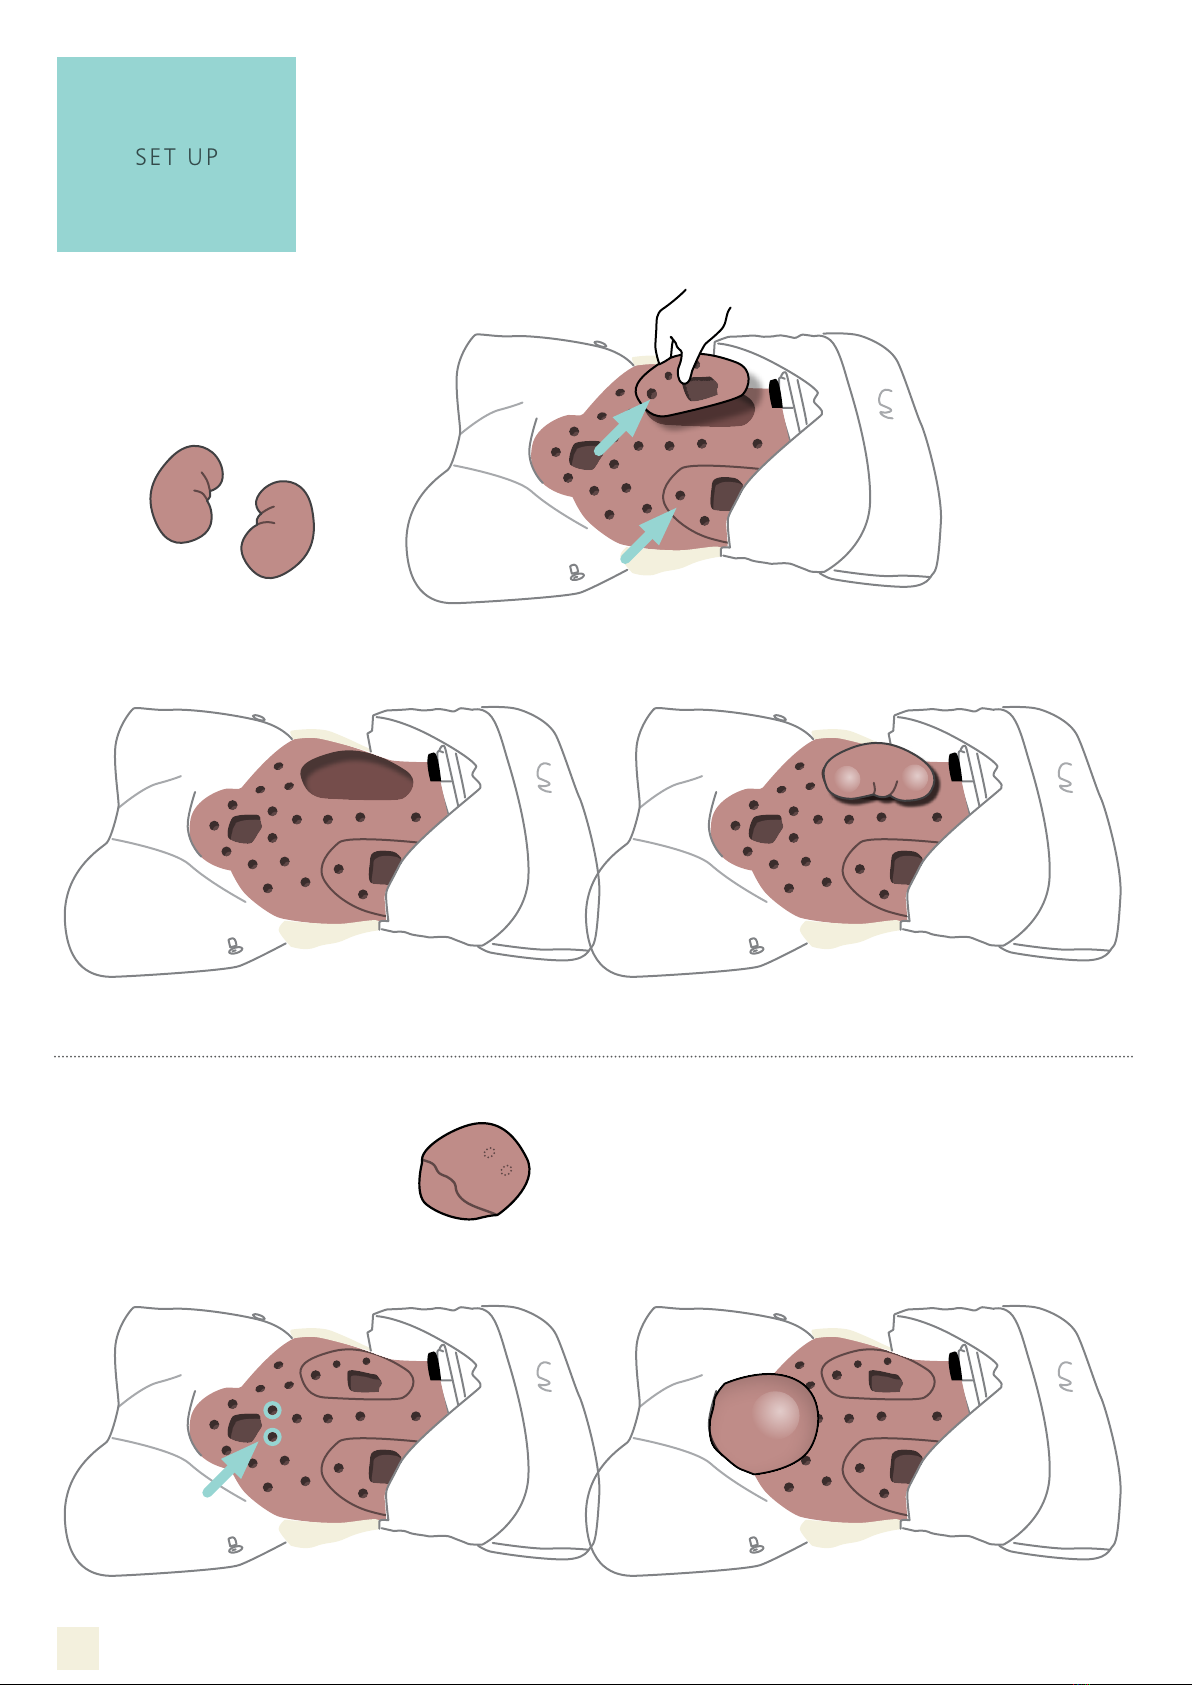
SET UP
PLACING ORGANS & PATHOLOGIES
Kidney & Bladder
Remove the KIDNEY LOCATOR
(1 on each side of the model)
Select the BLADDER and fit
the 2 pegs on its back to the
holes indicated below
Questo manuale è adatto per i seguenti modelli
1
Indice
Altri manuali Limbs & Things Attrezzature didattiche


