Mega Catch Premier MCP800 Manuale utente
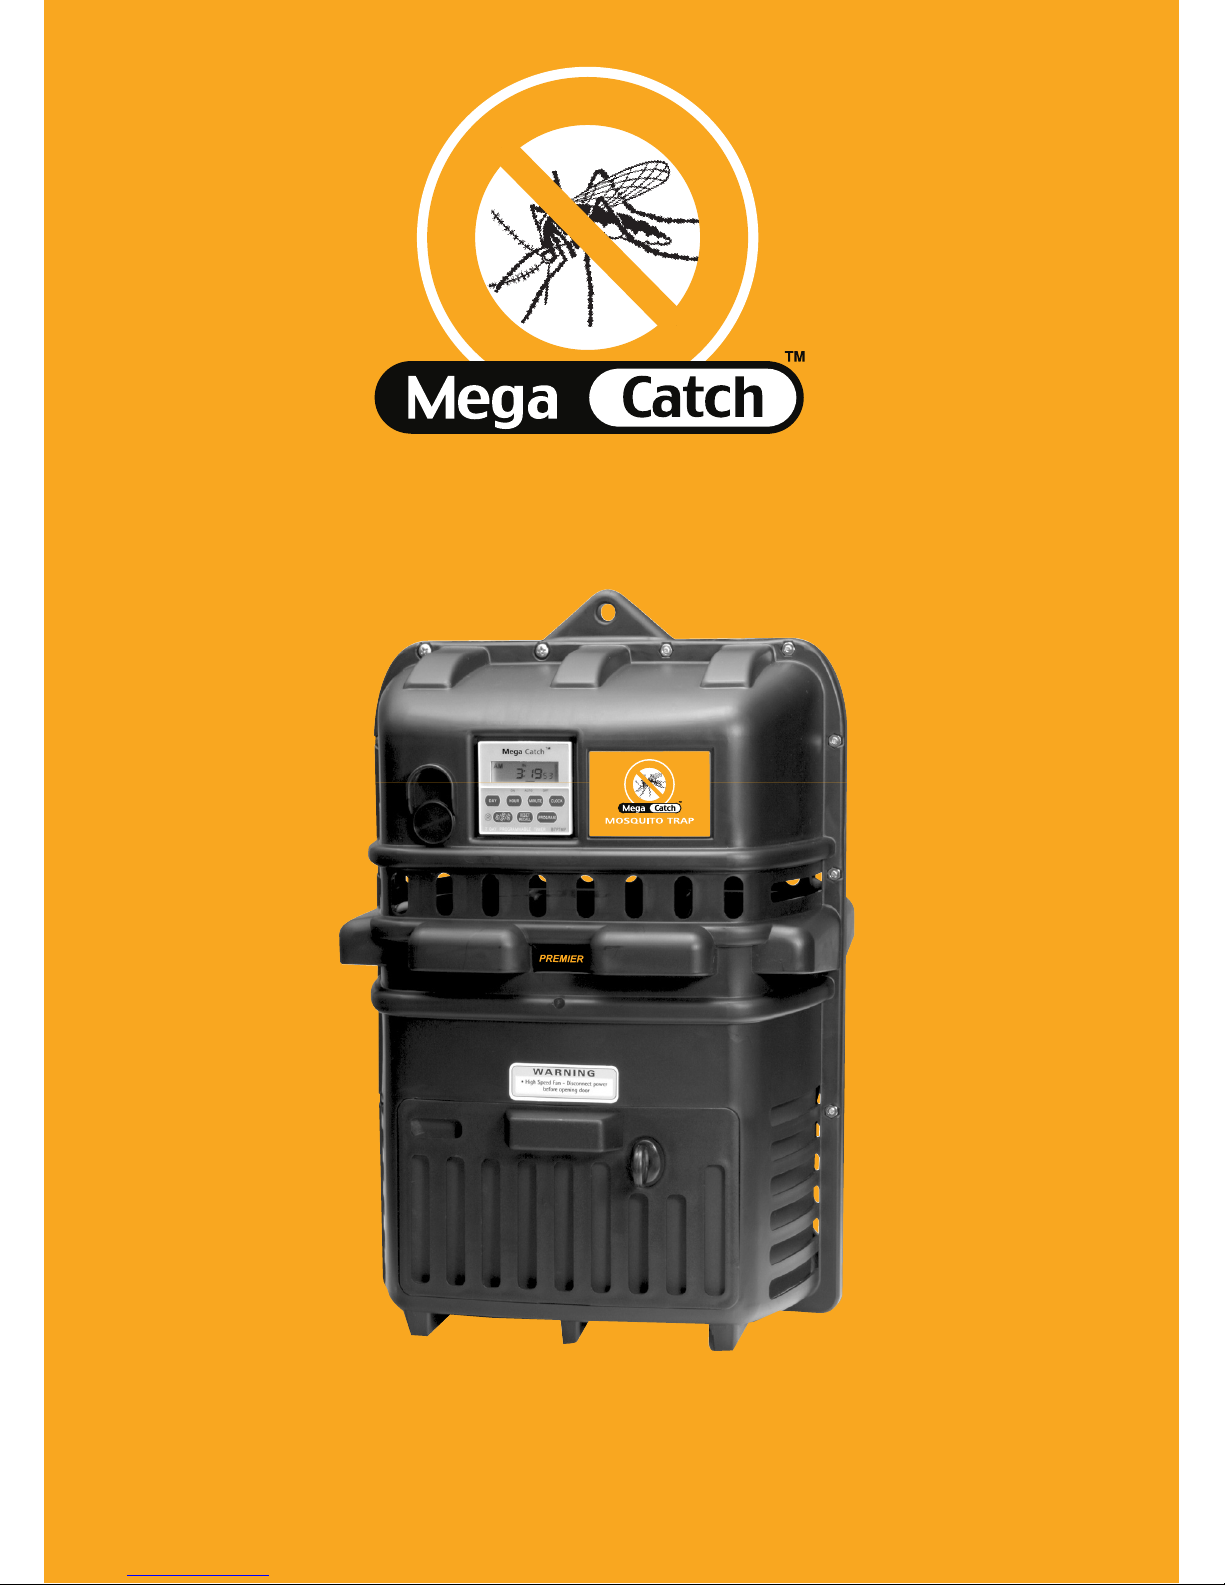
Mosquito Trap
Operation Manual
Premier Model MCP800
Pub. No: Canadian Version P1106

Contents Page
Important Safety Instructions 1
Introduction 2
Features of ega-Catch PRE IER osquito Trap 2
Initial Set Up Instructions 3
What Your ega-Catch osquito Trap Will Do 4
Installing and Siting the ega-Catch osquito Trap 5-6
Stand Assembly Instructions 7
Operation of the Programmable Timer 8-9
osquito Catching Systems 10
Using the Liquid Catch Container 10
Using the Catch Bag 11
Fitting of External Skirt 12-13
Care of Your Trap 13-14
Replacement of U.V. Bulb 14
ega-Catch Octenol Fragrance Strip 15
Optional Accessories 16
aintenance and Repair of Your Trap 17-19
Removal of Timer 20
Frequently Asked Questions 21
Problem Solving 22
Specifications 22
Parts List 23

Important Safety Instructions
1
Do not operate the Trap indoors.
Keep children and pets away from the Trap.
Always disconnect power before cleaning, servicing or inspecting the inside of the
Trap.
To avoid injury from the High-Speed Fan inside the Trap, always disconnect power
before opening the Door. Keep the Door locked and remove the Key while the Trap
is operating.
Plug the Power Cord into a properly grounded electrical outlet protected from
weather.
Do not allow the Trap, Transformer, Power Cord or plug to be immersed in water.
Do not operate the Trap with a damaged Transformer, Power Cord or plug.
Do not use any extension cord other than the Extension Cord supplied with the
Trap.
Ensure Power Cords are placed carefully to avoid causing a tripping hazard.
Ensure the Trap is properly installed in accordance with this operation manual.
Read and follow instructions in this operation manual carefully before operating
the Trap.
Your ega-Catch osquito Trap should be used in conjunction with other sensible
control measures designed to manage mosquito problems:
Eliminate standing water in low spots, ditches, gutters and similar areas.
Empty receptacles that collect water (e.g. bird baths and pot plant saucers).
Reduce breeding sites by keeping grass mown.
osquito netting/screens can be used to provide mosquito-free areas.
Light coloured clothing is less attractive to some mosquito species and if tightly
woven, can give some protection against biting.
DEET is considered the most effective mosquito repellent, but should not be used
too heavily.

Introduction
2
osquitoes have been described as the most dangerous creatures on Earth.
Aedes mosquitoes may carry yellow fever and dengue fever. Culex mosquitoes may carry several
strains of encephalitis (including St. Louis Encephalitis, Eastern Equine Encephalitis and West
Nile Virus), and Anopheles mosquitoes may carry malaria.
ale mosquitoes do not bite. The real risk is from female mosquitoes which bite when in search
of blood to provide protein for their eggs.
Scientific research over the past 50 years has shown that female mosquitoes find their prey
using a combination of sensory cues including light, shape, color, heat, vibration, sweat and
other by-products of human activity.
Using that research and with the benefit of extensive field testing (including tests by the United
States Department of Agriculture in Gainesville, Florida), ega-Catch has developed one of
the worlds most advanced mosquito traps: the ega-Catch PREMIER osquito Trap.
eatures of Mega-Catch PREMIER Mosquito Trap
The ega-Catch PREMIER osquito Trap has been designed for indoor or outdoor use.
(NOTE: when operating the PREMIER Trap indoors, remove the ega-Catch Octenol Fragrance
Strip.)
The PREMIER can operate unattended for long periods. It can be programmed to start and stop
according to peak mosquito activity in your area. It features an electronically controlled diode
lighting system that produces intermittent light at oscillating frequencies selected to coincide
with spectral sensitivity peaks for many mosquito species. It also features a low-intensity U.V.
or black light bulb.
osquitoes attracted to the PREMIER by visual and other cues seek to land on and probe
specially designed surfaces and enter the Trap where they are collected in the Catch Bag or
Liquid Catch Container.

Initial Set Up Instructions
3
Before attempting operation of your PREMIER Trap, follow these instructions:
1. Remove the Trap from the carton.
2. Remove the box containing the Stand from the carton.
3. Assemble the Stand (see Page 7 - Stand Assembly Instructions section).
4. Remove the box marked Accessories from the base of the carton.
5. Fit the External Skirt to the outside of the Trap by sliding the skirt on from the top of
the Trap so that the opening is directly in front of the Door (see Page 12 - itting of
External Skirt section).
Note: Failure to position the Skirt correctly will result in a NIL mosquito catch.
6. Your PREMIER Trap has two mosquito collection methods: a dry-catch system using
a Catch Bag and a wet catch system using a Catch Container. In most circumstances
the wet-catch system offers superior catch performance to the dry-catch system. The
dry-catch system using the Catch Bag is better for mosquito species identification.
7. If you wish to catch mosquitoes using the Catch Bag, then attach the Catch Bag to the
base of the Fan inside the Trap. The Catch Bag has an elastic top to facilitate attachment
(see Page 10 - Mosquito Catching Systems section).
8. If you wish to catch mosquitoes using the wet-catch system, fill the Liquid Catch
Container two-thirds full with fresh water. Add 2 or 3 drops of liquid detergent / soap
to break the surface tension of the water. Also add 3 or 4 teaspoons of a non-diet
(sugar-based) soft drink. Then place the Liquid Catch Container in the Trap using the
locating feet on its base.
9.. Remove the ega-Catch Octenol Fragrance Strip from its pouch being careful not to
touch the exposed holes on its surface. Place the strip inside the Trap (see Page 15 -
Mega-Catch Octenol ragrance Strip section).
Wash your hands after this procedure has been completed.
10. Reinstall the Door by locating the base of the Door in the Trap and then pushing firmly
until Door clicks into place. Lock the Door using one of the two Keys provided with the
Trap and then remove the Key. (NOTE: Removing and reinstalling the door is designed
to require a reasonable amount of force to make it difficult for children.)
11. Hang the Trap from the hook on the Stand in the direction shown in the Stand Assembly
Instructions. To achieve this, hold the Trap in an upright position so that the top of the
Trap is next to the hook on the stand. Then swing the bottom of the Trap outwards
(through an arc of about 45 degrees) and you will see that the top of the Trap will fit
through the gap in the hook. This is a design feature to prevent the Trap falling off the
stand accidentally.

4
What Your Mega-Catch Mosquito Trap Will Do
Your ega-Catch osquito Trap is designed to reduce mosquito populations, but it will not
permanently eliminate them. Operate the ega-Catch osquito Trap daily for several weeks.
Over this time you should notice a decline in mosquito numbers. This means your Trap is doing
its job.
The ega-Catch osquito Trap is not designed to compete with humans in close proximity
eg: at a barbecue. If you are planning an outdoor function, operate the Trap for several days
before the function.
NOTE: Your ega-Catch osquito Trap should be used in conjunction with other sensible
control measures designed to manage mosquito problems.
12. Your PREMIER Trap comes with a low-voltage transformer and a 60-foot (18-meter)
low-voltage extension cord with weatherproof connectors. Plug the extension cord into
the Trap connection turning the connector clockwise until tight. Plug the extension
cord into the transformer cable turning the connector clockwise until tight.
Then plug into the power supply.
(NOTE: The connectors are designed to be a tight fit to ensure that they are weatherproof.)
13. Turn on the power. A display should appear on the face of the Timer. (If it does not,
see Page 8 - Operation of the Programmable Timer section). Set the Timer to "ON" for
continuous running or to "AUTO" to program operating times. See Page 8 - Operation
of the Programmable Timer section for programming instructions.
14. When the Trap is operating, the Fan should be running, the four diode lights should be
flashing intermittently and the U.V. Bulb light should be on. If the Trap is not operating
correctly then re-read these instructions or refer to Page 22 - Problem Solving section
or email us at [email protected].
Installing and Siting the Mega-Catch Mosquito Trap
5
Installation of Trap:
Your osquito Trap comes fully assembled. To install, first follow the instructions on Page 3
- Initial Set Up Instructions section.
The Initial Set Up Instructions assume that you have decided to install your ega-Catch
osquito Trap on the Stand that is supplied with the Trap.
Alternatively you may decide to hang the Trap from a tree or a fixed post using a chain, nylon
rope or wire connected to the attachment hole at the top of the Trap. We recommen a height
of around 3 feet (1 meter) from the ground to the top of the ega-Catch osquito Trap.
However, you may need to adjust the Traps height depending on the type of mosquitoes you
are catching.
Your ega-Catch osquito Trap is supplied with a 60-foot (18-meter) low-voltage extension
cord with weatherproof fittings. To avoid the cord posing a tripping hazard or being damaged,
(e.g. by a lawn mower) we recommend that, if possible, it be placed 2-3 inches (50-75 mm)
underground. This can be easily achieved by using a spade which is inserted into the ground
and moved backwards and forwards to create a shallow slit trench into which the cord can
be pushed before the ground is replaced by standing on the top of the slit trench.
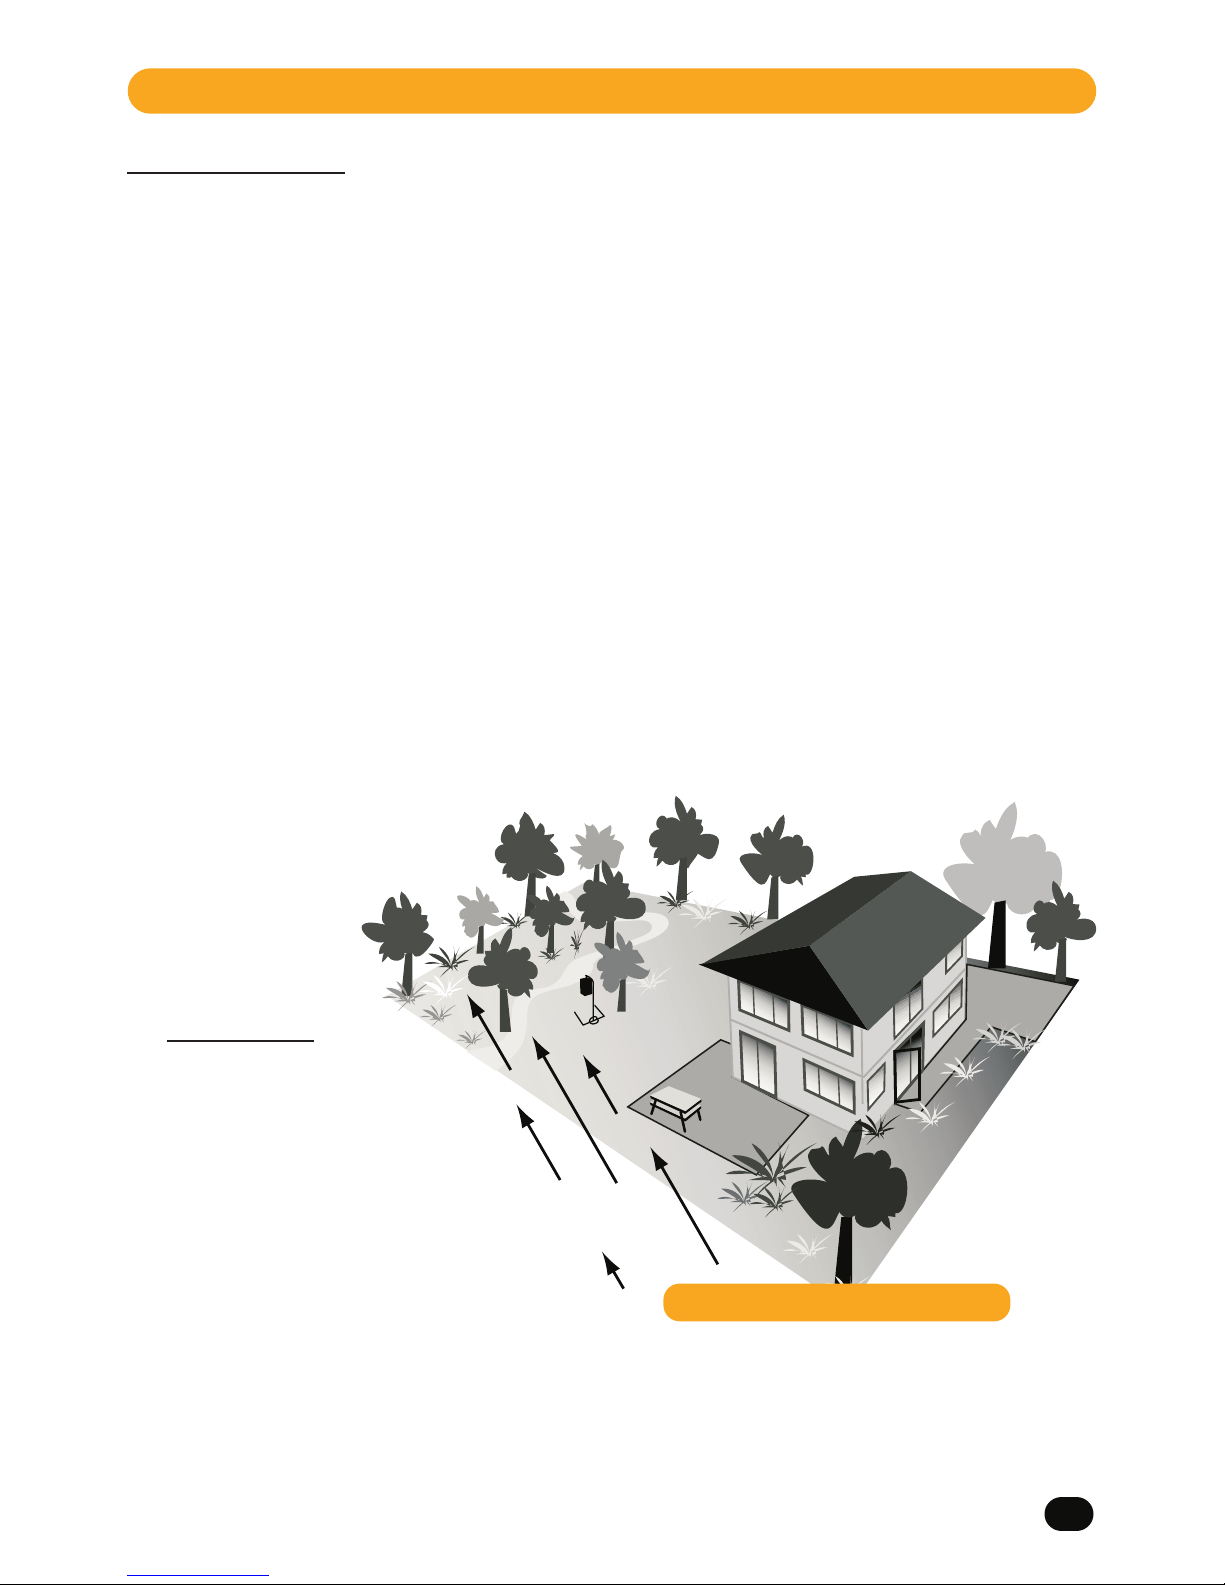
Trap
Prevailing
Wind Direction
osquito
source
Siting of Trap:
For the best performance from your ega-Catch osquito Trap, first determine the source
of the mosquito nuisance ( osquitoes breed in wet areas like streams, marshland,
IG 1 - Trap Positioning

6
wooded areas and gardens). Then use these rules to site the Trap:
Rule 1: Place the Trap between the mosquito source and areas of human activity.
Rule 2: Place the Trap as far away from people and as close to the mosquito source as possible.
(Attract them to the Trap and not to you.)
Rule 3: Place the Trap upwind of the mosquito source but only if you can comply with Rule
1. ( osquitoes sometimes use the wind to navigate.)
Rule 4: Place the Trap in a predominantly shaded area. ( ost mosquitoes avoid direct sunlight.)
Rule 5: Place the Trap in a location protected from rain and strong wind. ( osquitoes dont
fly in strong winds.)
Rule 6: If severe weather conditions are predicted then store the Trap out of the weather.
For maximum stability, point the small "U" shaped leg at the back of the Stand into the
prevailing wind and pin the base to the ground using the wire staples supplied with the Stand.
While your ega-Catch Stand is zinc-plated and powder-coated, when not in use, we
recommend that it be stored out of the weather.
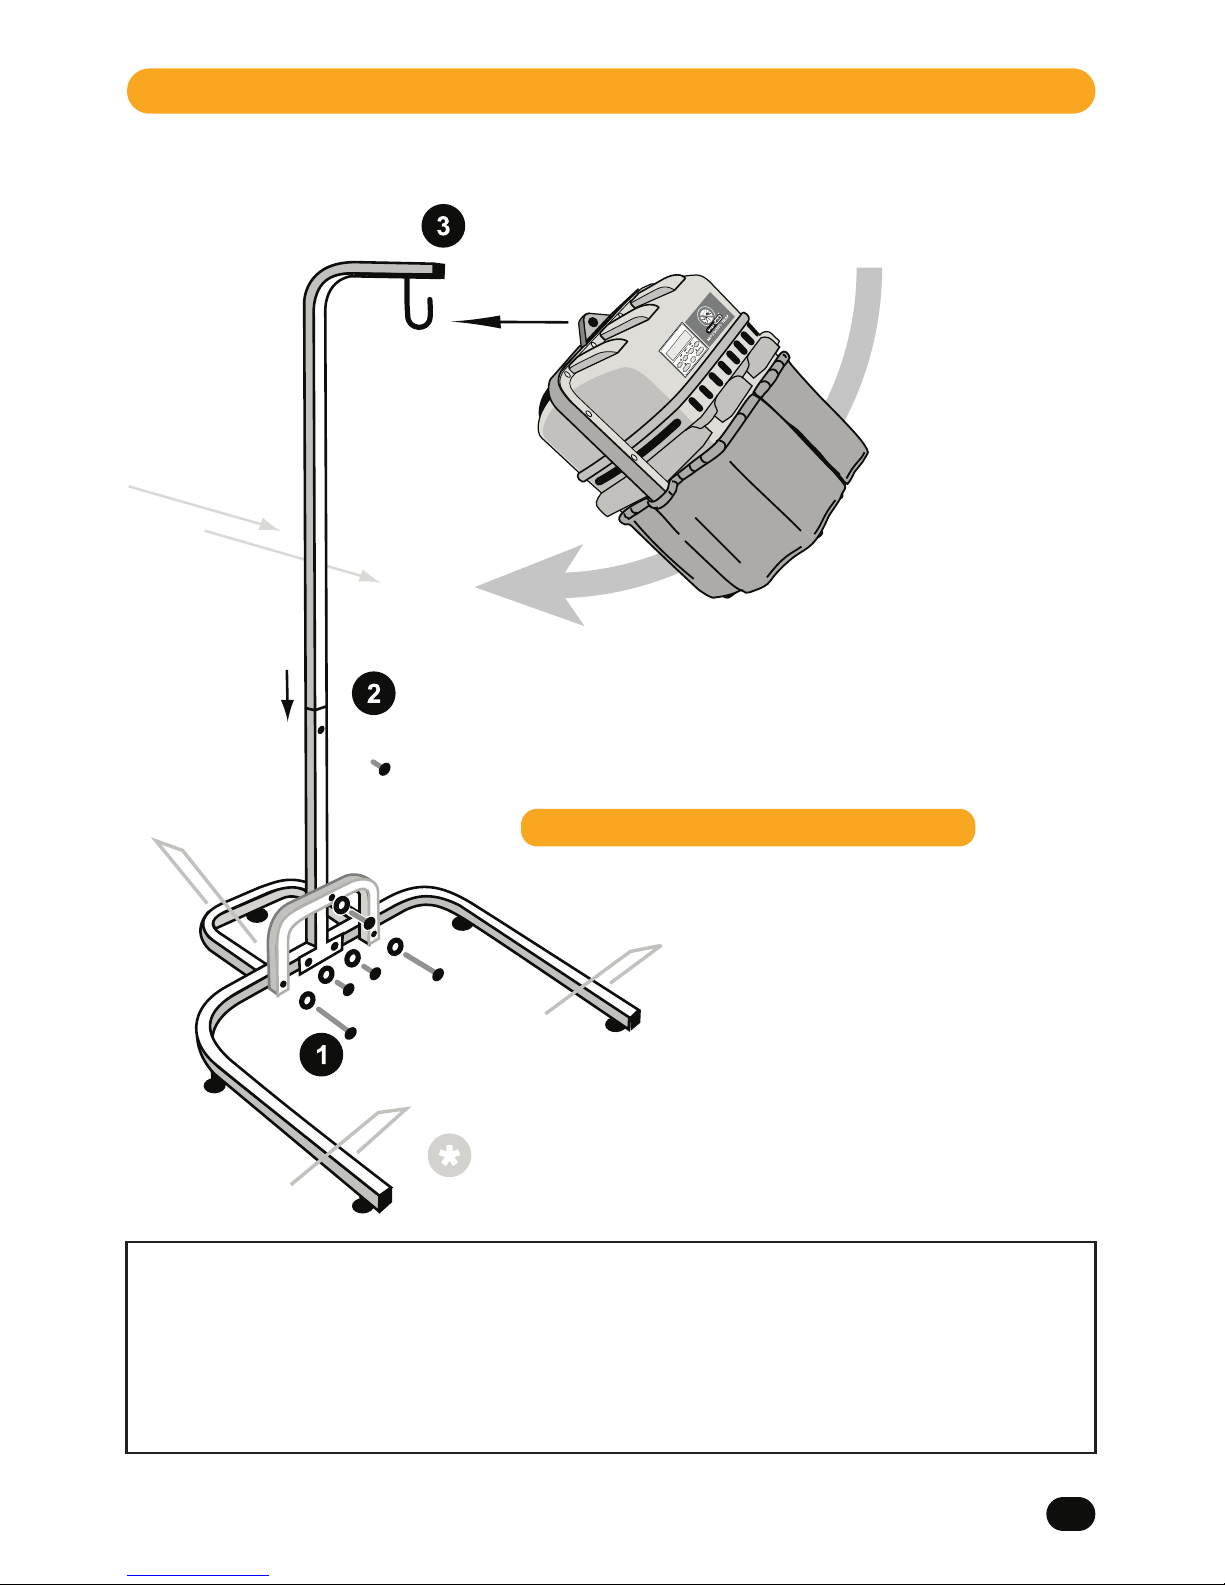
Stand Assembly Instructions
7
To assemble the Stand supplied with the Trap, follow the instructions shown in figure 2 below.
NOTE: For optimum performance place the trap in a predominantly shaded area (located between
your dwelling and the source of the mosquitoes) which is protected from rain and wind. ( osquitoes
do not fly in strong winds or severe weather conditions.)
For maximum stability the 'U' shaped leg at the back of the stand should be pointed in the direction
of prevailing winds. The wire staples supplied with the trap (or a cinder block placed on the back of
the stand) can be used to increase stability.
*
Fit top section over bottom section of upright - then fit bolt
and tighten firmly
Assemble stand base components as illustrated here - fit all bolts and
washers before tightening bolts firmly. Screw feet into bottom of stand base.
3 x 4" Wire staples are supplied to secure frame to ground.
Wind
direction
IG 2 - Trap Assembly Instructions
Fix external skirt then tip the Trap on its side and slide onto hook.
U.S. Design Patent No 449,091

8
Your ega-Catch osquito Trap is equipped with a high tech Programmable Timer. The Timer
enables you to program the Trap to operate at times when mosquitos are most active in your
area.
The timer is equipped with an automatically recharging battery. This battery can operate for
up to three months when fully charged. Your ega-Catch osquito Trap may need several
hours of running to charge up the battery upon initial use.
NOTE: If no display appears on the Programmable Timer when the power is switched on, the
battery may be discharged. To fully recharge the battery, run the Trap for 24 hours.
You can choose to operate the ega-Catch osquito Trap in 3 ways:
1. ON The ega-Catch osquito Trap will run 24 hours a day while connected to a
power source.
2. OFF the ega-Catch osquito Trap will not operate.
3. AUTO you can program when the ega-Catch osquito Trap will start and stop.
Operation of the Programmable Timer
AM
12:33
33
Mega Catch
Fr
R
RESET
RECALL
AM
1
ON
_ _ _ _
Mega Catch
Mo Tu We Th Fr Sa Su
R
RESET
RECALL
IG 3.1
IG 3.2
How to Program:
FIRST SET THE TI E.
To set the day and time, press and hold the CLOCK button while
pressing the DAY or HOUR or INUTE button (as the case
requires). This is the only function that requires two buttons to
be pressed at once.
THEN PRESS PROGRA TO START PROGRA ING.
Start time program 1. Enter start time with HOUR/ INUTE
buttons. For 7 days per week operation select the DAY display,
which shows all 7 days.
For individual day operation select the DAY display desired, e.g.
Su for Sunday.
THEN PRESS PROGRA .
Stop time program 1. Enter stop time with HOUR/ INUTE buttons.
THEN PRESS PROGRA .
Altri manuali per Premier MCP800
2
Indice
Altri manuali Mega Catch Attrezzature per il controllo degli insetti


Manuali Attrezzature per il controllo degli insetti popolari di altre marche


Olimpia electronics
Olimpia electronics RT-52/HACCP Manuale utente

MistAway
MistAway GEN III Manuale

One Stop Gardens
One Stop Gardens SOLAR INSECT KILLER 95500 Guida di riferimento rapido

Dynamic
Dynamic Dynatrap XL Manuale utente

Stinger
Stinger BKC40 Series Manuale per l'uso e la cura

Agrimate
Agrimate AF-4000NK-VM Manuale utente