GRIP PULSE HANDRAILS
ON/OFF SWITCH
CIRCUIT BREAKER
TRANSPORT WHEEL
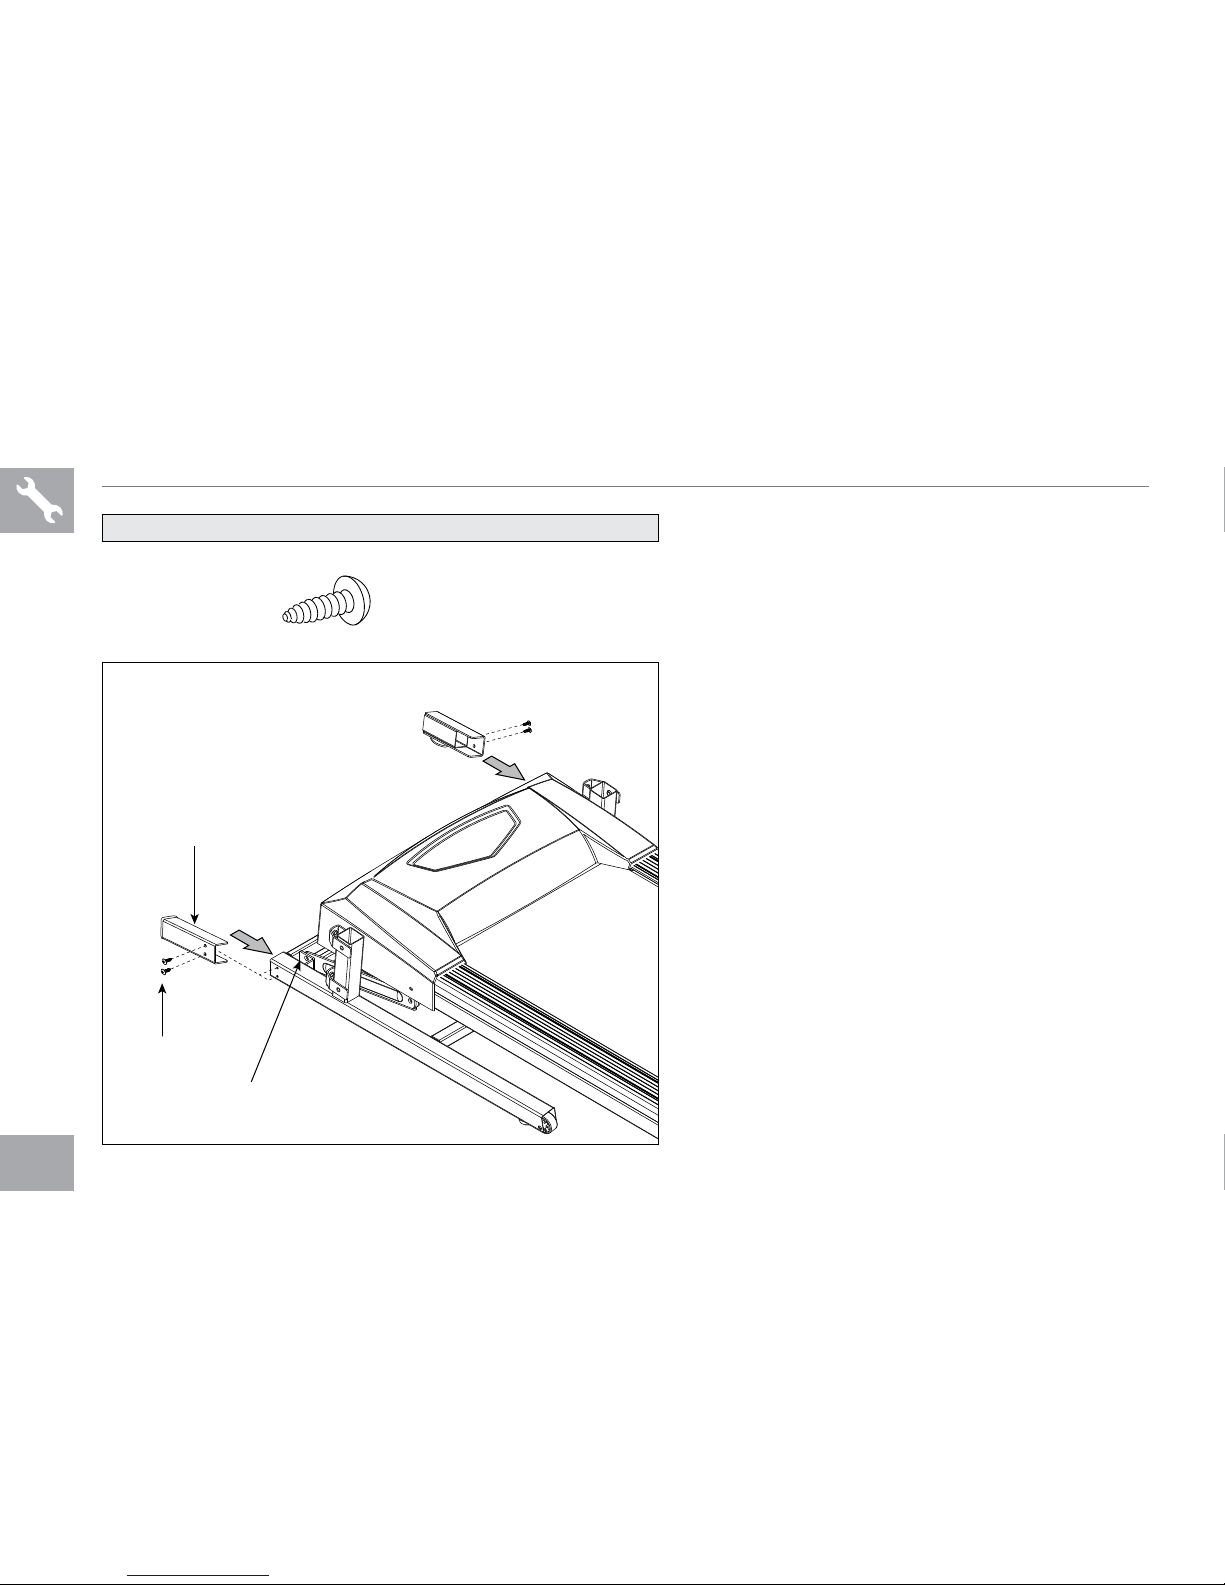
FRAME EXTENSION TUBE
CUSHIONING
POWER CORD
READING RACK
TOUCH PAD PANEL
ATTACH SAFETY KEY CLIP TO CLOTHING BEFORE STARTING. TO
AVOID INJURY, STAND ON THE SIDE RAILS BEFORE STARTING
TREADMILL. READ AND FOLLOW ALL INSTRUCTIONS BEFORE
OPERATING. KEEP CHILDREN AWAY FROM THIS EQUIPMENT.
REMOVE SAFETY KEY WHEN NOT IN USE AND STORE OUT OF
REACH OF CHILDREN. CONSULT A PHYSICIAN BEFORE USING
THIS EQUIPMENT. STOP EXERCISING IF YOU FEEL PAIN, FAINT,
DIZZY OR SHORT OF BREATH. FOR CONSUMER USE ONLY.
WARNING
CAUTION AVERTISSEMENT PRECAUCIÓN
KEEP HANDS AND FEET
AWAY FROM THIS AREA.
GARDER LES MAINS ET LES
PIEDS LOIN DE CETTE REGION.
MANTENGA LAS MANOS Y LOS
PIES LEJOS DE ESTA AREA.
CAUTION AVERTISSEMENT PRECAUCIÓN
HOLD ONTO DECK WHEN
LATCH IS RELEASED.
GARDER LES MAINS ET LES PIEDS
LOIN DE CETTE RÉGION.
SUJETE LA PLATAFORMA
CUANDO VAYA BAJANDO.
WATER BOTTLE HOLDER
CONSOLE
SAFETY KEY PLACEMENT
RUNNING BELT / RUNNING DECK
SIDE RAIL
ROLLER END CAP
CONSOLE MAST
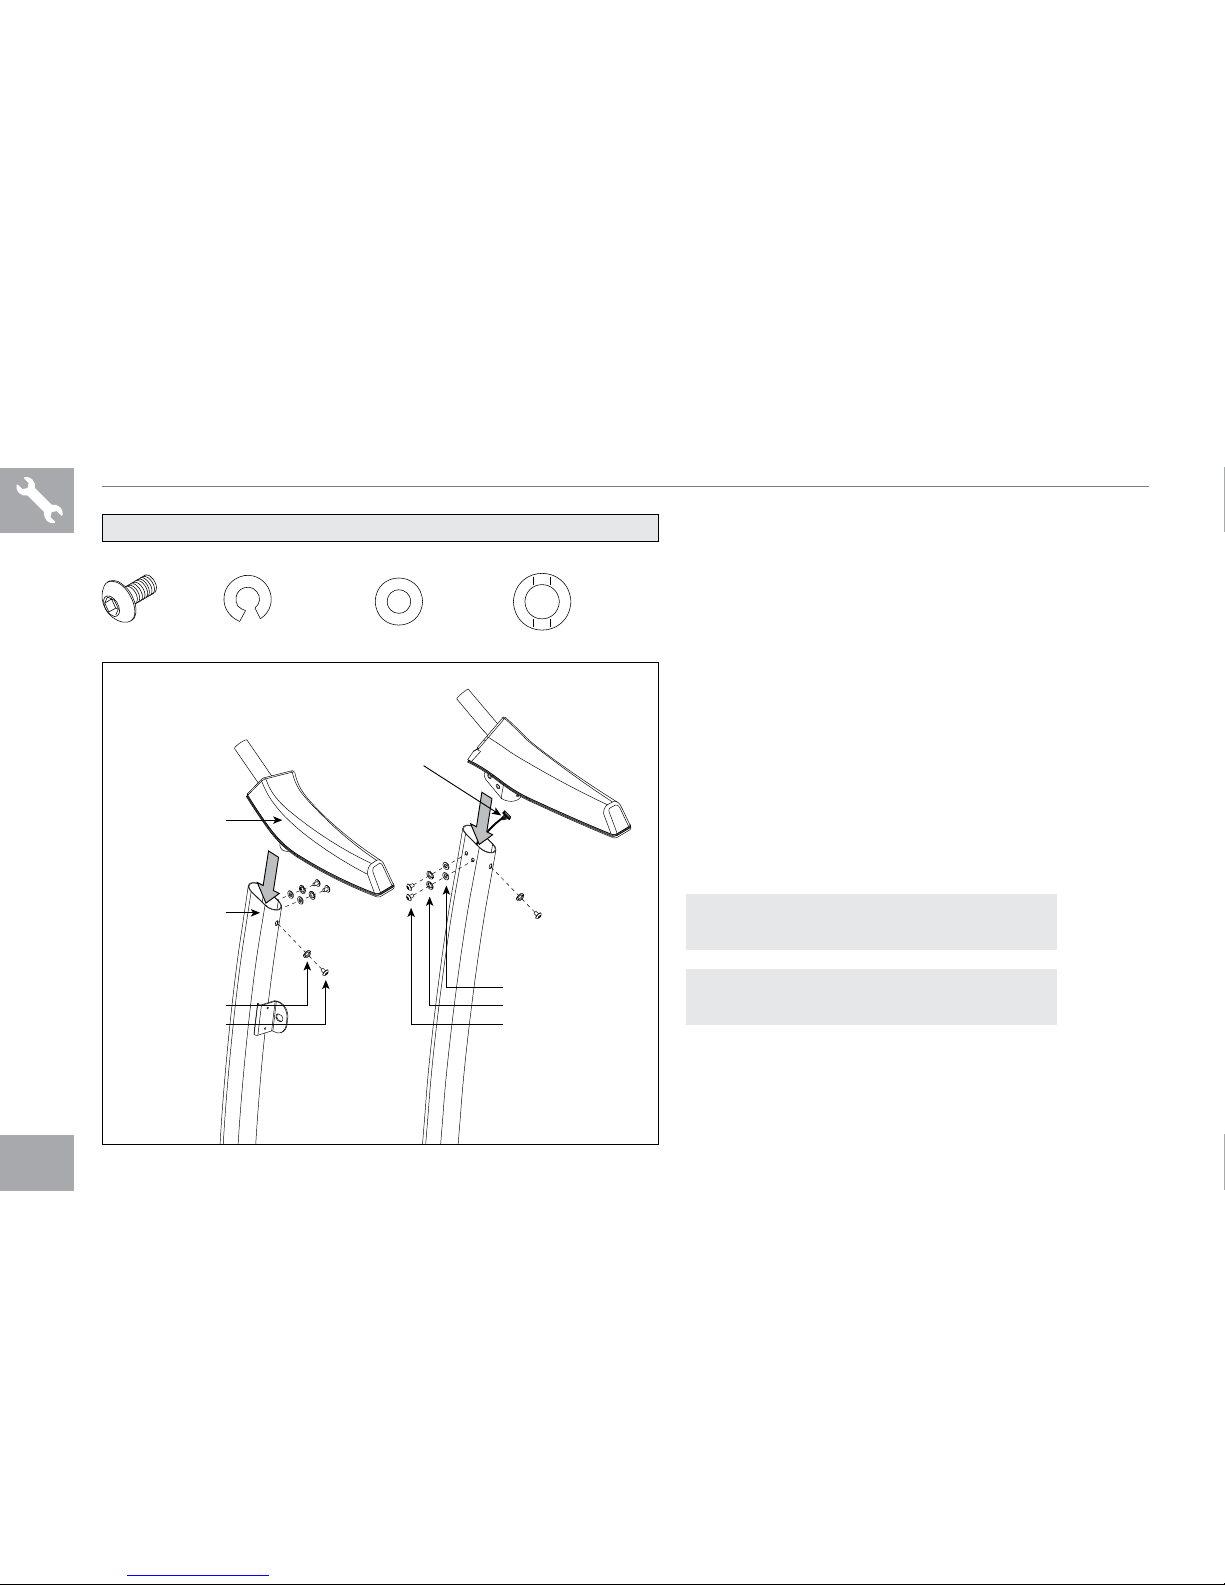
HANDLEBARS
REAR ROLLER
ADJUSTMENT BOLTS
MOTOR COVER
DECK LOCK PIN
SUJETE LA LLAVE DE SEGURIDAD A SU ROPA ANTES DE COMENZAR.
PARA EVITAR ACCIDENTES PARESE EN LO RIELES ANTES DE
COMENZAR. LEA CUIDADOSAMENTE EL MANUAL DE USUARIO Y
CONSULTE A SU MEDICO ANTES DE COMENZAR. MANTENGA EL
PRODUCTO FUERA DEL ALCANZE DE LOS MENORES. QUITE LA LLAVE DE
SEGURIDAD CUANDO NO ESTE EN USO. CONSULTAR CON UN MEDICO
ANTES DE USAR ESTE EQUIPO. SI SIENTE ALGUN DOLOR O FATIGA PARE
DE INMEDIATO. ESTE EQUIPO ES SÓLO PARA EL USO DEL CONSUMIDOR.
ATTACHER LA PINCE DE LA CLÉ DE SÉCURITÉ AUX VÊTEMENTS AVANT DE COMMENCER.
POUR ÉVITER TOUTES BLESSURES, SE TENIR SUR LES RIDELLES AVANT DE DÉMARRER
LE TAPIS ROULANT. AVANT USAGE, LIRE LE GUIDE D’UTILISATEUR. NE PAS LAISSER CET
ÉQUIPEMENT À LA PORTÉE DES ENFANTS. ENLEVER LA CLÉ DE SÉCURITÉ LORSQUE LE
TAPIS ROULANT N’EST PAS UTILISÉ ET LA RANGER HORS DE LA PORTÉE DES ENFANTS.
CONSULTER UN MÉDECIN AVANT D’UTILISER CET ÉQUIPEMENT. ARRÊTER D’UTILISER
L’APPAREIL EN CAS DE DOULEUR, D’ÉVANOUISSEMENT, DE VERTIGE OU
D’ESSOUFFLEMENT. POUR USAGE DOMESTIQUE UNIQUEMENT.
PRECAUCIÓN
AVERTISSEMENT