Osenous P Series Manuale utente

E-mail: amy@osenous.com
Hunting Trail Camera
USER MANUAL
C A U T I O N :
1 . F O R M A T y o u r T F ( ) c a r dm i c r o S D
b e f o r e u s e ;
2 . T F ( m i c r o S D ) c a r d m u s t u n d e r 3 2 G
( 3 2 G i s O K ) .
English 01 08............................................................... -
............................................................ -Francais 09 16
............................................................ -Deutsch 17 24
............................................................. -Español 25 32
............................................................... -日本語 33 40

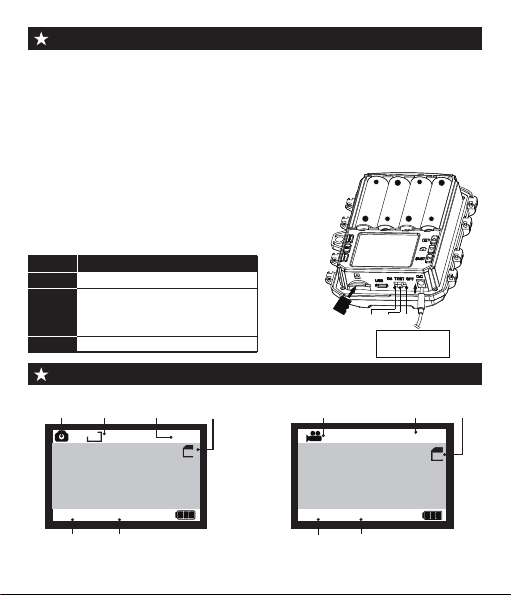
Camera View ( N SERIES )
Camera View ( P SERIES )
1
2
3
4
5
6
7
8
9
10
11
12
13
14
15
17 18 20
16
21
19
1. Night Vision Sensor
2. Infrared LEDs
3. PIR Sensor
4. Microphone
5. LED Indicator
6. Buckle
7. Camera Lens
8. ompartmentBattery С
9. LockHole
. 10 Menu Button
.11 OK Button
. 12 Replay Button
13. Up/Video Button
. 14 Down/Capture Button
15. Shot Button
16. LCD Screen
23
20
17. Micro SD card slot
. 18 USB interface
.19 Switch
(ON/TEST/OFF)
.20 DC IN
21. Strap Hole
22.Hole for A Cable Lock
. 23 Tripod Slot
22
- 1 -

Camera View ( N SERIES )
Camera View ( D SERIES )
5
6
7
8
9
10
11
12
13
14
15
17 18 20
16
21
19
1. Night Vision Sensor
2. Infrared LEDs
3. PIR Sensor
4. Microphone
5. LED Indicator
6. Buckle
7. Camera Lens
8. ompartmentBattery С
9. LockHole
. 10 Menu Button
.11 OK Button
. 12 Replay Button
13. Up/Video Button
. 14 Down/Capture Button
15. Shot Button
16. LCD Screen
23
20
17. Micro SD card slot
. 18 USB interface
.19 Switch
(ON/TEST/OFF)
.20 DC IN
21. Strap Hole
22.Hole for A Cable Lock
. 23 Tripod Slot
22
- 2 -
1
2
3
4

Camera View ( N SERIES )
Camera View ( F SERIES )
21
1. Infrared LEDs
2. Night Vision Sensor
3. PIR Sensor
4. Microphone
5. Buckle
6. Camera Lens
7 Battery С. ompartment
8. LED Indicator
9. LockHole
. 10 Menu Button
.11 OK Button
. 12 Replay Button
13. Up/Video Button
. 14 Down/Capture Button
15. Shot Button
16. LCD Screen
23
20
17. Micro SD card slot
. 18 USB interface
.19 Switch
(ON/TEST/OFF)
.20 DC IN
21. Strap Hole
22.Hole for A Cable Lock
. 23 Tripod Slot
22
- 3 -
3
4
2
1
5
6
7
9
10
11
12
13
14
15
17 18 20
16
19
8

Camera View ( N SERIES )
Camera View ( Q SERIES )
21
1. Night Vision Sensor
2. Infrared LEDs
3. PIR Sensor
4. Microphone
5. LED Indicator
6. Buckle
7. Camera Lens
8. ompartmentBattery С
9. LockHole
. 10 Menu Button
.11 OK Button
. 12 Replay Button
13. Up/Video Button
. 14 Down/Capture Button
15. Shot Button
16. LCD Screen
23
20
17. Micro SD card slot
. 18 USB interface
.19 Switch
(ON/TEST/OFF)
.20 DC IN
21. Strap Hole
22.Hole for A Cable Lock
. 23 Tripod Slot
22
- 4 -
3
4
2
1
6
7
9
10
11
12
13
14
15
17 18 20
16
19
8
5
1. Power Supply
This camera support 2 power supply modes: AA battery and external
power.
1.1 AA battery: Which need 4 pieces 1.5V AA batteries,and make sure
the battery polarityis correct.
1.2 At the bottom of camera, there is external power supply port, which
support DC 6V 1.5A power, power plug size is 3.5X1.35mm.
Camera View ( N SERIES )
Preparation before use
2.InsertingtheMemoryCard
2.1 microSDInstallation of the Class 10 TF( )
card with FAT/FAT32. Support up to 32 G Max.
3.Switch Function Introduction:
Mode
ON
TEST
OFF
Description
1. Normal working ;
1. Custom settings ;
2. Manual shooting ;
3. Check and replay
1.Switch o ffcamera.
Manually shooting or recording under " TEST " mode
- 5 -
TF
+
-
+
-
+
-
+
-
External power
supply
ON TEST OFF
Camera
Image
Mode
Size
Picture
Quantity
TF
Card
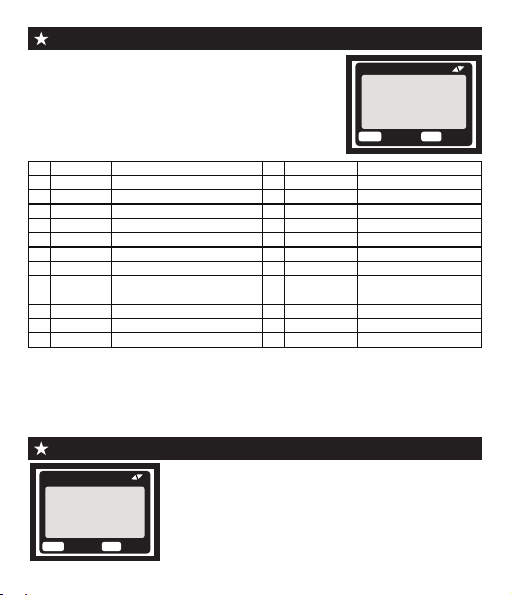
Photograph interface
Date Time
5M
9999
00/00/00 00:00:00
Camera
Image
Video
time
SD
00:00:00
SD
TF
Card
00/00/00 00:00:00
Video interface
Date Time
SD

● Slide the switch to “TEST” position (The screen is on).
● Press Key ▲ or ▼ Key to quickly shift between photographing an
videoing.
● Press Key “SHOT” to take a picture manually or to take a video
manually.
Browse photos/video
Follow steps below to preview photos or videos in your camera:
1.Slide the switch to “TEST” position (The screen is on).
2. Press “PLAY” Key to enter the picture or video interface.
3. Press ▲ Keyand ▼ Key to select the photo or video to preview.
4.When playing a vedio, press “OK” Key to play or pause,press ▲ to
fast forward the video,Press ▼ to fast backward the video.
5. Press “PLAY” Key to exit.
TF card setting
● Slide the switch to “TEST” position (The
screen is on);
● Press "PLAY" to enter TF card browsing →
Press the "MENU" key → Press "OK" to enter
the delete option → Select "One" or "All" and
press "Ok" to confirm → Press “PLAY” key to
exit.
USB cable connection computer precautions
1.Make sure that the switch is on “Test” mode.
2.The memory card cannot be formatted via USB When connected to
computer,only picture/video browsing,copy an delete etc can be done.
3.Before USB connecting,please enter password if the camera has
been set. - 6 -
MENU
Back
OK
Select
Setting
Delete current file
Delete all files
Activate slide show
Write protect
Note:
1."Alarm" and "Matchcode" functions is only available for cameras with
alarm function.
2.Loop Record: When the memory capacity is insufficient, the new video
will overwrite the old video in time sequence.
Setting of "Time Lapse"
Menu Overview (Default parmeters)
● Slide the switch to“TEST”position(The screen
is on);
● Press“Menu”key to enter the setting interface;
● Press ▲, ▼ to scroll through the setting options,
and the “OK” button to confirm the setting;
● Press “MENU” key to exit.
- 7 -
MENU
Back
OK
Select
Setting
Mode
PIR Interval
PIR Level
Capture Num
Video Length
MENU
Back
OK
Select
Time Lapse
Normal
TL video
Off
Mode
PIR Level
PIR Interval
Capture Num
MENU Settings
Photo / Video / Photo+video
Low / Middle / High
1 Photo / 2 Photo / 3 Photo
3 seconds - 10 minutes
Code
1
2
3
4
5
12
8
11
Software
Video Size
Language
Video Length
FW UPDATE / FW VERSION
720P / 1080P /...
6
English, Deutsch, Francais,
Italiano,日本語 ...
MENU Settings
Code
5 seconds - 60 minutes
9Set Clock YY / MM / DD 00:00
10 Stamp
Photo Size 5M / 8M / 12M / 16M /...
13
Time Lapse Normal / TL video / Off
14
Timer Setting
15
Camera Name
16
Security Code
17
18
Alarm
Match code
19
Format
20
Default NO / Yes
21
22
Pairing...
NO / Yes
Audio Recording
ON / OFF
IR LED Power
Auto / Near / Middle / Far
7
Time & date / Date / Off
ON / OFF
Loop Record ON / OFF
ON / OFF
ON / OFF
ON / OFF
If you enable this function, the PIR Sensor of
the camera will be deactivated.
* Normal : According to the "Mode" setting, the
camera will take photos / videos / photo + video in
the time interval you set.

Once all the setting has been done,the camera is ready for field use:
● Mount the camera about 0.5-2m high with the camera pointed at a
slight downward angle.
● Keep the camera facing north or south NOT east or west due to
sunrise and sunset could produce false triggers and overexposed
images.
●Clear all obstructions in front of camera to avoid obscuring
camera lens or PIR sensor.Otherwise, the camera may be
triggered by mistake during windy or hot days.
● In order to avoid false triggers,you should adjust PIR sensitivity
depend on the object or wild animals size, the speed and distance
of the movement.
● Make sure that time and date is correct.
● Make sure that the camera’s mode switch is “ON” mode(before
you leave).
Setting of " TimeSetting "
Setup the camera outdoor
- 8 -
MENU
Back
OK
Select
Timer Setting
Timer Setting
Hr : Min
Start : 00 00
Stop : 00 00
You can enable it to set a working period for
the camera.It will enter the standby mode if the
time is not within the period.
* If the start time is earlier than the current time,
the setting will take effect the next day.
* If the start time is later than the current time,
the setting will take effect on the same day.
* TL vidwo : The camera will take photos at the time interval you set.
These photos will be formed to a video.

1
2
3
4
5
6
7
8
9
10
11
12
13
14
15
17 18 20
16
21
19
1. Capteur de Vision Nocturne
2. LED Infrarouges
3. Capteur PIR
4. Microphone
5. Indicateur LED
6. Boucle de Verrouillage
7. Objectif de la Caméra
8. Compartiment de Piles
9. Trou de Verrouillage
. 10 Bouton MENU
.OK11 Bouton
. 12 Bouton PLAY
13. Bouton supérieur
. 14 Bouton gauche
15. Bouton SHOT
16. écran LCD
23
20
17. Cran TF
. Interface USB18
.Interrupteu19
(ON/TEST/OFF)
.20 Port DC In
21. Trou pour Cble Antivol
22.Trou de Bandoulire
. 23 Tripod Slot
22
- 9 -
Vue d’appareil photo ( SÉRIE P )
Questo manuale è adatto per i seguenti modelli
2
Indice
Lingue:
Altri manuali Osenous Telecamera da ricognizione


