AUDI RNS-E:
PL Naciśnij przycisk CD/TV, pojawi sięmenu dostępnych źródeł. Naciśnij przycisk górna strzałka i dużym
pokrętłem wybierz opcjęTV. Naciśnij pokrętło aby zatwierdzić.
GB Press the CD/TV key, the source menu will indicate. Press the upper right key and turning rotary knob choose
the TV option. For sign this, press rotary knob.
DE Nach dem Sie die CD/TV taste gedrückt haben, erscheint das Quellen Menü. Danach drücken Sie die obere,
rechte Pfeil Taste und mit dem Drehknopf erst wählen und dann bestätingen Sie die Funktion TV.
PL W przypadku gdy na ekranie będąwidoczne zniekształcenia obrazu (nowa nawigacja RNS-E z ekranem HD)
naciśnij i przytrzymaj na 5 sekund przycisk '+' na adapterze, dopóki adapter sięnie zrestartuje.
GB In the case of distortion of the image (new AUDI RNS-E with HD display) , press '+' on the interface for about
5 seconds. Adapter reset and set new parameters of the image.
DE Im Fall der Verzerrung des Bildes (neu AUDI RNS-E mit HD-Display), drücken Sie '+' an der adapter für etwa
5 Sekunden. Adapter zurückgesetzt und neue Parameter des Bildes.
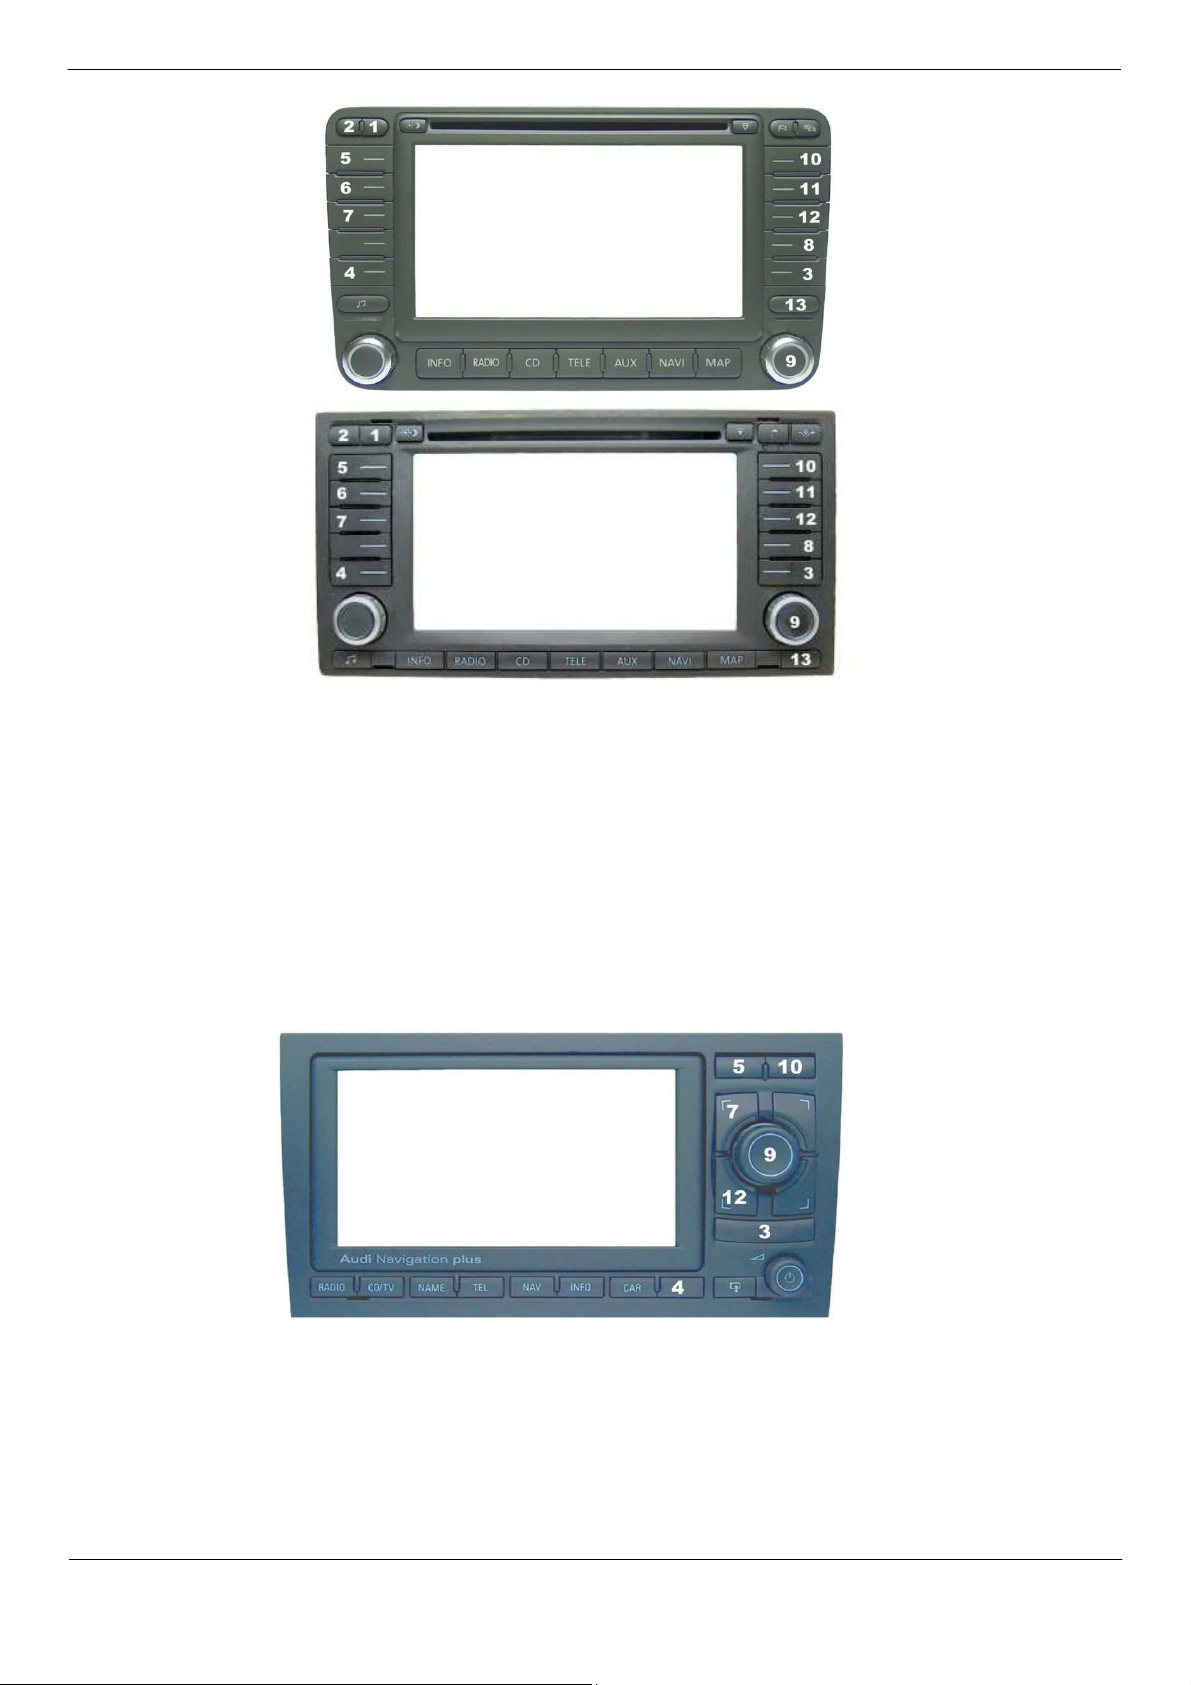
MB COMAND 2.5 :
PL Wybierz opcjęTV. Zamontuj nawigację. Na ekranie będzie widoczny obraz
GB Chose TV button. Build the navi. It will be seen picture on the navi screen.
DE Drücken Sie die Option TV aus Bauen Sie das Navi ein. Auf dem Display erscheint das Bild.
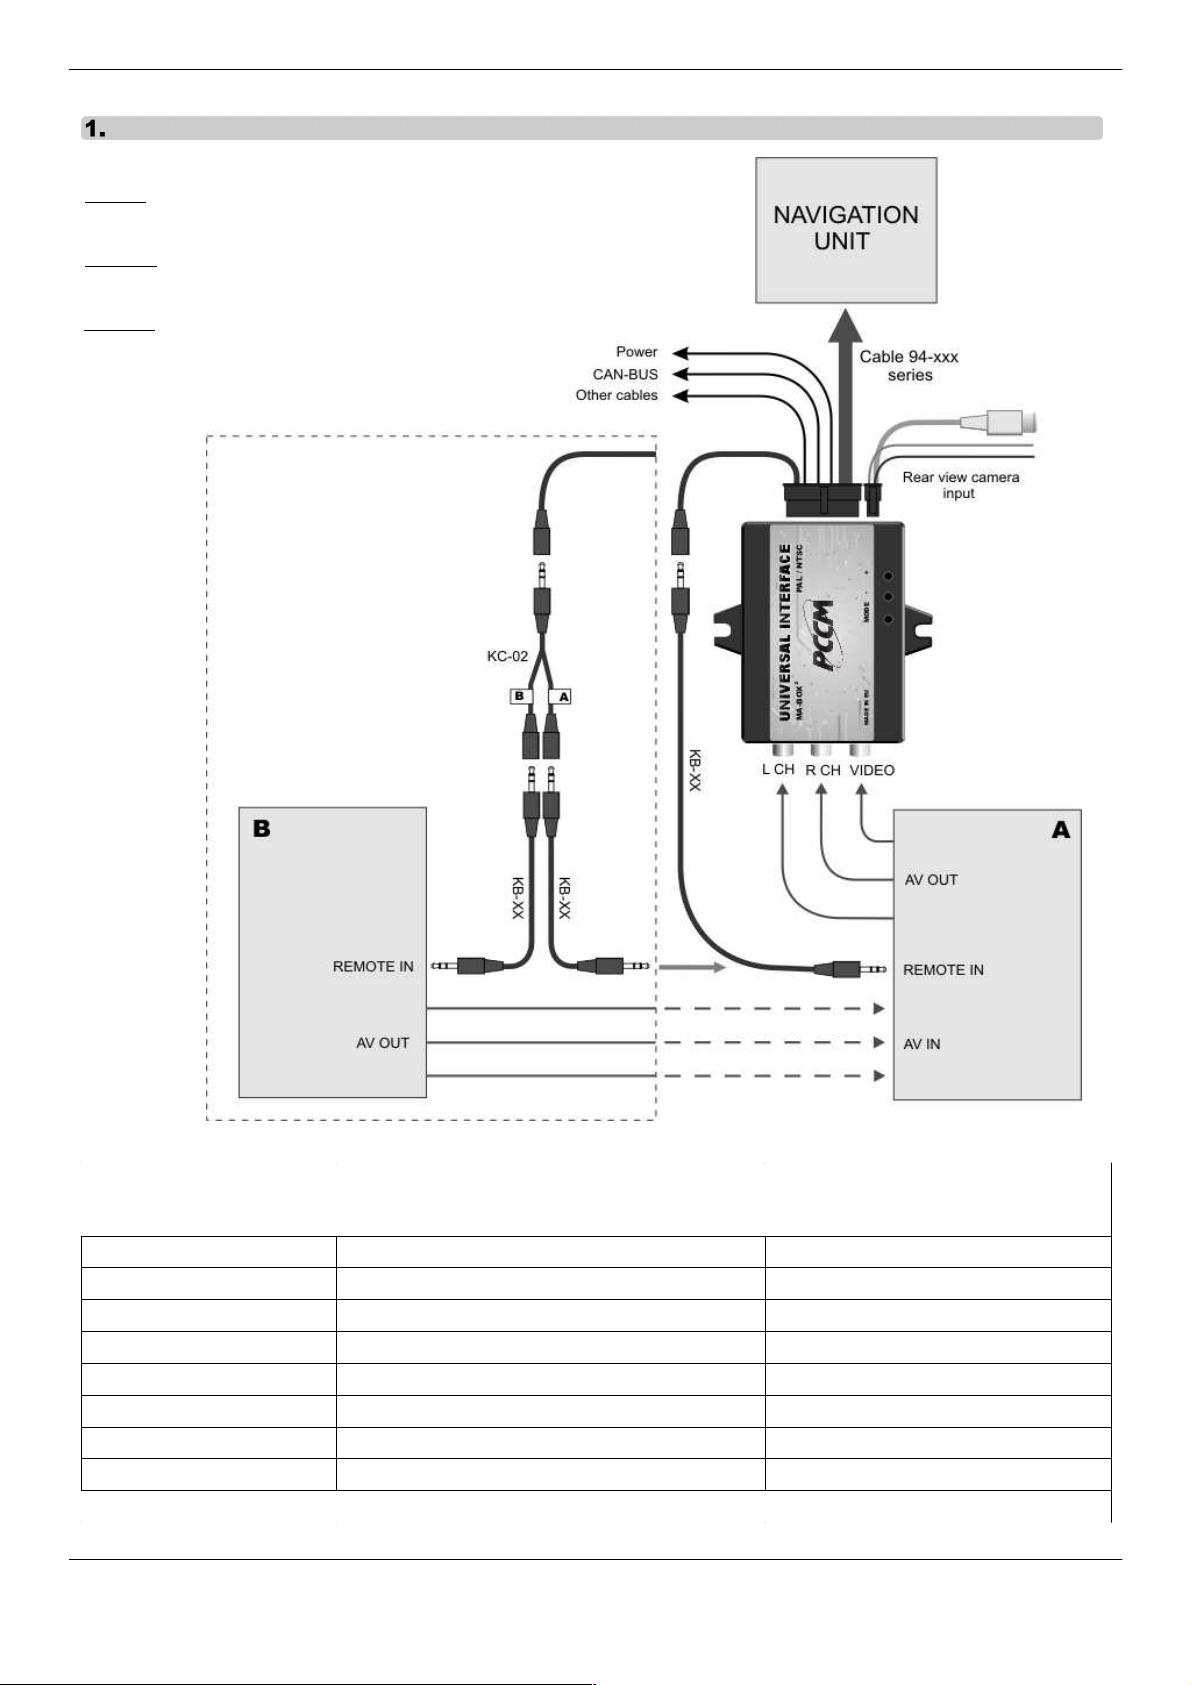
PL Adaptery z okablowaniem 94-210, 94-220, 94-130, 94-230, 94-140, 94-240, 94-150, 94-250 (z CAN-BUS)
Aby zaprogramowaćtryby pracy adaptera naciśnij i przytrzymaj klawisz na nawigacji ( nr [4] – rysunki poniżej ).
Na ekranie pojawi sięMENU. Każde krótkie naciśnięcie pokrętła [9] zmienia opcjęktórąmożna
regulowaćpokręcając pokrętłem: Kontrast →Jasność →Kolor →Zoom H →Urz. A →Urz. B →Kamera →
Zaciemnienie →Kontrast itd. Każda regulacja jest dostępna przez 10 sek. Po tym następuje wyjście z trybu
regulacji. Kody sterujące urządzeniami sąpodane na końcu instrukcji .
Funkcja Kamera ma następujące ustawienia:
CAMERA IN OFF - wejście VIDEO 2 nieaktywne
CAMERA IN 1 - wejście VIDEO 2 wyzwalane przez +12V na fioletowym kablu
CAMERA IN 2 - TYLKO MFD2, RNS2, RNS-E wejście VIDEO 2 wyzwalane sygnałem biegu wstecznego
na magistrali CAN
Adaptery z okablowaniem 94-110, 94-120 (bez CAN-BUS)
Wyreguluj jasność, kontrast i kolor za pomocąprzycisków MODE,+, -. na adapterze. Naciskanie MODE
powoduje wejście w tryby regulacji w kolejności: Kontrast →Jasność →Kolor →Zoom H →Urz. A →Urz. B
→Kamera →Zaciemnienie →Kontrast itd. poprzez klawisze +i -. Każda regulacja jest dostępna przez 10
sek. Po tym następuje wyjście z trybu regulacji.
Funkcja Kamera ma następujące ustawienia:
CAMERA IN OFF - wejście VIDEO 2 nieaktywne
CAMERA IN 1 - wejście VIDEO 2 wyzwalane przez +12V na fioletowym kablu
CAMERA IN 2 - dla kabli 94-110 i 94-120 funkcja niedostępna
GB Adapters with wiring harness 94-210, 94-220, 94-130, 94-230, 94-140, 94-240, (with CAN-BUS)
To program the adapter modes, press and hold button in the navigation No [4] - ( the drawings below). On the
screen appears MENU. Each short pressing the wheel [9] changes the option that you can adjust the turning
knob: Contrast →Brightness →Color →Zoom H →Device A →Device B →Camera in →Blending →
Contrast, etc. Each of regulation is posibble for 10sec. After this time adjustment is not available.
Device control codes are listed at the end of manual.
CAM function has the following settings:
CAMERA IN OFF - VIDEO 2 input inactive
CAMERA IN 1 - VIDEO 2 input triggered by a +12 V to purple cable
CAMERA IN 2 - ONLY MFD2, RNS2, RNS-E VIDEO 2 input trigger back gear on the CAN BUS
Adapters with wiring harness 94-110, 94-120 (without CAN-BUS)
Adjust brightness, contrast and colour with a switch MODE, +, -at adapter. By pressing MODE can adjust of
order : Contrast →Brightness →Color →Zoom H →Device A →Device B →Camera in →Blending →
Contrast, etc. trought +, -Each of regulation is posibble for 10sec. After this time adjustment is not available.
7