SMK-Link VersaPoint Manuale utente
User’s Manual
VersaPoint Wireless Slim Desktop Suite

Page 2
Regulatory Compliance
This device complies with Part 15 of the FCC Rules. Operation is subject to the
following two conditions: (1) This device may not cause harmful interference, and
(2) This device must accept any interference received, including interference that
may cause undesired operation.
FCC Certication
This equipment has been tested and found to comply with the limits for a Class B
digital device, pursuant to Part 15 of the FCC rules. These limits are designed to
provide reasonable protection against harmful interference when the equipment
is operated in a residential installation. This equipment generates, uses and
can radiate radio frequency energy and, if not installed and used in accordance
with the instructions, may cause harmful interference to radio communications.
However, there is no guarantee that interference will not occur in a particular
installation. If this equipment does cause harmful interference to radio or
television reception, which can be determined by turning the equipment off and
on, the user is encouraged to try to correct the interference by one or more of the
following measures:
Reorient or relocate the receiving antenna.
Increase the separation between the equipment and receiver.
Consult the dealer or an experienced radio/TV technician for help.
Notice: Any changes or modications not expressly approved by the party
responsible for compliance could void the user’s authority to operate the
equipment. Extension cables are not recommended, if used, they must be shielded
in order to comply with the emission limits.
IC Certication
The term “IC” before the certication/registration number only signies that the

Page 3
Industry Canada technical specications were met.
Declaration of conformity
Hereby, SMK-LINK Electronics, Inc. declares that this VersaPoint Wireless Slim
Desktop Suite is in compliance with the essential requirements and other relevant
provisions of Directive 1999/5/EC. All trademarks and registered trademarks
mentioned in this document are the property of their respective owners.
Features and specications are subject to change without notice.
© 2010 SMK-LINK Electronics, Inc.

Page 4
System Requirements
Hardware: Notebook or Desktop computer system with 1 USB
port
Operating System: Windows XP, Vista or Windows 7
Package Contents
Wireless keyboard
Wireless mouse
USB receiver dongle
4 AAA Alkaline batteries (2 for the keyboard, 2 for the mouse)
User’s manual
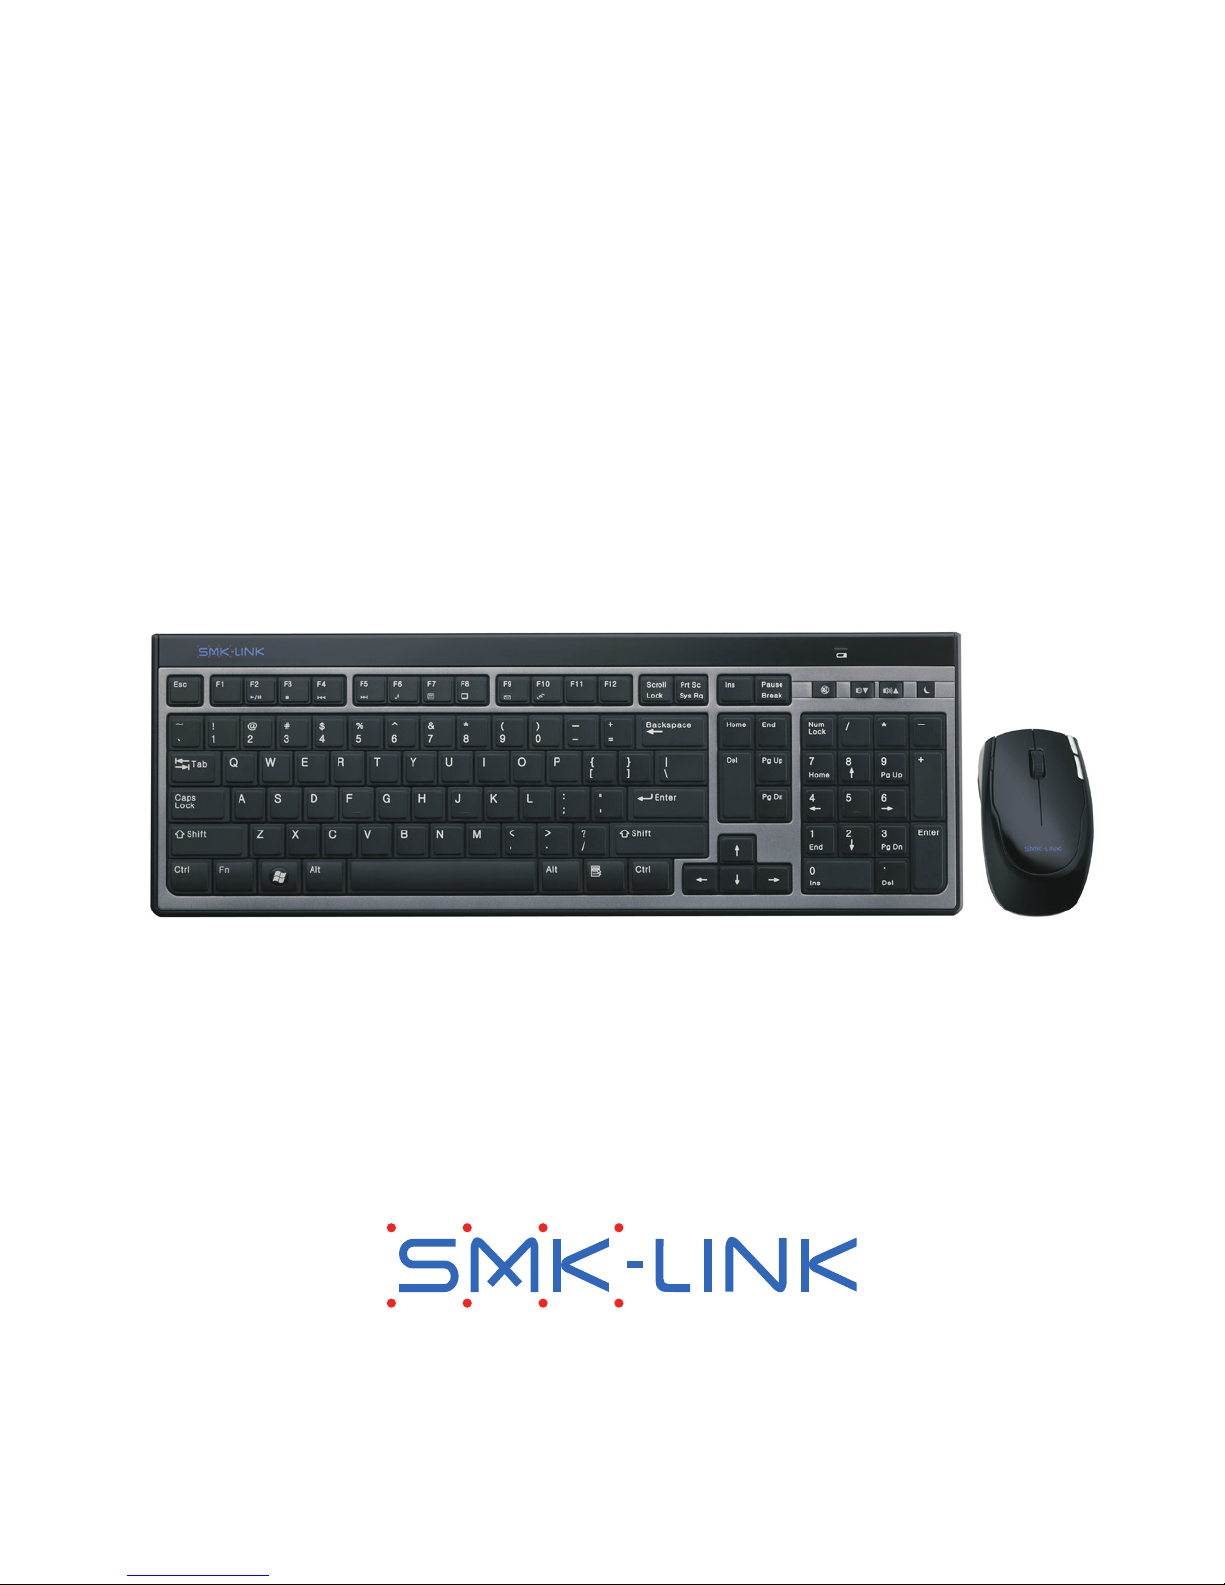
Installing Keyboard
Remove the battery cover located at the bottom of the
keyboard.
Insert the 2 supplied AAA batteries into the battery
compartment.
Make sure the positive (+) and negative (-) ends of the
batteries match the polarity markings inside the battery
compartment.
Snap the battery cover back into position, the keyboard is
ready to work.
•
•
•
•
•
•
•
•
•
•
•
Page 5
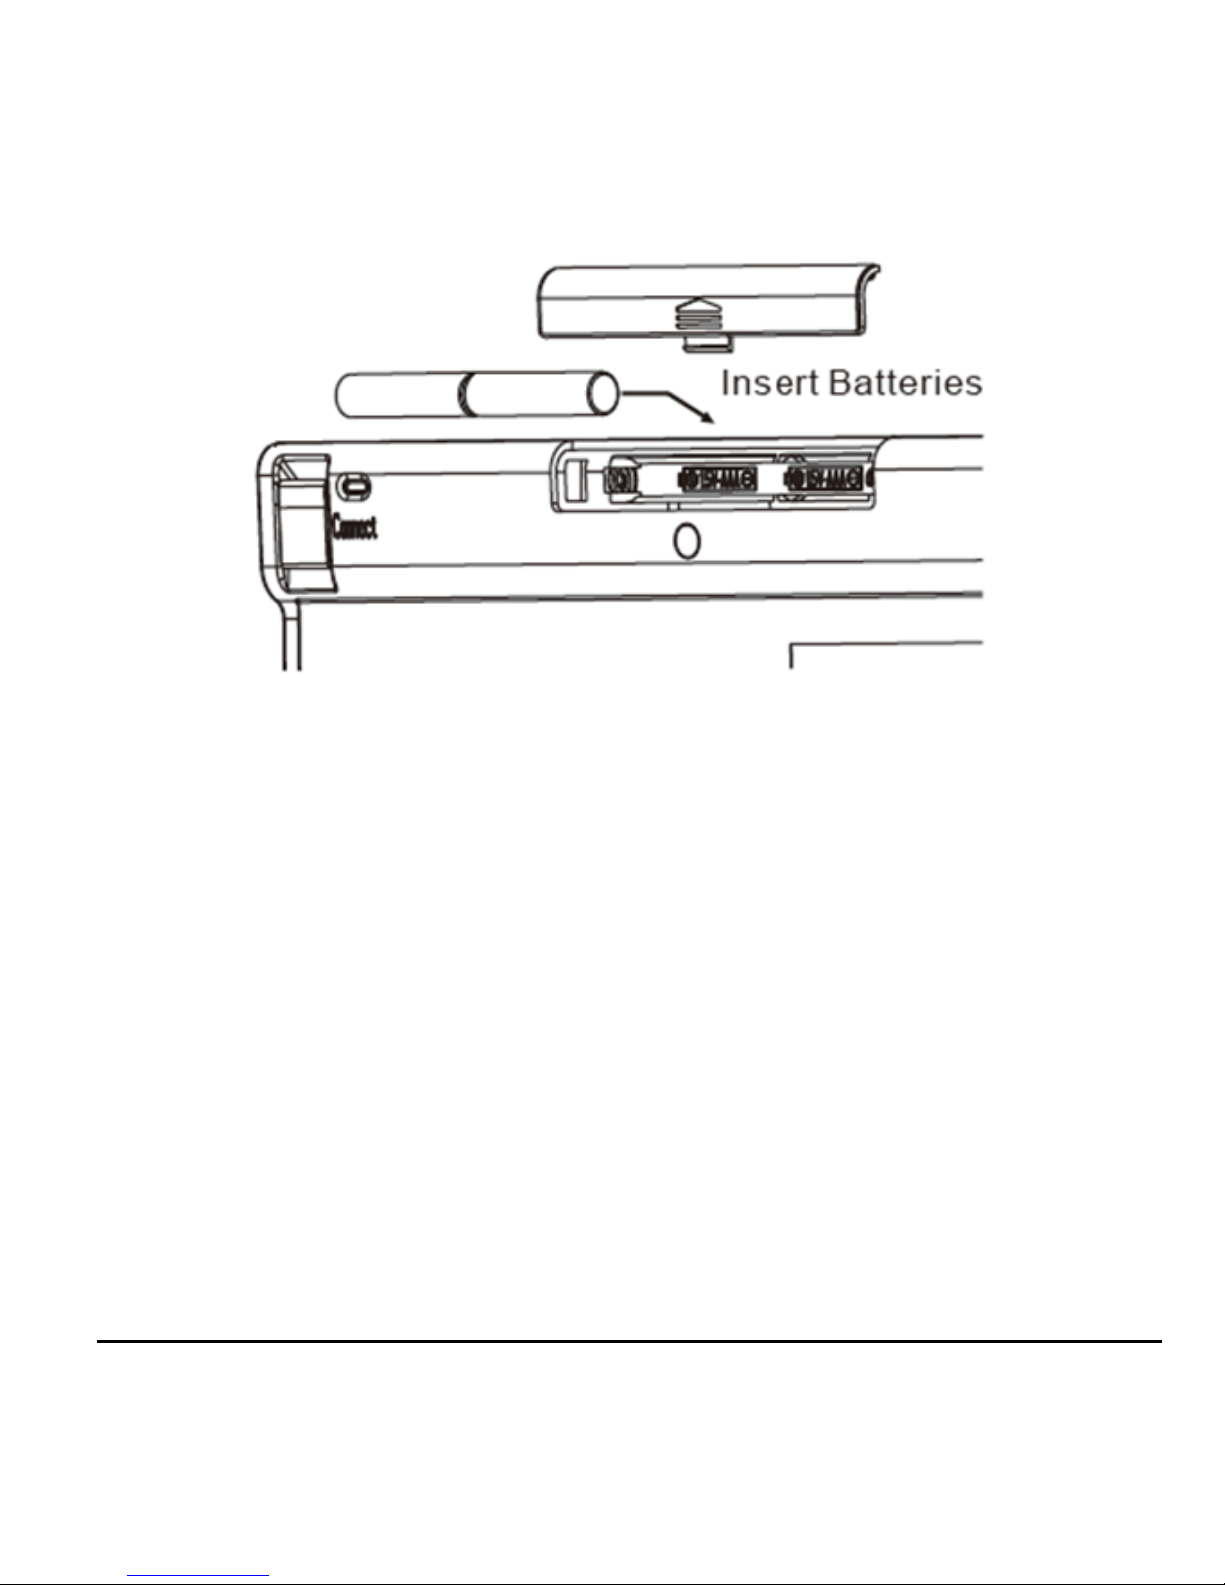
Keyboard Battery Installation
Installing the mouse
Remove the battery cover located at the bottom of the mouse.
Insert the 2 supplied AAA batteries into the battery
compartment.
Make sure the positive (+) and negative (-) ends of the
batteries match the polarity markings inside the battery
compartment.
Snap the battery cover back into position.
•
•
•
•
Page 6
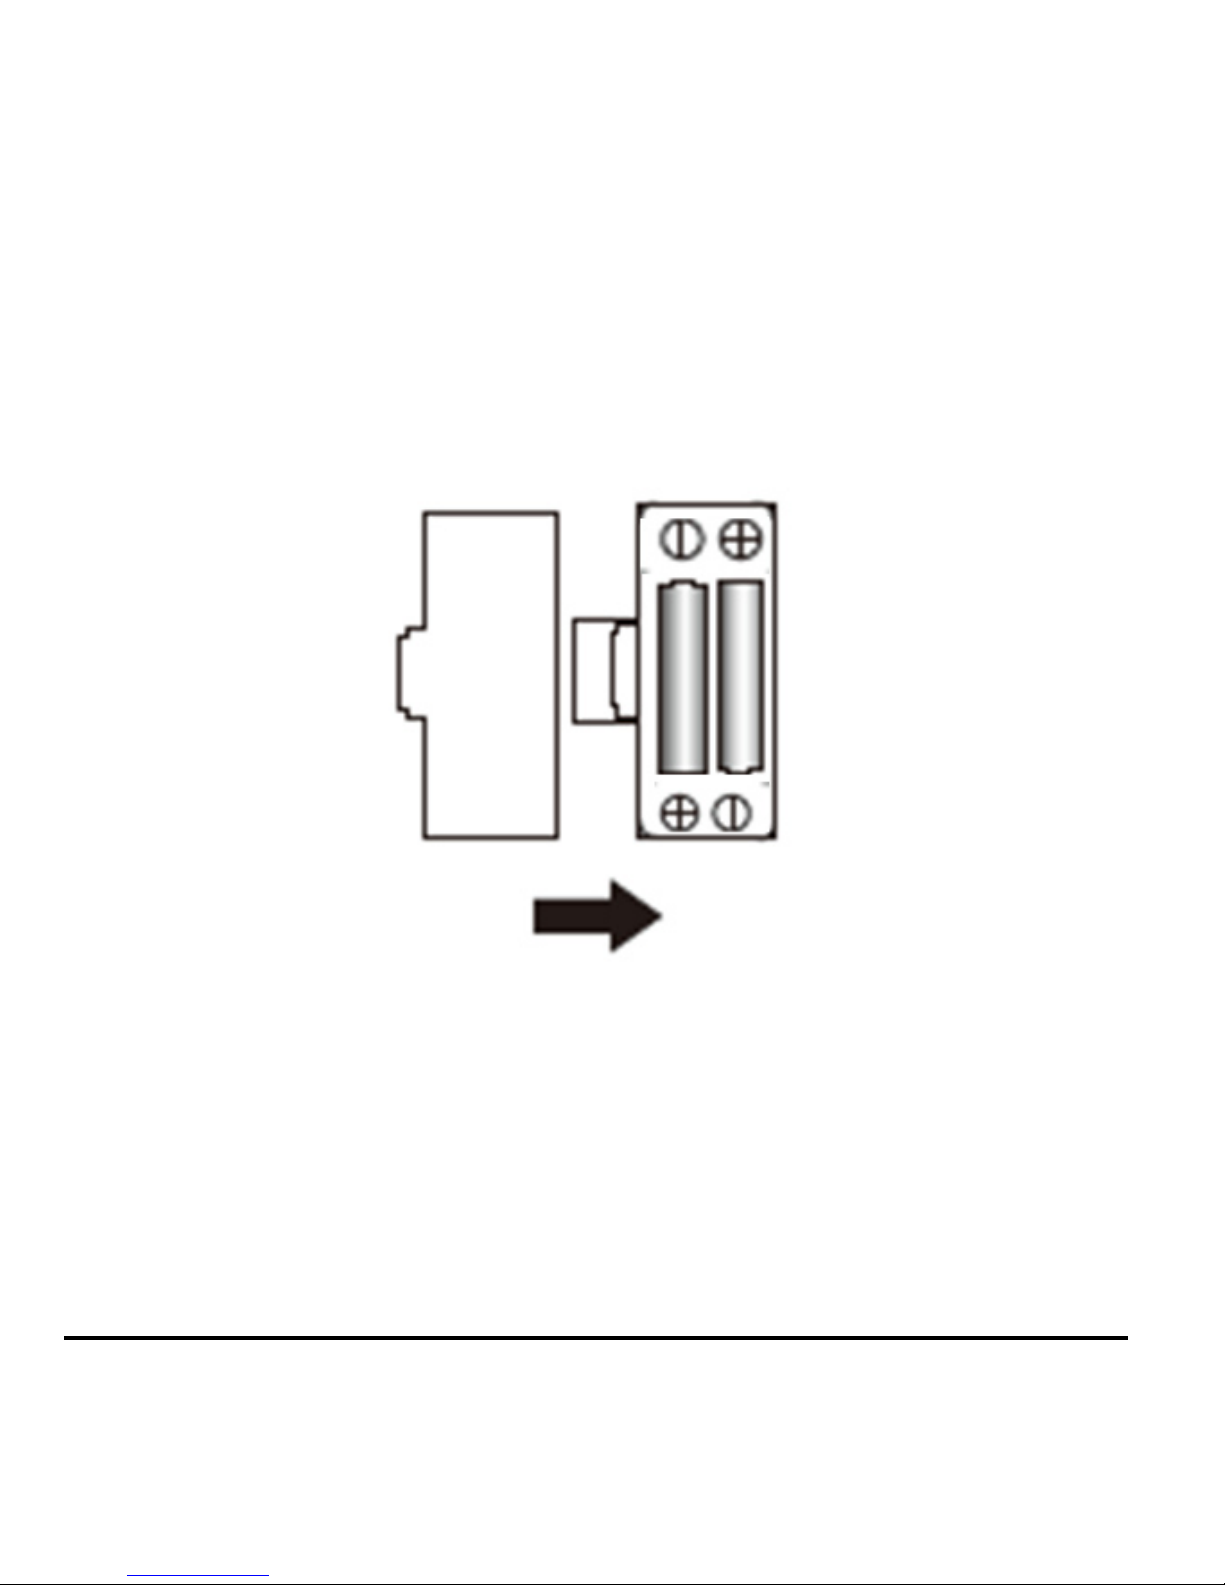
Turn on the power switch which is located next to the battery
cover. The optical sensor emits a red light and the mouse is
ready to work. (Caution: do not stare directly on the optical
light as the light may be harmful to the eye.)
•
Mouse Battery Installation
Page 7
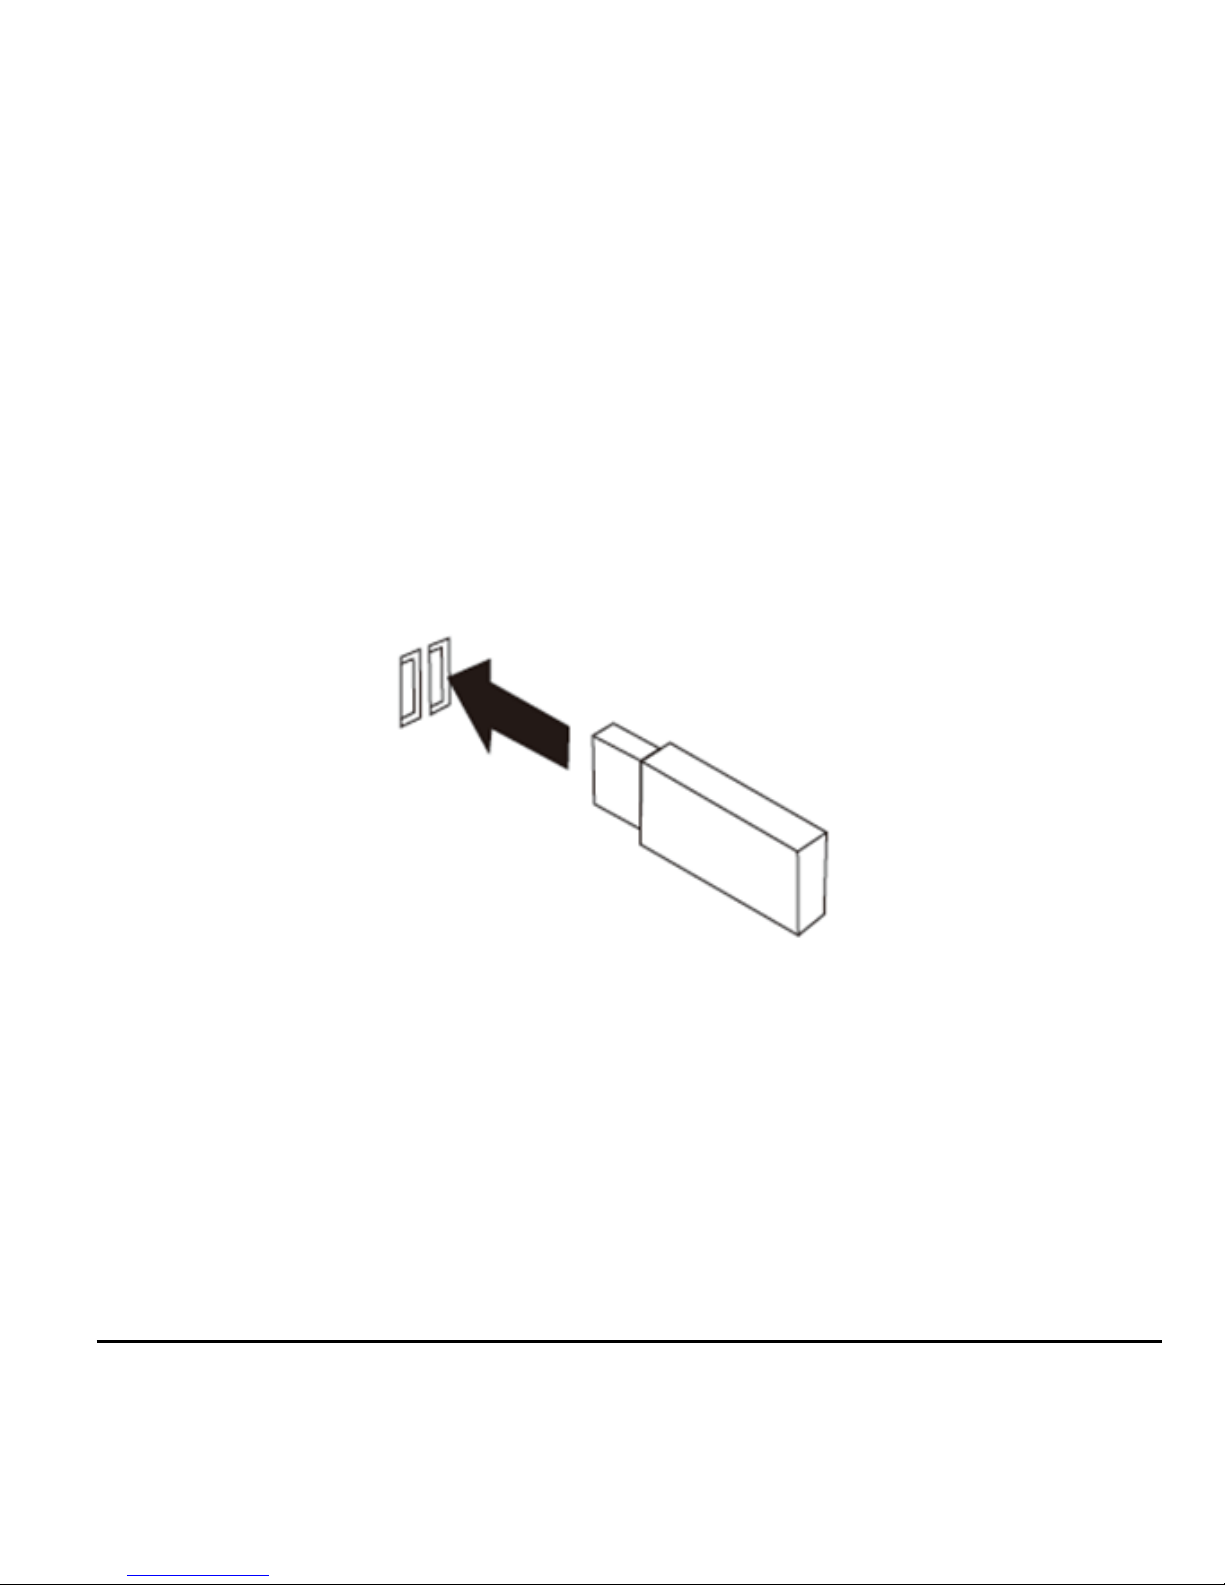
Connecting the Keyboard & Mouse to the
Computer
Plug the USB receiver dongle into an available USB connector
on the notebook or desktop computer. Wait for the system to
detect new hardware and run through auto-install process in
the OS.
The USB receiver is pre-synchronized to the keyboard and
mouse at the factory for your convenience. The keyboard and
mouse should be functioning now. (Hint: remember to turn on
the mouse by placing the power switch located at the bottom of
the mouse to “On” position.)
If, for any reason, the keyboard and mouse are not connected
to the system, or there’s interference in the vicinity, you may
•
•
•

Page 8
reset the connection by doing the following:
Reconnect the keyboard: press and hold the “Connect” button
located at the bottom of the keyboard for 3 seconds. The
receiver dongle LED light blinks to indicate successful pairing.
Reconnect the mouse: pressing both left and right mouse
buttons simultaneously for 3 seconds. The receiver dongle
LED light blinks to indicate successful pairing.
Please note that there’s no “Connect” button on the receiver
dongle. This product is designed with the latest RF connection
technology and the receiver is set to automatically scan and
synchronize with the keyboard and mouse when the computer
is powered on.
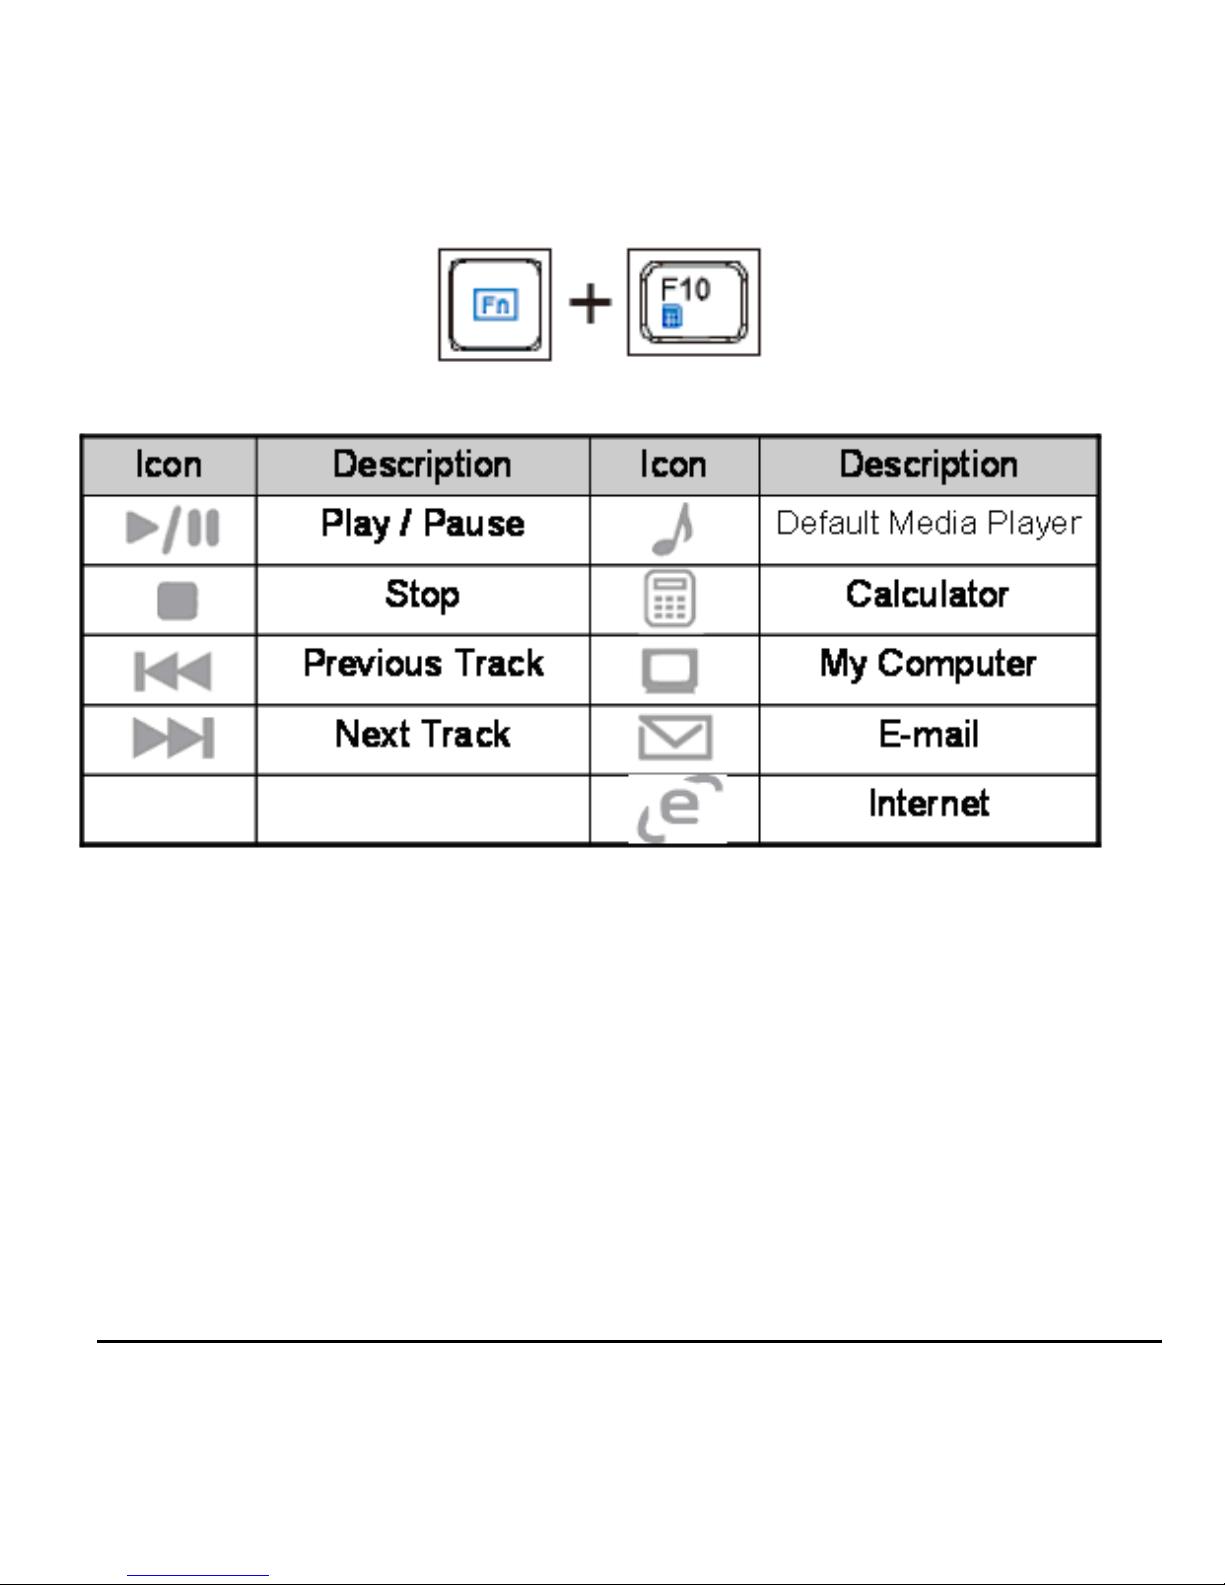
Operating Instructions
Using the Keyboard
This keyboard comes with the standard 104-key QWERTY layout
in US English. It also features 8 media control function keys and
4 hot keys to enhance productivity.
To use the 8 media control function keys: press “Fn” and one of
the media control function keys.
*
*
*
•
•
Page 9
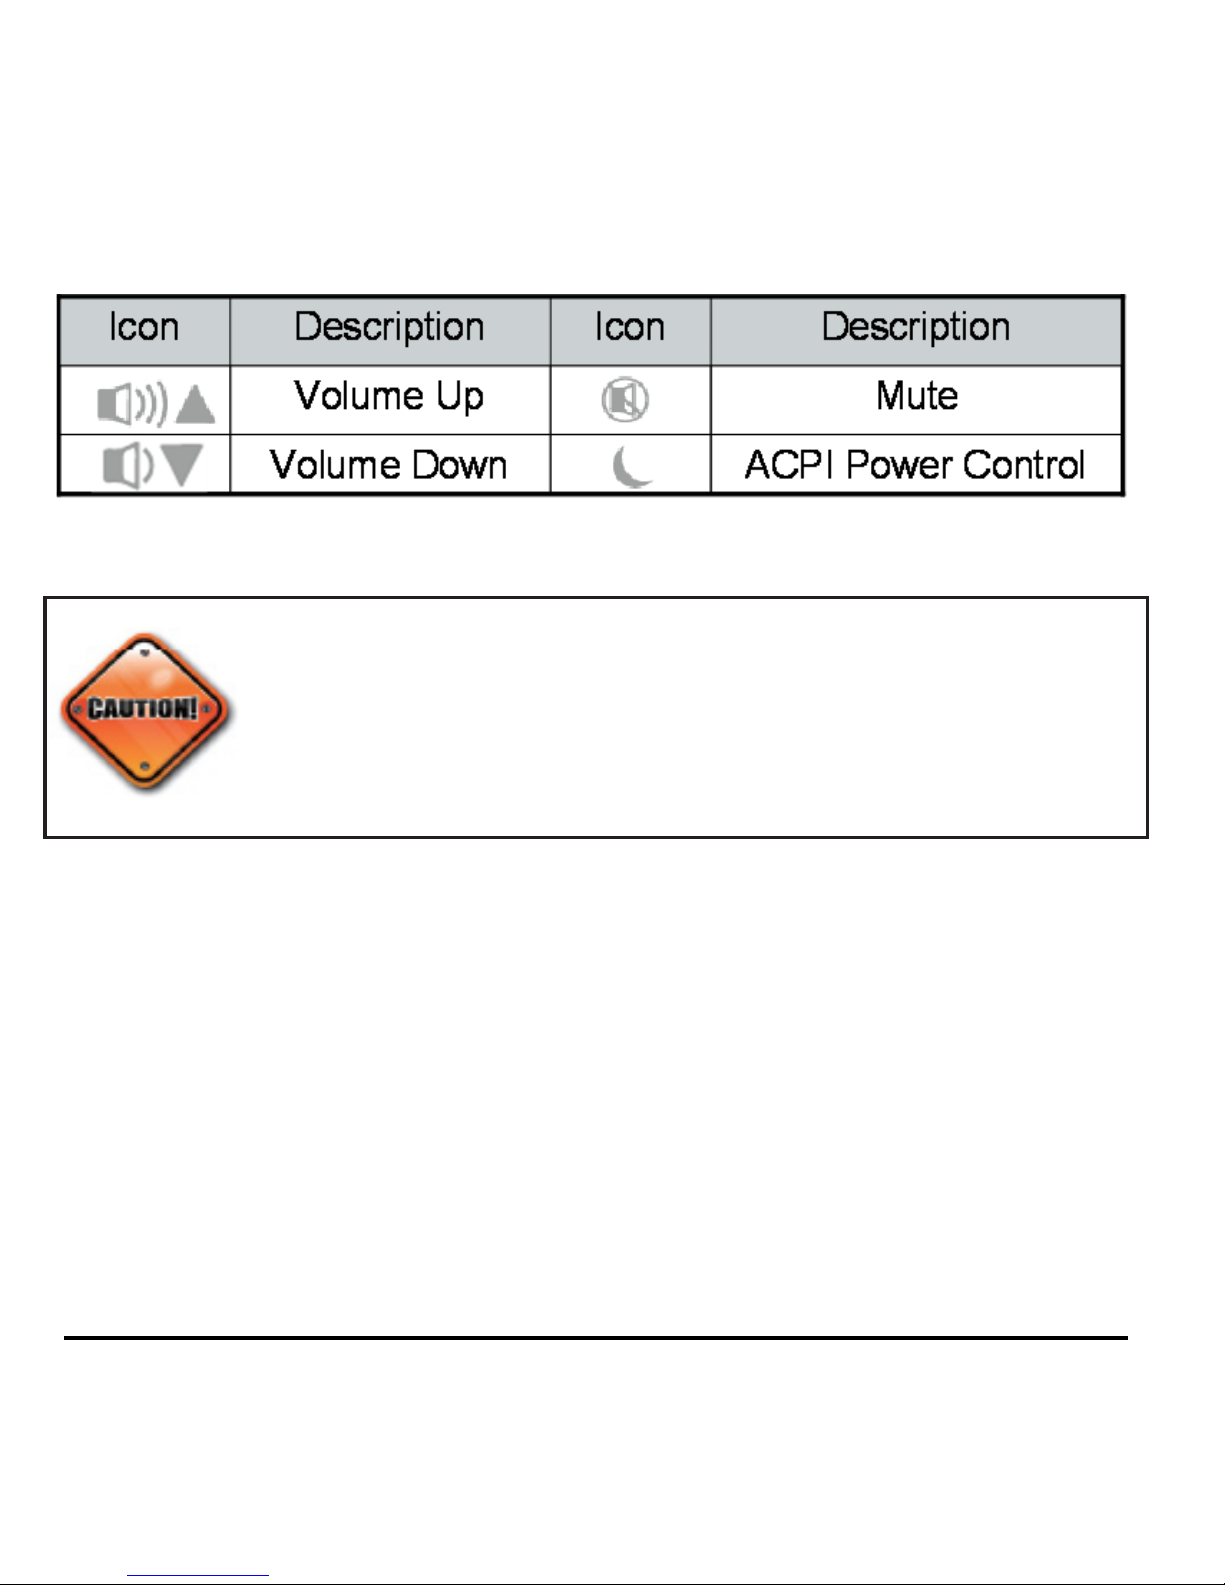
To use the 4 hot keys:
Mute: Toggle key to mute and un-mute audio
Volume Up: Press to increase audio volume
Volume Down: Press to decrease audio volume
ACPI Power Control: Toggle key to send the computer
to power-saving (sleep) mode and wake up
•
*
*
*
*
Page 10
The ACPI (Advanced Conguration and Power Interface) function
is system-dependent. Not all computers support this function;
some systems may go into sleep mode and not wake up until reboot
while some systems may not go into sleep mode at all. Most newer
systems support this function. Please test this feature with caution.
When low-power indicator on the keyboard blinks, replace
batteries immediately to avoid interruption or loss of
productivity.
•
Altri manuali per VersaPoint
1
Indice
Altri manuali SMK-Link Accessori per computer


