3
CAUTION
1. This appliance is for household use only.
2. Any servicing, other than cleaning and user maintenance, should be performed by
an authorized service center.
3. Do not immerse machine in water.
4. To reduce the risk of fire or electric shock, do not disassemble the machine.
5. There are no parts inside the machine serviceable by the user.
6. Repair should be done by authorized service personnel only.
7. Check voltage to be sure that the voltage indicated on the nameplate corresponds
with your voltage.
8. If the supply cord is damaged, it must be replaced by the manufacturer, his service
agent or similarly by a qualified person in order to avoid a hazard.
9. Never use warm or hot water to fill the water tank. Use cold water only.
10. Keep your hands and the cord away from hot parts of the appliance during
operation.
11. Never clean with scrubbing powders or harsh cleaners. Simply use a soft cloth
dampened with water.
INSTRUCTIONS FOR POWER
SUPPLY CONNECTION
If a long detachable power-supply strip or extension cord is used:
1. The marked electrical rating of the detachable power-supply cord or extension cord should be
at least as great as the electrical rating of the appliance.
2. If the appliance is of the grounded type, the extension cord should be a grounding-type 3-wire
cord.
3. The longer cord should be arranged so that it will not drape over the counter top or table top
where it can be pulled on by children or tripped over.
4
Contents
Introduction
............................................................................................................
1
Important Safeguards and Precautions
.........................................................................
2
Instructions for Power Supply connection
.......................................................................
3
Safety instructions
....................................................................................................
5
Safety Precautions
...................................................................................................
7
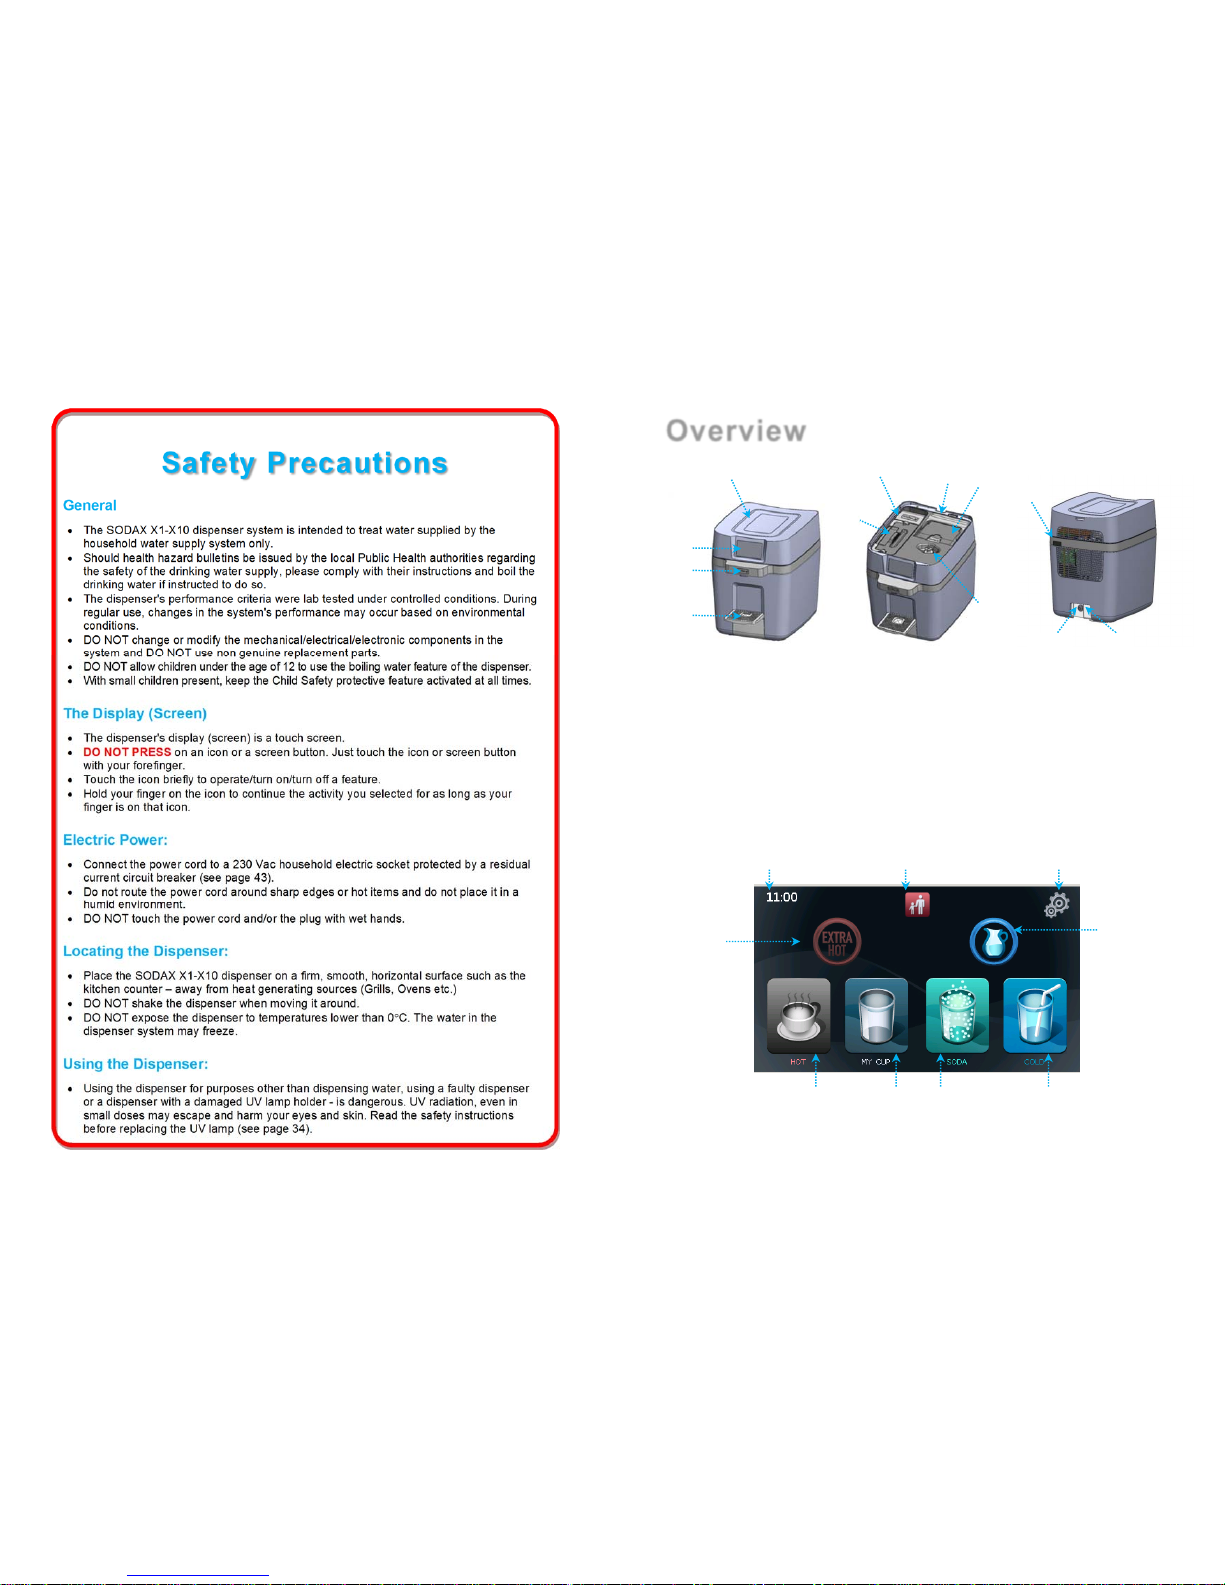
Overview
...............................................................................................................
8
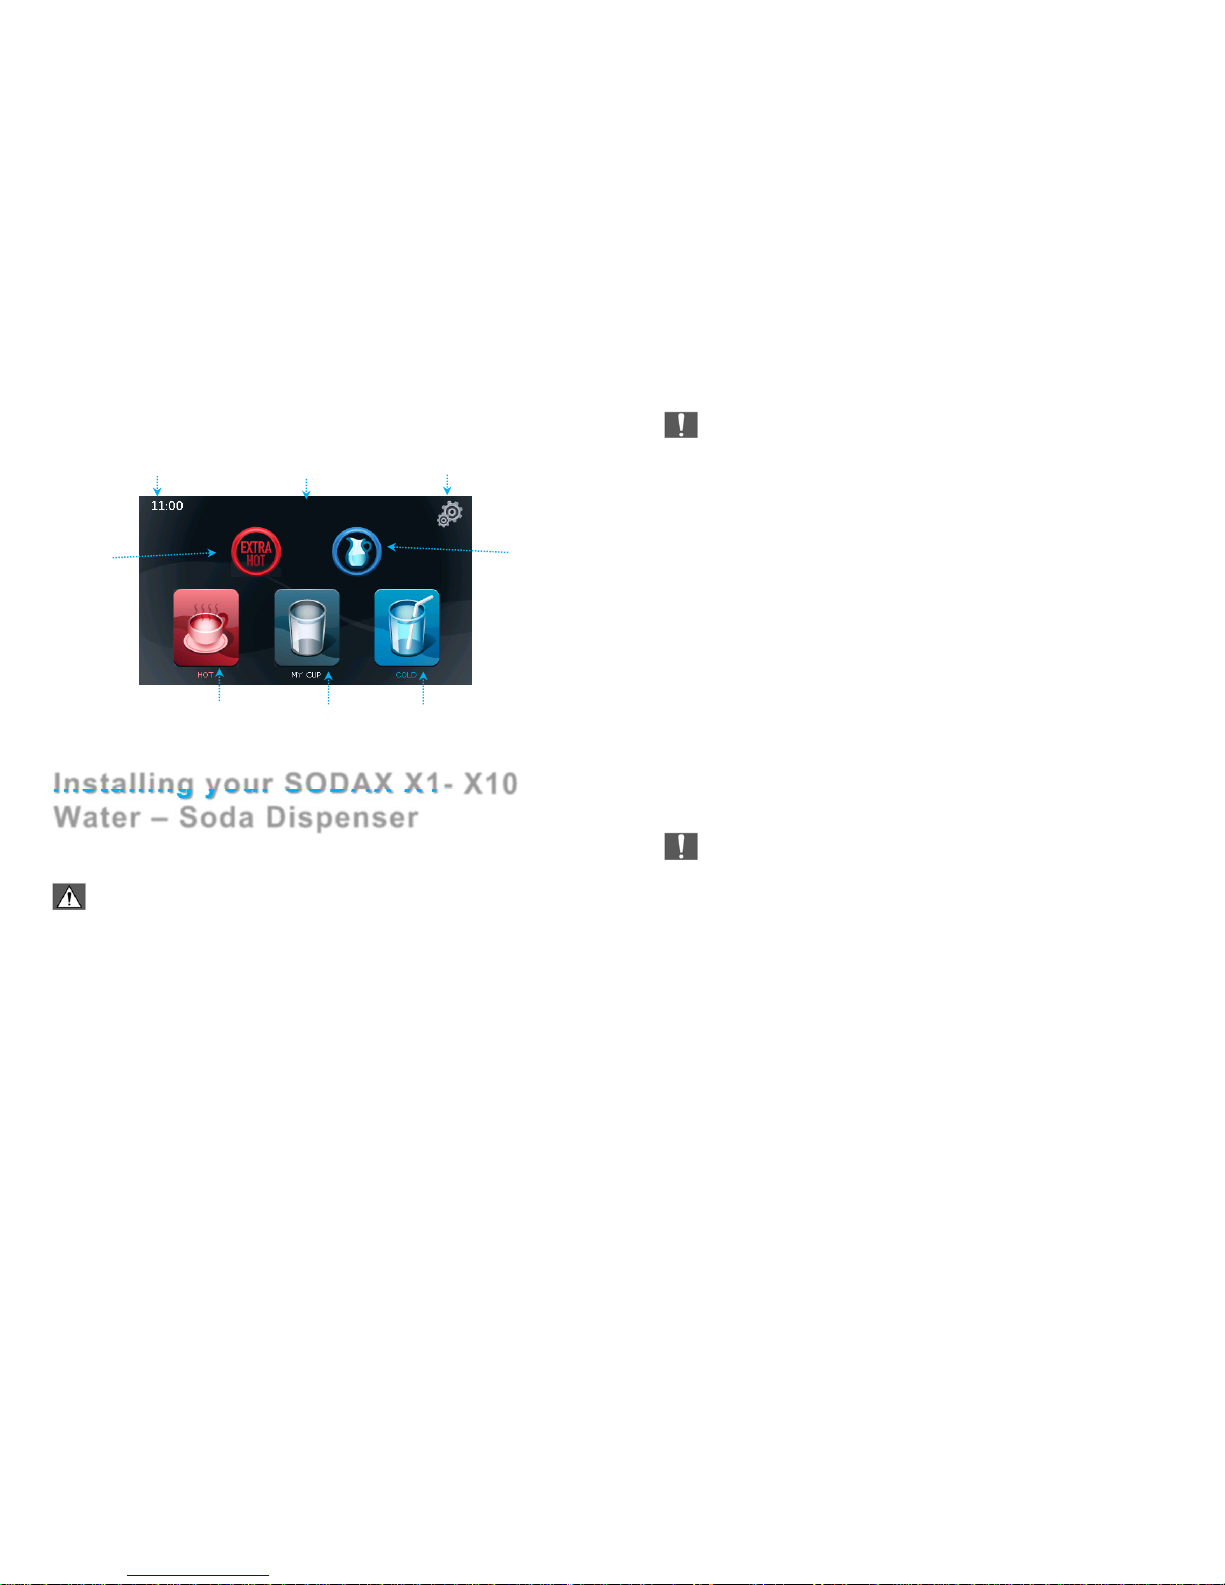
Installing your SODAX X1 – X10 Water – Soda Dispenser
..................................................
9
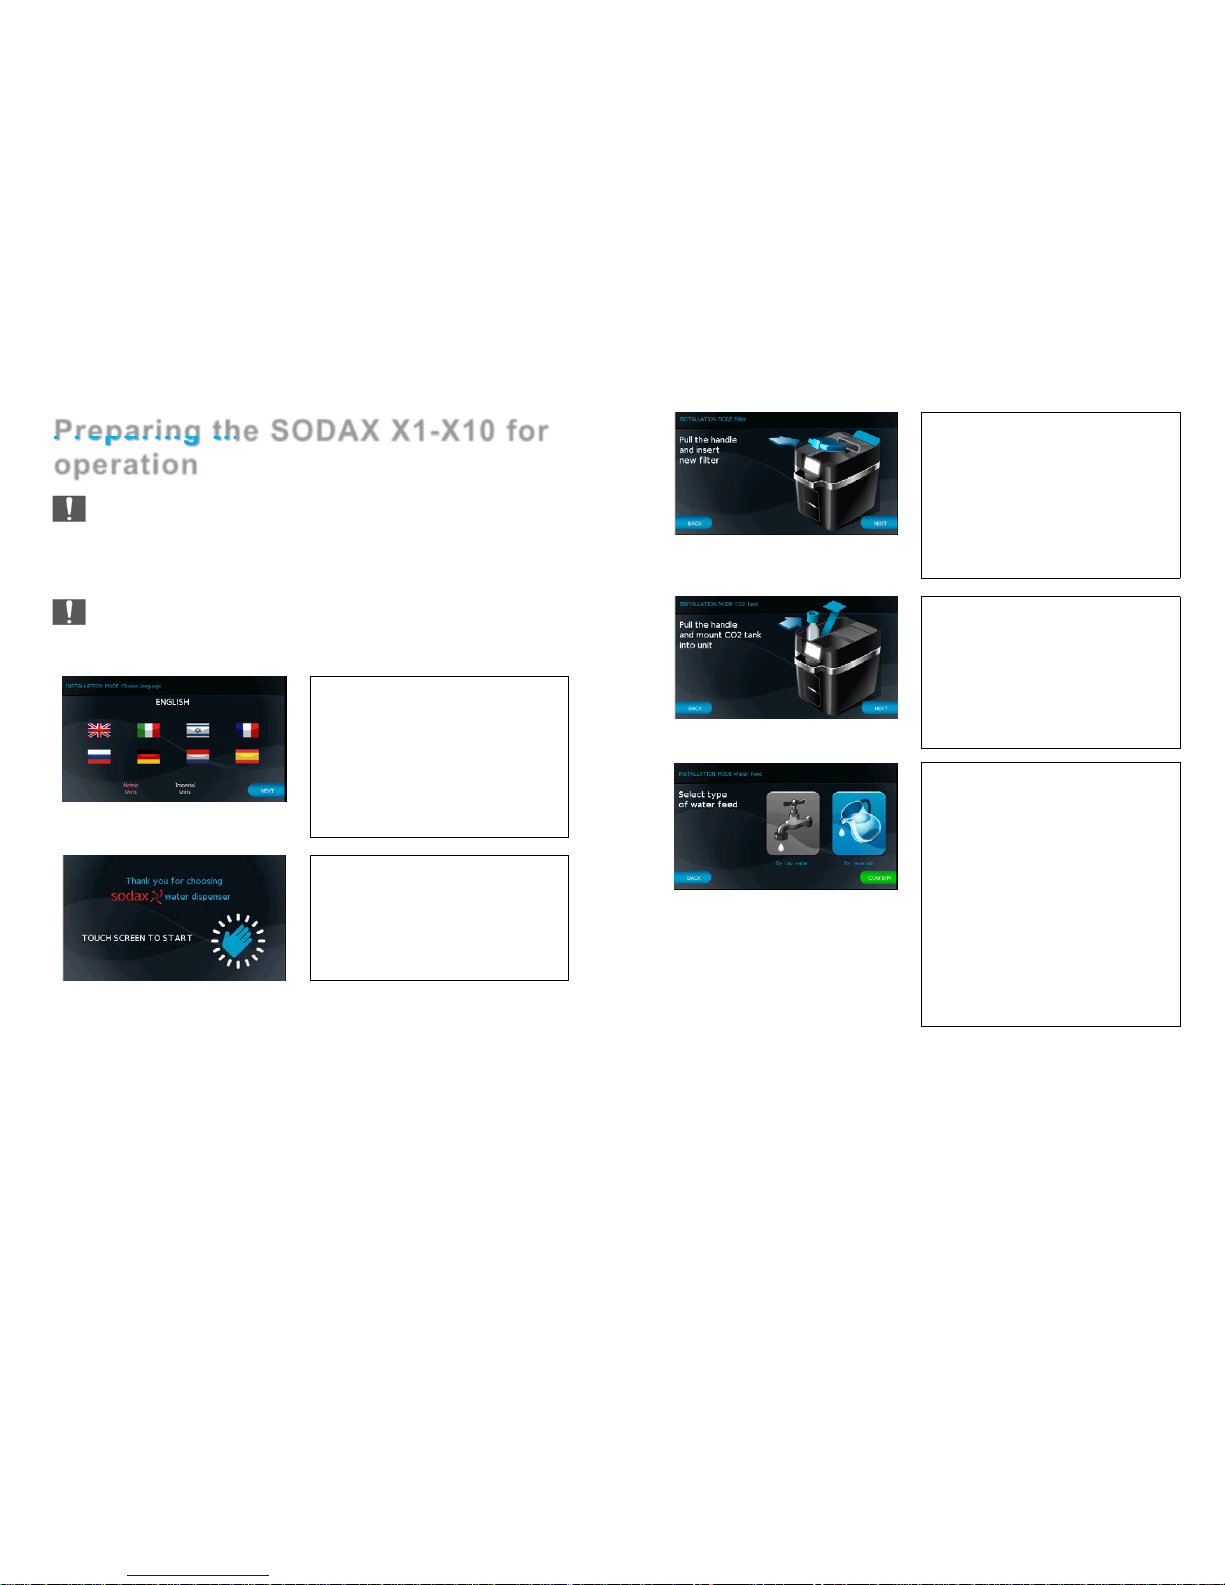
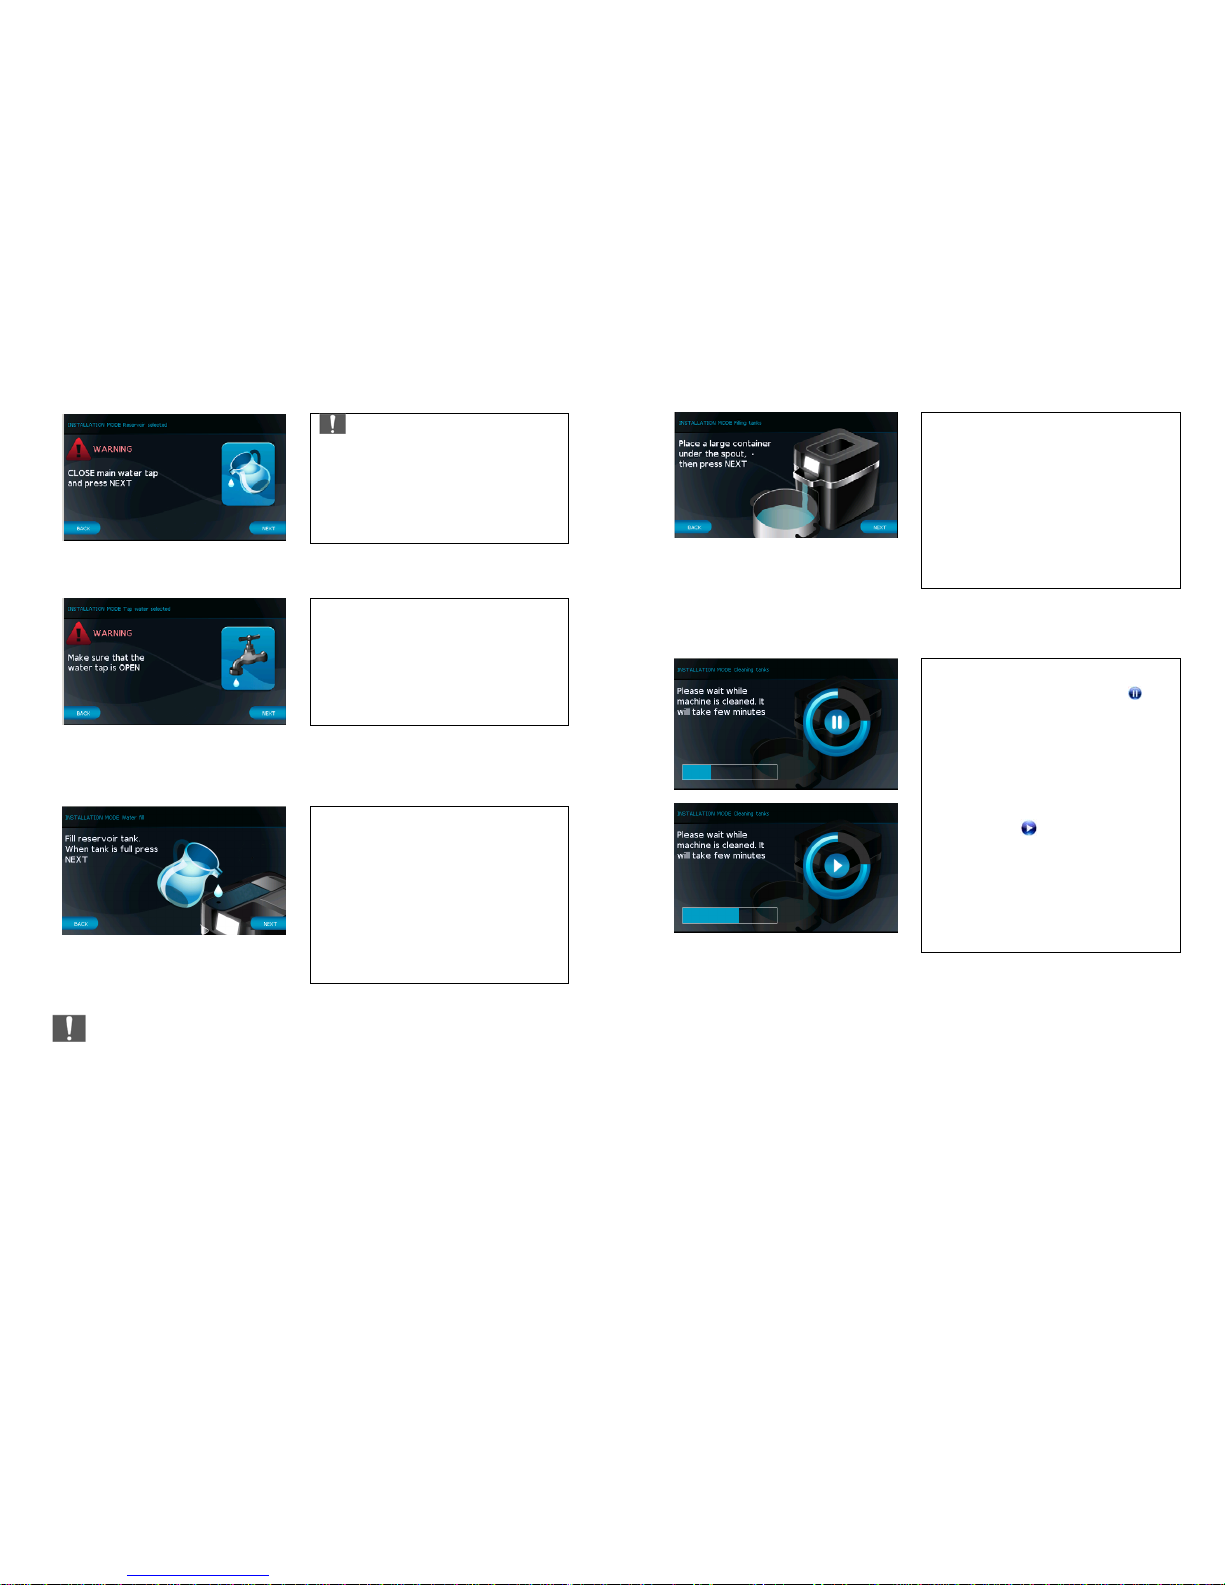
Preparing the SODAX X1 – X10 for operation
...............................................................
11
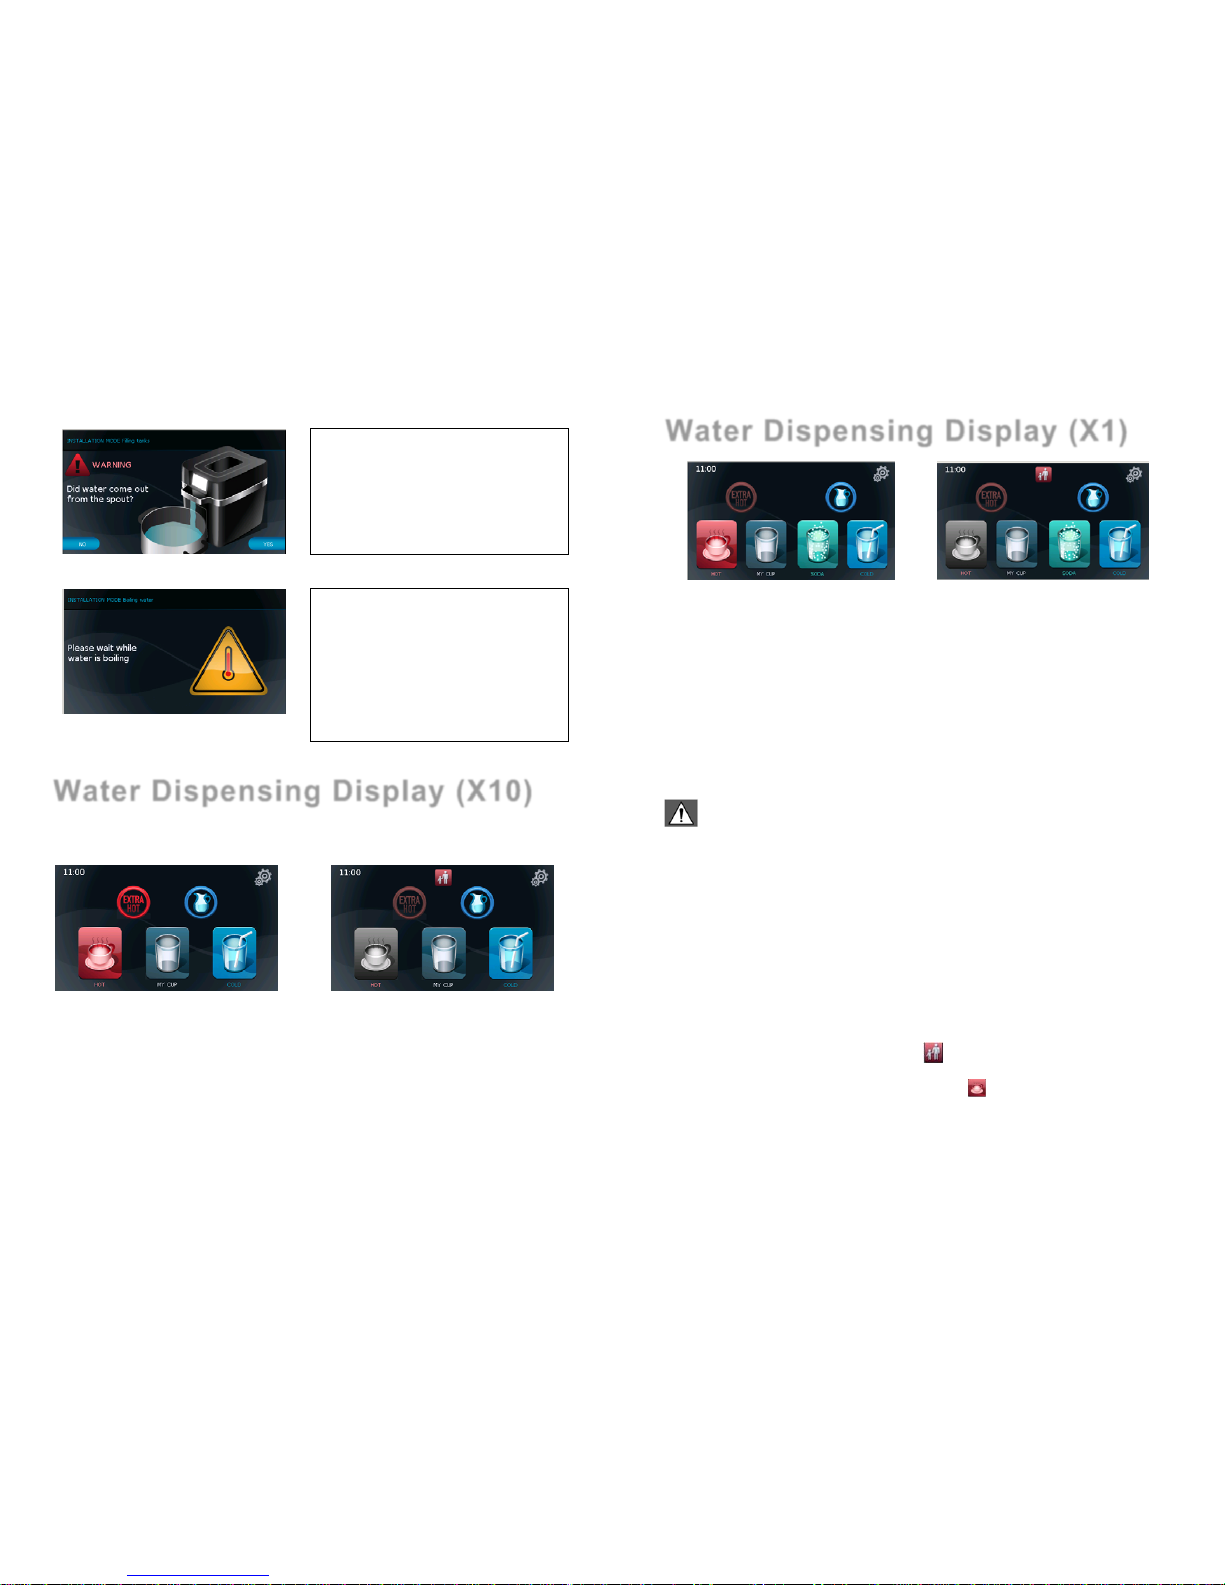
Water Dispensing Display
........................................................................................
16
The Settings Screen
...............................................................................................
18
Replacement of Consumables
...................................................................................
33
Replacing The CO
2
Bottle
........................................................................................
37
The Technical Settings Screen
..................................................................................
38
In Case of a Problem
..............................................................................................
41
Technical Specifications SODAX X1-X10 Dispenser
......................................................
43
Machine disposal
...................................................................................................
44