Page 6/33
Assembly Instructions
Alu-Line
www.sorotec.de V 2.0.0
Introduction
Congratulations on purchasing our kit for a CNC por-
tal milling machine from the Alu-Line. Before assem-
bly, we recommend reading through these instruc-
tions completely and then assembling the kit step by
step as described.
General information
Please assemble the kit as carefully as possible
and exact – the accuracy of the nished machine
depends not only on the quality of the delivered com-
ponents, but also to a large extent of correct assem-
bly and alignment. All components must be checked
prior to assembly to ensure they are free of burrs and
reworked if necessary.
Optional accessories
The fully assembled machine can be further supple-
mented and adapted to your requirements with op-
tional accessories. In the Sorotec shop you will nd,
among other things, milling spindles, base frames,
housings, vacuum tables, control electronics, control
software and minimum quantity lubrication.
Attention!
Only carry out the work if you are familiar with the
necessary actions and suitable tools are available.
Sorotec GmbH assumes no liability for damage to
property or personal injury occurring during assem-
bly or operation of the CNC portal milling machine!
Notice:
These instructions apply to all Alu-Line kits. When
assembling a kit with 2 ball screws on the X-axis,
the sections marked with 2S the additional inst-
ructions „Assembly 2nd ball screw X-axis“ must
be observed.
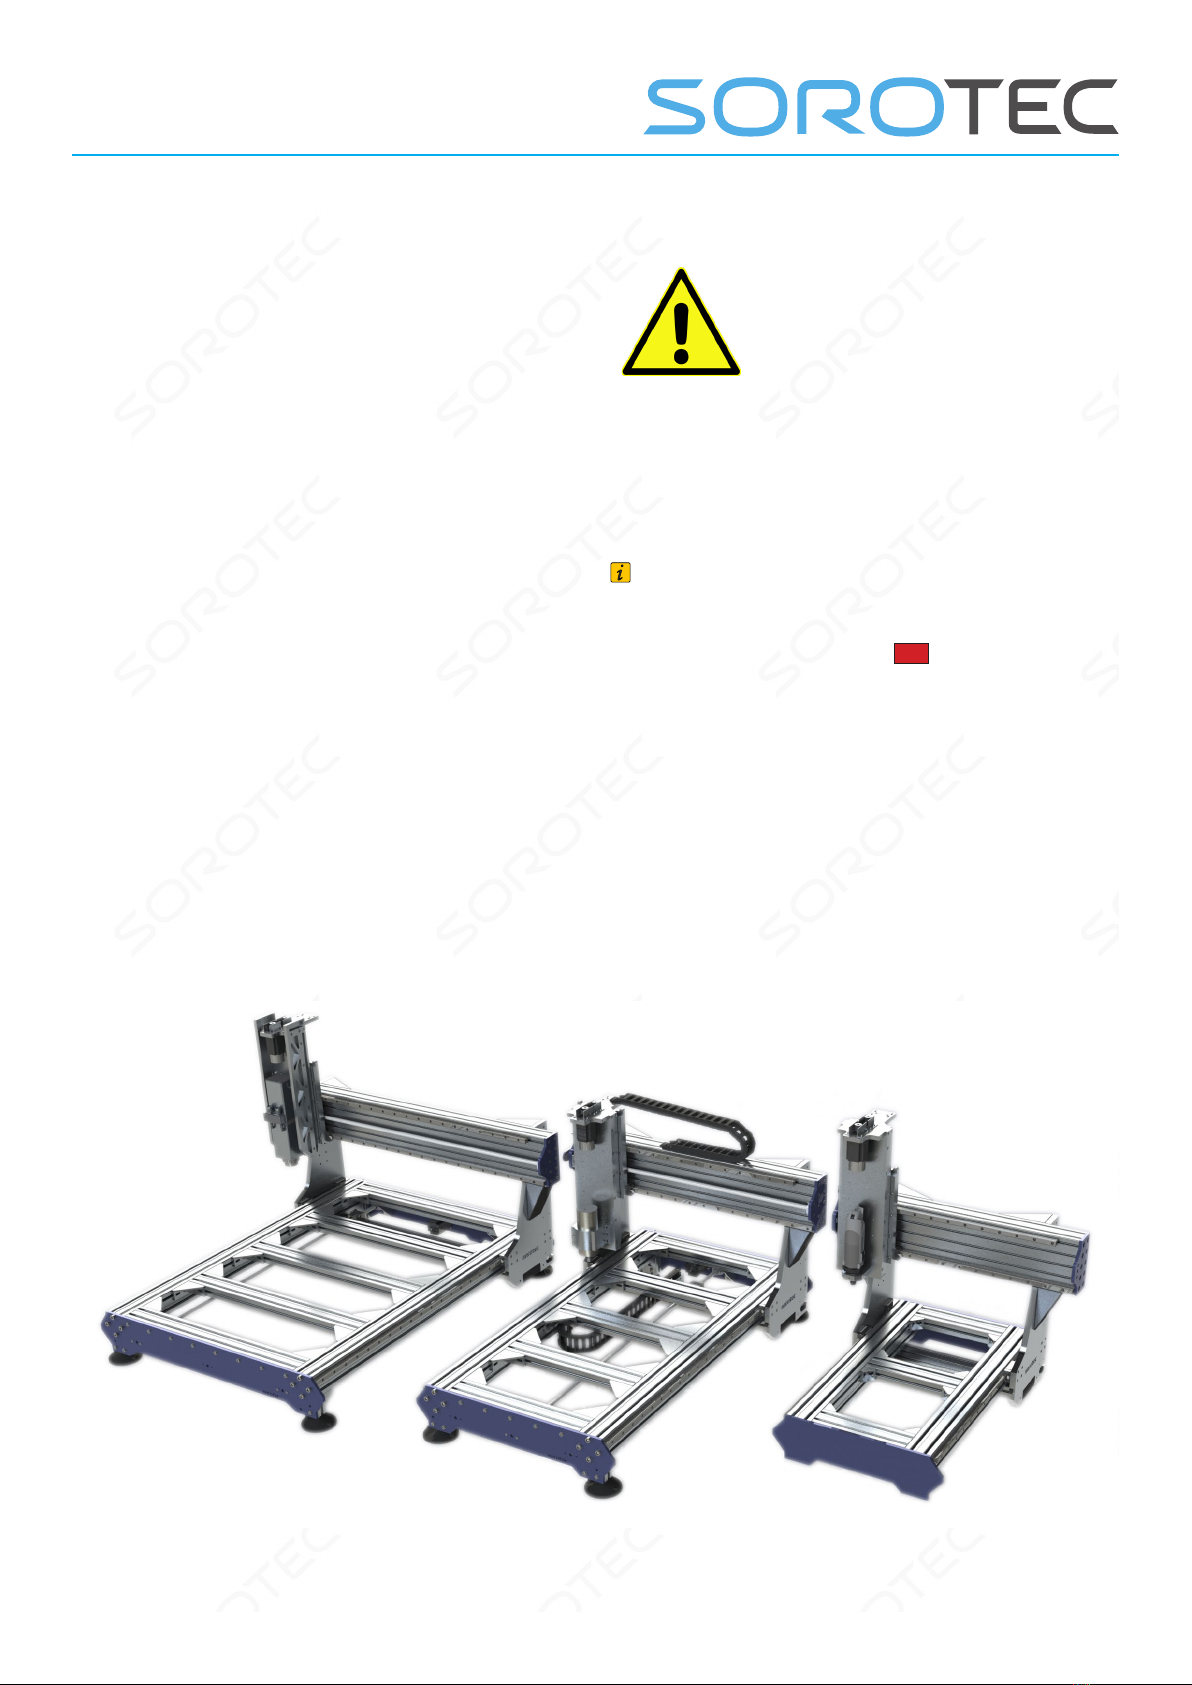
All directions (left, right, front, back, up and down)
in this manual are based on the view as shown in
the gure below.
Fig. 1: From left to right - Alu-Line 1110, 1107 and 0605