tagarno FHD ZIP Manuale utente

1
CONTENTS
1. INTENDED USE 2
2. WARNINGS 2
3. TIPS 2
4. YOU HAVE RECEIVED 3
5. ASSEMBLING 4
6. CONNECTING 5
7. OPERATION 6
8. TECHNICAL SPECIFICATIONS 9
9. SYSTEM REQUIREMENTS 11
10. MAINTENANCE 12
11. WARRANTY 12
12. ERGONOMICAL RECOMMENDATIONS 12
13. DECLARATION OF CONFORMITY 13
14. COMPLIANCE STATEMENTS 14
MANUAL
TAGARNO FHD ZIP
Go to tagarno.com/productmanuals to nd manuals and tutorial videos.
VERSION: 1.6 | FIRMWARE 5.8 | 2019-12-02

2
1. Read the manual before you use the product
2. Use the product only as specied, or the protection supplied by the product can
be compromised
3. Do not position the equipment so that it is difcult to operate the disconnecting
device (appliance inlet of external power supply, equipment input connector)
4. If fluids are spilled on the product, turn the system off immediately by pulling the power
supply out of the electrical outlet
5. In case of re close to the microscope, please turn off and disconnect the system
6. Avoid subjecting the lens to sharp or hard objects
7. Please do not connect the microscope, if visible damages appear
8. Do not dismantle any parts of the microscope, except where noted in the manual
9. Never disassemble or clean internal optical surfaces
10. Use only the power supply provided from TAGARNO
11. Always turn off the system before unplugging, when possible
WARNINGS
The product is a digital magnifying system consisting of a camera unit, PCBs, mechanical
parts and a power supply. The product is intended for marketing worldwide and is designed for
manual visual inspection.
INTENDED USE
Read all safety information before you use the product.
Please pay attention when you see a warning label on the product.
This product is for indoor use only.
You must not discard this electrical/electronic product in domestic household waste.
Please dispose at your local recycling centre.
1. INTENDED USE
2. WARNINGS
3. TIPS
CAUTION, HOT SURFACE: The inside of the camera head might be hot.
To reduce the risk of injury from a hot component, allow surface to cool before
changing the close-up lens.
12. Do not touch the light source. It gets hot when using the product
13. Do not look directly into the light source
WARNING: This is a Class A product. In a domestic environment, this product may
cause radio interference, in which case the user may be required to take appropriate
measures.
1. Avoid touching the lens glass
3
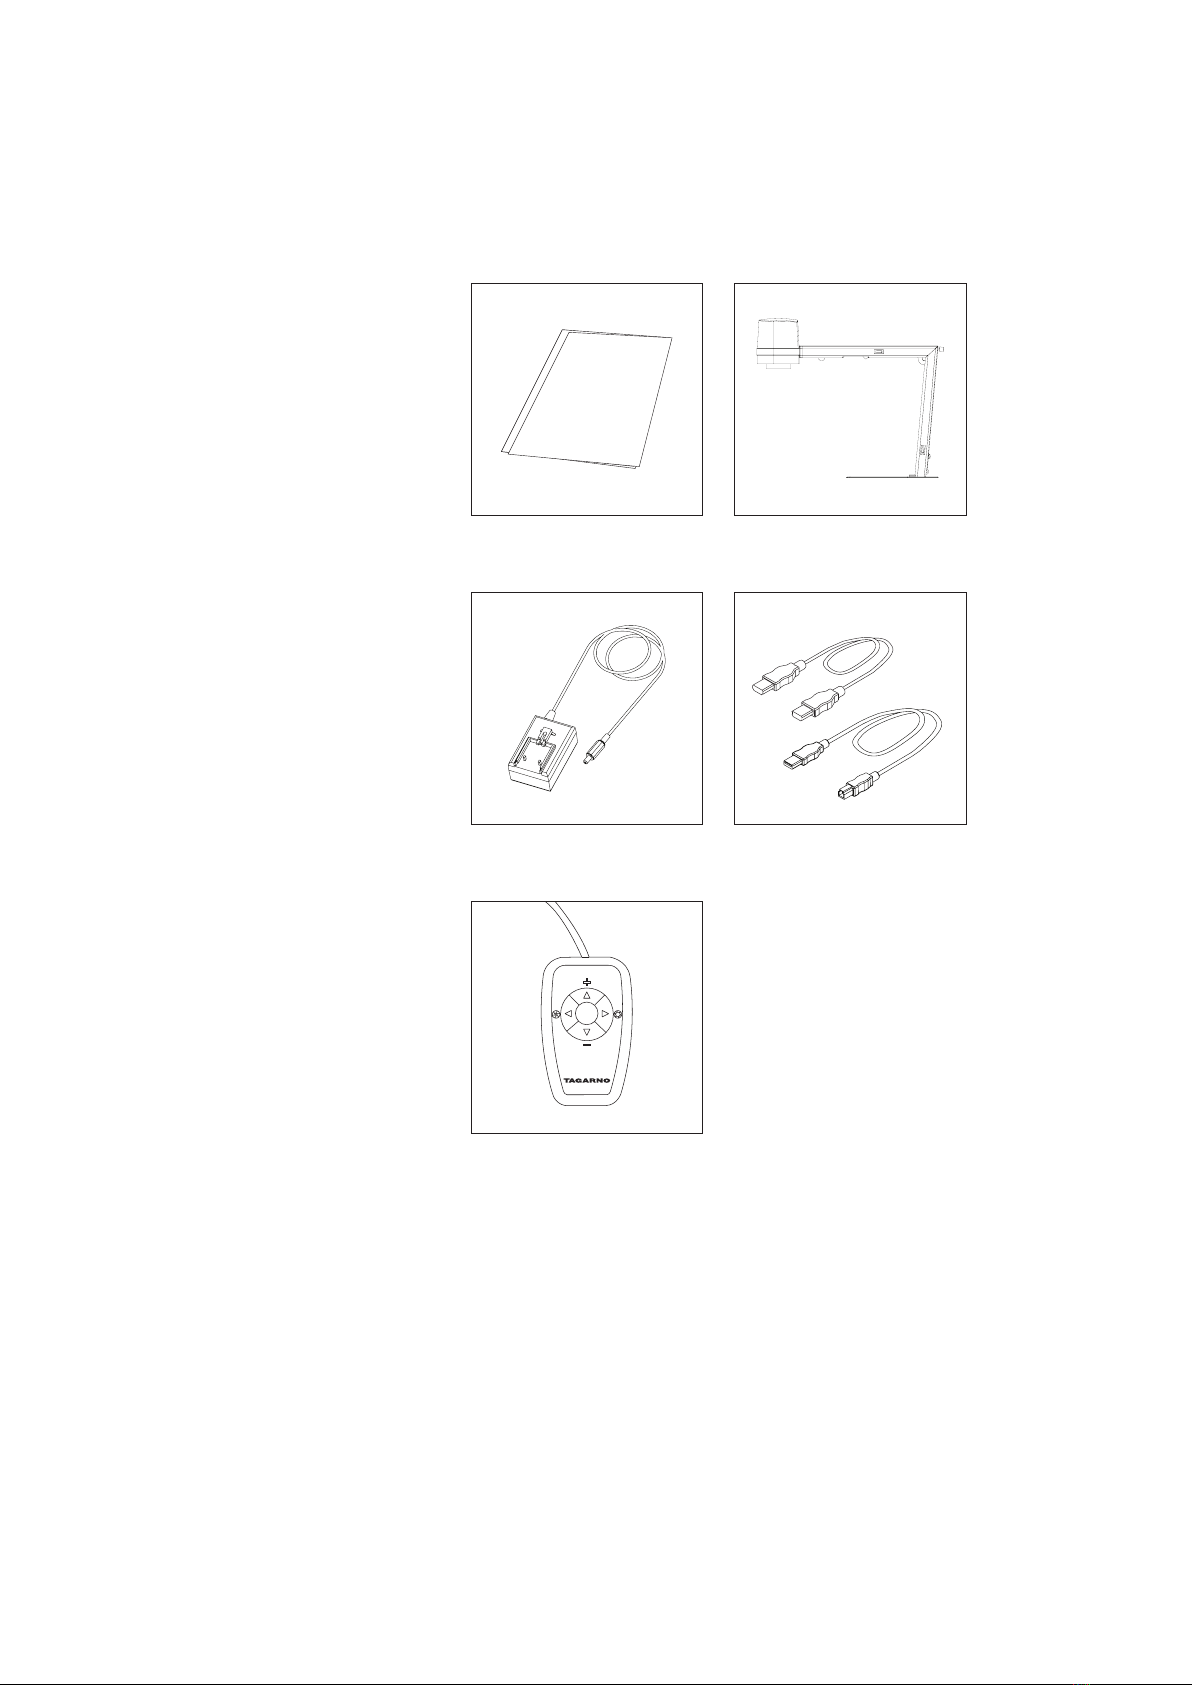
Manual
Power supply Mini HDMI-HDMI Cable
Micro USB 3.0 Cable
XKEY Control box
Microscope
4. YOU HAVE RECEIVED

4
Unfold the device and rotate the camera head 90 degrees so the
lens points downwards.
Lock the device by fastening the screw.
5. ASSEMBLING
TIP!
Find the “How to Install” tutorial video here:
www.tagarno.com/installzip

5
3.
4.
5.
1.
2.
6. CONNECTING
Connect the control box (3), power supply (4)
and ESD - Electro Static Discharge (5).
Connector Description Type Connect to Specication
1Output Mini
HDMI
Type C
Monitor HDMI out 720p50, 720p60, 1080p25,
1080p30, 1080p50, 1080p60
2USB 3.0
output
Micro
USB 3.0
Type B
Computer USB 3.0 Device, Self-powered
3Control box D-SUB
9-Pin
Female
Control
box
Output: 3.3V 330µA
Use only control boxes supplied
by TAGARNO
4Power
supply (DC)
DC Jack Power
socket
Input: 12V 1.0A
Use only the power supply
provided by TAGARNO:
Brand/Model: Mean Well/GEM18I12
Protection Class II
Input: 100-240V 0.45-0.2A, 50/60Hz
Overvoltage category ll
Output: 12V 1.5A Max
5ESD Snap
Socket,
10mm.
ESD
Grounding
point
ESD Grounding point
Connect HDMI cable (1) and USB 3.0 cable (2).
WARNING! Do not connect the mini HDMI
cable to a PC. Please do not use force when
inserting the cable plugs

6
7. OPERATION
Power on/off
Short push switches between Iris,
Gain and Preset mode.
Increase Iris/Gain or switch between
zoom preset 1, 2 or 3.
Decrease Iris/Gain or switch between
zoom preset 1, 2 or 3.
To change and save a zoom preset,
use zoom buttons to select a zoom
level and simultaneously press
left/right buttons. OSD will show
STORED: PRE(X)
Hold down for 3 seconds to use
auto exposure mode
RESET TO FACTORY SETTINGS
Follow this procedure to change back to factory
setting 1080P60.
1. Turn the microscope off
2. Press and hold the center button down
while turning the power on
3. Keep holding the center button down for
25 seconds
4. Release the center button and turn the
power off
5. Turn the power back on and the
microscope is set to factory setting
1080P60
Multi function buttons. Do only connect
equipment distributed by TAGARNO
Light on/off
OPERATION | CONTROL BOX (1/3)
Zoom in
Zoom out
Push both plus and minus to switch
from auto focus to manual focus.
You can now adjust the focus
manually by using plus/minus
If you wish to focus on something
close
If you wish to focus on something
farther away
TIP!
Find the "How to Use" tutorial video here: www.tagarno.com/usezip

7
OPERATION | ON SCREEN DISPLAY (OSD) (2/3)
2. Choose lens
Set the current close-up lens by using the left/right arrows on the XKEY Control box. The
choice is naturally between LENS +3, +4, +5 or +10. LENS +4 is factory default. Continue
using the down arrow.
3. Choose monitor width
Press the center button to set up the width of the monitor. You need to measure the
horizontal width of the monitor panel on your monitor. Select one digit at a time by using the
left/right arrows and adjust the digits with the up/down arrows. Switch between millimeters
and inches via the up/down buttons. Monitor 24” FHD is factory default. To store modied
settings, press the center button.
4. Set start magnication
Select the magnication level you wish to use as start up level. Press the center button and
select one digit at a time in the bottom of the page by using the left/right arrows and adjust
the digits with the up/down arrows. By pressing the center button one more time, you have
selected the values chosen. Press the down arrow to choose format.
5. Choose format
You have the option to switch between different video formats, 1080p 60fps being the
highest quality. Select the required format by pressing the center button, and use arrow keys
left/right to select between 6 different formats.
When turning on your FULL HD system, you are informed of the given units, serial number
(SN), version and resolution.
1. Open the OSD menu
To open the TAGARNO On Screen Display Menu, press and hold down the center button for
approximately 5 seconds.

8
OPERATION | ON SCREEN DISPLAY (OSD) (3/3)
6. Select OSD presets
You need to choose between respectively ALWAYS ON, OFF or TIMEOUT using the left/right
arrows in order to have the OSD Menu displayed continuously, never or for 3 seconds at the
time. Continue by pressing the down arrow.
7. Color boost
The OSD menu gives you the possibility to choose between two color settings; Color boost
on or off, by using the left/right arrows. Which setting chosen, is a matter of individual
preferences and the object projected on screen. Continue by pressing the down arrow.
8. Picture ip
In the menu you have the possibility to rotate the screen image 180 degrees, or choose the
standard view by using the left/right arrows. Choose between the two views by pressing the
left/right buttons. Continue by pressing the down arrow.
9. White balance
Choose between these settings: AUTO and POWER UP by using the left/right arrows. In AUTO
mode the white balance is continuously adjusted to achieve the best color reproduction. In
POWER UP mode the white balance calibration is performed only once when the system is
turned on. In this mode it’s important that a white sheet of paper is visible in the eld of view
when the microscope is switched on. Continue by pressing the down arrow.
10. Save presets
To save your presets and exit the menu, press the center button and thereby return to the
image displayed on the monitor, using your recently saved presets.
If you have changed the various formats, your FULL HD system needs to be restarted.
This will be indicated in the bottom if needed.

9
8. TECHNICAL SPECIFICATIONS
Dimensions H: 350mm/13.78”
W: 155mm/6.10”
D: 386mm/15.20”
Weight 2.0 kg/4.4lbs
Camera
resolution FHD 1080p, 1920x1080p at 59,94/50/29,97/25Hz
HD 720p, 1280x720p at 59,94/50Hz
Camera zoom 30x optical
Autofocus Yes
Work height 245mm/9.65”
Work depth 280mm/11.02”
Auto Monitor
Detect Yes
Plug
connection Mini-HDMI & Micro-USB 3.0
Power
requirements
Line voltage 100 - 240V 10%
Line frequency 50/60Hz
AC current consumption (typ.) 130mA/100V 55mA/240V
DC current consumption (typ.) 1.0A/12V
Environmental
conditions
Temperature Storage -5 to 60oC / 23 to 140oF
Operation 5 to 40oC / 41 to 104oF
Humidity range Storage 20 to 90% RH non-condensing
Operation 30 to 80% RH non-condensing
Altitude 0 to 2000m / 0 to 6500ft
above sea level
Pollution degree 2
ESD ESD Grounding Point
TECHNICAL SPECIFICATIONS (1/2)
H
D
W

10
FEATURES
Auto & Manual Focus Color boost
Iris, Gain & Preset mode Flip picture
OSD menu Image capture, PC (with third-party software)
Choose lens
Choose monitor width
Set start magnication
Choose format
Select OSD presets
LENS
Dimensions 58 mm/2.3”
Included lens +4
LENS Lens to object distance Magnication on 24" monitor
+4 250mm/9.84” 1.7x - 53x
RECOMMENDED MONITOR FORMAT
Panel format 16:9 (Widescreen)
How to link HDMI input
Response time 2 ms
Signal format FHD 1920x1080
ACCESSORIES
FHD monitors per request Cleaning kit
Light Kits: Ultra Violet, Coaxial, Ringlight and
Backlight
Tables: XY-Table, Height adjustable and
Circular Titling Table
Foot switch
TECHNICAL SPECIFICATIONS (2/2)
FIELD OF VIEW - MINIMUM & MAXIMUM
MINIMUM
Lens X-Direction Y-Direction
+4 290 mm / 11.42’’ 163.10 mm / 6.42’’
MAXIMUM
X-Direction Y-Direction
10.50 mm / 0.41‘‘ 5.91 mm / 0.02’’
Indice
Altri manuali tagarno Microscopio


