TileVision 17" Manuale utente
17" TileVision®
Operating Instructions (NTSC)
PORTER LANCASTRIAN
PORTER LANCASTRIAN LIMITED
www.tilevision.tv
17" Widescreen TileVision®
A Wide Array of Screen Settings
You can choose different screen settings depending on the type of programme you are
watching or the surrounding conditions (the lighting or the outside weather conditions).
You can switch between Dynamic, Standard, Mild and Game Options, or you can
configure the screen settings yourself. You can select 4:3 (normal format), 16:9
(widescreen format), or Zoom (widescreen view of normal format) to match what you are
watching to your preference.
A Wide Array of Sound Settings
You can choose an optimal sound setting for the type of program you are watching.
You can switch between Flat, Music, Movie, and Speech, or you can configure
the settings yourself.
Quick View
Press the QV button to view the last programme you were watching.
This symbol is intended to alert the user to the presence of important
operating and maintenance (servicing) instructions in the literature
accompanying the appliance.
CAUTION
RISK OF ELECTRIC SHOCK
DO NOT OPEN
WARNING: TO PREVENT INJURY, THIS APPARATUS MUST BE
SECURELY ATTACHED TO THE WALL IN ACCORDANCE THE
INSTALLATION INSTRUCTIONS.
CAUTION: DO NOT REMOVE COVER.
NO USER-SERVICEABLE PARTS INSIDE.
REFER SERVICING TO QUALIFIED SERVICE PERSONNEL.
BEWARE OF STATIC SENSITIVE PARTS.
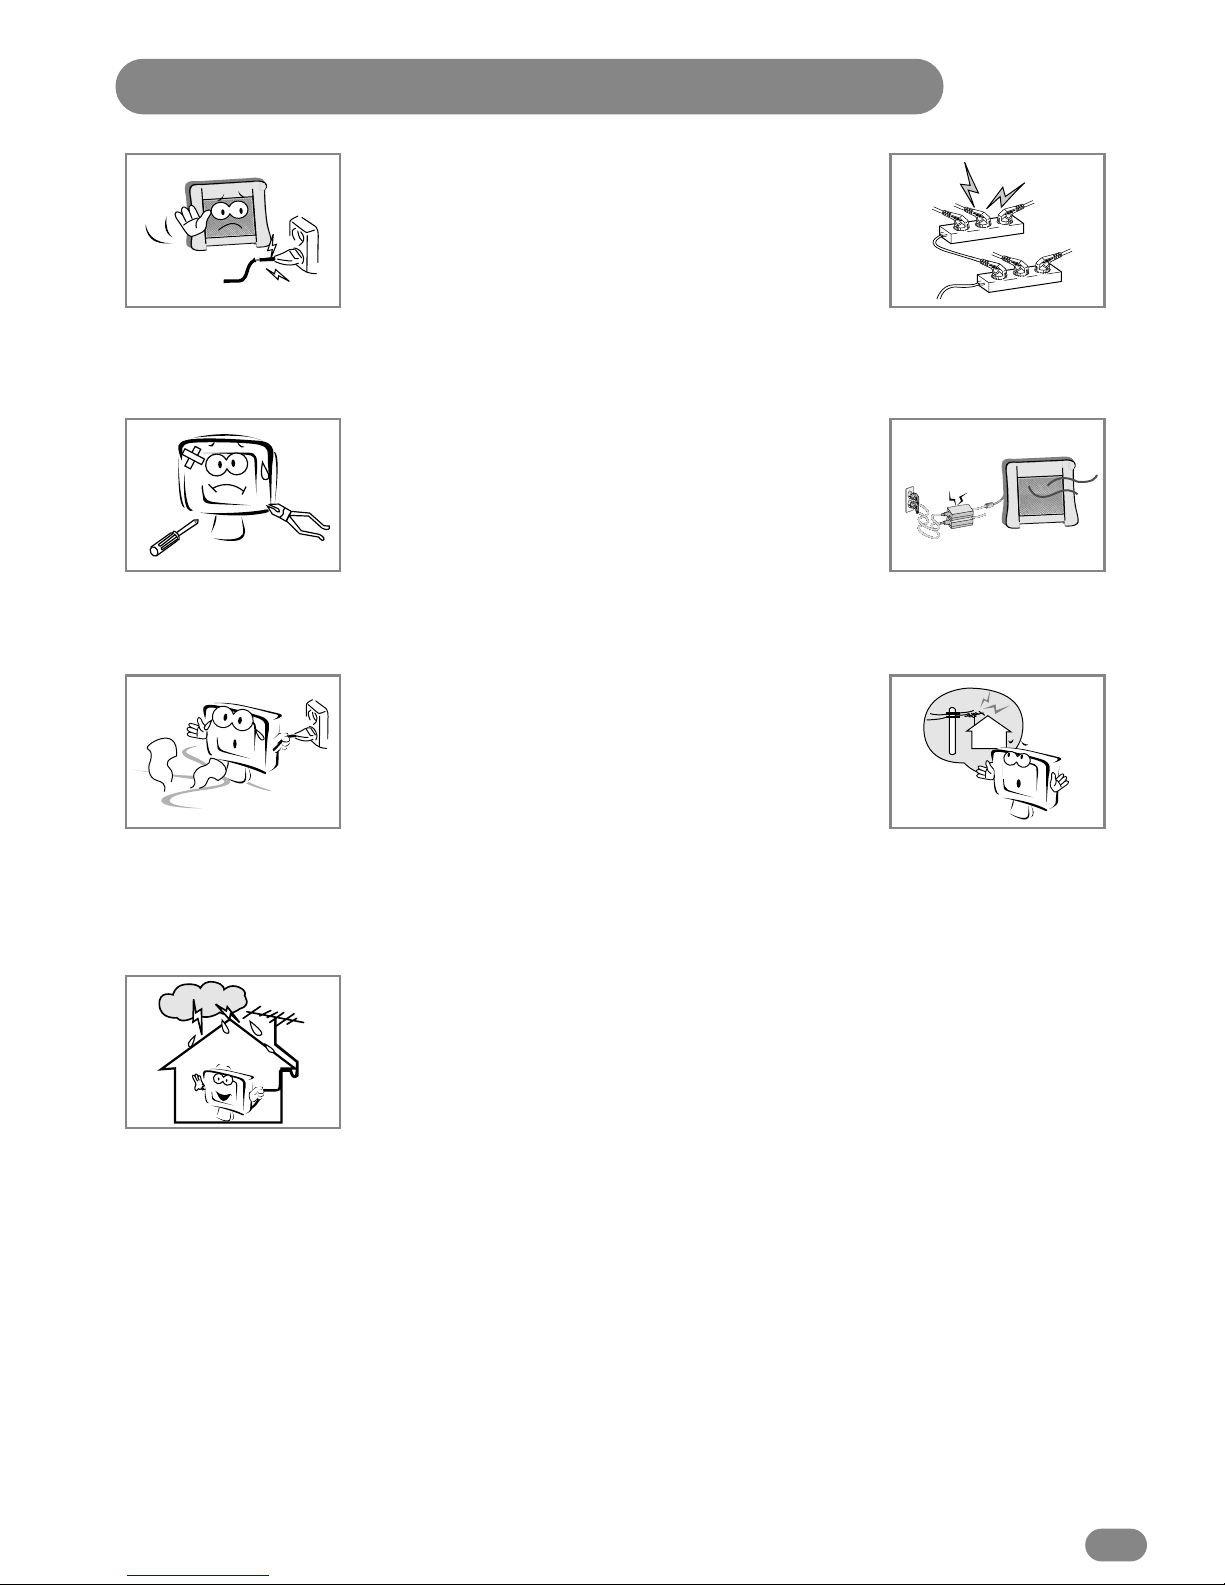
Safety Instructions
1
Do not use a damaged socket and do not let the power cord
touch a heat source.
– This may cause an electric shock or fire.
Do not attempt to service the unit.
Contact an authorised dealer or repair service.
– Servicing the unit yourself may cause an electric shock or fire.
If there are any unusual sounds or smells coming from the
unit, unplug it immediately and contact an authorised
dealer or repair service.
– This may cause an electric shock or fire.
If an outside antenna is connected to the unit, ensure the
external to internal cable entry is fully sealed
– This may cause an electric shock or fire.
Note to the Cable/TV Installer
This reminder is provided to call the cable TV system Installer’s
attention to Article 820-40 of the National Electric Code (U.S.A.).
The code provides guidelines for proper grounding and, in
particular, specifies that the cable ground shall be connected to
the grounding system of the building, as close to the point of
cable entry as practical.
Do not connect too many extension cords or plugs to
an outlet.
–This may cause a fire.
Keep the power adaptor away from any heat source.
–This may cause a fire.
Ensure the antenna is located away from overhead cables.
–This may cause an electric shock.
2
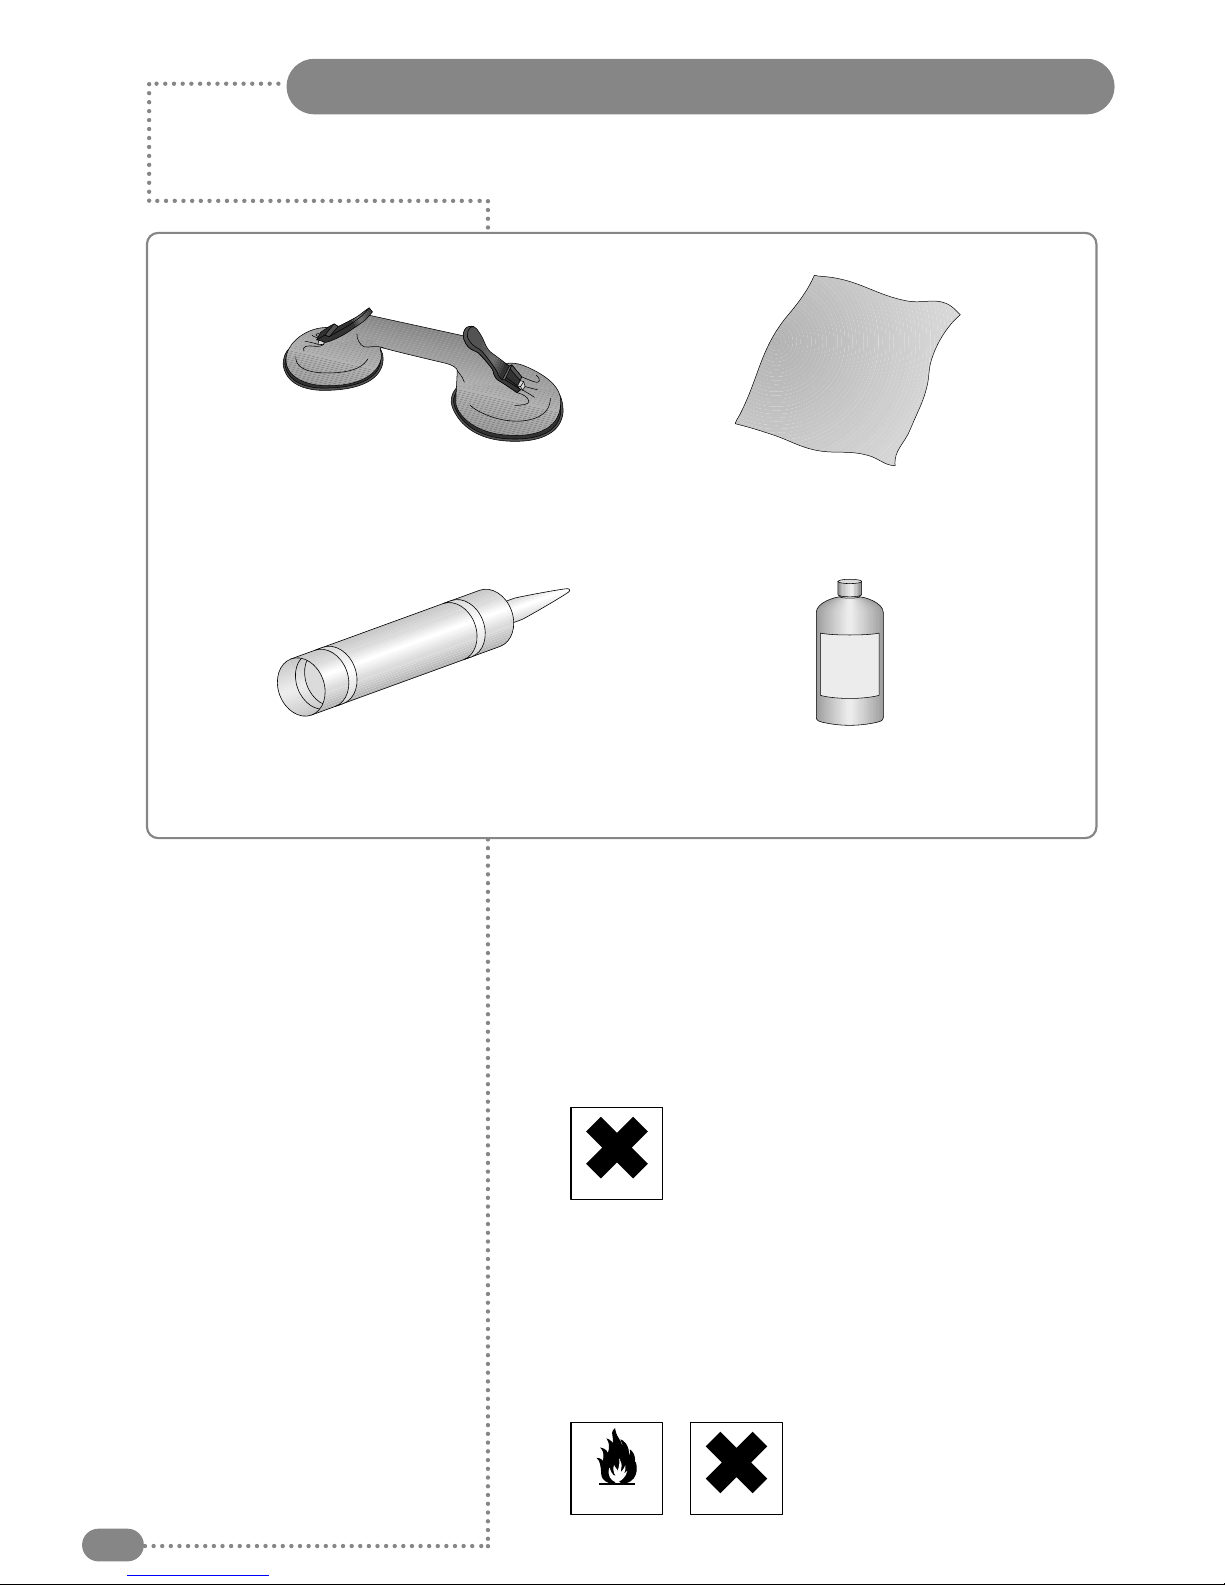
Tools Required
Suction Lifter
Silicone Sealant Isopropyl Alcohol
I
s
o
p
r
o
p
y
l
A
l
c
o
h
o
l
Soft Cloth
☛
Silicone Sealant evolves acetic acid during cure. Use only
in well ventilated areas. Irritating to eyes. Wash hands
after use and before meals. Wash splashes from skin,
clothing and other surfaces. Use a clean cloth. In case of
contact with eyes wash immediately with plenty of water.
Please observe safety precautions on the container. Keep
out of reach of children and animals.
☛
Isopropyl alcohol is available from most pharmacies and
larger electronics wholesalers. It is an effective
degreasing agent.
Please observe safety precautions on the container. Keep
out of reach of children and animals. Do not drink.
HIGHLY
FLAMMABLE
IRRITANT
IRRITANT
Table of Contents
3
Safety Instructions ........................................................................................................................1
Tools Required ..............................................................................................................................2
Unpacking your TileVision®............................................................................................................4
Your TileVision®..............................................................................................................................5
Connector Inputs ..........................................................................................................................5
Connections ..................................................................................................................................6
Connecting an Antenna or Cable ..................................................................................................7
Connecting to the RCA or S-Video Input ......................................................................................8
Connecting to a DVD or DTV Set-Top Box Input ..........................................................................9
Connecting to the Component Input ............................................................................................9
Installing the Front Plate ............................................................................................................10
The Remote Control ....................................................................................................................11
Switching the TileVision®On/Off ..................................................................................................12
Selecting a Picture from External Sources ................................................................................12
Selecting your On-screen Language ..........................................................................................12
On-screen Menus and Displays ..................................................................................................13
Tuning, Setup and Editing TV Programs ....................................................................................14
Parental Control ..........................................................................................................................16
Picture Control ............................................................................................................................19
PC Picture Adjustment ................................................................................................................20
Sound Control ............................................................................................................................21
TV, Component, S-Video and PC Modes ....................................................................................22
Auto Sleep ..................................................................................................................................22
Blue Back ....................................................................................................................................23
ARC (Aspect Ratio Control) ........................................................................................................23
Sleep Timer ................................................................................................................................24
ST/SAP ........................................................................................................................................24
Troubleshooting ..........................................................................................................................25
Specifications ..............................................................................................................................26
Notes ..........................................................................................................................................27
Unpacking your TileVision®
4
Accessories
Please make sure the following items are included with your TileVision®
if any items are missing, contact your dealer.
Two boxes supplied –
1. Back Box Assembly –(first fix)
2 speakers.
2 lengths speaker cable.
1 12V DC Adaptor with 4 metre cord.
1 AC Power cord –100–240V.
1 stainless steel back box.
1 back box installation instructions.
2. Front Assembly –(second fix)
1 front plate assembly complete with Velcro sealing strips.
1 remote control.
1 installation and instruction manual.
1 mirror acrylic surround.
Your TileVision®
5
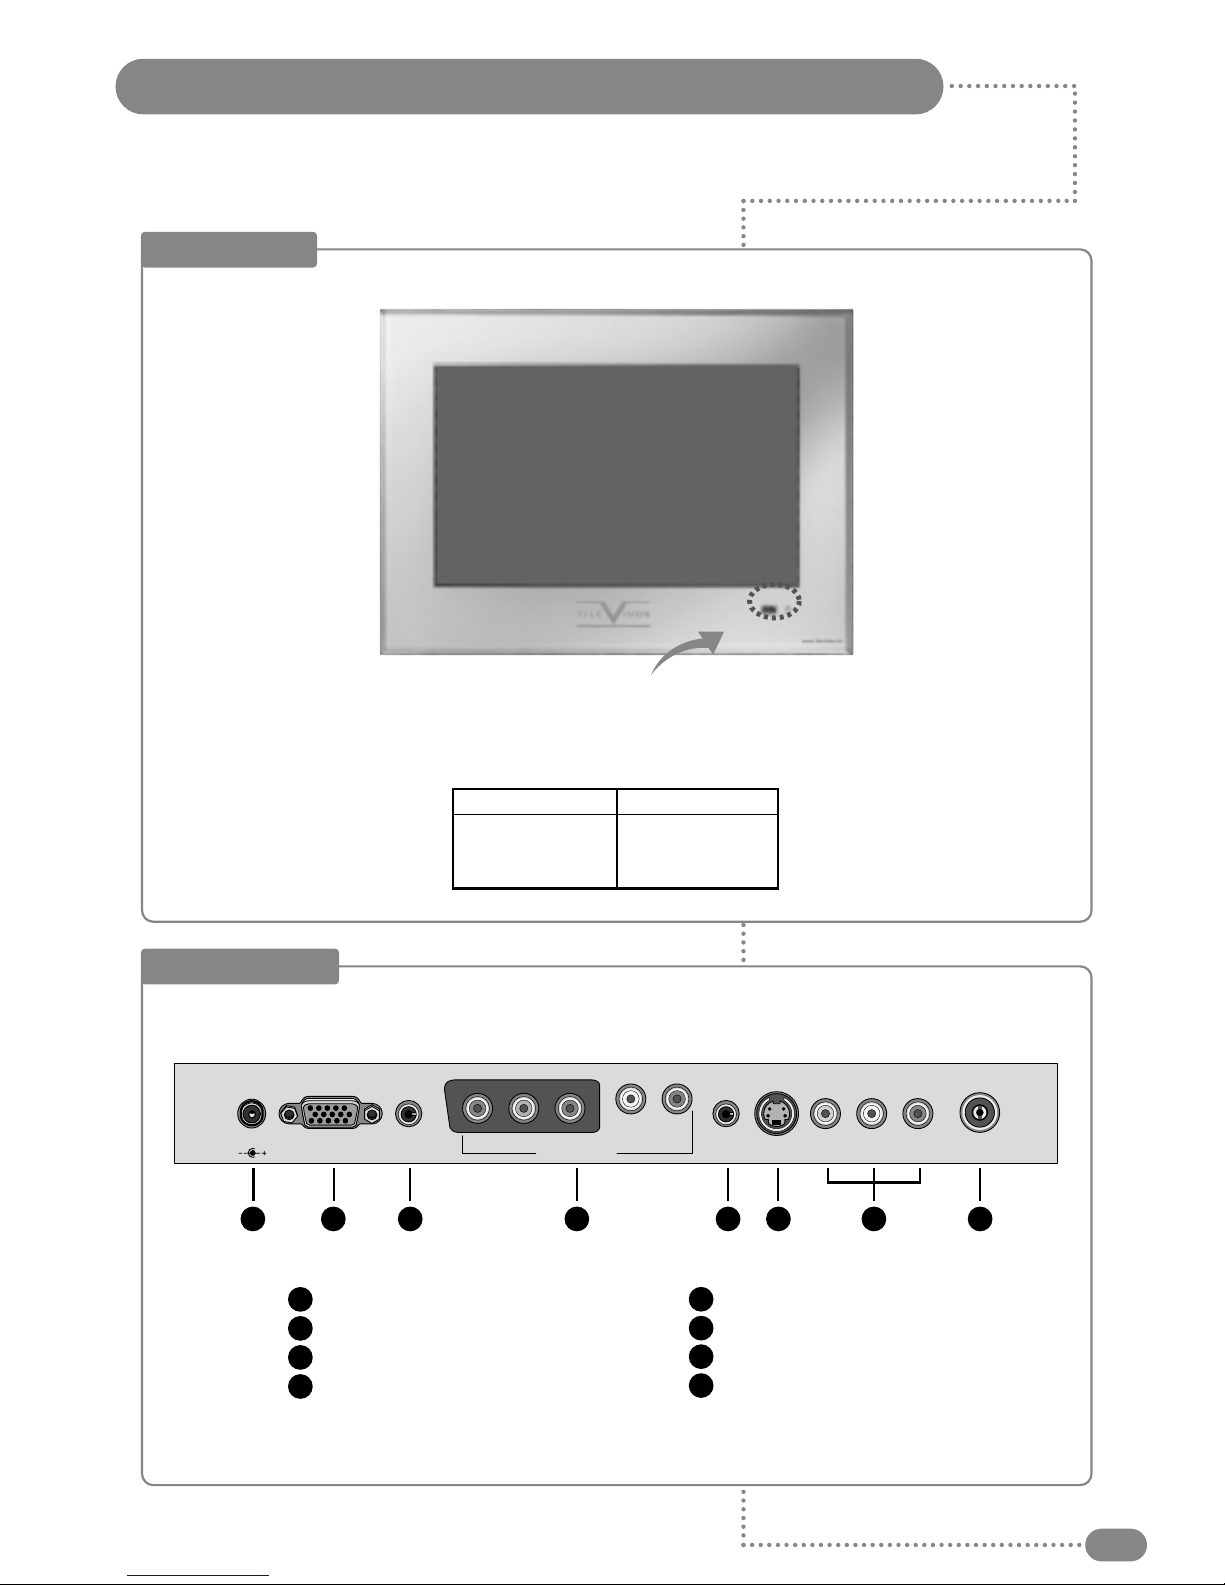
Front View
Indicator
Red
Green
Green blinking
Remote control sensor and indicator
Status
Stand-by
Power on
Remote control
Power Indicator Status
Connector Inputs
DC12V Power Input
RGB Video Input (PC/DTV)
Audio Input (PC/DTV)
Component Input (Y, CB, CR)/
L (mono) R
1
2
3
4
Headphone Output
S-VIDEO Input
AV Video & Audio Inputs
Antenna Input Jack
5
6
7
8
1 2 3 4 5678
12VDC RGB Audio In
COMPONENT
S-VIDEO VIDEO
LAudio RANTPhones
YCBCR
L (mono) R
Connections
6
Earthing Points
The Earthing connection points are found on the rear of the front plate and are clearly marked with
green labels.
Power Socket
The Power socket (1) is located at the extreme left of the connection array.
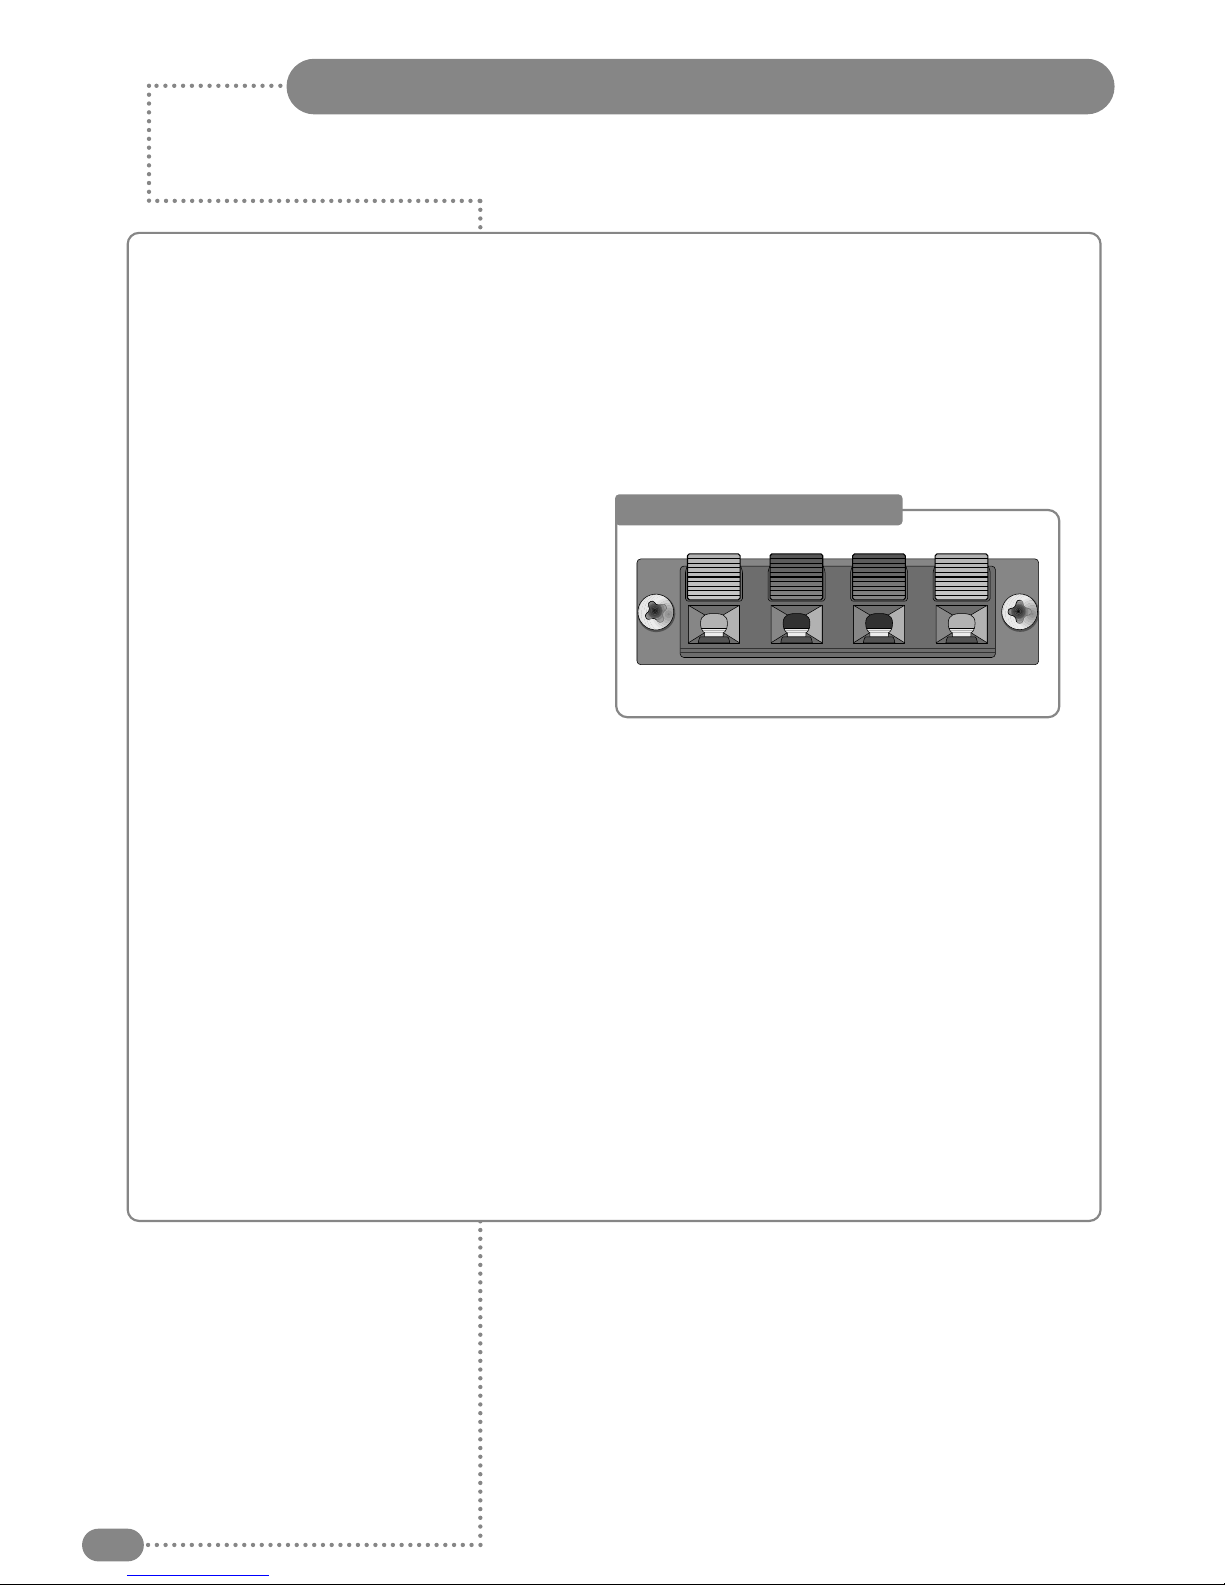
Speaker Connections
The speakers should be connected after the
Earth straps to the rear of the front plate as
detailed on page 10 of these operating
instructions.
The speaker connection block is found on the
right of the rear of the front plate. Lift one of
the lugs and push one conductor of the
speaker lead into the connector and release
the lug and give the lead a slight pull to make
sure that it is gripped correctly. The other wires are connected in the same way.
Note: To ensure that the speakers are in correct phase, the conductor with the stripe should be
connected to the negative terminal (L–or R–) and the plain conductor should be connected to the
corresponding positive terminal (L+ or R+).
Connections to the speakers terminals should be made in the same way –striped conductor to the
negative terminal and positive conductor to the positive terminal.
Antenna Feed
The Antenna input jack is found at the extreme right of the connection array (refer to page 7). A
minimum signal level of 60dBu/1mV is required to avoid a noisy picture.
Component/Composite Video/S-Video/PC/DTV (RGB) Inputs
These are found in the central portion of the connection array. If these inputs are to be utilised the
necessary cables must be installed at the same time as the back box (refer to pages 8 and 9 of
these instructions).
Note: Careful consideration should be given to use of these inputs prior to the installation
of the unit.
Speaker Connection Block
L–L+ R–R+
7
or
Cable Television
Network
Rear of the
TileVision
®
ANT
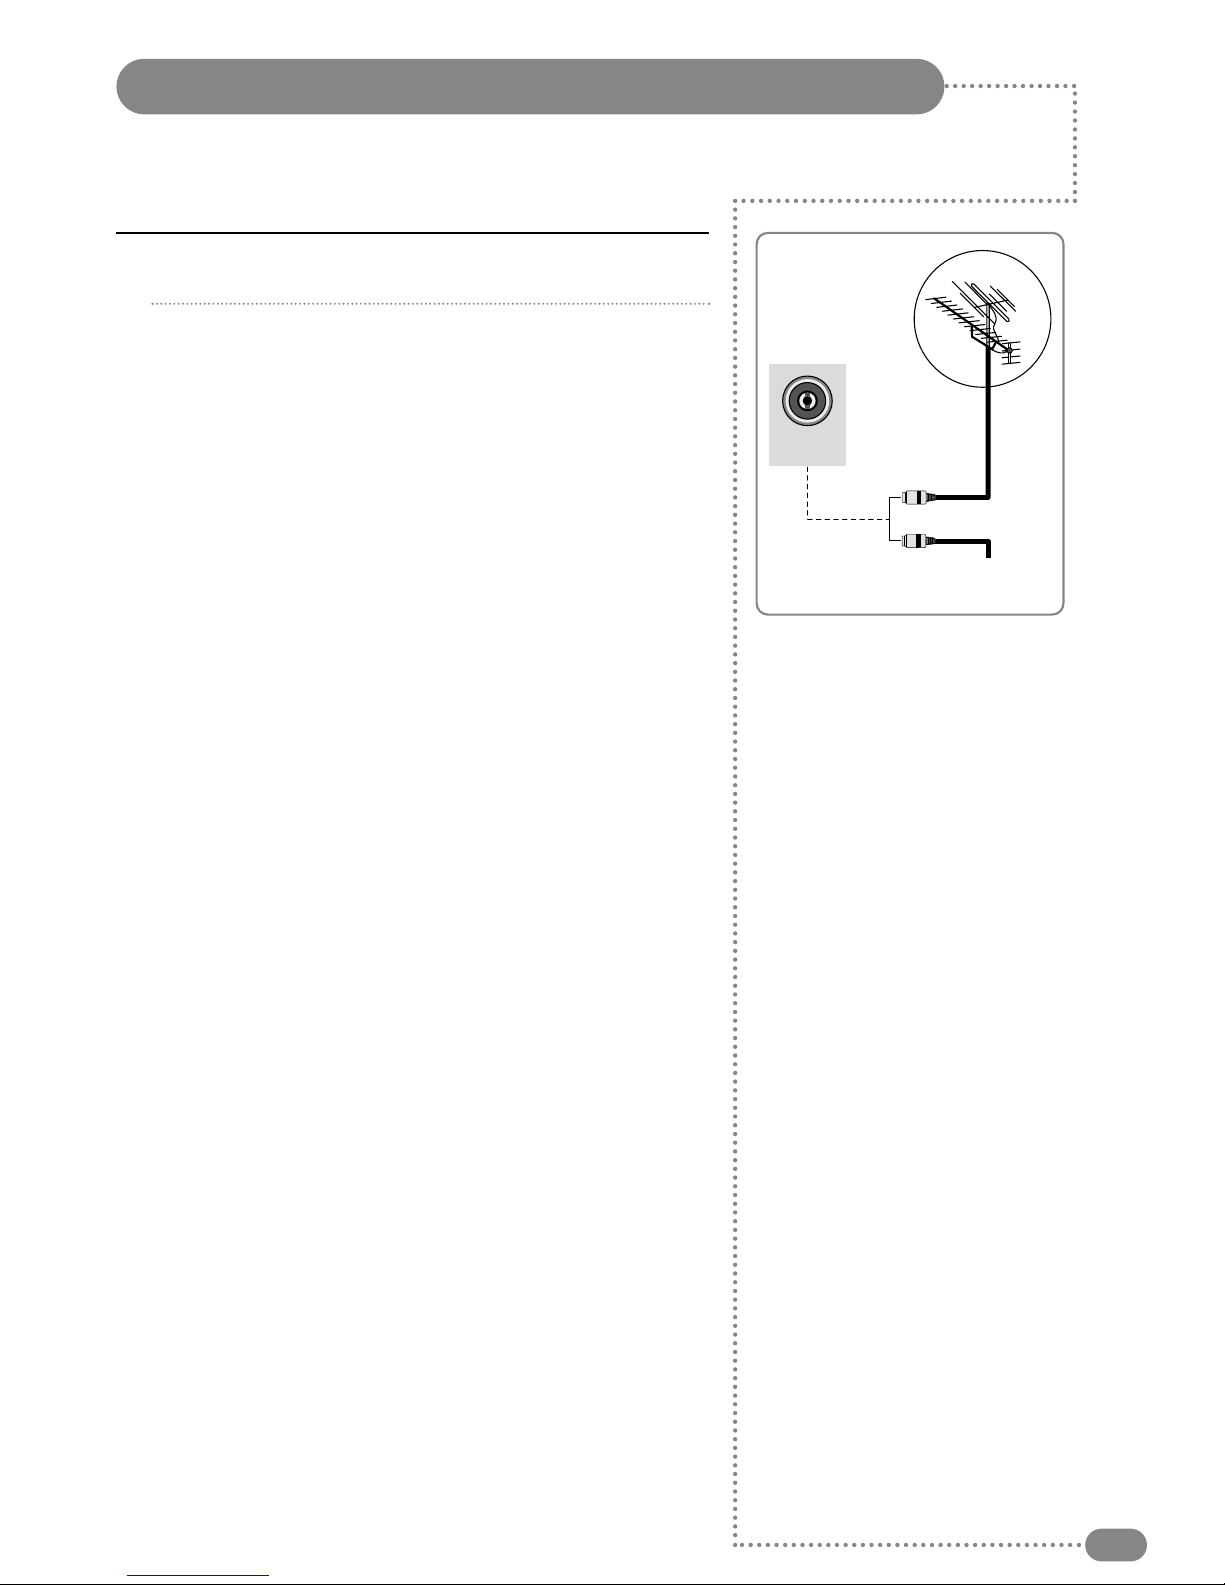
Connecting an Antenna or Cable
1
2
To view television channels correctly, a signal must be received by the set from one of
the following sources: an outdoor antenna, a cable television system or a satellite dish.
Connect the antenna or input cable to the 75Ωcoaxial input
on the rear of the TileVision®.
If you are using an indoor antenna, you may need to turn it
when tuning your television until you receive a clear picture.
☛
The signal level fed to the set must be at least
60dBu/1mV or the picture may be noisy.
If in doubt, consult a qualified aerial technician.
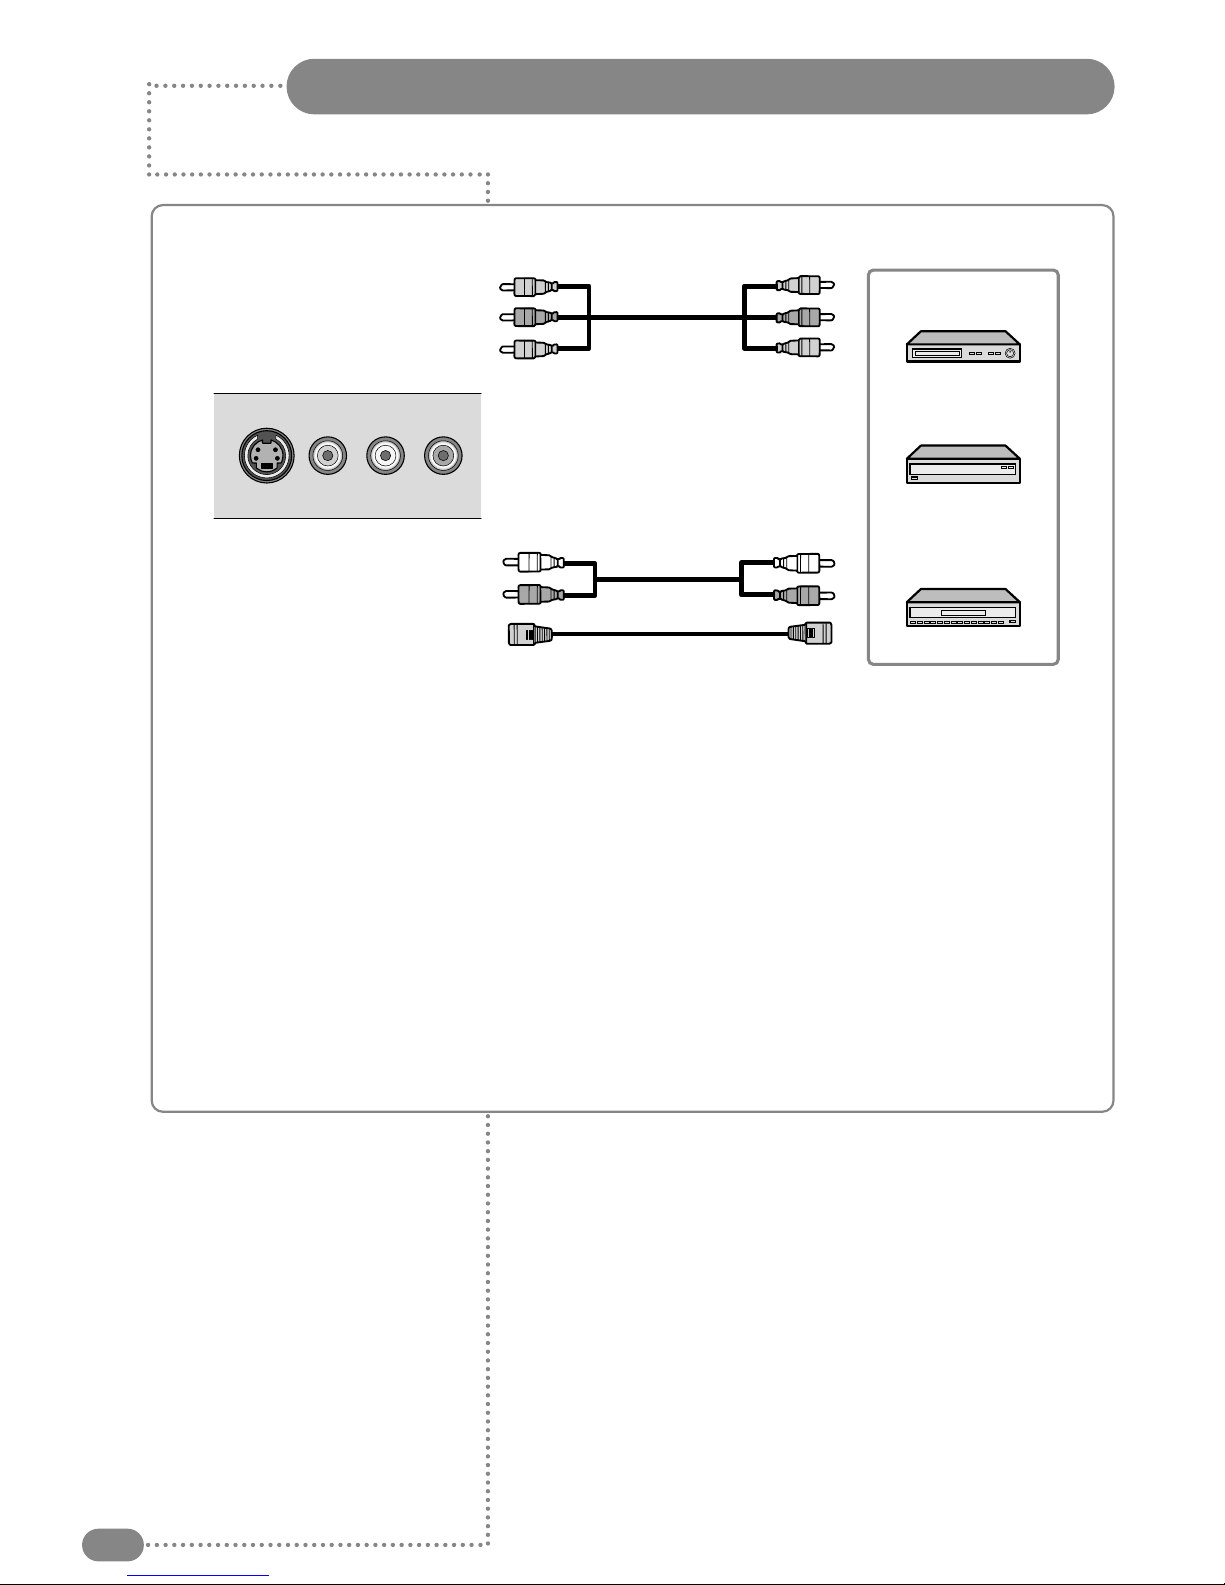
Connecting to the RCA and S-Video Inputs
8
All connections must be made prior to sealing the front plate into the back box.
(A) For RCA Input
1. Connect the RCA cable to the input jacks (video+ audio L/R) on the TileVision®and
output jacks on the external equipment such as a video recorder (VCR, DVD or HD) or DVD player, a
video game device, or a home automation system.
(B) For S-Video Input
1. Connect the S-Video/RCA (audio L/R) cable to the input jacks on the TileVision®and output jacks
on the external equipment such as a video recorder (VCR, DVD or HD) or DVD player, a video game
device, or a home automation system.
2. If the external equipment has mono audio output, connect it only to left jack of the Audio
Input/Output.
S-VIDEO VIDEO
LAudio R
Video game device
Home automation
system
Video Recorder
(A) For RCA Input
(B) For S-Video Input
Questo manuale è adatto per i seguenti modelli
1
Indice
Altri manuali TileVision TV

TileVision
TileVision TV/17/FR5/PS Manuale utente

TileVision
TileVision 23 Manuale utente

TileVision
TileVision TV/19/FR1 Manuale utente

TileVision
TileVision TV/17/FR2 Manuale utente

TileVision
TileVision TV/17/FR3/PS Manuale utente

TileVision
TileVision 22" mirror finish Manuale utente

TileVision
TileVision TV/17/FR4/PS Manuale utente

TileVision
TileVision TV/104/FR2 Manuale utente

TileVision
TileVision TV/17/FR Manuale utente

TileVision
TileVision Mirage Manuale utente


