Short manual LOC2001
K004-9901
Operators must follow all rules and regulations for the
proper use of abrasive blasting equipment. Caution must
be also paid to the following:
• Any and all recommendations and instructions, espe-
cially basic safety instructions included in the opera-
tors manual!
• This equipment must be operated by trained and
skilled personnel only!
• The magnet of the remote control must always be se-
curely tied to the operators wrist!
• Protective clothing, helmet, hearing and respiratory
protection must always by worn!
• Before operating the equipment, make sure all com-
ponents are in working order!
• If further information is needed and not included on
this short version operators manual, please see the
main manual included with your equipment!
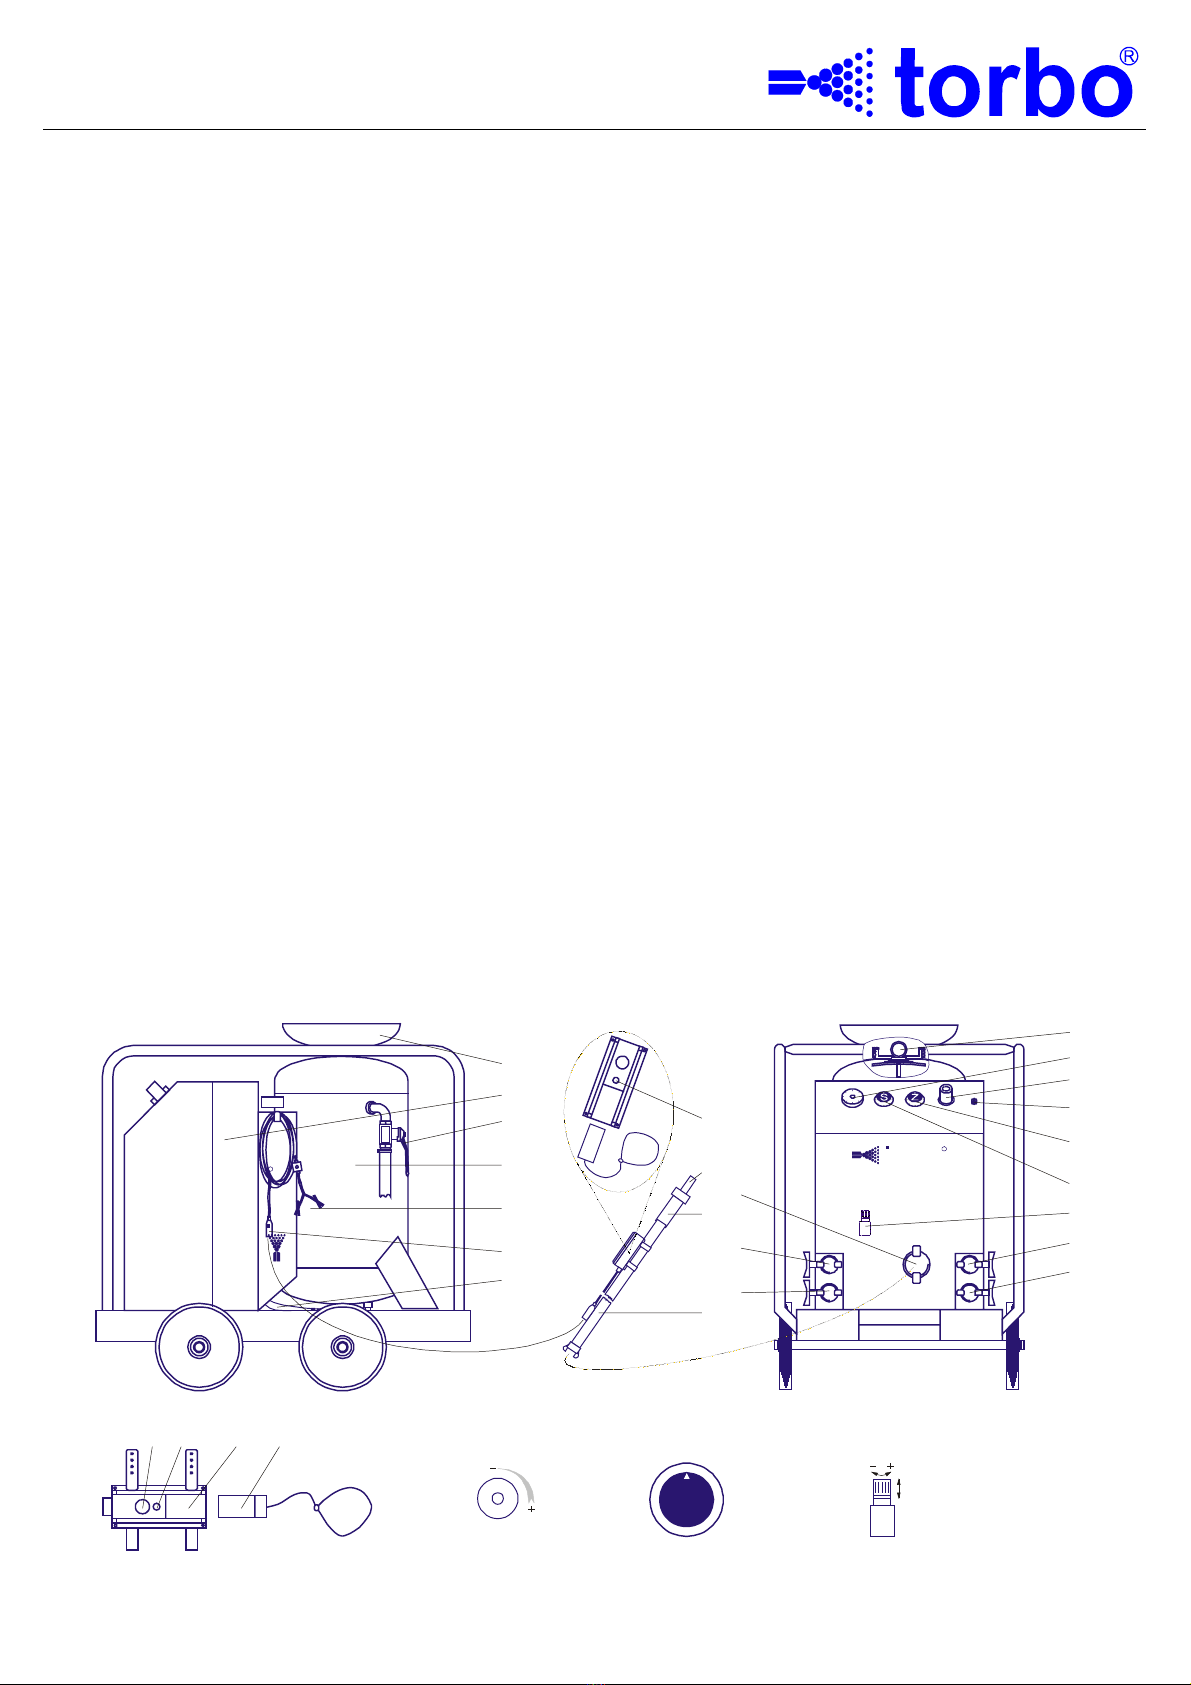
1. Machine setup procedures
• Close valve „P“ (11).
• Connect abrasive feed hose (7), water hose on cou-
pling (22), air hose on coupling (12) for soft cleaning
and on (12 and 13) for power cleaning, power cable
(5) on 12V DC, remote control (8) with additional cable
to coupling (6), and blast hose (14) with nozzle (9) to
coupling (10).
• Connect the remote (8) approx. 30 cm (12 inches) be-
hind the blast nozzle (9).
• Check all electrical, air, water, blast hose connections
and apply safety pins where required.
• Select the abrasive, start the compressor, open the
water supply and compressed air supply to the ma-
chine.
2. Filling the machine with abrasive/water
• Turn metering valve „S“ (20) to position „D”.
• Add the abrasive through the loading hopper into the
pressure vessel until abrasive flows from the overflow
hose (3).
• Close valves (3).
• Raise the loading hopper back, make sure the pres-
sure vessel is totally full of water, and pull up on the
vessel sealing disc (15).
• Lower the hopper to the vessel.
3. To start blasting
• Set valves (16, 19 & 20) to the recommended settings
(see back page).
• Attach magnet (8.4) to operators wrist and keep a firm
hold of the blast hose (11).
• To start blasting, put the magnet (8.4) into the correct
opening (8.3) of the remote control (8), activate push
button (8.1) to start.
• For wash down, set (20) to “0”.
• For drying (air only), set (19 & 20) to “0”.
• To switch off, remove magnet (8.4) from opening
(8.3).
4. Machine shut-down procedures
• Close valve (16) and turn off main switch (17) =
EMERGENCY-OFF.
• Open valve (3) and close compressed air valve at
compressor, turn off the compressor.
If the machine is to be shut down for an extended period
of time, the following measures must be taken:
• Close water supply feeding the machine, uncouple
hose (7), and empty vessel.
• Push the relief valve (18) until air flow stops.
• Remove power cable (5), water hose from coupling
(22), air hose from coupling (12 and 13).
• Remove remote control (8), and additional cable from
blast hose (14) and coupling (6) and blast hose (14)
from coupling (10)
to orb
R
toorb
R
8.1 8.2 8.3 8.4
3
4
5
6
7
No. 19, 20
0,6
4
5
D
62
1
3
S
No. 16 No. 21
15
17
18
19
20
21
22
23
10
12
13
1
2
16
8
9
11
14