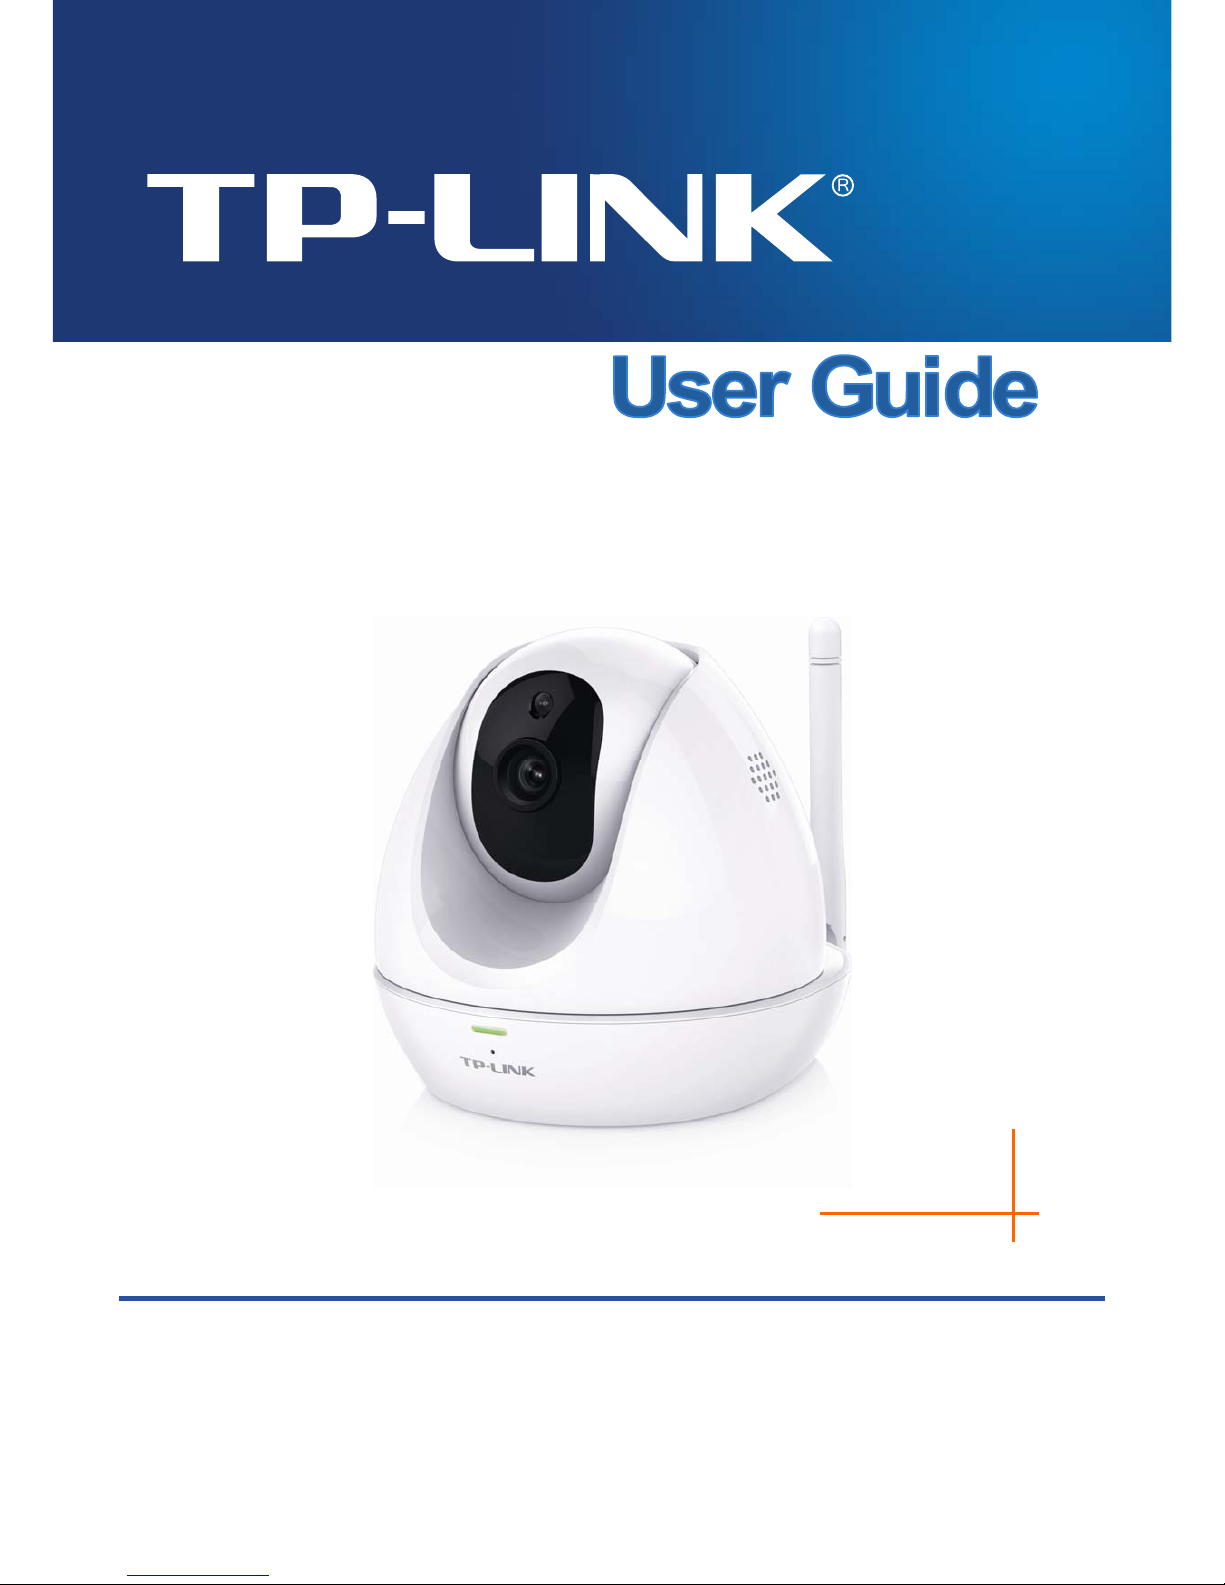
TP-Link NC450 Manuale utente

NC450
HD Pan/Tilt Wi-Fi Camera with Night Vision
1910011601
REV1.0.0

CONTENTS
Chapter 1About This Guide................................................................................... 1
1.1Conventions..................................................................................................................1
1.2Overview of This Guide ................................................................................................1
Chapter 2Get to Know About Your Camera.......................................................... 2
2.1Product Overview .........................................................................................................2
2.2Panel Appearance ........................................................................................................2
2.2.1Front Panel ........................................................................................................2
2.2.2Rear Panel .........................................................................................................3
Chapter 3Set Up Your Camera .............................................................................. 5
3.1Set up the Camera with the tpCamera APP..................................................................5
3.2Position Your Camera ...................................................................................................6
Chapter 4Configure Your Camera......................................................................... 9
4.1Log in to Your Camera ..................................................................................................9
4.2Live View ....................................................................................................................10
4.3Basic...........................................................................................................................12
4.3.1Basic > Status ..................................................................................................13
4.3.2Basic > Network...............................................................................................15
4.3.3Basic > Wireless Connection ...........................................................................16
4.3.4Basic > Cloud Setting.......................................................................................18
4.3.5Basic > LED .....................................................................................................19
4.4Advanced....................................................................................................................20
4.4.1Advanced > Status ...........................................................................................20
4.4.2Advanced > Network........................................................................................20
4.4.3Advanced > Wireless Connection ....................................................................24
4.4.4Advanced > Cloud Setting ...............................................................................25
4.4.5Advanced > Video............................................................................................25
4.4.6Advanced > Sound Detection ..........................................................................27
4.4.7Advanced > Motion Detection ..........................................................................28
4.4.8Advanced > SD Card .......................................................................................29
4.4.9Advanced > Notification Delivery .....................................................................30
4.4.10Advanced > LED ..............................................................................................33
4.5System........................................................................................................................33
4.5.1Account............................................................................................................33
4.5.2Date/Time ........................................................................................................35
4.5.3Management ....................................................................................................37
4.5.4System Log ......................................................................................................39
Appendix: Specifications....................................................................................... 40

NC450 HD Pan/Tilt Wi-Fi Camera with Night Vision
1
Chapter 1 About This Guide
This guide is a complementation of Quick Installation Guide. The Quick Installation Guide instructs
you on quick setup, and this guide provides details of each function and shows you the way to
configure these functions appropriate to your needs.
When using this guide, please notice that features of the TP-LINK Cloud Camera may vary slightly
depending on the model and software version you have, and on your location, and language. All
images, parameters and descriptions documented in this guide are used for demonstration only.
1.1 Conventions
In this Guide the following conventions are used:
Symbol Description
Note:
Ignoring this type of note might result in a malfunction or damage to the
device.
1.2 Overview of This Guide
Chapter Introduction
Chapter 1 About This Guide Introduces the guide structure and conventions.
Chapter 2 Get to know about
your camera
Introduces the features, application and appearance of the
camera.
Chapter 3 Set up your camera Introduces how to quickly set up the camera using the
tpCamera app and how to position your camera.
Chapter 4 Configure the
Camera
Introduces how to configure the camera using the built-in web
management page.
More Info
The latest software, management app and utility can be found at Download Center at
http://www.tp-link.com/support.
The Quick Installation Guide can be found where you find this guide or inside the product package.
A Technical Support Forum is provided for you to discuss our products at http://forum.tp-link.com.
Our Technical Support contact information can be found at the Contact Technical Support page at
http://www.tp-link.com/support.

NC450 HD Pan/Tilt Wi-Fi Camera with Night Vision
2
Chapter 2 Get to Know About Your Camera
2.1 Product Overview
TP-LINK NC450 HD Pan/Tilt Wi-Fi Camera with Night Vision is a cloud-based Wi-Fi video
monitoring device with live streaming and remote viewing, which makes it easy to stay connected
with what you care most.
Easy to install with tpCamera app
Remote monitoring via TP-LINK Cloud website or tpCamera app
Get notifications when motion or sound is detected, and view alerts history
View clearer images with HD resolution
View clearly in the dark with Night vision
Stay in touch with 2-way audio
Save the image and video in the Micro SD card
Patrol a large area with pan and tilt
2.2 Panel Appearance
2.2.1 Front Panel
System LED
Microphone
Figure 2-1 Front Panel

NC450 HD Pan/Tilt Wi-Fi Camera with Night Vision
3
System LED:
Status Indication
Flashing Red The camera starts booting up.
Solid Red The camera has boot up, but is not connected to any
network.
The camera is in firmware upgrade procedure.
Flashing Green The camera is connecting to a network.
The camera is connected to a network.
Solid Green The camera is transferring data.
Microphone: The camera has a built-in internal microphone. This microphone is hidden in
the pinhole located on the front panel.
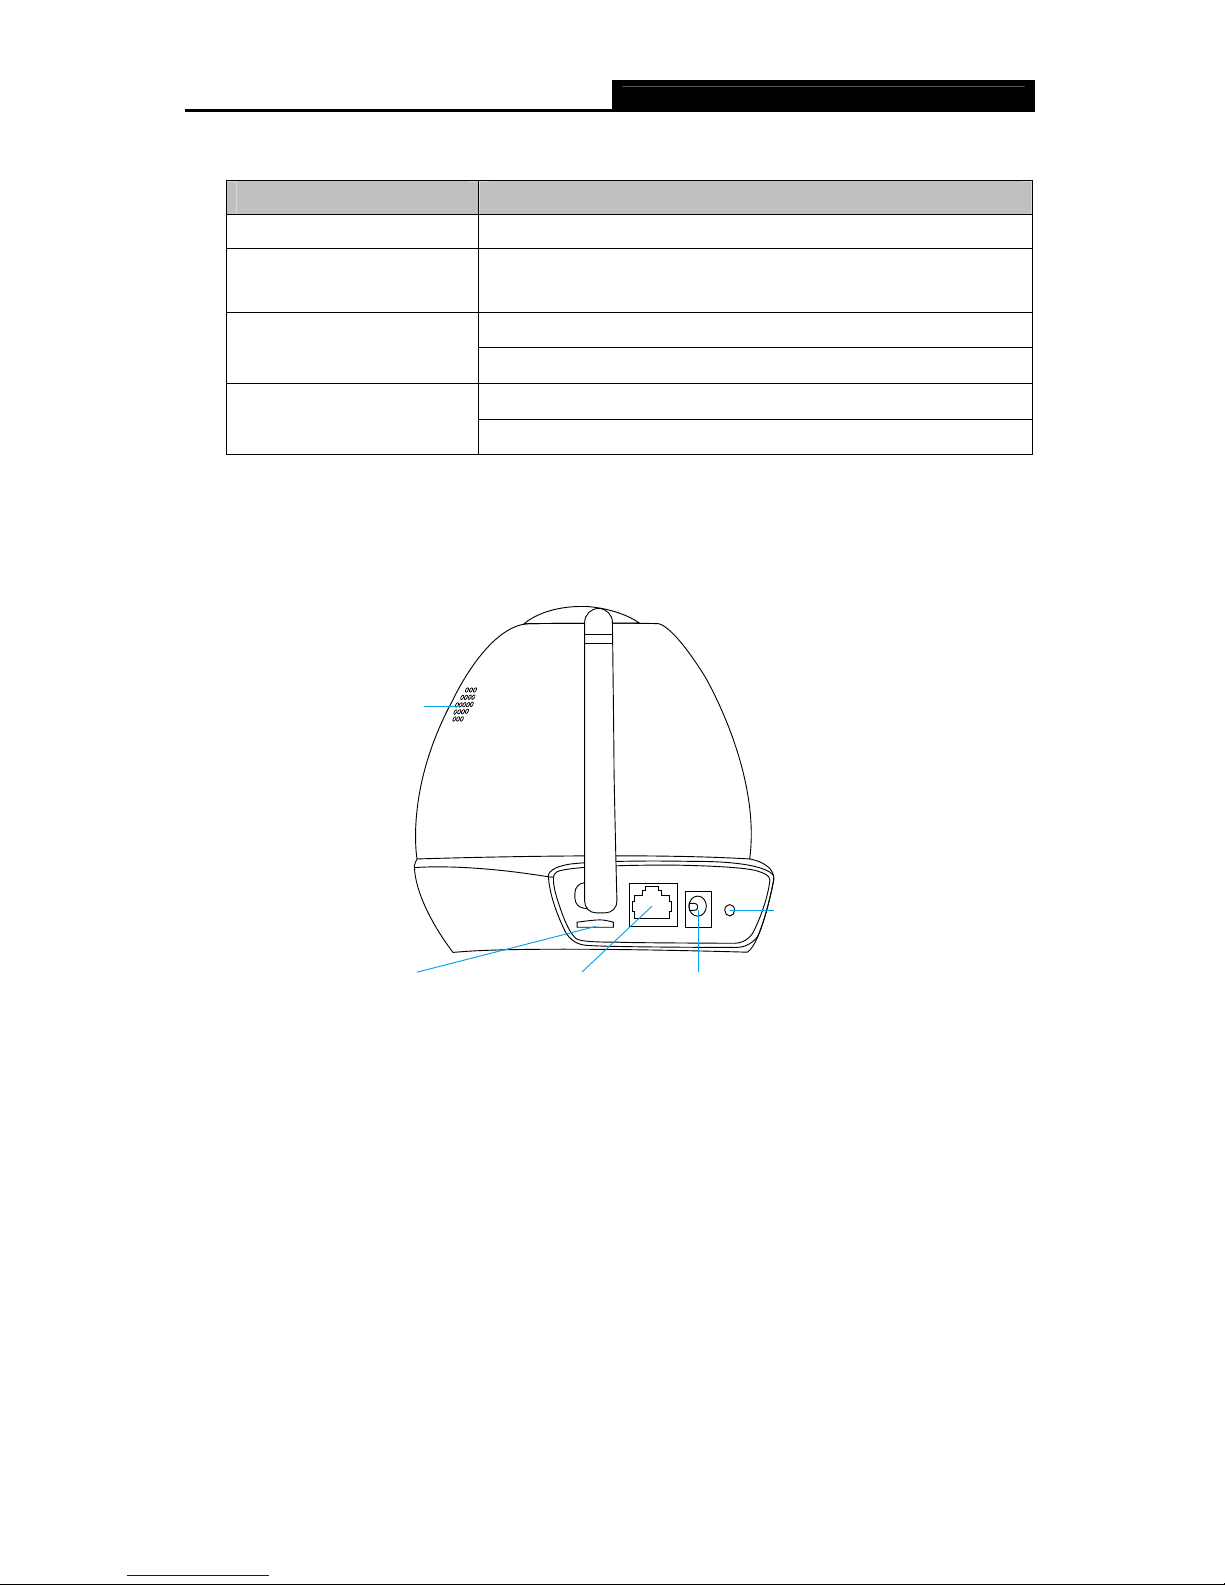
2.2.2 Rear Panel
Speaker
Internet PortMicro SD Card Slot Po
w
er Jack
WPS/Reset Button
Internet Power WPS/
ResetMicroSD
Figure 2-2 Rear Panel
Speaker: For audio output.
Micro SD Card Slot: For holding the micro SD card.
Internet Port: For connecting the camera to your router via an Ethernet cable.
Power Jack: For connecting the camera to power socket via the provided power adapter.
WPS/Reset Button: The switch for the WPS and Reset function. To use the WPS function,
press it for about 2 seconds. To use the Reset function, press and hold for more than 5
seconds.

NC450 HD Pan/Tilt Wi-Fi Camera with Night Vision
4
Used as the WPS button:
If your wireless router supports WPS (Wi-Fi Protected Setup), you can connect the
camera to your Wi-Fi network using WPS. Press the WPS or QSS button on your router.
Within 2 minutes, press the WPS/Reset button on the camera for about 2 seconds, then
the LED above this button will start flashing quickly. When this LED becomes solid on,
the WPS is successful.
Used as the Reset button:
With the camera powered on, press and hold the WPS/Reset button (for more than 5
seconds) until the System LED turns off. Then release the button and wait the camera to
reset to its factory default settings.
WPS LED:
Status Indication
The camera starts booting up.
Flashing Green The camera is connecting to a network by WPS function.
The camera has boot up.
Off The camera failed to be added to a network by WPS function.
Solid Green The camera has been successfully added to a network by WPS
function. This process will last in the first two minutes.

NC450 HD Pan/Tilt Wi-Fi Camera with Night Vision
5
Chapter 3 Set Up Your Camera
3.1 Set up the Camera with the tpCamera APP
Step 1. Connect the camera to the network your smartphone is on.
1) Power on the camera using the provided power adapter as shown.
2) Connect a smartphone to the router as shown.
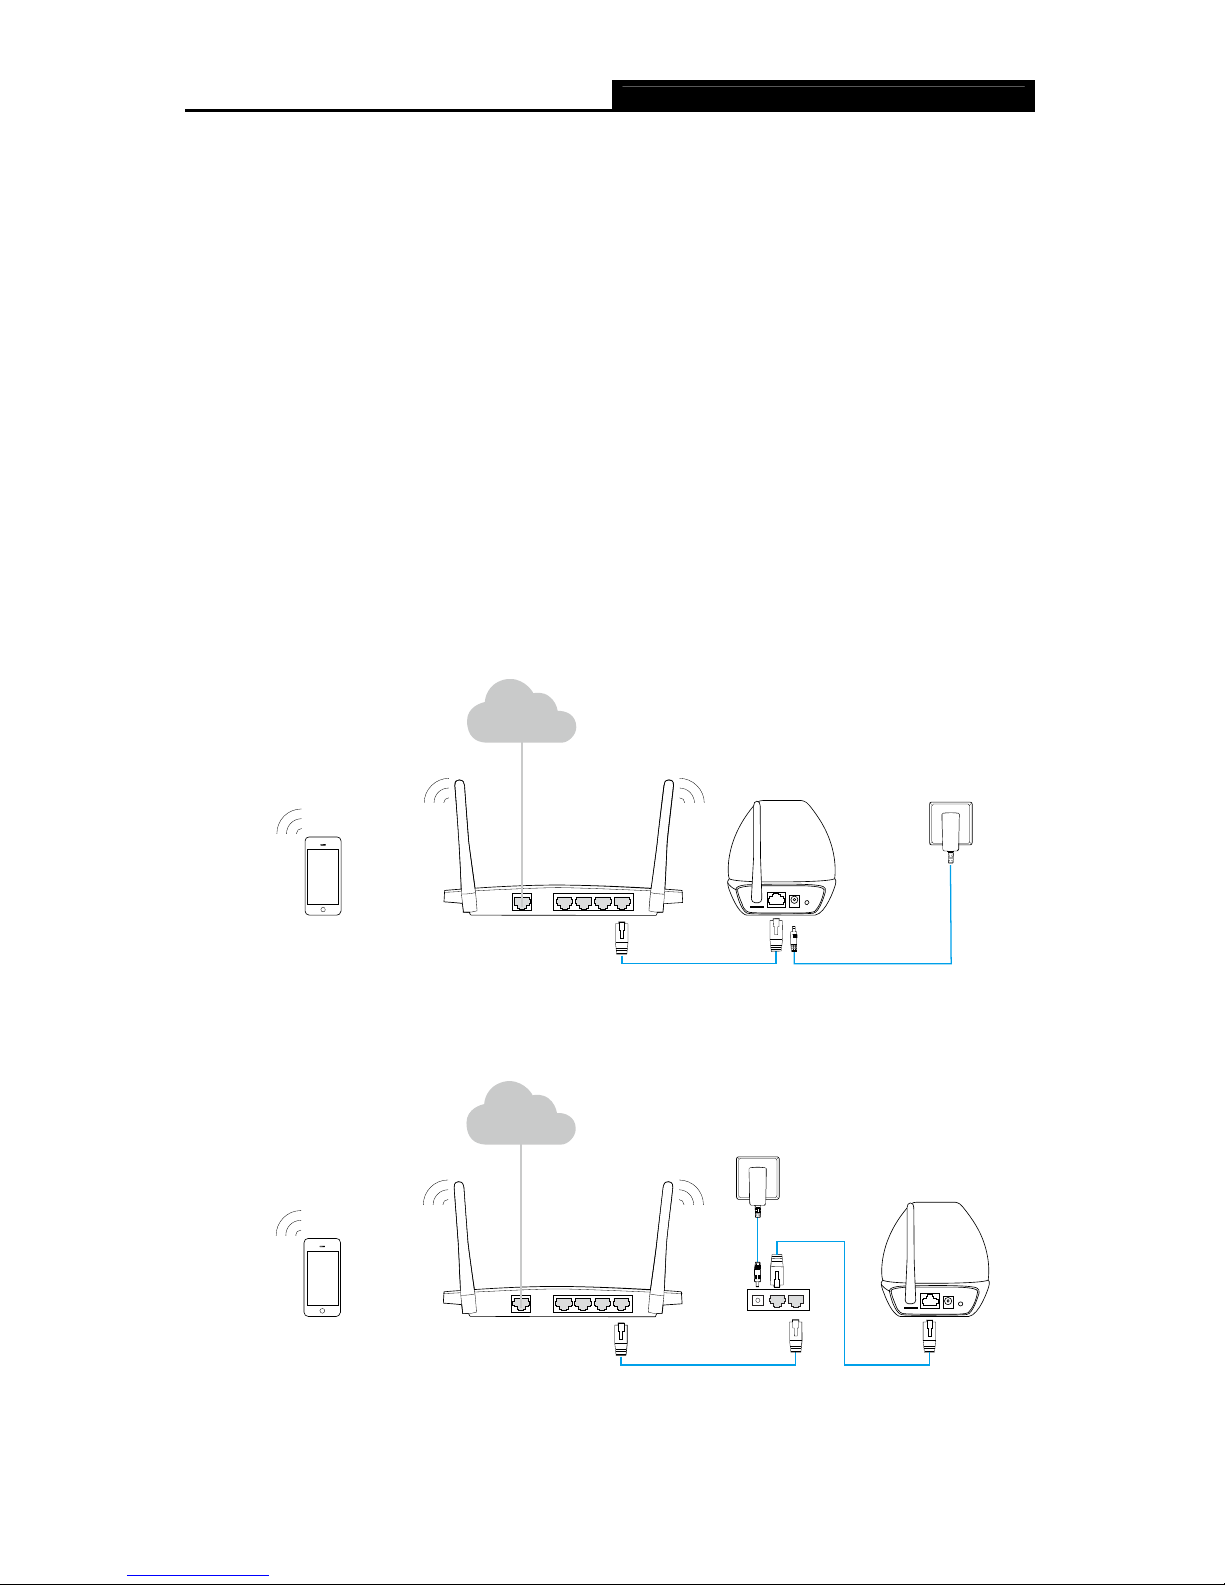
3) Connect the camera to the router via wired or wireless connection, and then wait till the
camera’s system LED become solid green.
Wired: Connect the camera to the router’s LAN port via an Ethernet cable or the provided
passive POE injector.
Via an Ethernet cable
Smartphone Camera Outlet
W
ireless Route
r
LANWAN
Internet
Via the provided passive POE injector
Smartphone Camera
Outlet
Wireless Router Passive POE Injector
LANWAN
Internet

NC450 HD Pan/Tilt Wi-Fi Camera with Night Vision
6
Wireless: If your wireless router supports WPS, you can connect the camera to your Wi-Fi
network using WPS. Press the WPS or QSS button on your router. Within 2 minutes, press
the WPS/Reset button on the back of the camera for about 2 seconds, then the LED above
this button will start flashing quickly. When this LED becomes solid on, the WPS is successful
and the camera is connected to the router wirelessly.
Smartphone Camera Outlet
W
ireless Router
LANWAN
Internet
WPS/
RESET
WPS
Step 2. Download and install the tpCamera app.
You can download the free tpCamera app from the App Store or Google play. You can also scan
the QR code below to download the tpCamera app.
OR
Step 3. Add the camera to your TP-LINK Cloud account.
Launch the tpCamera app, log into your TP-LINK Cloud account or create one if you do not have
an account. Then follow the app instructions to add your new camera to your account.
When you reach the My Cam screen, you have successfully added your camera and can start to
use your camera.
3.2 Position Your Camera
Before positioning your camera, please keep these safety guidelines in mind:
Keep your camera out of reach of children and pets.
Use your camera only indoors, and keep it out of direct sunlight. Make sure its operating
temperature is in the range of 0-40°C (32-104°F).
Pick a location which is close enough to a wall outlet.

NC450 HD Pan/Tilt Wi-Fi Camera with Night Vision
7
Use only the power adapter that comes with this camera in the package.
You can place your camera to your desired location. Just unplug and replug it without having to go
through the app’s setup again. Place the camera within the coverage of your wireless network.
You can place the camera in various ways:
Place it on a flat surface.
Mount it on the wall or ceiling with the provided screws and base.
When you finish positioning your camera, use the tpCamera app to check that your camera can
see what you want to keep an eye on. Adjust its position if needed.
Detailed instructions on mounting your camera to a wall or ceiling are shown as follows.
Wall Mounting
Get the provided accessories for camera’s wall mounting ready, and follow the instructions below
to mount the camera. After relocating your camera, remember to power on it.
w
all plugsscrews
A) Place the paper drill guide where you want the camera. Check the alignment using a level.
B) Using a 0.24 inch (6mm) drill bit, drill holes through the two circles on the guide. Remove the
paper.
C) Insert the two anchors into the holes. Place the camera mount over the anchor and use the
screws to secure it.
D) Attach the camera.
2Mount Base 3Secure Cam era
1Drill Holes
Ceiling Mounting
Get the provided accessories for camera’s wall mounting ready, and follow the instructions below
to mount the camera. After relocating your camera, remember to power on it.

NC450 HD Pan/Tilt Wi-Fi Camera with Night Vision
8
screws wing nuts washers
A) Place the paper drill guide where you want the camera*.
*Camera placement can affect viewing angle. For best results, place the camera near a wall or
corner.
B) Using a 0.24 inch (6mm) drill bit, drill holes through the two circles on the guide. Remove the
paper.
C) Attach the camera mount using the screws, washers, and wingnuts.
D) Attach the camera.
32
Mount Base Secure Camera
1Drill Holes
Altri manuali per NC450
3
Indice
Altri manuali TP-Link Telecamera IP